Ark's City Goblin (2007 2.0L LSJ donor) - Aborted mission
- Thread starter Ark :D
- Start date
Ark :D
Goblin Guru
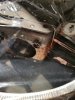
Just discovered those aren't bolts I snapped off, they were studs that were part of the exhaust manifold/header. So I guess I need a new one. Just as well, this one is rusty as hell and I wasn't looking forward to cleaning it up.
Question; is this an oxygen sensor?

Questions are coming to me hard and fast now ... lol! There's no way I'm going to be able to stick to my self-assigned finish goal of summer 2022. No way!

I have the 2.0L LSJ motor, and in the process of building the Goblin, we remove the AC pump, right?... so do we have to reroute the serpentine belt? (It looks to me like once the AC pump is gone, if we don't reroute the belt, it'll rub against itself on the alternator pulley) .... Also, what length should the new belt be?
Question; is this an oxygen sensor?
Questions are coming to me hard and fast now ... lol! There's no way I'm going to be able to stick to my self-assigned finish goal of summer 2022. No way!
I have the 2.0L LSJ motor, and in the process of building the Goblin, we remove the AC pump, right?... so do we have to reroute the serpentine belt? (It looks to me like once the AC pump is gone, if we don't reroute the belt, it'll rub against itself on the alternator pulley) .... Also, what length should the new belt be?
Last edited:
Karter2026
Goblin Guru
Studs can be drilled out and replaced. But the stainless header looks good till you drive it once.....
You will Need to at least update the timing chain tensioner Yours id the old style.
I think most guys have just gutted the A/C compressor and used the same belt.
Not to change the subject but this should probably be moved to the build log page. It has gone way past new introduction.
You will Need to at least update the timing chain tensioner Yours id the old style.
I think most guys have just gutted the A/C compressor and used the same belt.
Not to change the subject but this should probably be moved to the build log page. It has gone way past new introduction.
Ross
Goblin Guru
You keep the AC pump... you can gut the pump part of it, if you want, and just use the front pulley.Just discovered those aren't bolts I snapped off, they were studs that were part of the exhaust manifold/header. So I guess I need a new one. Just as well, this one is rusty as hell and I wasn't looking forward to cleaning it up.
Question; is this an oxygen sensor?
View attachment 9299
Questions are coming to me hard and fast now ... lol! There's no way I'm going to be able to stick to my self-assigned finish goal of summer 2022. No way!
I have the 2.0L LSJ motor, and in the process of building the Goblin, we remove the AC pump, right?... so do we have to reroute the serpentine belt? (It looks to me like once the AC pump is gone, if we don't reroute the belt, it'll rub against itself on the alternator pulley) .... Also, what length should the new belt be?
Yes, that is an O2 sensor.
Ark :D
Goblin Guru
So today, I made it a point that I wanted to have the harnesses all torn out and the dash completely disassembled before I was done. That was a bit too ambitious, but I ALMOST got it all done. All the harnesses are in a pile in the corner of my garage, just waiting for my attention. Not looking forward to that one bit, but I figure I'll hold off on attacking that job until my donor carcass is gone.
The dash was the toughest part of the tear-down for me so far. Unfortunately I was home by myself all day so I had me, myself, and I to move the dash around. I managed, but **** is that thing heavy after a while.
Areas where I may or may not have a problem:
1) I believe I'm going to need a new brake booster. I don't know how these things work so maybe it's an easy fix, but, there's a rod on the inside of the booster that's loose, with a metal "ring" at the end of it. Well, that ring got loose and is floating around inside the booster and I can't get it out. Woops.
2) Clutch pedal ... I tried like hell to get that pedal out late in the day. Couldn't do it. But, I was ready to be done for the day and was irritable and impatient ... got a nice hot shower and sat down to consult Google, and I think I found good instructions to get the pedal loose from the clutch master cylinder. We'll see next time I work on it.
3) There seems to be quite a few little harnesses and plugs that are not accounted for in the instructional videos DF has posted on YouTube. Is it safe to say, "if a particular harness/connector is not mentioned, it's not important"? I've labeled everything I could and didn't snip anything off (except the trunk light connector, woops).
That's all for now...
Desert Sasqwatch
Goblin Guru
I've got a brake boost that I may not be using. I just need to get my frame to see what some of the measurements are to see if an alternate booster will work. If it dose, the one from my donor will need a new home. I know you are still a ways away from assembly and I will likely have my kit delivered before that time, so this may work out okay for both of us.So today, I made it a point that I wanted to have the harnesses all torn out and the dash completely disassembled before I was done. That was a bit too ambitious, but I ALMOST got it all done. All the harnesses are in a pile in the corner of my garage, just waiting for my attention. Not looking forward to that one bit, but I figure I'll hold off on attacking that job until my donor carcass is gone.
The dash was the toughest part of the tear-down for me so far. Unfortunately I was home by myself all day so I had me, myself, and I to move the dash around. I managed, but **** is that thing heavy after a while.
Areas where I may or may not have a problem:
1) I believe I'm going to need a new brake booster. I don't know how these things work so maybe it's an easy fix, but, there's a rod on the inside of the booster that's loose, with a metal "ring" at the end of it. Well, that ring got loose and is floating around inside the booster and I can't get it out. Woops.
2) Clutch pedal ... I tried like hell to get that pedal out late in the day. Couldn't do it. But, I was ready to be done for the day and was irritable and impatient ... got a nice hot shower and sat down to consult Google, and I think I found good instructions to get the pedal loose from the clutch master cylinder. We'll see next time I work on it.
3) There seems to be quite a few little harnesses and plugs that are not accounted for in the instructional videos DF has posted on YouTube. Is it safe to say, "if a particular harness/connector is not mentioned, it's not important"? I've labeled everything I could and didn't snip anything off (except the trunk light connector, woops).
That's all for now...


Desert Sasqwatch
Goblin Guru
Ark, still playing with the brakes, but I have not forgotten about you needing my donor stock brake booster. I saw you had replied to another thread about the broken booster and thought I should send a message.
Ark :D
Goblin Guru
Testing/cleaning fuel injectors
I pulled the injectors out of my engine last night and was contemplating cleaning them, or at the very least, testing them, and I came across the above video. In it, the guy shows a way to clean the injectors that involves connecting a 9V battery to the injector's leads. Is that really safe for the injector?
I pulled the injectors out of my engine last night and was contemplating cleaning them, or at the very least, testing them, and I came across the above video. In it, the guy shows a way to clean the injectors that involves connecting a 9V battery to the injector's leads. Is that really safe for the injector?
Ross
Goblin Guru
Since the fuel injector normally runs at 12v, I don't see any issue running it at 9v, as long as you can hear it click, it is working.Testing/cleaning fuel injectors
I pulled the injectors out of my engine last night and was contemplating cleaning them, or at the very least, testing them, and I came across the above video. In it, the guy shows a way to clean the injectors that involves connecting a 9V battery to the injector's leads. Is that really safe for the injector?
That video showed how to dissolve varnish, but he didn't back flush the injector, which other videos did.
Last edited:
Ark :D
Goblin Guru
I won't be able to work on the project for the next week (headed to the beach), so I am not starting any "big" chunks yet. When I get back, I'll work on thinning the harnesses and cleaning the engine. I will also install my new timing kit after I get back. No need to drain the engine's oil to install the timing kit, right? I'm expecting to make a tiny mess, but not an "oh no, oil is pouring out of my engine onto the floor" mess.
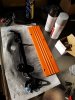
Cleaning the engine and other stuff has begun in earnest though. I'm planning to go with a black and orange color scheme on the finished Goblin so I've begun painting parts of the engine. I don't plan on painting the whole block, but I will paint the valve cover, supercharger, fuel rail, etc. on the top of the engine gloss black, with the coil cover pumpkin orange.
Also, Metal Rescue is amazing stuff, well worth the cost. It's cleaning up my pedal box nicely.
Attachments
-
 393.5 KB Views: 370
 -
 285.2 KB Views: 315
Karter2026
Goblin Guru
No need to drain the oil. You will need to change it when you are done though.
Ark :D
Goblin Guru
Just got a call back from my local powder coater. It sounds like they'll only want $300ish to powder-coat my frame. I was expecting it to be a lot more than that ... of course, it's only a ball-park estimate, and I told them it's most like a sprint car frame, so we'll see if that estimate holds true in the end.
Torchandregdoc
Goblin Guru
I was quoted $300 for the chassis (based of of pics) and another 200 for what ever I could hang on their rack system. So.... $500 total.
Ark :D
Goblin Guru
So this morning I decided to truly begin working on the engine, getting the timing set installed and cleaning up the exterior to a degree. I was also hoping to get some insight on why the engine does not run. And boy, did I .... I'm going to need some help with this.
I started by taking the valve cover off so I could prep/clean it, and sooner or later, paint it. The first thing I saw when I took the valve cover off was this:
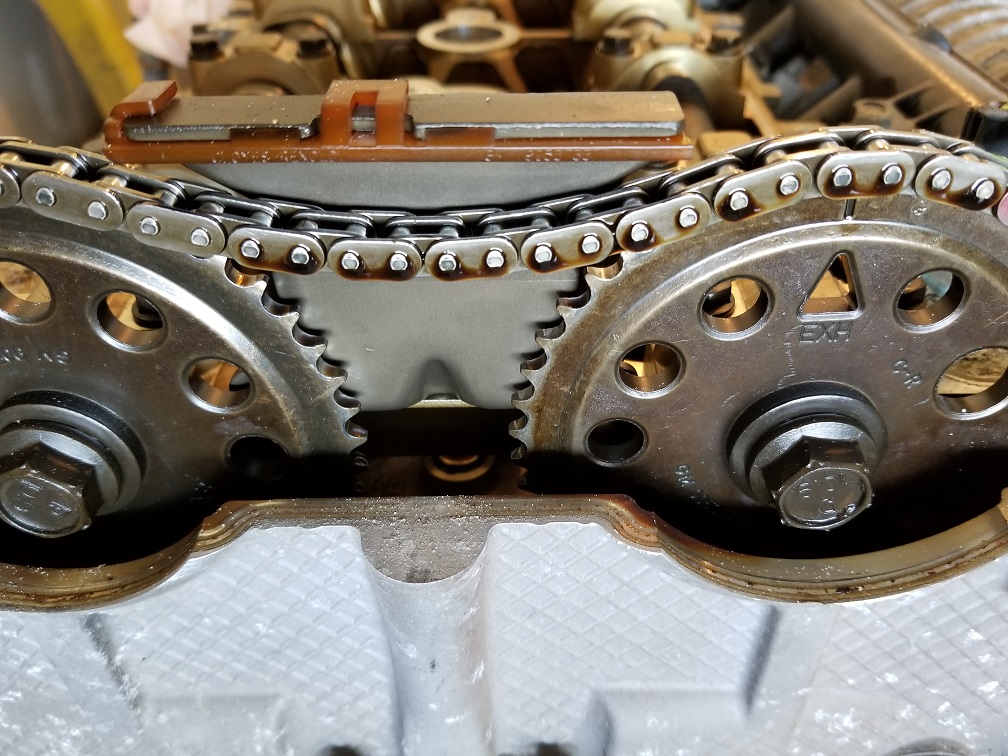
Correct me if I am wrong, but the timing chain should have no slack, correct? Upon touching it, I was able to easily move it with my finger, which doesn't strike me as a good thing.
So I continued on, and examined the cams. The first cam I looked at, looked like this:
All good, as far as I can tell.
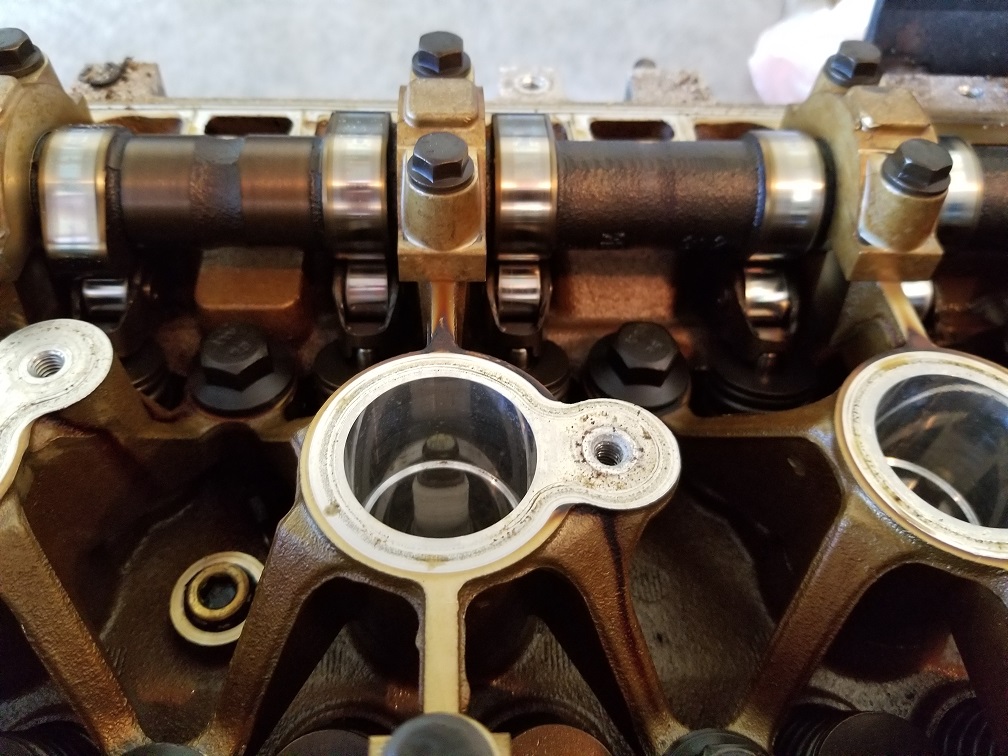
However, the second cam looked like this:
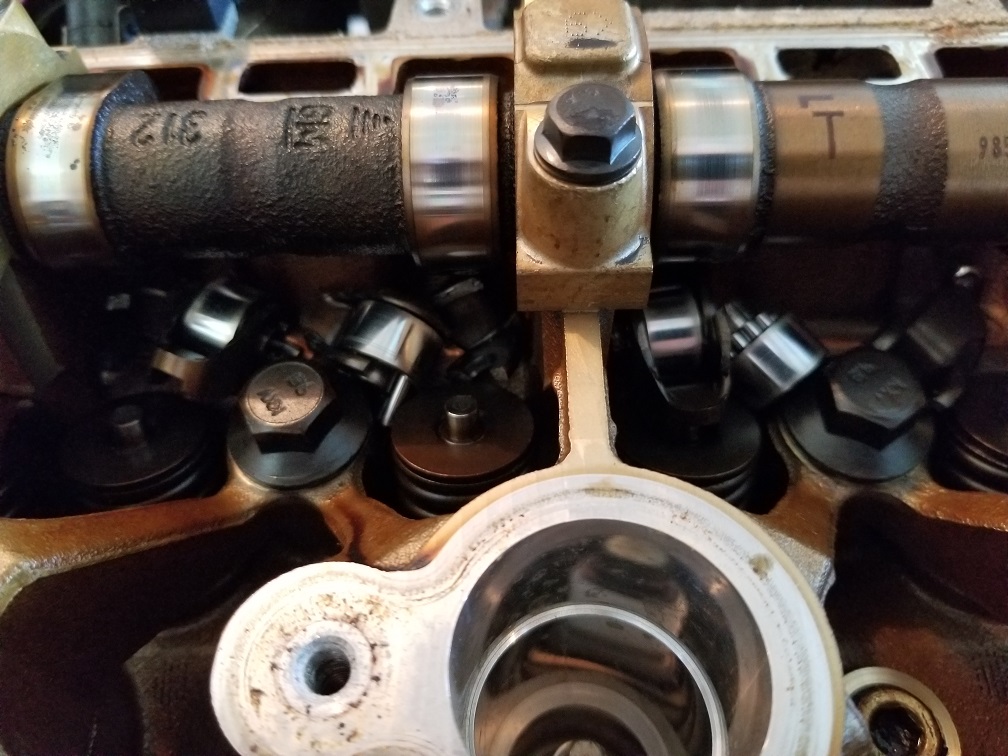
I guess I found the source of my "jingling" from when I turned the crankshaft by hand a while ago. I got to picking with some needlenose pliers, and ended up with this:
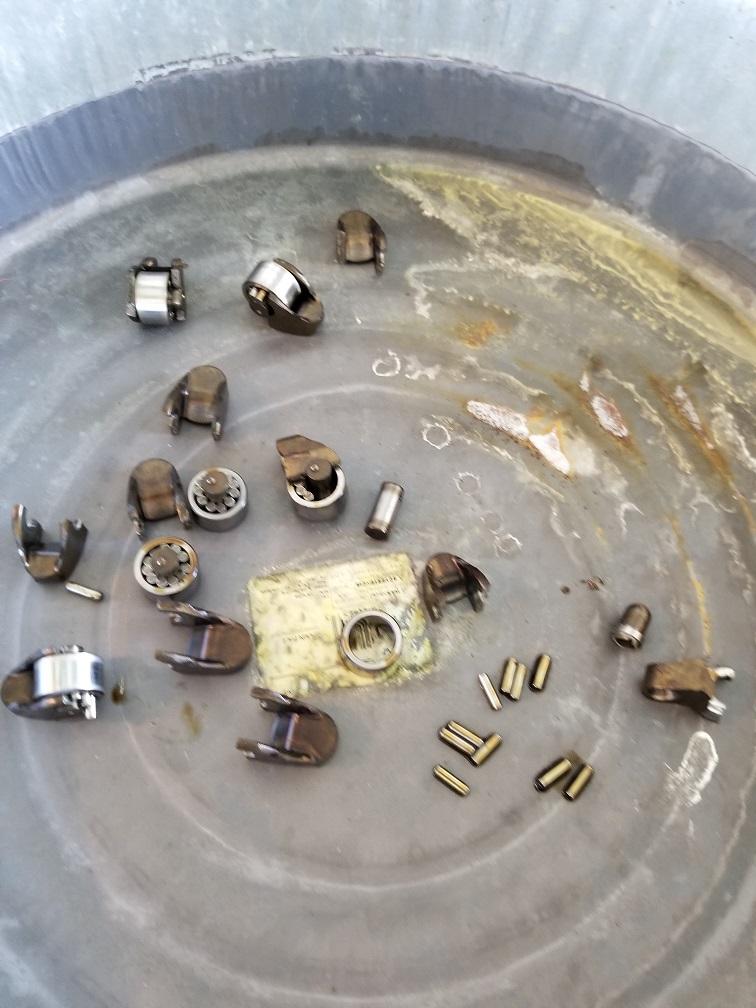
I don't even know what these little things are called, let alone of the engine could be ruined. Any thoughts, resident experts??
What an adventure!
I started by taking the valve cover off so I could prep/clean it, and sooner or later, paint it. The first thing I saw when I took the valve cover off was this:
Correct me if I am wrong, but the timing chain should have no slack, correct? Upon touching it, I was able to easily move it with my finger, which doesn't strike me as a good thing.
So I continued on, and examined the cams. The first cam I looked at, looked like this:
All good, as far as I can tell.
However, the second cam looked like this:
I guess I found the source of my "jingling" from when I turned the crankshaft by hand a while ago. I got to picking with some needlenose pliers, and ended up with this:
I don't even know what these little things are called, let alone of the engine could be ruined. Any thoughts, resident experts??
What an adventure!
Last edited:
Ross
Goblin Guru
I'm guessing the valves came in contact with the pistons...
The cam chain shouldn't be loose, and the valve train rollers shouldn't be broken off.
Pull the head, and you will know. Or put a camera down the spark plug hole, if you own an inspection camera.
If you're lucky the block is saveable, but probably the pistons, valves, rockers with rollers, and a cam are toast. Head saveable? You'll have to look.
Last edited: