ctuinstra's City Goblin - 07 SS/SC donor 2.0
- Thread starter ctuinstra
- Start date
ctuinstra
Goblin Guru
Didn't get much done at all this week or weekend. Had too many things going on with volunteering at a local Halloween scare fest. I did manage to mount the gas tank tonight. I plan on working on the front end this week. My goal is to have the front suspension on and maybe the radiator and everything mounted by the end of next weekend.
ctuinstra
Goblin Guru
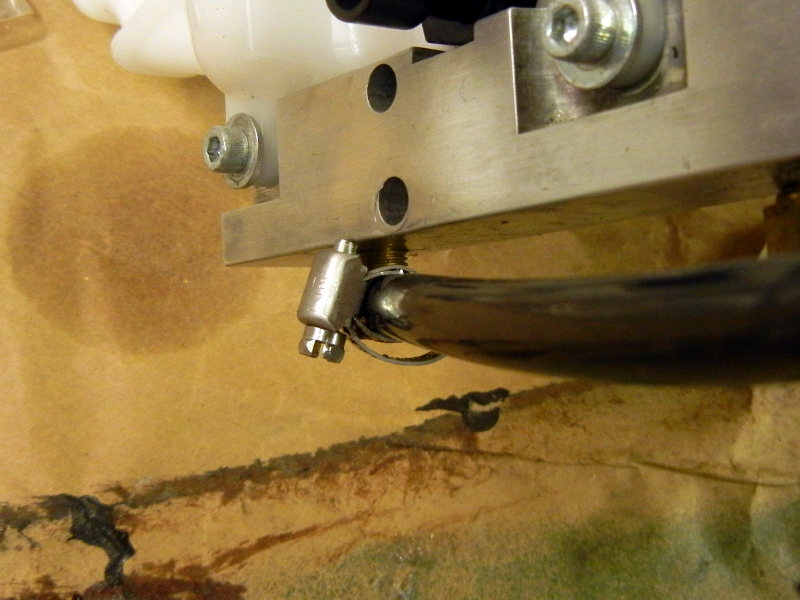
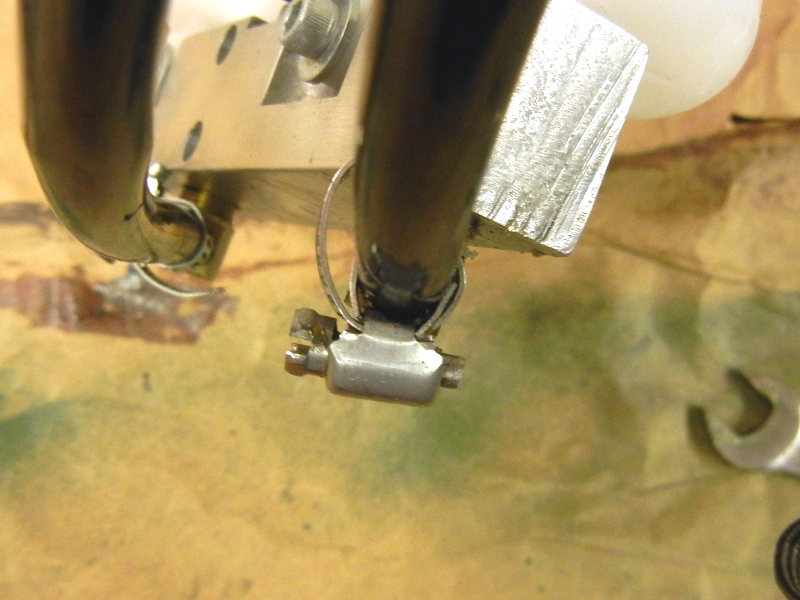
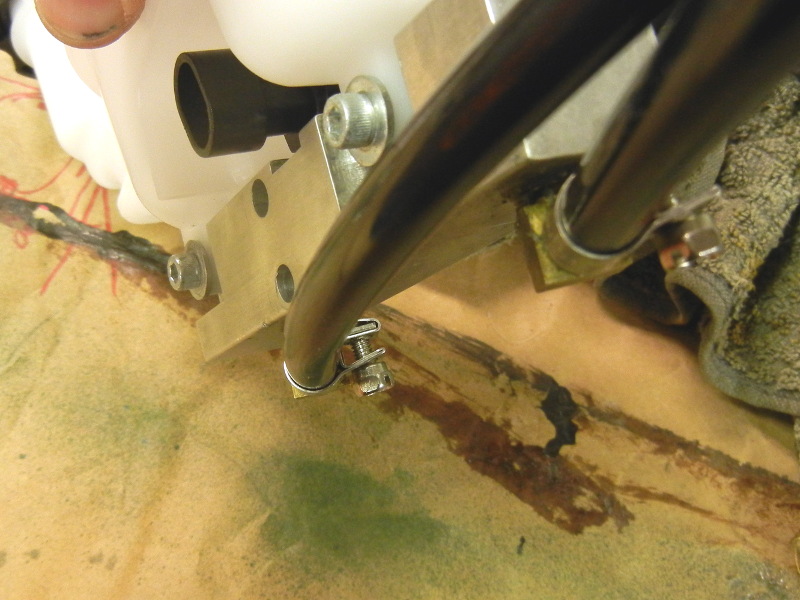
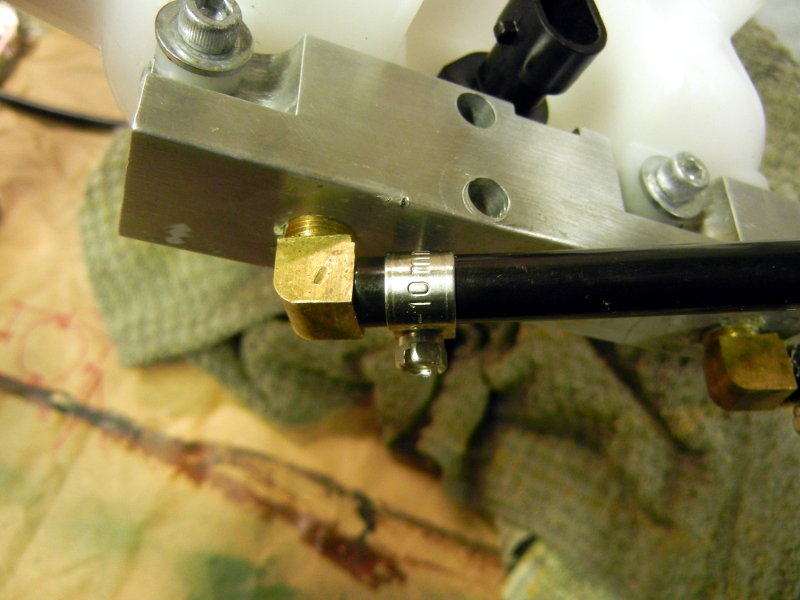
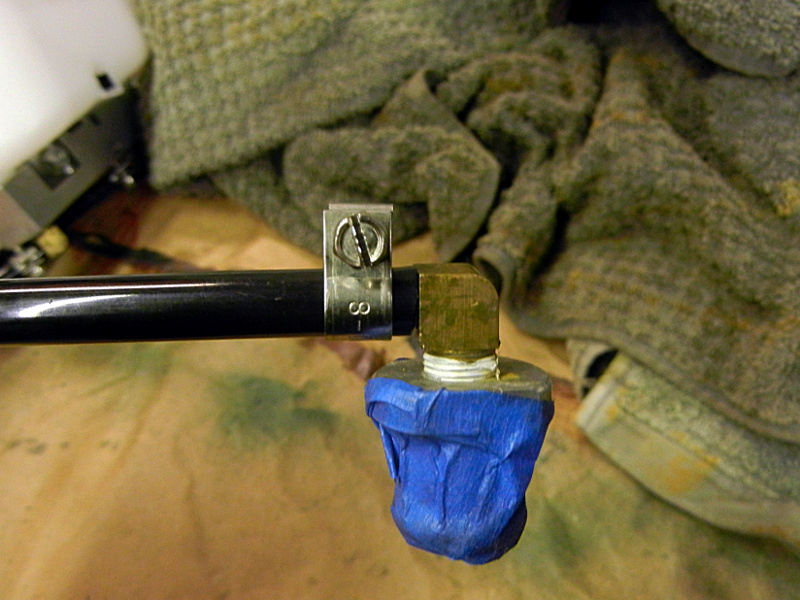
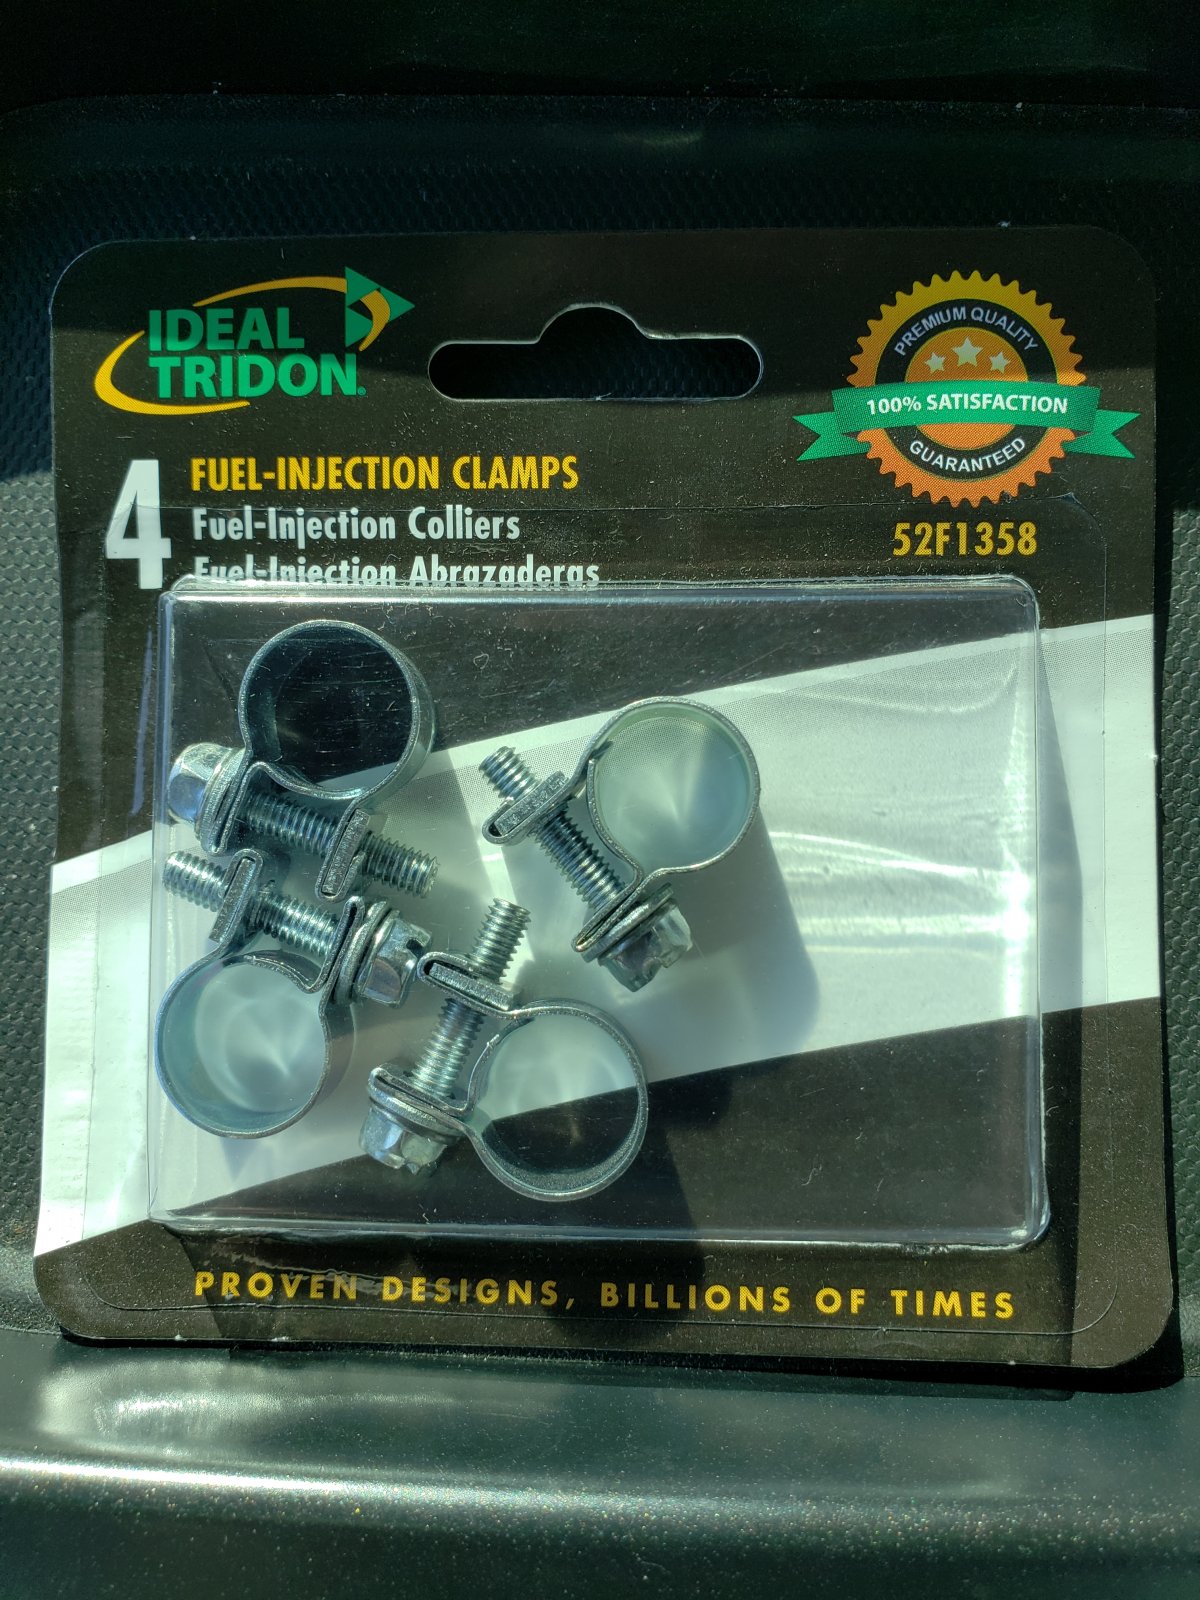
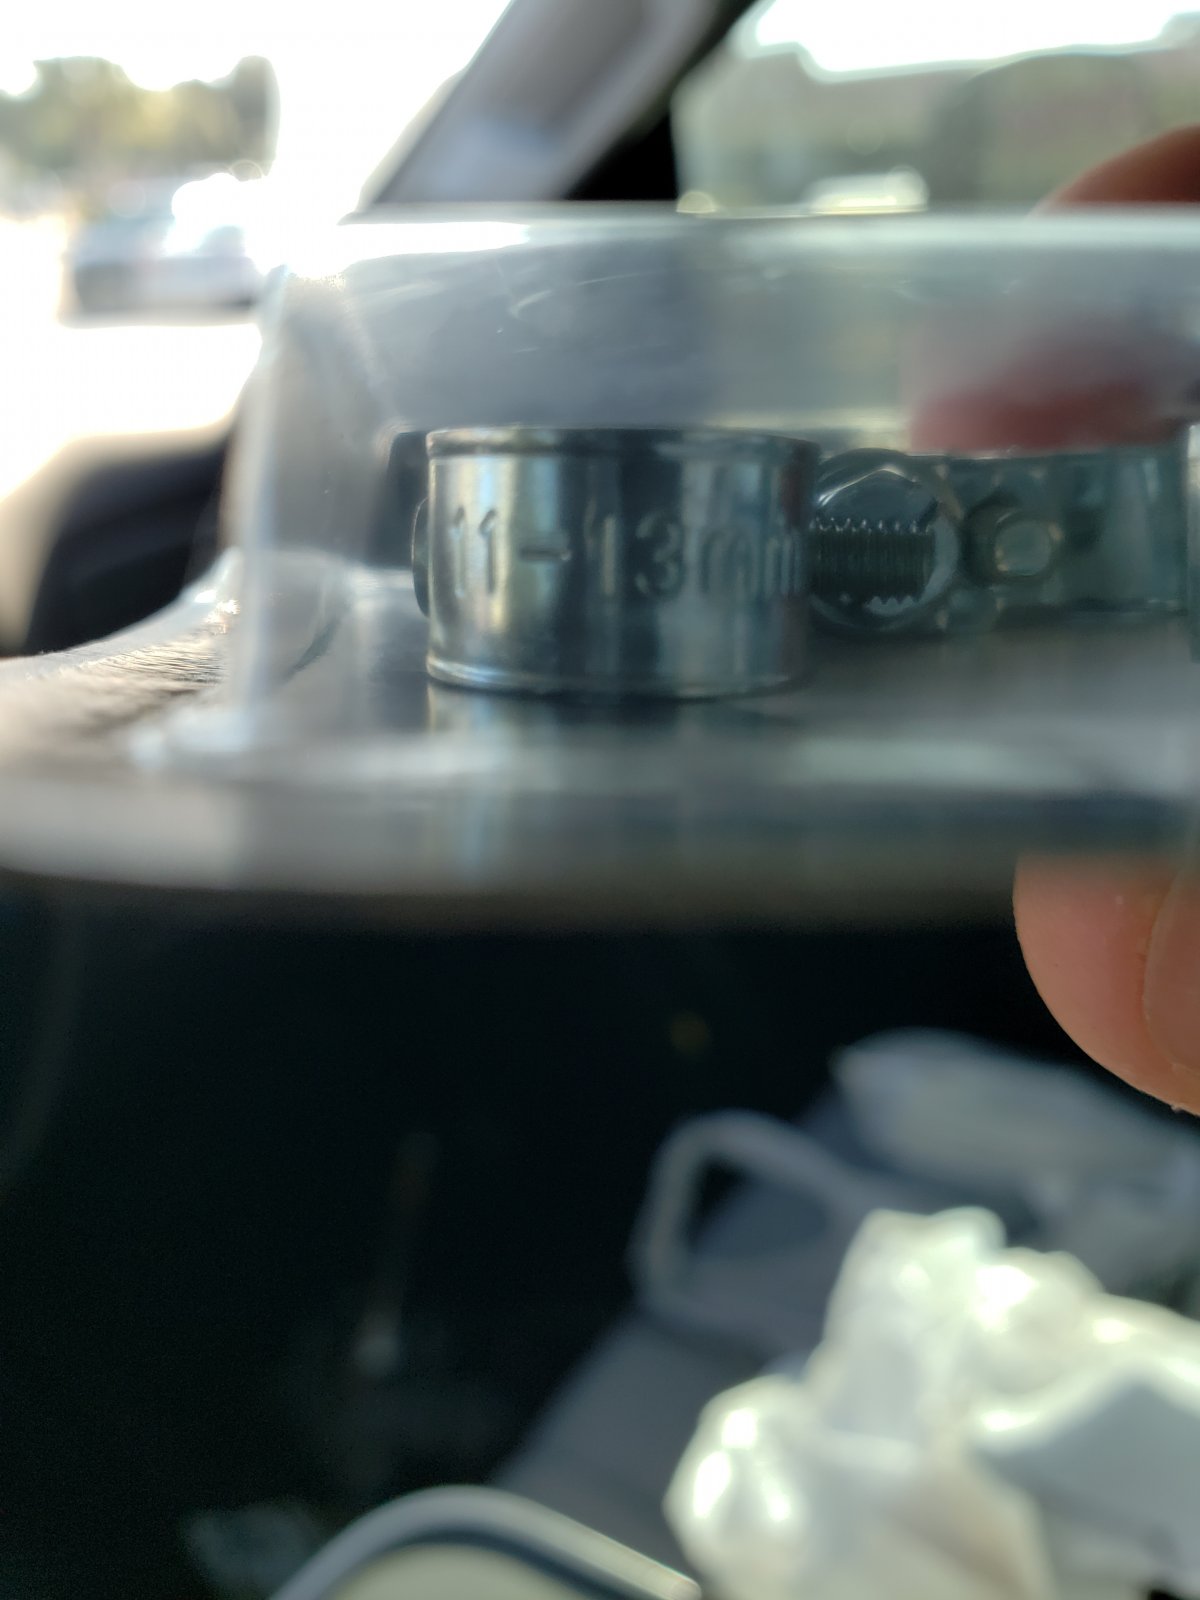
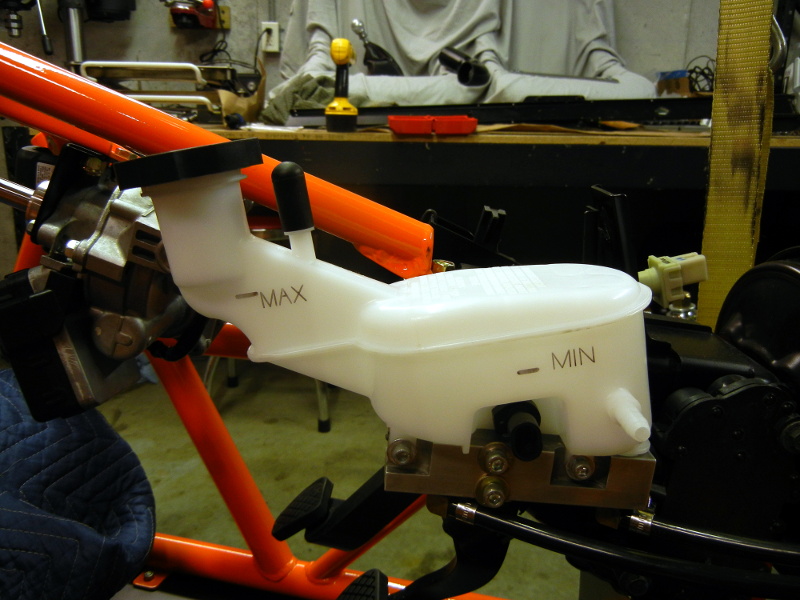
Very minor progress tonight but a major fix for me. I've alway had trouble with the brake fluid leaking one drop every couple of days from the reservoir- VERY ANNOYING! I've tightened the small hose clamps to the point that they are going to strip out and I don't think that it will help anyways. When they are this small, there is alway a gap at the screw end (see photo). I found another type of clamp that I think will do a better job of sealing. They are very small and designed for a very small range of clamping.
The hard hose was pinched and scraped a bit in the accident and I was very fortunate that I kept what I had left from the first build and it was just enough to replace both lines!!!!
This time I used my rework station (solder station) that has hot air I adjusted to about 275* and warmed up the hose ends, slipped them on and quickly tightened the clamp down while still warm. This way it can form to the fitting and the clamp more. It's so tight now the hose will not rotate on the fitting. I can't be happier...as long as it doesn't leak.
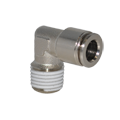
https://www.amazon.com/gp/product/B07369QWD1/ref=oh_aui_detailpage_o02_s00?ie=UTF8&psc=1

Notice the gap at the worm screw.
So much happier with this!

The hard hose was pinched and scraped a bit in the accident and I was very fortunate that I kept what I had left from the first build and it was just enough to replace both lines!!!!
This time I used my rework station (solder station) that has hot air I adjusted to about 275* and warmed up the hose ends, slipped them on and quickly tightened the clamp down while still warm. This way it can form to the fitting and the clamp more. It's so tight now the hose will not rotate on the fitting. I can't be happier...as long as it doesn't leak.
https://www.amazon.com/gp/product/B07369QWD1/ref=oh_aui_detailpage_o02_s00?ie=UTF8&psc=1
Notice the gap at the worm screw.
So much happier with this!
JeffsGoblin
Goblin Guru
Nice! I'm definitely going to try those!
ctuinstra
Goblin Guru
This is a bit premature but I'm pretty excited about it and had to share. I've been thinking about upgrading the dash backlighting to LED to brighten it up and change the color temp a bit. I found the LEDs that will solder in the place of the bulbs and figured up the current limiting resistor values and order them all up. Got the LEDs in today (still waiting on the specific resistors). I just had to do a little bench testing to see how they will work out.
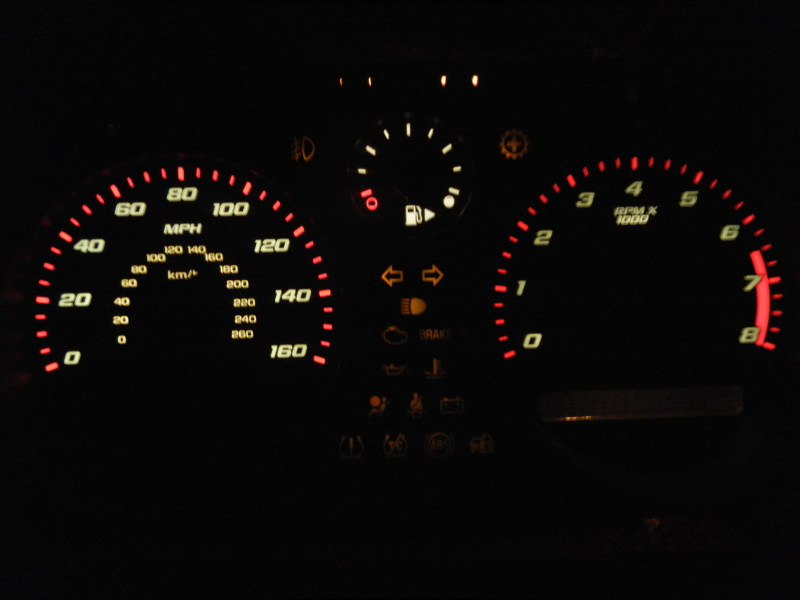
Here is a photo of the original dash lights. It's really hard to take a good photo of them with the point-and-shoot camera changing the exposure all up so I ended up having to video them and grabbing a screenshot. This made for the best representation of the actual brightness and color.
Sorry it's a bit blurry, it's hard to stand still for that long of an exposure. This is an photo and is a bit brighter than actual. This is the screen print over the lights, the rest of the dash is in pieces, that's why there are no needles and the other light seem to be lit up.
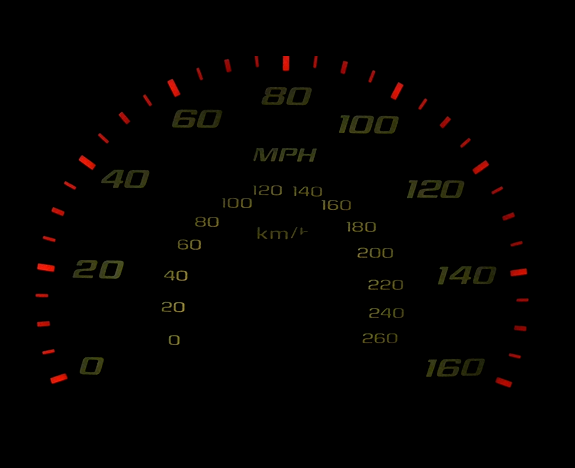
This is a screenshot of the video and a very close representation of the actual brightness.
This is just one of six installed. There are two per gauge.
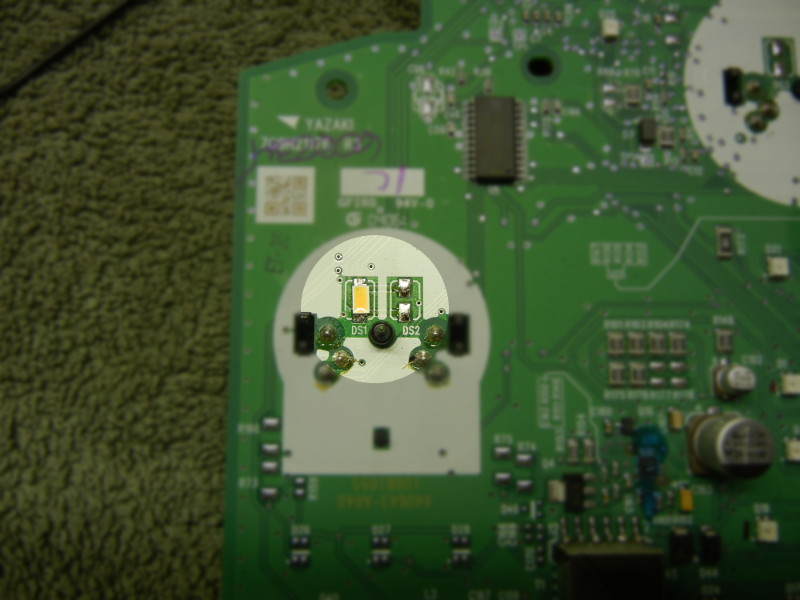
And here is what it looks like with just one of two for this gauge!
When I get all done, I'll do a full write up on it with all of the parts, values, and placement. Cost is about $10 for the LEDs and resistors.
Here is a photo of the original dash lights. It's really hard to take a good photo of them with the point-and-shoot camera changing the exposure all up so I ended up having to video them and grabbing a screenshot. This made for the best representation of the actual brightness and color.
Sorry it's a bit blurry, it's hard to stand still for that long of an exposure. This is an photo and is a bit brighter than actual. This is the screen print over the lights, the rest of the dash is in pieces, that's why there are no needles and the other light seem to be lit up.
This is a screenshot of the video and a very close representation of the actual brightness.
This is just one of six installed. There are two per gauge.
And here is what it looks like with just one of two for this gauge!
When I get all done, I'll do a full write up on it with all of the parts, values, and placement. Cost is about $10 for the LEDs and resistors.
ctuinstra
Goblin Guru
No, not really.Like it! Any chance there is a way to make DIC brighter, too?
Lethalcast
Well-Known Member
Good find on the clamps. I was at advance and asked if he had fuel line clamps and sure enough they do. These are only zinc plated it looks like but for $3.39 for 4 I'm gonna give them a shot lol
ctuinstra
Goblin Guru
It's been too long since my last update. While I have tinkered with things here and there, I haven't got a lot done. Frankly with the snow on the ground, it took some of the urgency out of it. Also Kaleb hasn't had a lot of time to help me on the weekends, and while I can do the entire car by myself, I want him to help with some of the reconstruction. I'll do all of the little tedious things and prep work for when he is here. He has come home for Thanksgiving holiday and we plan to work on it more and have some already.
In a post quite some time ago, I said "Ooo, I almost forgot, I'm working on a little surprise that I'm very excited about. As soon as it's complete in the next couple of day, I'll post about it. I can't wait.... ", well the couple of days ended up being a couple of weeks! Lesson learned, never, ever say "No rush, I'm not in a hurry", that translates to "Put it on the back burner, hell, throw it in the closet and forget about it!". Well it's finally finished and I think it turned out really good. I had a custom boot made for the shifter. It comes complete with black snaps to hold it on. The one comment that really stuck with me at the car shows is a guy mentioned that I really need a shifter boot and I couldn't really argue with him. I always wondered what others would think about it being exposed. It really makes it look much more refined.
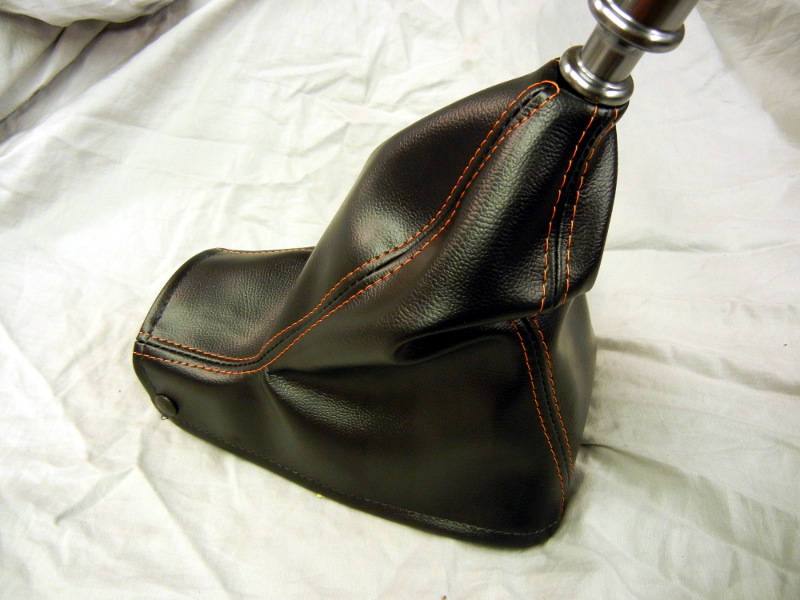

In a post quite some time ago, I said "Ooo, I almost forgot, I'm working on a little surprise that I'm very excited about. As soon as it's complete in the next couple of day, I'll post about it. I can't wait.... ", well the couple of days ended up being a couple of weeks! Lesson learned, never, ever say "No rush, I'm not in a hurry", that translates to "Put it on the back burner, hell, throw it in the closet and forget about it!". Well it's finally finished and I think it turned out really good. I had a custom boot made for the shifter. It comes complete with black snaps to hold it on. The one comment that really stuck with me at the car shows is a guy mentioned that I really need a shifter boot and I couldn't really argue with him. I always wondered what others would think about it being exposed. It really makes it look much more refined.
ctuinstra
Goblin Guru
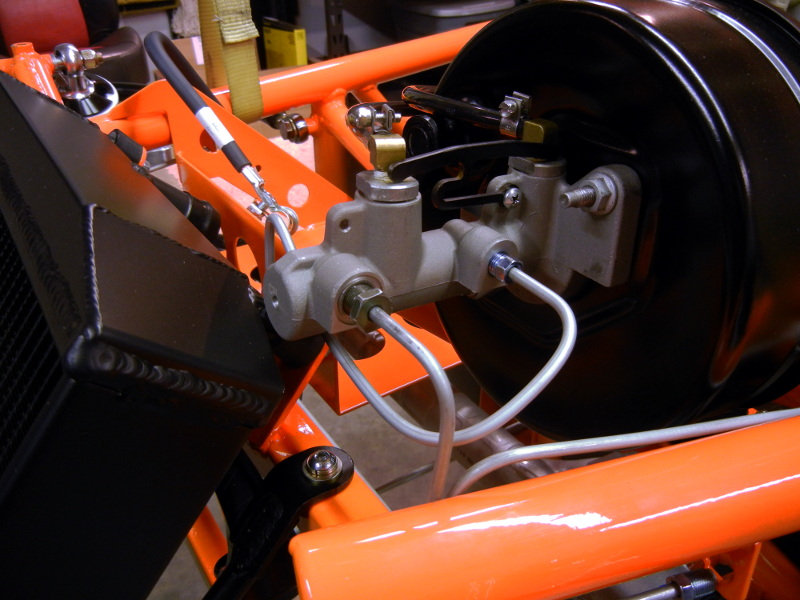
Now for a couple of shots of the current process. We have the engine installed back in the new frame. Had a bit of trouble getting the rear frame tubes to line up and was really concerned about the possibility of the subframe cradle being tweaked a bit, but I was able to get everything to bolt up. I just can't see how the subframe could have been bent. However, I did see some witness marks on the subframe where the front carriage bolt on the passenger side and the frame mount. Over the weekend I hope to get all the brake lines hooked up, clutch lines, and bled. Then move on to the wiring, mounting the heat exchanger, tunnel cover, and coil-overs.
I changed up the color scheme just a bit on the front a-arms and coil springs. I didn't know at first if I would like it and now that I see it, I really, really like it!
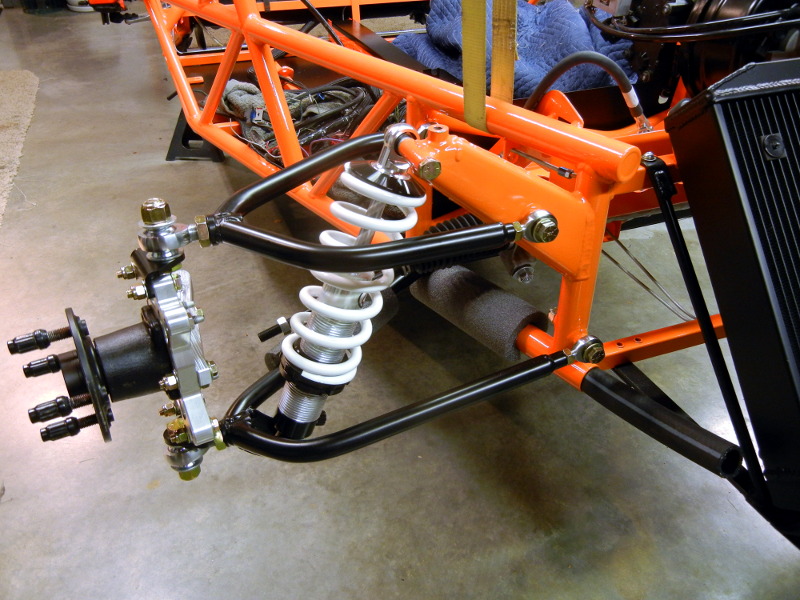
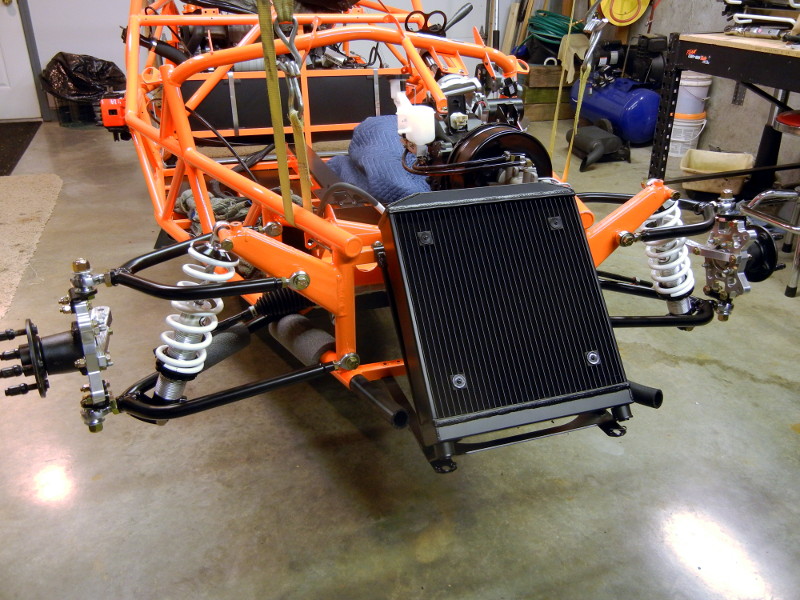
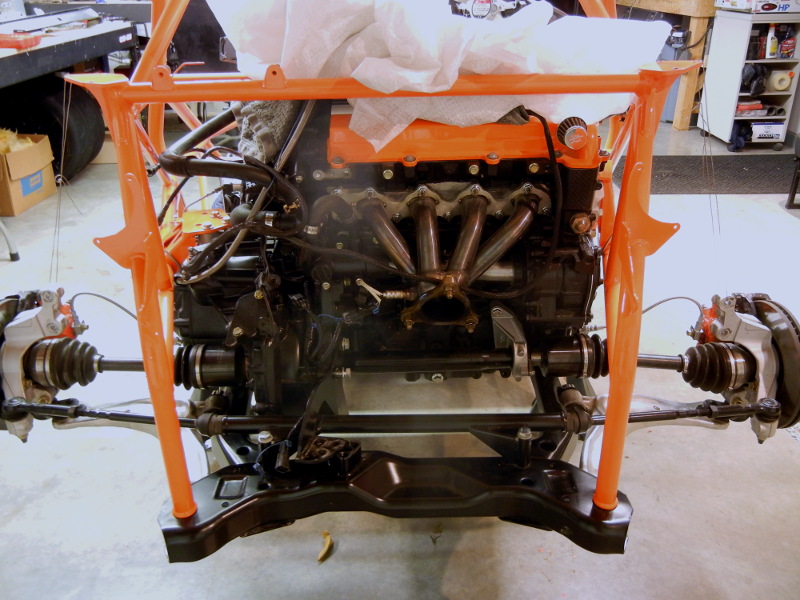
I changed up the color scheme just a bit on the front a-arms and coil springs. I didn't know at first if I would like it and now that I see it, I really, really like it!
Briann1177
Goblin Guru
Not sure how off your subframe bolts were, but mine were off too by about a half of the bolt diameter. I had to use ratchet straps in both directions to get the bolts to go in. I think it's common.
Karter2026
Goblin Guru
The shifter boot looks great! Does it cover the belcranks and rods also? I have said quite a few times to my self that that was one of those things that I would like to address after I get it on the road. It will just give it more of a finished look. It is all in the small details.
ctuinstra
Goblin Guru
It does not cover the bellcrank area and the front part of the rods since that is farther to the front and there really is nothing around the bellcrank to support a cover. I like the looks of the bellcrank mechanism and don't mind that being exposed. The uglyness of factory plastic shifter mount did bug me a bit.The shifter boot looks great! Does it cover the belcranks and rods also? I have said quite a few times to my self that that was one of those things that I would like to address after I get it on the road. It will just give it more of a finished look. It is all in the small details.
ctuinstra
Goblin Guru
The first frame seem to line up very well but we had to pull the two uprights in to get the bolts to go in. This one just seemed like it was off a more but all the bolts did go in, so if it is off, it's not off much.Not sure how off your subframe bolts were, but mine were off too by about a half of the bolt diameter. I had to use ratchet straps in both directions to get the bolts to go in. I think it's common.