ctuinstra's City Goblin - 07 SS/SC donor **Licensed**
- Thread starter ctuinstra
- Start date
ctuinstra
Goblin Guru
Still working on cleaning up all the parts and the engine. I've painted the engine and will post pictures soon as I get it together more. I was a real pain to tear much of it down and clean it up and paint it, but in the end I think it will be worth it. I don't plan to run a cover over the engine so it will be mostly exposed.
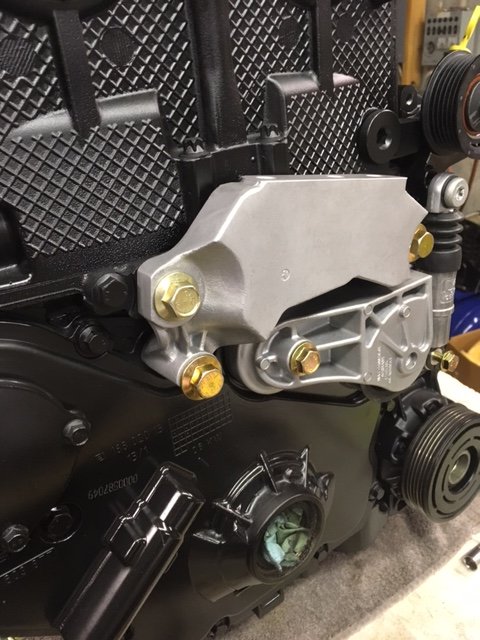
Here is a little teaser of what I have been doing. I removed the guts of the AC compressor and I'm just using it at a bracket for the pulley. You could almost get by with just the two front mounting bolts and leave to rest of the body off of the compressor but I was afraid of putting the pulley and bracket in a bind under tension from the belt. Not wanting to get the compressor full of water and other debris, my son designed a cover for the ports and 3D printed it for me. I think it turned out nice.
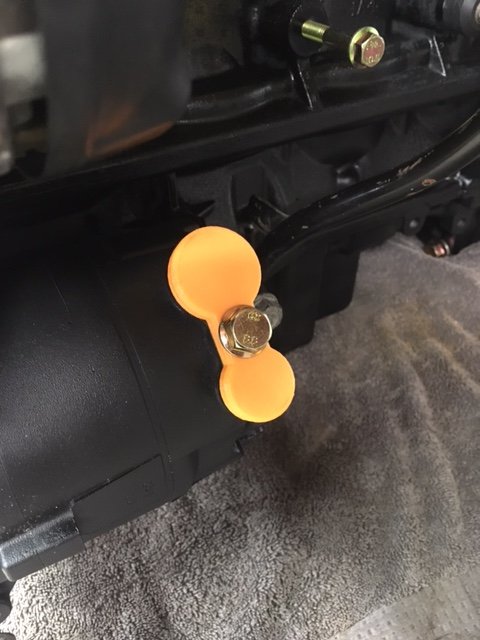
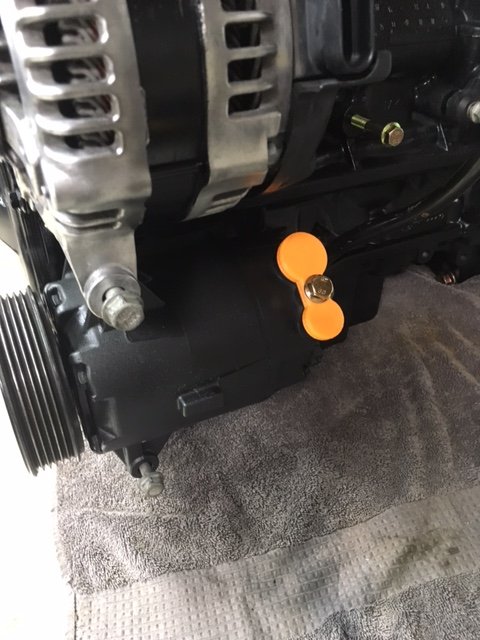
Here is a little teaser of what I have been doing. I removed the guts of the AC compressor and I'm just using it at a bracket for the pulley. You could almost get by with just the two front mounting bolts and leave to rest of the body off of the compressor but I was afraid of putting the pulley and bracket in a bind under tension from the belt. Not wanting to get the compressor full of water and other debris, my son designed a cover for the ports and 3D printed it for me. I think it turned out nice.
ctuinstra
Goblin Guru
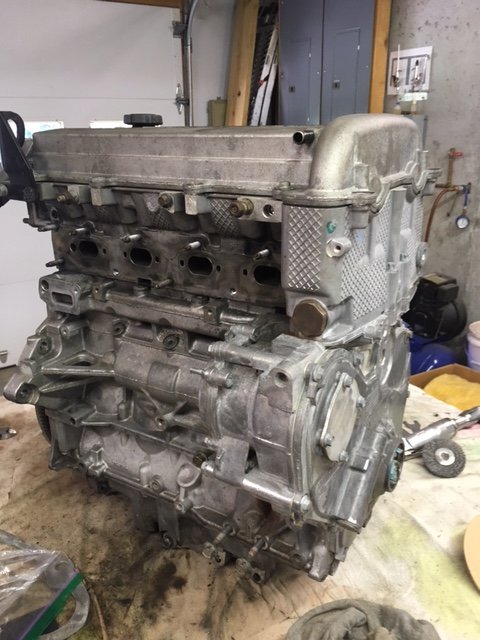
I'm overdue updating my build. Been busy reading and watching everyone else. Actually I've been plugging along just cleaning up the engine and making it a bit more presentable. Here is a before shot. What you can't see it the extreme amount on oxidation from all of the moisture and salt over the years. The whole outside was a powder. I just couldn't stand the sight of it. Seems like many of the other engines posted looked much better. This is after hours of a wire brush on the die grinder so it doesn't look too bad.
ctuinstra
Goblin Guru
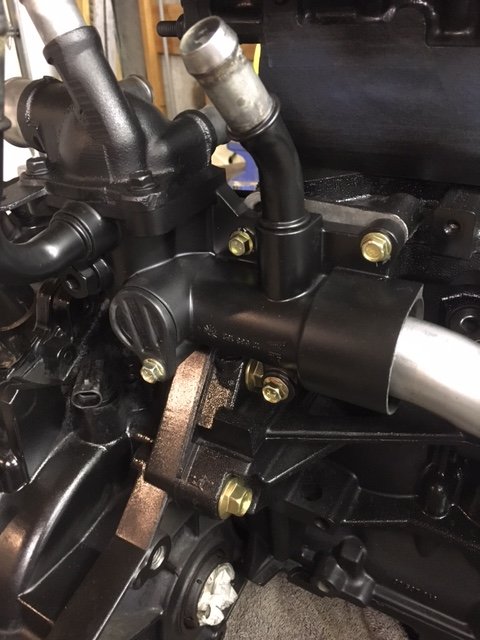
This is after painting with a ceramic engine paint from Eastwood with activator. I really liked the paint and how it sprayed on or could be brushed. A little paint went a long way! I hung the engine from the loader while painting it and left it out in the sun for hours to bake.
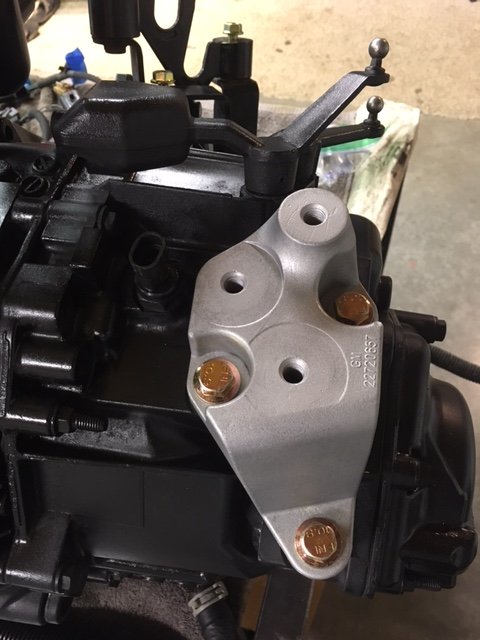
Many of the smaller pieces I took to the local precision machine shop and they have some type of bath and blasting that they do that makes the cast parts look better than new! I was so happy with the outcome I'm addicted to it. They are so clean that the least little bit of dirt or oil on your fingers will show up. I had to darn near wear gloves until I could get a coat of clear satin on them.
Also replaced a lot of the old rusty bolts with yellow zinc coated flange bolts from Fastenal. Chased all of the threaded holes with a tap to clean them up. Nothing like a new bolt in a new hole. Everything went together using my fingers and then a torque wrench to finish them off.
I cleaned up and polished the pipe and finished with a light wire brushing and then a clear coat.
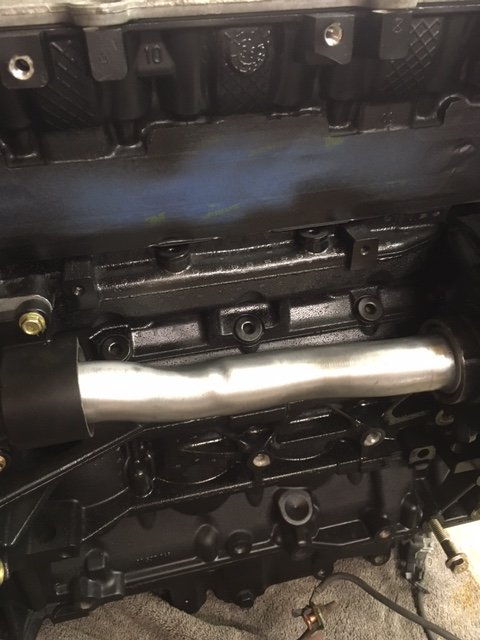
The bottom bolt of the thermostat housing was a real pain to find. Only one place on the internet had that size/length. That is a $9 bolt with shipping.
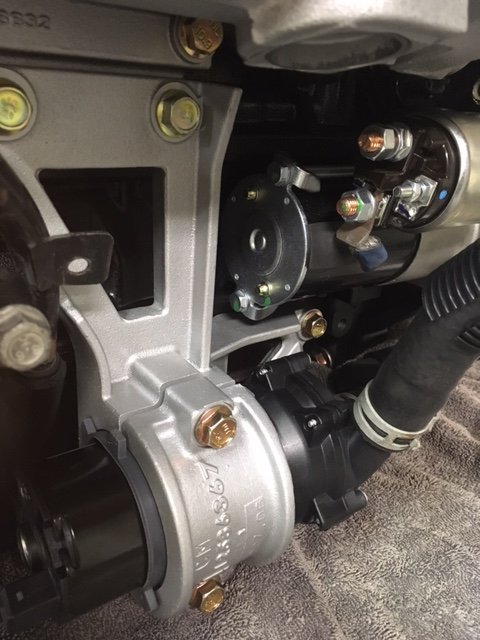
Still working on putting everything together so not everything is bolted down tight. I had to replace the starter because one of the terminal broke off trying to get the nut off. It was just a problem waiting to happen. And yes, that is a new Bosch pump. I found out my original was dead, brushes were worn completely down-gone!
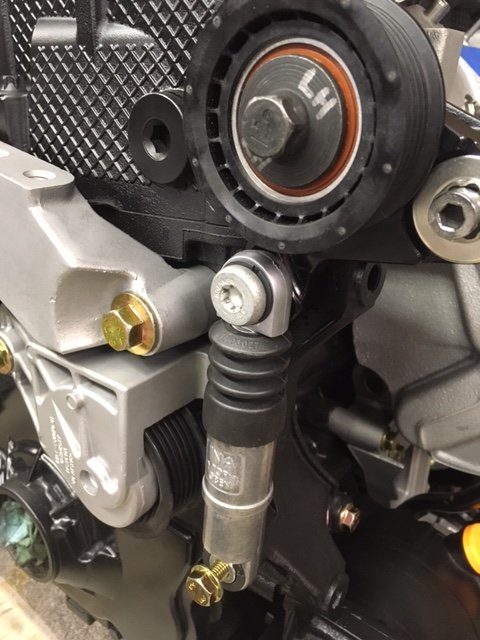
Again, some of it is just mocked up for now. This is the ZZP adjustable tensioner.
Many of the smaller pieces I took to the local precision machine shop and they have some type of bath and blasting that they do that makes the cast parts look better than new! I was so happy with the outcome I'm addicted to it. They are so clean that the least little bit of dirt or oil on your fingers will show up. I had to darn near wear gloves until I could get a coat of clear satin on them.
Also replaced a lot of the old rusty bolts with yellow zinc coated flange bolts from Fastenal. Chased all of the threaded holes with a tap to clean them up. Nothing like a new bolt in a new hole. Everything went together using my fingers and then a torque wrench to finish them off.
I cleaned up and polished the pipe and finished with a light wire brushing and then a clear coat.
The bottom bolt of the thermostat housing was a real pain to find. Only one place on the internet had that size/length. That is a $9 bolt with shipping.
Still working on putting everything together so not everything is bolted down tight. I had to replace the starter because one of the terminal broke off trying to get the nut off. It was just a problem waiting to happen. And yes, that is a new Bosch pump. I found out my original was dead, brushes were worn completely down-gone!
Again, some of it is just mocked up for now. This is the ZZP adjustable tensioner.
Last edited:
ctuinstra
Goblin Guru
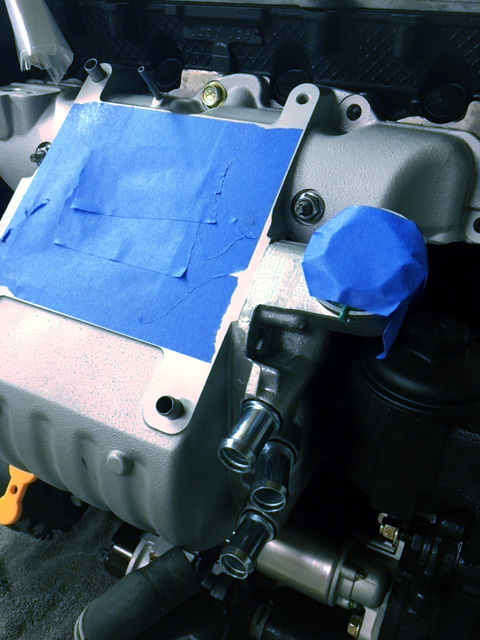
This picture does not do it justice. The intake came out so clean a bright. It's almost white. I was so happy with their work. I installed the dual pass water housing for the supercharger. In doing so, I pulled the laminova tubes out. The fins were getting pretty dirty with oil from the K&N filter that was used. Inside the intake, the walls were covered in black grease along with the IAT sensor. A strong aerosol spray cleaner made short work of cleaning the laminova tubes.
For now I'm working on cleaning up the engine harness. I've removed the AC wires, I know it's not really worth it, but I can be kind of anal about some of that. I'm going to replace all of the split loom anyways after cleaning the sticky off of the wires and re-taping them.
Slowly starting to run out of things to do. Maybe I can get back to life and do other things like mow the lawn for once.") Man, I'm addicted to this!
Man, I'm addicted to this!
For now I'm working on cleaning up the engine harness. I've removed the AC wires, I know it's not really worth it, but I can be kind of anal about some of that. I'm going to replace all of the split loom anyways after cleaning the sticky off of the wires and re-taping them.
Slowly starting to run out of things to do. Maybe I can get back to life and do other things like mow the lawn for once.
Man, I'm addicted to this!
Last edited:
ctuinstra
Goblin Guru
Actually I did keep a spreadsheet to keep track of what size/length and where they go. My notes may not be perfect and this is not every bolt, just ones that I have ordered/replaced so far. But it's a good start. Attached is the Excel files zipped up.Looks great I was planning on using the same paint also did you take notes on what bolt did you buy I will want to do the same thing since I have a little ocd and things like that bother me
Attachments
-
8.4 KB Views: 494
Johvans
Well-Known Member
You might be benefiting by not having the frame sitting there waiting.. I've been bead blasting the smaller parts and painting them with matte clear similar to what you've done.
I'm tempted to just throw my clutch in and get the motor in the frame.. I might have to wire wheel my block and transmission now before I put them in the car. You may have sparked a whole new adventure now..
I'm tempted to just throw my clutch in and get the motor in the frame.. I might have to wire wheel my block and transmission now before I put them in the car. You may have sparked a whole new adventure now..
ctuinstra
Goblin Guru
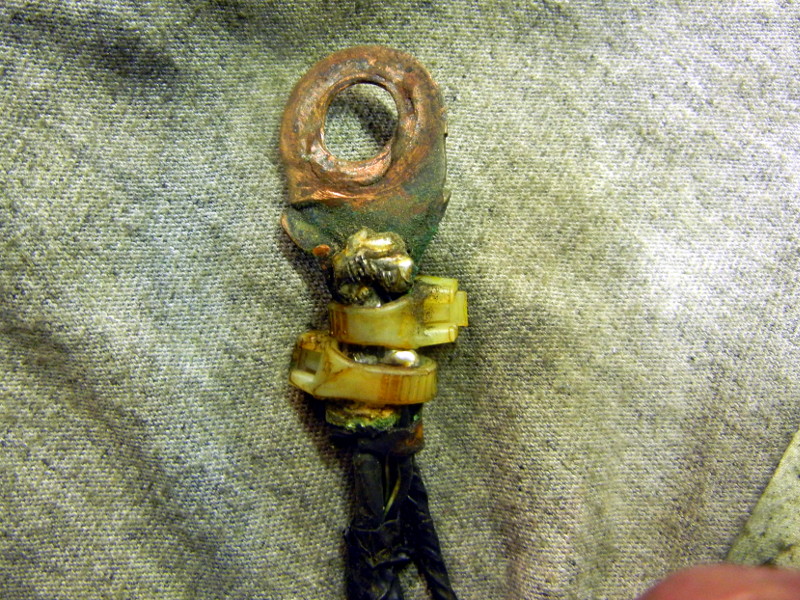
Today was cleaning up the engine harness. I knew there was a ground strap in the harness that bolts to the block but for the life of me, I could not find it. Then I found it, this is what I found. I sure am glad I found this so it could be taken care of. Can you imaging the gremlins this could have caused? Someone attempted to solder blob it.
Briann1177
Goblin Guru
The bigger the blob, the better the job. BTW, the engine looks awesome. Need a few zoomed out pics like the before paint one.
ctuinstra
Goblin Guru
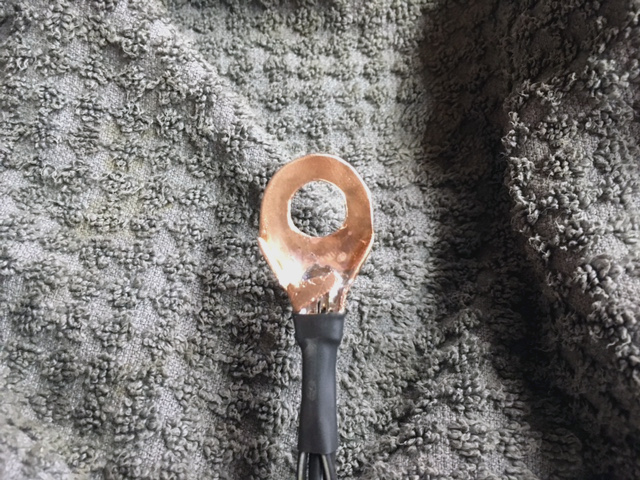
I was not able to find a suitable copper ground lug that I was happy with so I spent way too much time today fabricating one out of a piece of 3/4" copper coupler. I made this one just a bit smaller then the original since it doesn't need the ground for the radiator fan anymore. You just can't find one with a large enough hole but still made for a couple of 16GA wire. This one is soldered properly.
ctuinstra
Goblin Guru
The valve cover hasn't been touched yet. It's going to be powder coated the same as the frame.BTW, the engine looks awesome. Need a few zoomed out pics like the before paint one.
Johvans
Well-Known Member
What color are you guys going with?The valve cover hasn't been touched yet. It's going to be powder coated the same as the frame.
John
ctuinstra
Goblin Guru
I'm going with Competition Orange. My son and I are huge KTM fans and like the color scheme. Orange frame with lots of black with just a touch of white accents.What color are you guys going with?
John
Johvans
Well-Known Member
Love it. That will look great! I loved my 690 Enduro.I'm going with Competition Orange. My son and I are huge KTM fans and like the color scheme. Orange frame with lots of black with just a touch of white accents.
John