Dre city Goblin build - 06 LS Donor

Dre

Well-Known Member
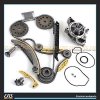
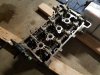
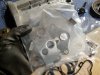
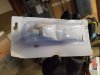
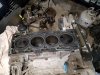
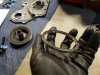
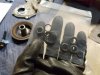
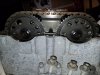
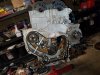
Update! I'm in the process of changing the engine seals. I'm changing the valve cover gasket and seals, engine cover gasket, head gasket, water pump, starter, timing chain, and thermostat

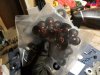
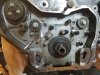
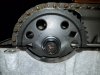
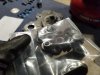
The serpentine belt was partially shreaded and the belt tensioner was broken. I already ordered replacement parts. The sprockets look to be in great shape, so I'll continue to use those.
 

Attachments

ctuinstra

Goblin Guru
You have the old-style cam chain tensioner. I highly recommend changing it out while you have it apart that far. Also it's best to change the chain and the sprockets as a set. They wear as a set and if you change just the chain, it will wear quickly to the old sprockets. How many miles are on the engine? Cloyes has a nice set that isn't too expensive. Check out my build for more information.
 

Dre

Well-Known Member
There is about 130,000 miles on the car. How do you determine if it's the old style? I have a kit already at home.
 

SliderR1

Well-Known Member
The old style tensioner bolt head is flat and the new style has an external 'dimple' that sticks out.
 
  • Like
Reactions: Dre

ctuinstra

Goblin Guru
There is a great video on YouTube by Cloyes on how to replaced the timing chain. Very informative! Search Ecotech timing chain and look for one by Cloyes.
 
  • Like
Reactions: Dre

ctuinstra

Goblin Guru
This is the kit i have at home.
That looks like you have everything. The best that I can tell, the new style adjuster is in there. The marking on your timing chain may be different than what is in the video, so don’t let that confuse you. Make sure you double, triple check the timing of the chain on the gears (intake can, exhaust cam, and crank) before you put it back together. You don’t want to find out on your first start the timing is off. I took a lot of pics before putting the cover back on just so I could verify later if I needed to. Also there is a procedure to installing the tensioner and releasing it. Make sure to watch the video to see how to do it. If it doesn’t tension, it will jump teeth and make a mess.
 

Karter2026

Goblin Guru
If you rotate the motor over after lining up the timing marks. Do not expect them all to line up on the next rotation.
 
  • Like
Reactions: Dre

Dre

Well-Known Member
Maybe I didn't look hard enough, but the instructions for the QA1 shocks say to lube the threads. Did the box come with lube?
 

Briann1177

Goblin Guru
No. You need to go to your local big box store and get some anti-seize compound. Don't be like me and pick up the high temp one the first time around. Just the normal gray colored goop from Permatex should work just fine.
 

Dre

Well-Known Member
Lots of photos uploaded... I removed the timing chain and some of the sprockets. I also removed the head. I finally cracked open the gasket kit i bought. I have not really worked on an engine before. Can someone help me identify the items I'm holding in my hand in the photos? I know they are not good. Also, my frame is still at the paint shop. I'll call tomorrow to see how things are going.
 

Attachments

SliderR1

Well-Known Member
pic 722 - the large one is for the exhaust;
629 appears to be valve guide seals;
903 - assembly lube?
759 - the black ones are for the valve cover (around spark plugs);
731 - valve cover bolts;
 
  • Like
Reactions: Dre

Karter2026

Goblin Guru
pic 722 - the large one is for the exhaust;
629 appears to be valve guide seals;
903 - assembly lube?
759 - the black ones are for the valve cover (around spark plugs);
731 - valve cover bolts;
903 is RTV sealant for corners of valve cover
759 has the throttle body and intake manifold gaskets in it also
745 ??????
 
  • Like
Reactions: Dre

ctuinstra

Goblin Guru
Hard to tell from the picture, but it looks like you have some wear on the timing gears. Probably a good thing you are taking care of that now.

1532611983478.png
 
  • Like
Reactions: Dre

ctuinstra

Goblin Guru
The haynes manual doesn't say to add RTV gasket to the head, should i anyway?
Just to specify, Karter2026 mentioned for the corners of the valve cover and you asked about the head. Not trying to be nit picky, just trying to clarify they are two different items. I don't think it's a bad idea to put a dab in the tight corners, that's not uncommon. I didn't when I put a new seal on the valve cover and it seems to be doing fine. Either way will work, whatever you feel comfortable with.
 
Top