Jeffrey's City Goblin SS Turbo Illusion Purple

Jlarson524

Active Member
Good Afternoon all,

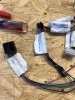
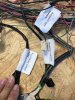
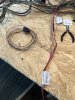
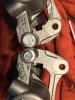
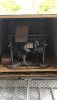
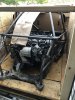
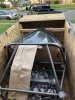
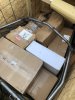
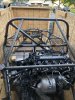
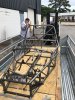
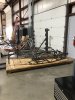
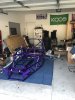
My name is Jeffrey and I am building a City full door style SS turbo Goblin. I started this project back in October of 2017. I realized I needed to start posting in the forums so here I am. I received my kit back in May of 2018. So far all I have really accomplished is some powder coating and prepping donor parts. I will be posting all the struggles here in hope to get the help needed from you experienced builders. Here are some pictures of up to where I am. I am currently waiting on the floor and gas tank to come back so I can start Stage 1. Thanks for reading and God bless.
 

Attachments

Jlarson524

Active Member
I am thinning the dash harness at the moment and have a few questions. Can I delete the theft deterrence module, steering wheel buttons, audio amplifier x3, remote control receiver, ambient light sensor and the accessory power outlet?
 

Attachments

Briann1177

Goblin Guru
You'll need to keep the anti theft module that goes around the ignition switch.

The right steering wheel switch that controls the radio can go. If you want cruise control and the driver information center, you'll need to keep the wiring on the left switch. You don't need the actual switch unless you want to use it. Regular push buttons will work too, but you'll need resistors for the cruise control and the driver info center.

Audio amp wires can go.

Ambient light sensor is up to you. I'm keeping mine because I plan on using day running lamps.

I highly recommend you keep the accessory plug wires. That way you'll have power for things like a phone charger, GPS, tablet, etc.
 
Last edited:

Briann1177

Goblin Guru
It should be something like four ~1-1/2" long x 1/4" diameter button head bolts, washers, and nylock nuts.
 
Last edited:

ctuinstra

Goblin Guru
I don't have picture of them, but 2 of the large black plastic grommets (aprox 1"x1") and 2 rubber isolated studs for the top mount.

1 RAD-AL3CR Radiator Del Sol
2 RAD-GRMT Radiator Grommet
2 RAD-STUD-M6 Isolated Radiator Stud
 

Jlarson524

Active Member
in the thinning the body harness video approximately 3:30 it states to cut the passenger seat wires. on my harness I have another connector running from that. I assume its fine to cut all that out as long as I keep the main connector. I am not a wiring expert and I want to make sure I make no mistakes while thinning the harness. Thanks.
 

Attachments

Briann1177

Goblin Guru
I can't see the connector you have labeled, but I don't think that's the right one that the video has you keep for the dash cluster. Does that connector look like this?

PPS.jpg
 

Briann1177

Goblin Guru
The other connector looks to be your passenger seat belt tension sensor. That appears to have only three pins so that definitely won't work for your dash connector. Maybe you do keep the 18 pin one. I didn't so I'm really not sure.

Either way, all of the associated wiring on those two connectors can be thinned out.
 

Briann1177

Goblin Guru
Correct me if I'm wrong, but that connector plugs into another connector on the bottom of the passenger seat? You'll also need that one off the seat if you want to use the pictured one for the dash, right?
 

Jlarson524

Active Member
Silly question. I installed the springs on the front coil overs. After getting them installed I realized the other boxes are labeled as front spring. looking at the boxes the spring is the same... "SPRING, CR-SI HIGH TRAVEL 2-1/2" ID" one is labeled 9HT300 the other say 9HT400. Are they interchangeable?
 

Attachments

George

Goblin Guru
If you have DF rear coilovers the 400 go in front and 300 rear. If you are using stock rear springs the fronts use the 300s

Brad
 

Jlarson524

Active Member
Ran into another question today. Taking the calipers apart to paint and I noticed on 1 of the calipers the guide pin bolts instead of being a 14mm they are 12mm bolts. just 1 of them are this way. the other 3 are the 14mm. is it possible I got one that is the wrong part number?
 

Attachments

Top