Rich's Track Goblin - 09 SS Turbo **TITLED & REGISTERED***
- Thread starter RichRich
- Start date
canyon bolieu
Well-Known Member
Probably just black somthing dark to go with it then stickers from sponsors. And yes yours has a lot of flake compared to mine, was your frame powder coated by the guys in Dallas that DF uses?
I’m still waiting on some parts also
I’m still waiting on some parts also
canyon bolieu
Well-Known Member
Yeah I had mine done there too strange how they came out so different but thats one reason I like the color you can’t ever get it exactly the same
Briann1177
Goblin Guru
Can you post a pic of how you routed the coolant hose that runs from the tee and over to your coolant tank?
I can't seem to find a good way without extra fittings.
I can't seem to find a good way without extra fittings.
RichRich
Well-Known Member
I angled the tee upwards that went to the overflow tank, I also have a longer hose than the stock one.
The bottom part to the relay/fuse box worked perfectly. Everything fit as planned. Here is the link for it, took about a week and a half to be delivered but they kept up with order status through email the whole time. Here is the link for it, keep in mind this is for an 09 SS https://www.wholesalegmpartsonline.com/products/Chevrolet/BRACKET-Emission-Control-System/3055878/25974391.html
The bottom part to the relay/fuse box worked perfectly. Everything fit as planned. Here is the link for it, took about a week and a half to be delivered but they kept up with order status through email the whole time. Here is the link for it, keep in mind this is for an 09 SS https://www.wholesalegmpartsonline.com/products/Chevrolet/BRACKET-Emission-Control-System/3055878/25974391.html
Brian74
Goblin Guru
I just ordered one. Shipping was $24. Crazy. I figure for the price, I’m saving time by not having to drive all the way to LDK and try and describe which part it is and gamble whether or not they would even be able to sell it without charging me for the entire fuse box assy.I’d rather get one now because I plan to weld mounting tabs in for the corner tab mount before I powdercoat.
RichRich
Well-Known Member
Had the goblin out yesterday for a little testing. Have the intake all done up so actually had boost this time. Wasn't even being too aggressive but still managed to get my wife to grab for a oh **** handle on a 2nd gear pull haha
Next is mounting the IC heat exchanger start wiring up the lights and blinkers
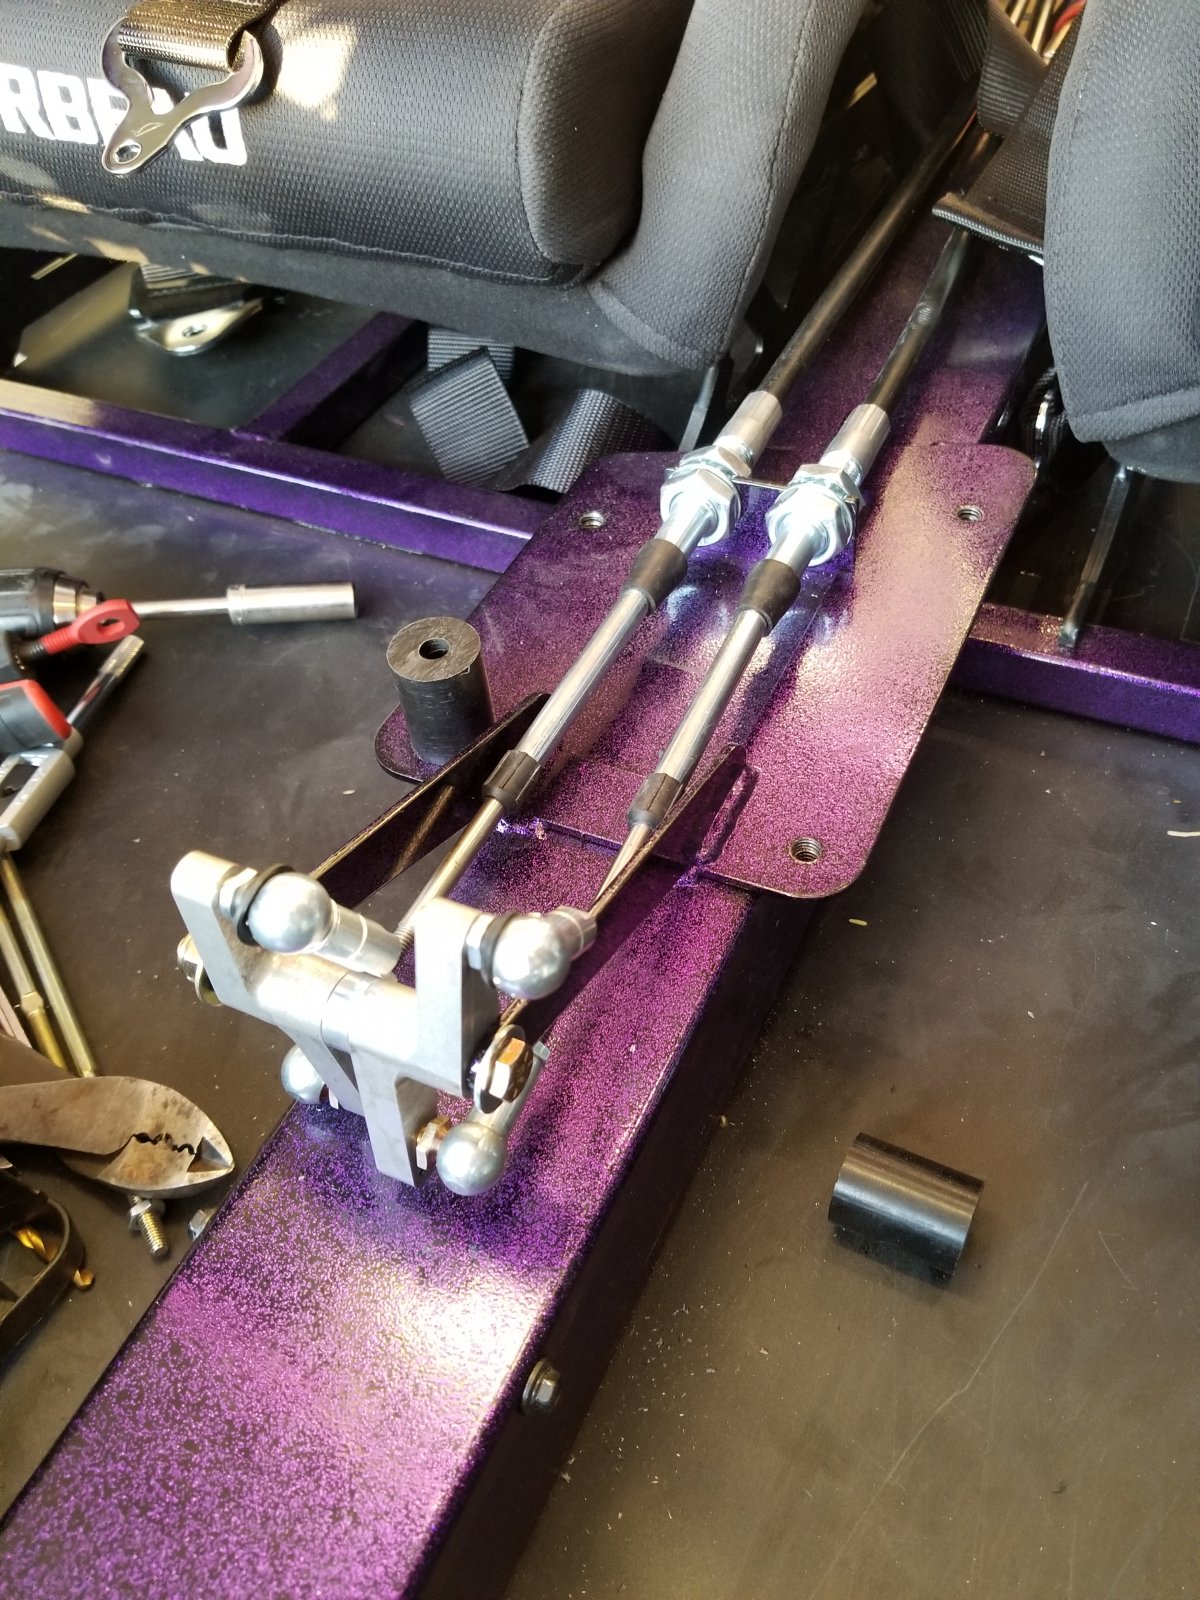
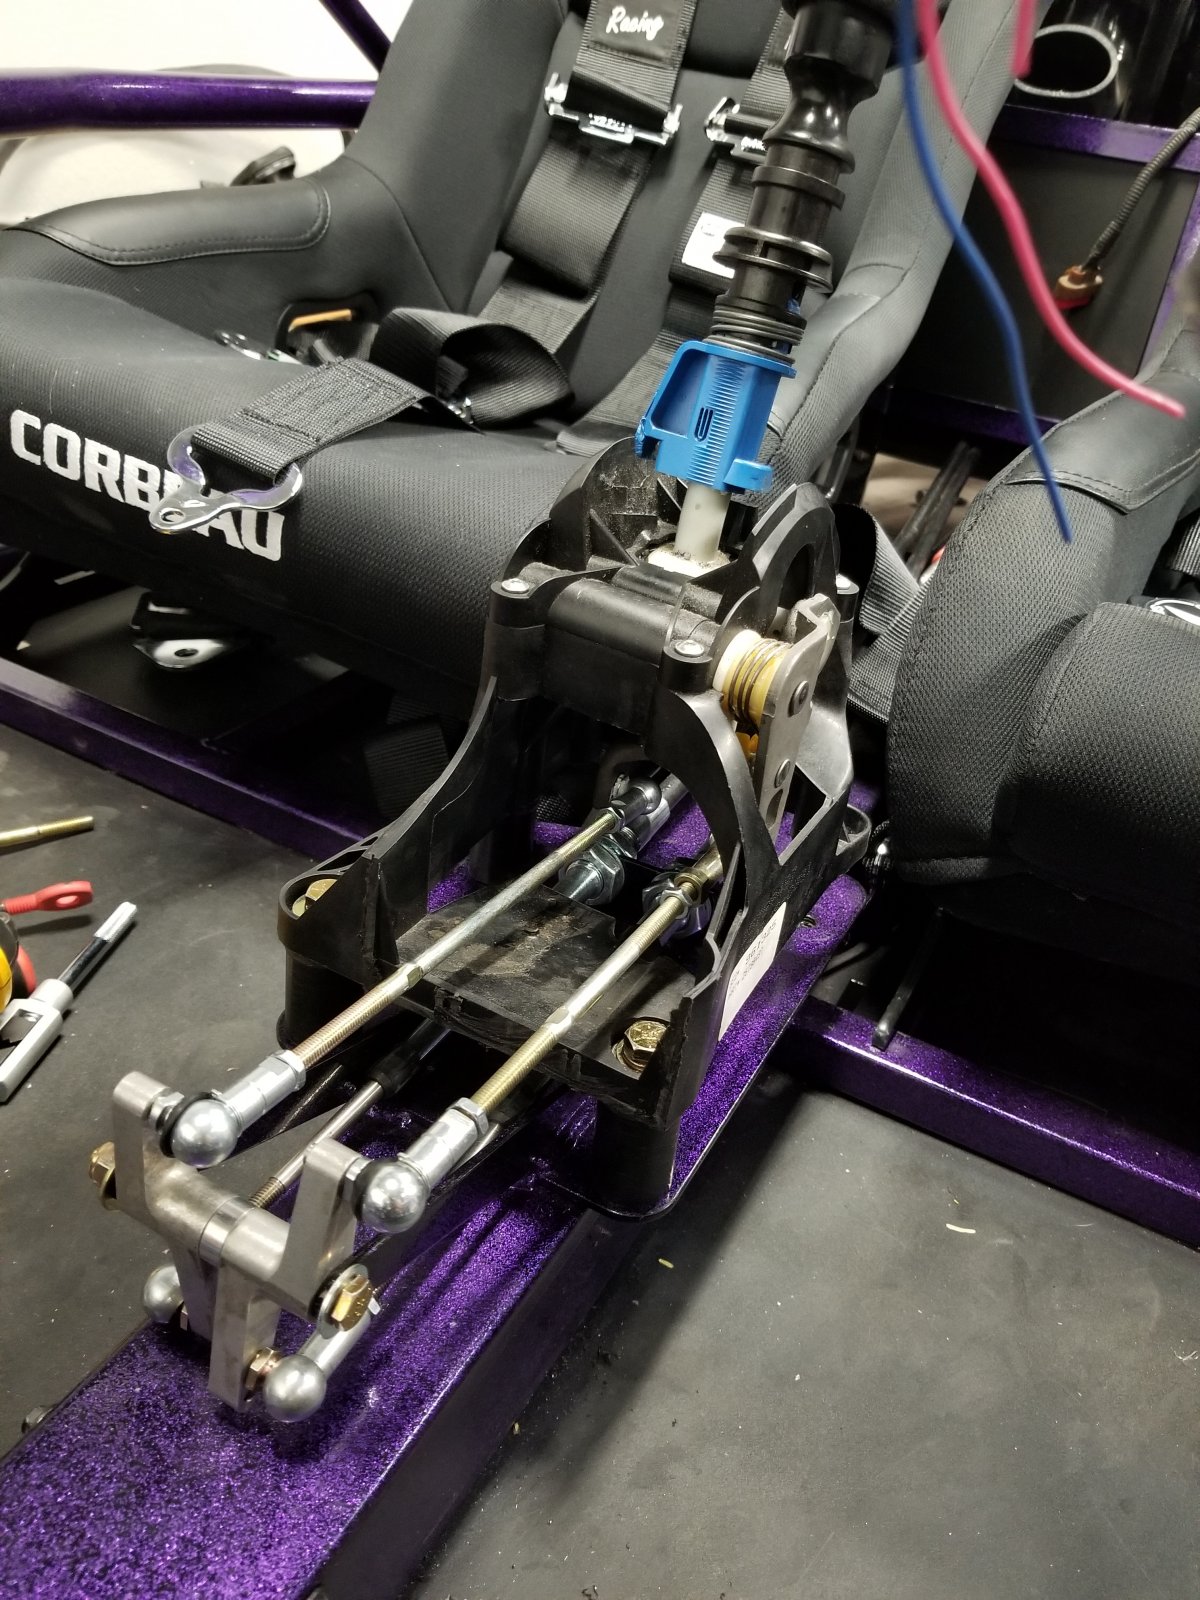
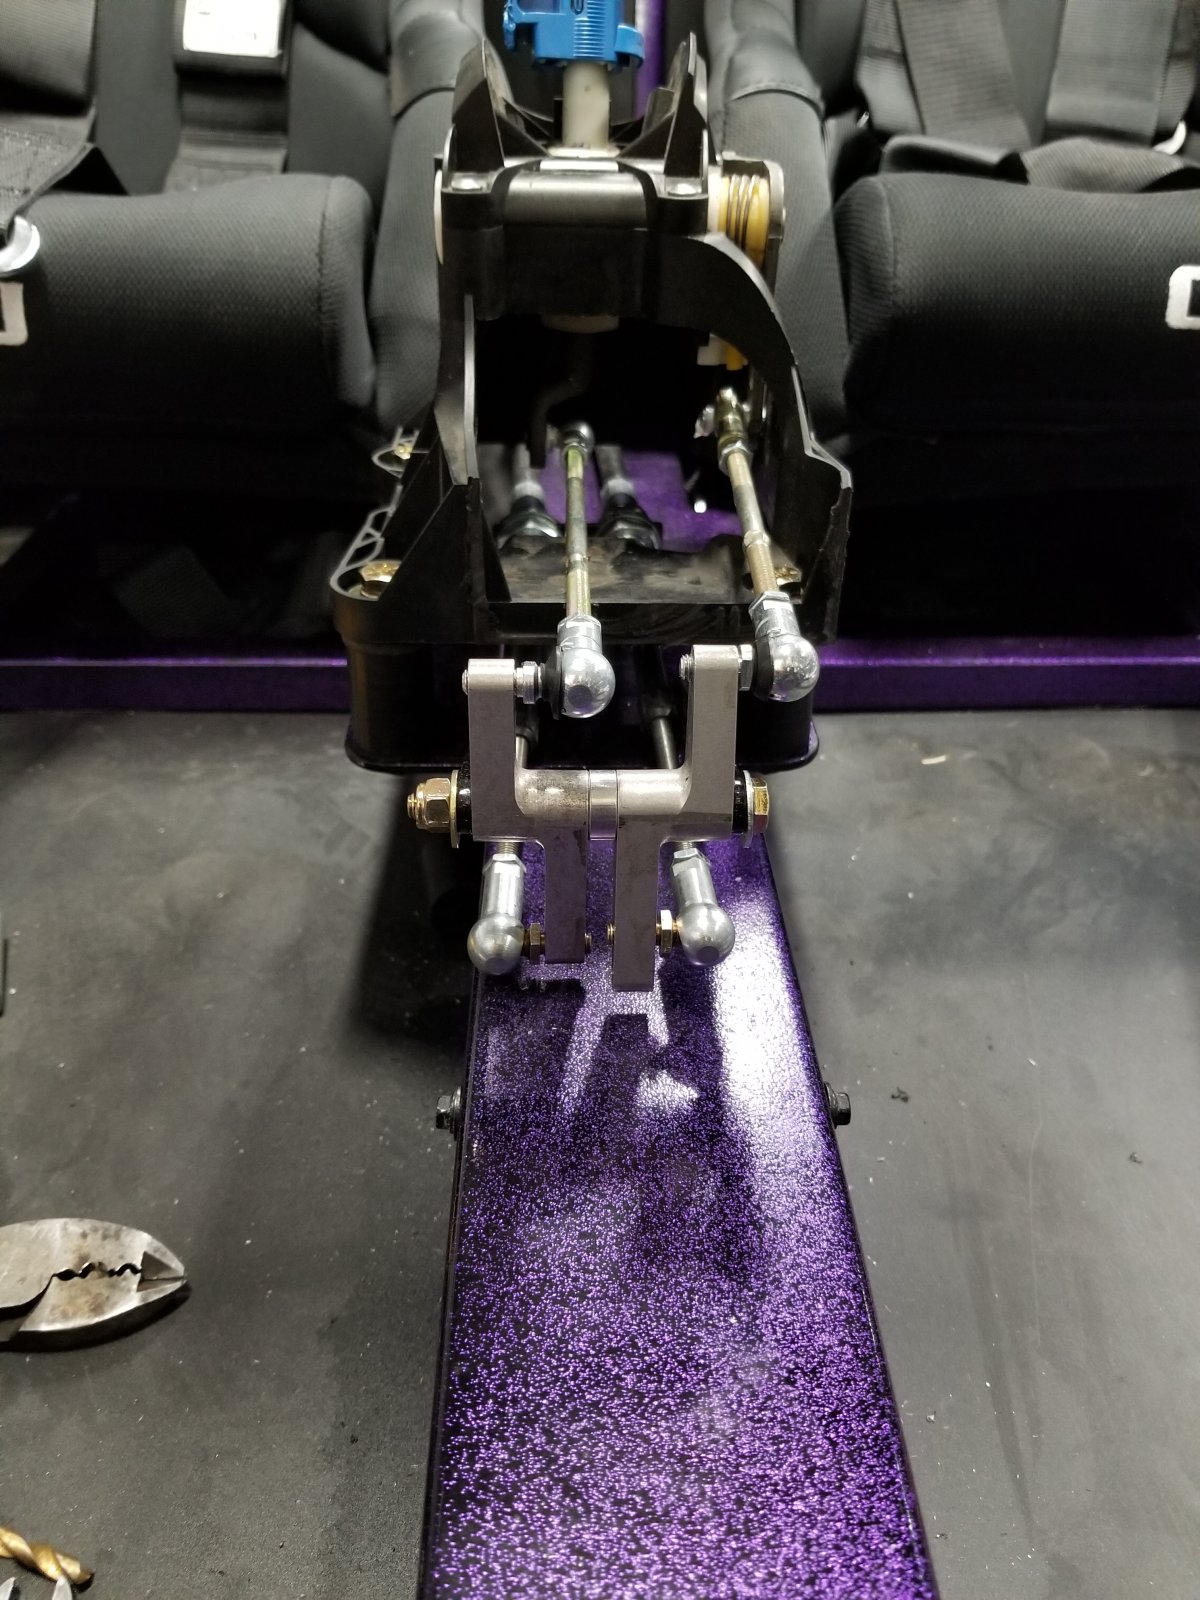
here is the shifter setup I found that keeps everything the straightest. I did trim off the front section of the shifter.
Next is mounting the IC heat exchanger start wiring up the lights and blinkers
here is the shifter setup I found that keeps everything the straightest. I did trim off the front section of the shifter.
Briann1177
Goblin Guru
Can you post pics of your intake setup so far? I think you're the first to get this far with the TC stuff.
Briann1177
Goblin Guru
I was curious to see how the MAF and vacuum lines were done so thanks for showing that. Where are the IAT and breather ports at?
Briann1177
Goblin Guru
PCV.
ctuinstra
Goblin Guru
What is the difference between them? I used the new ones in the rear but I bought new ones for the front also.One important note I did not know till yesterday that I feel I should pass on, the stock tie rod end links need to be removed from the tie rods on the steering assembly and put in the rear. The new ones included in the kit are for the front.
RichRich
Well-Known Member
The stock ones are apx 1 inch longer than the ones included, it gives more threads engaged in the rear to hold the torque from the motor. On the original mock up with no alignment I engaged apx 8 full turns worth of threads. If you put the originals in the rear it will engage around 15. There is a noticeable difference in length if holding them side by side. I should of snapped a pic
Tony
Well-Known Member
Thanks for the pics, good reference. I should be right behind you as soon as I can get my DD fixed. How was the clearance between the compressor outlet and the cross brace before you put the piping in? Mine is so close, I don't even know if I'll be able to get the silicone coupler on there.