Steve's City Ext 09 Turbo
- Thread starter Steve Sallenbach
- Start date
Steve Sallenbach
Active Member
Thanks guys, this has been a lot longer process than I anticipated. This is the first time I tried something like this and I way underestimated the time involved. I will get this done this year, finally. Not sure if I will make the May Midwest meetup. I am doing six layers for the molds and you can only do only layer per day. Then when you have parting lines, that extends the whole process because you are dealing with another 6 layers for the parting lines again.
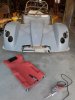
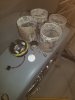
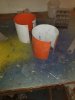
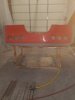
First pic is the front with the cutout for the lights. Second pic is the light buckets and the front headlights and turn signal lights I will use. It took me a while to find something that was DOT legal and not too big to over-power the front fenders. I wanted to do something different, but I couldn't make it happen. Third pic is the what I used to make the headlight buckets, just rolled some aluminum, riveted it to complete the circle, then glassed the inside. Once hardened, I drilled out the rivets and pulled the aluminum piece apart and wallah, my buckets. I need to grind on them a little bit to make the headlight unit fit inside the bucket . I didn't make the circumference of the aluminum piece big enough. Once that's done I will cut them to fit the front fenders and glass them in.
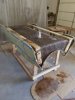
Forth piece is the main part of the tail section mold that is completed. The fifth pic is the tail upside down. The sixth pic is the tail section ready to get gel coated and then I start glassing and the other two parting line sections which are the wheel wells and the front part that will attached to the side panels. I wanted to do something different in the tail section like Lamborghini style lighting , but I ended up being symmetrical, and boring, matching the round front lights. I guess I can always change it later.
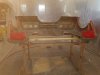
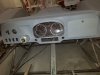
The last pic is the dash which I made a glove box for it as seen on the right side. I need to do some more work on switches yet.
First pic is the front with the cutout for the lights. Second pic is the light buckets and the front headlights and turn signal lights I will use. It took me a while to find something that was DOT legal and not too big to over-power the front fenders. I wanted to do something different, but I couldn't make it happen. Third pic is the what I used to make the headlight buckets, just rolled some aluminum, riveted it to complete the circle, then glassed the inside. Once hardened, I drilled out the rivets and pulled the aluminum piece apart and wallah, my buckets. I need to grind on them a little bit to make the headlight unit fit inside the bucket . I didn't make the circumference of the aluminum piece big enough. Once that's done I will cut them to fit the front fenders and glass them in.
Forth piece is the main part of the tail section mold that is completed. The fifth pic is the tail upside down. The sixth pic is the tail section ready to get gel coated and then I start glassing and the other two parting line sections which are the wheel wells and the front part that will attached to the side panels. I wanted to do something different in the tail section like Lamborghini style lighting , but I ended up being symmetrical, and boring, matching the round front lights. I guess I can always change it later.
The last pic is the dash which I made a glove box for it as seen on the right side. I need to do some more work on switches yet.
Attachments
-
 250.5 KB Views: 372
 -
 226.8 KB Views: 362
 -
 291.1 KB Views: 359
 -
 291.7 KB Views: 361
 -
 198.4 KB Views: 353
 -
 179.6 KB Views: 365
 -
 220.9 KB Views: 390
Steve Sallenbach
Active Member
I had a break between fiber glassing coats on the tail section so I made this rear cover for the roll hoop. It's still in rough form, need to cover it with fiber glass cloth then a bunch of body work, then paint, then make a mold. Not sure if I should try to cover the tubing on the underside or not. What do you guys think?
Attachments
-
 284 KB Views: 301
Waterdriver
Goblin Guru
It would give it a more completed look being enclosed. Plus better aero.
Keep up the great work! It's looking awesome!
Keep up the great work! It's looking awesome!
Ross
Goblin Guru
I am having a hard time picturing the difference in my head.I had a break between fiber glassing coats on the tail section so I made this rear cover for the roll hoop. It's still in rough form, need to cover it with fiber glass cloth then a bunch of body work, then paint, then make a mold. Not sure if I should try to cover the tubing on the underside or not. What do you guys think?
Put it together without the extra underside fiberglass, and decide later if you like it or not.
Waterdriver
Goblin Guru
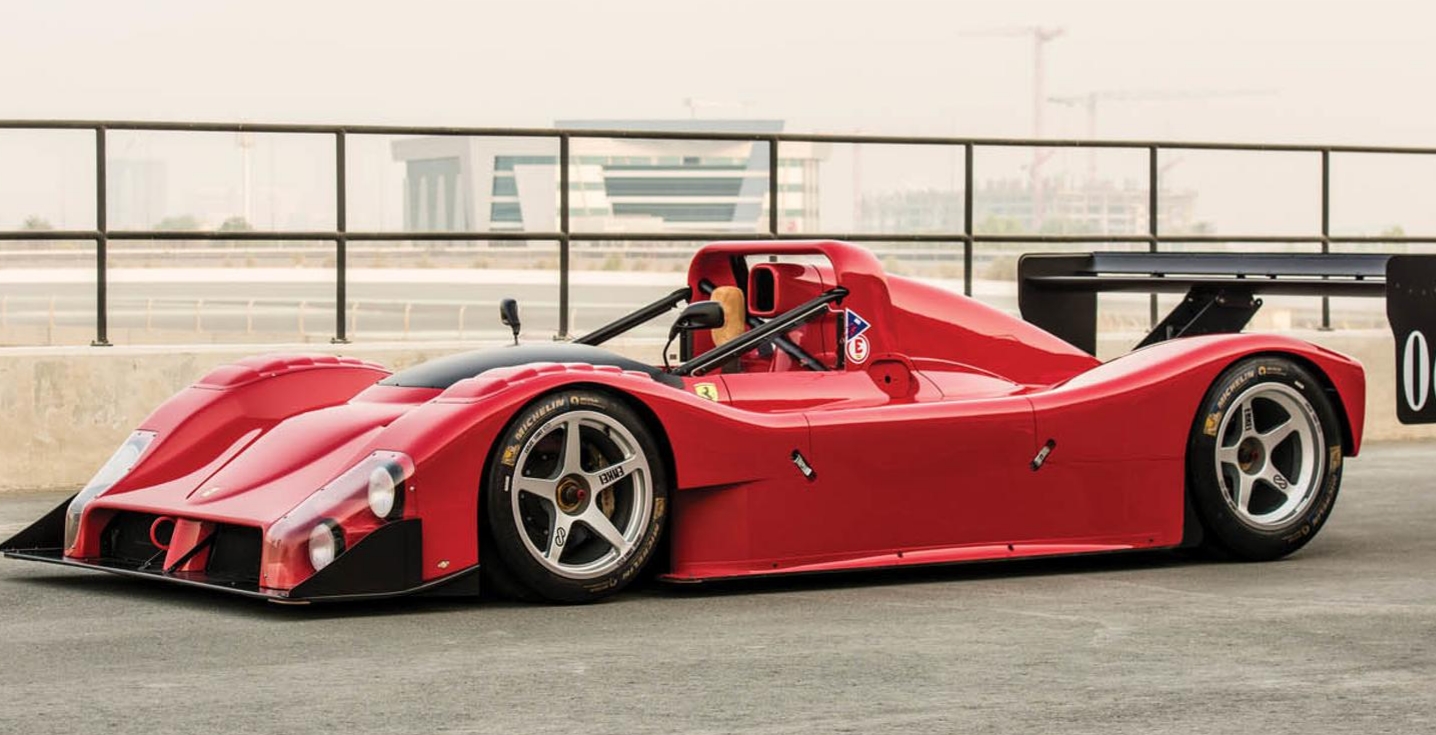
I'm sure it's a lot more work to enclose the rollbar. But since he seems to be rockin this body build, I saw something similar to the 333sp. One of my favorite cars.
Steve Sallenbach
Active Member
Haven't seen that car before. I was thinking about doing something similar with the air intake, but will have to see on how much time I have, it will probably be after the rest of the car is completed.
JBINTX
Goblin Guru
I was going to try to duplicate the ram air intake as well. Until I read an article about the true impact on horsepower. Supposedly on F1 cars, the additional horsepower is less than 2% increase when the air flow is at 200+ mph. So, practically speaking, it does not add anything for us on the Goblin going 60 mph - other than the cool factor of course. ")
Steve Sallenbach
Active Member
Interesting on the F1. With a windshield I figured there would be dead air until you get past at least the roll hoop or even further back. I was hoping I could get some clean air with the air scoop, but looks like that's not going to be functional. Air flow would probably would be better without the windshield but I'm not running with out one even though I will probably be wearing a helmet most of the time. I will still try to come with something like the Ferrari but the first priority is to get the rest of the Goblin done and licensed.
Steve Sallenbach
Active Member
Thanks, not sure on the weight, I would think 100 lbs or less. The individual pieces aren't that heavy, the tail section would be the heaviest piece which I'm in the process of finishing up the mold. Once the tail section is done, I could weigh each piece and post the results.
Steve Sallenbach
Active Member
I hope the extra body comes in under the 200 lb mark, but will see.
LaunchPad
Well-Known Member
Hey all, I wanted to update you on Steve's project. I will try and obtain some photos for you- it was finished and has been driven. it certainly looks amazing!
Steve passed away a bit back and April of this year (2023) his kids auctioned off many of his toys and side projects. The car in this build log is being retained by Steves daughter for the time being. I don't know if you were aware, but Steve had a second goblin he barely uncrated and I ended up purchasing that second unassembled Goblin from his kids. (chassis 109)
Steve passed away a bit back and April of this year (2023) his kids auctioned off many of his toys and side projects. The car in this build log is being retained by Steves daughter for the time being. I don't know if you were aware, but Steve had a second goblin he barely uncrated and I ended up purchasing that second unassembled Goblin from his kids. (chassis 109)
Desert Sasqwatch
Goblin Guru
Good to hear that Steve's Goblin dreams will live on. Start a build log and make certain to keep in contact with the Goblin family.
escapepilot
Goblin Guru
The workmanship on the body was amazing. Looking forward to see the finished pictures.
ah.b.normal
Goblin Guru
It is wonderful to hear you and his kids are trying to carry on his Dreams! Remember with fiberglass you can over build it then save weight by grinding away some of the inside where you don't need it. From your prior post's I'll bet you'll be helping out with the bodied car, keep up with pics! And to your "Scattered Goblin" problem, man, DO just lean on us, we're here and happy to help.Hey all, I wanted to update you on Steve's project. I will try and obtain some photos for you- it was finished and has been driven. it certainly looks amazing!
Steve passed away a bit back and April of this year (2023) his kids auctioned off many of his toys and side projects. The car in this build log is being retained by Steves daughter for the time being. I don't know if you were aware, but Steve had a second goblin he barely uncrated and I ended up purchasing that second unassembled Goblin from his kids. (chassis 109)