Andrew's Extended Track Goblin - 08 SS/TC
ATMironov
Well-Known Member
Thanks! I'll switch up the rear shock plates!Top rear shock plates go UNDER the frame plate.
Also, mounting the engine before installing the subframe is pretty easy. Not sure how easy it will be doing from the top side. Let us know if that works well also, please.
As for the subframe, I do plan on dropping it to put the motor in. I'll put the motor in after I modify the frame. I just need the car rolling for now.
Jareth
Goblin Guru
I finished up the wiring harness today.
I used Tesa tape instead of electrical tape and I used labels with clear heat shirk for some long lasting connector labels.
I didn't fully wrap the harness at this point. I wrapped the connector tails and the splits from the harness. After I Install all my accessories, I'll wrap all the wires at once.
I rather enjoyed the process. The videos make it pretty fool proof, so low stress, just some satisfying thinning and clean up..
Overall it took me about 25hours.
View attachment 21860
Any chance you have a text or excel file of what you printed on the labels?
.
ATMironov
Well-Known Member
I don't. I labeled everything when I disassembled with blue tape, then just used a label maker while working through the harness to clean it up. Sorry.Any chance you have a text or excel file of what you printed on the labels?
.
ATMironov
Well-Known Member
Well I finally had a good weekend to work on the car.
My main focus right now is getting the brake system figured out.
I started by getting the DS seat mocked up. I'm ran into a bit of a height issue, but with a little tweaking, I think I'll make it work.
I then got a panel cut for the floor of the drivers side so I could mount the pedal assembly.
I mounted the pedal to a 1/8" plate and fabbed up a bracket to hold the OEM throttle pedal, then connected the new pedal to the OEM with some rod ends.
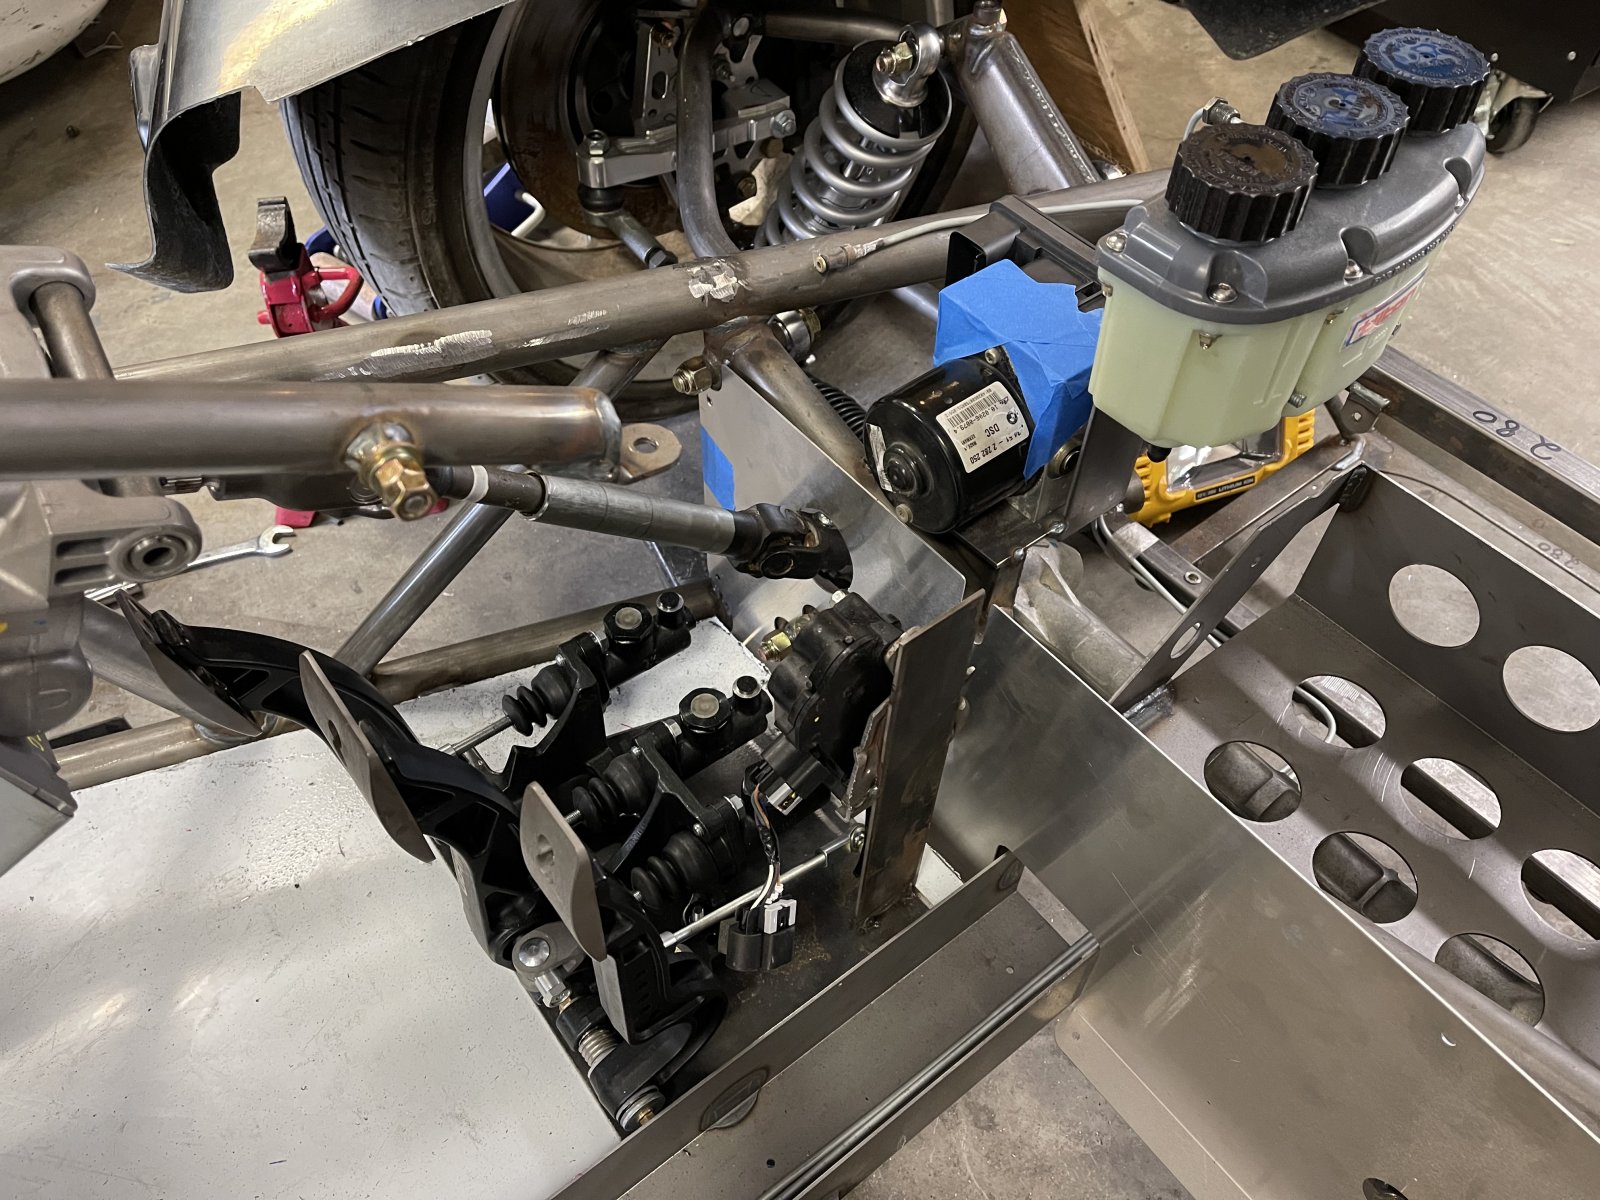
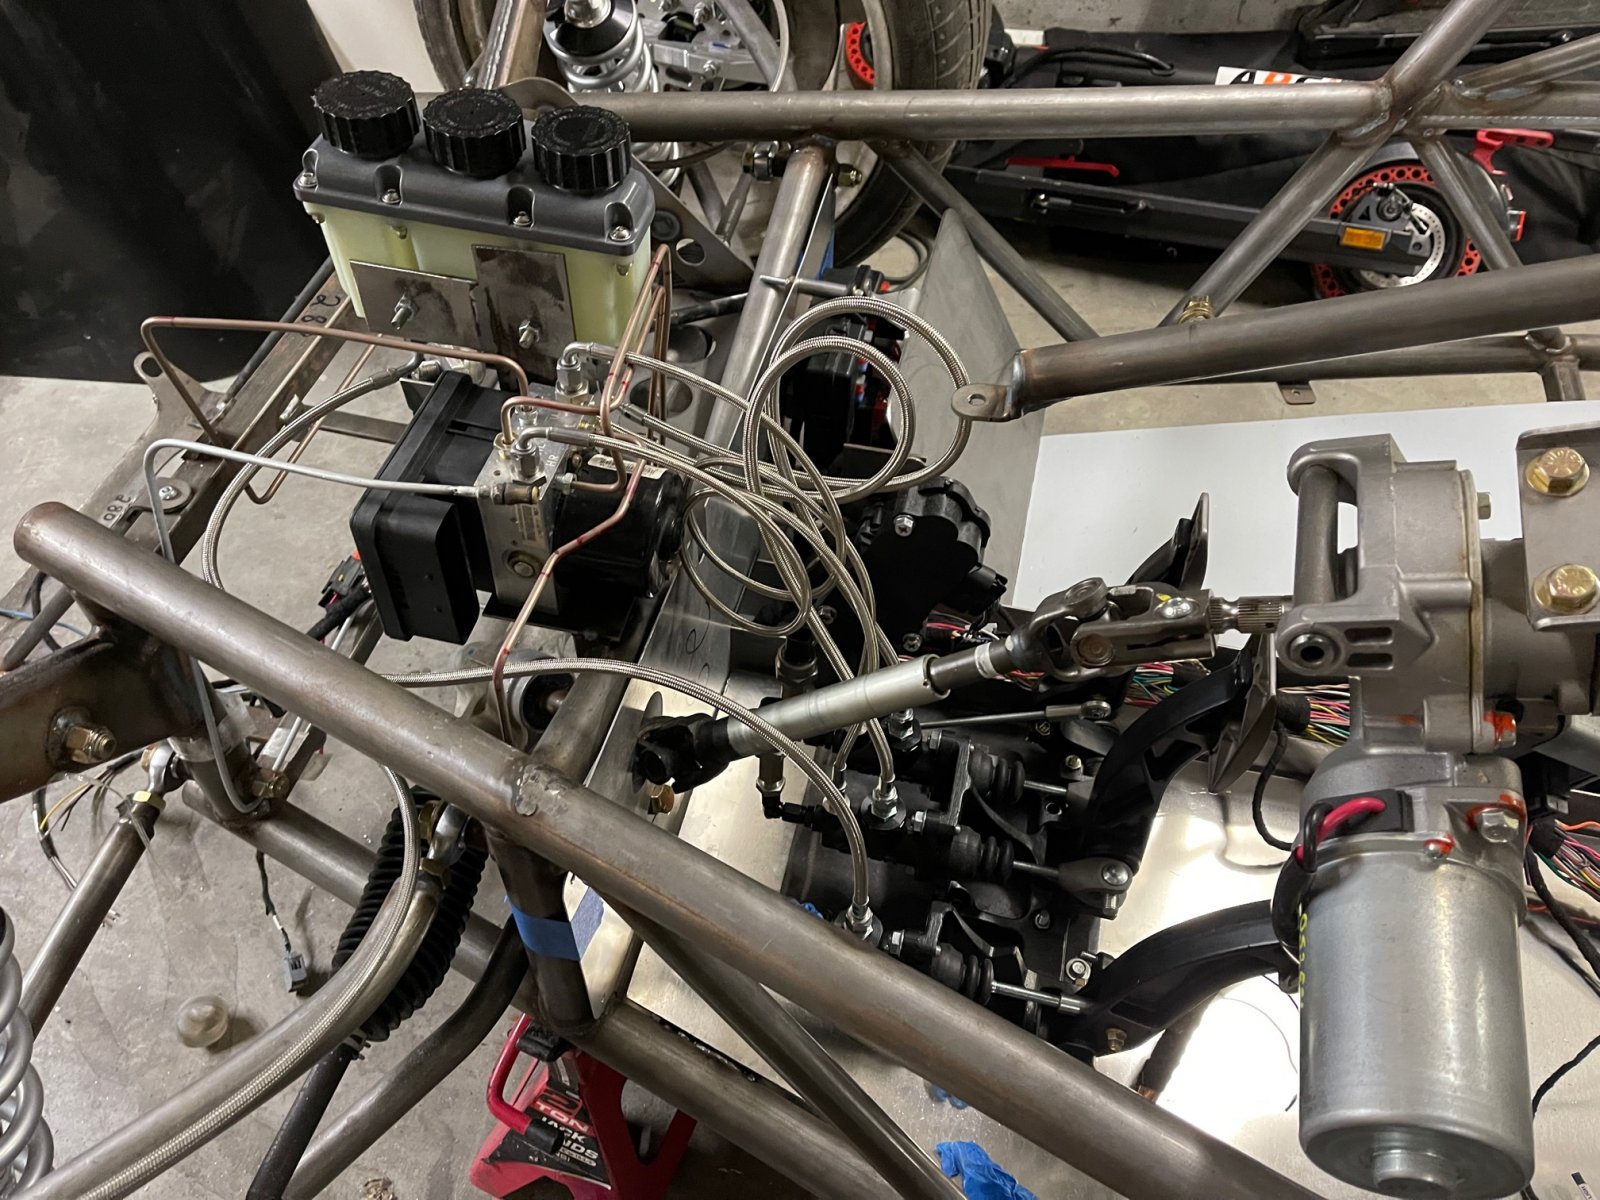
After the pedals were in I got the ABS pump and the fluid revivor mounted. This will allow me to order the wiring ABS wiring harness and all the brake lines and fittings I need.
Finally I mocked up the hood and windshield so I could get a sense of the space for the dash.
I printed scaled templates of the two dash sizes available. The 5" dash could fit behind the steering wheel, while the 7" dash would have to be mounted to the right. I'm leaning towards the 7" Dash.
Next up, I'll start working on the brake lines.
My main focus right now is getting the brake system figured out.
I started by getting the DS seat mocked up. I'm ran into a bit of a height issue, but with a little tweaking, I think I'll make it work.
I then got a panel cut for the floor of the drivers side so I could mount the pedal assembly.
I mounted the pedal to a 1/8" plate and fabbed up a bracket to hold the OEM throttle pedal, then connected the new pedal to the OEM with some rod ends.
After the pedals were in I got the ABS pump and the fluid revivor mounted. This will allow me to order the wiring ABS wiring harness and all the brake lines and fittings I need.
Finally I mocked up the hood and windshield so I could get a sense of the space for the dash.
I printed scaled templates of the two dash sizes available. The 5" dash could fit behind the steering wheel, while the 7" dash would have to be mounted to the right. I'm leaning towards the 7" Dash.
Next up, I'll start working on the brake lines.
ATMironov
Well-Known Member
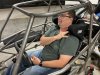
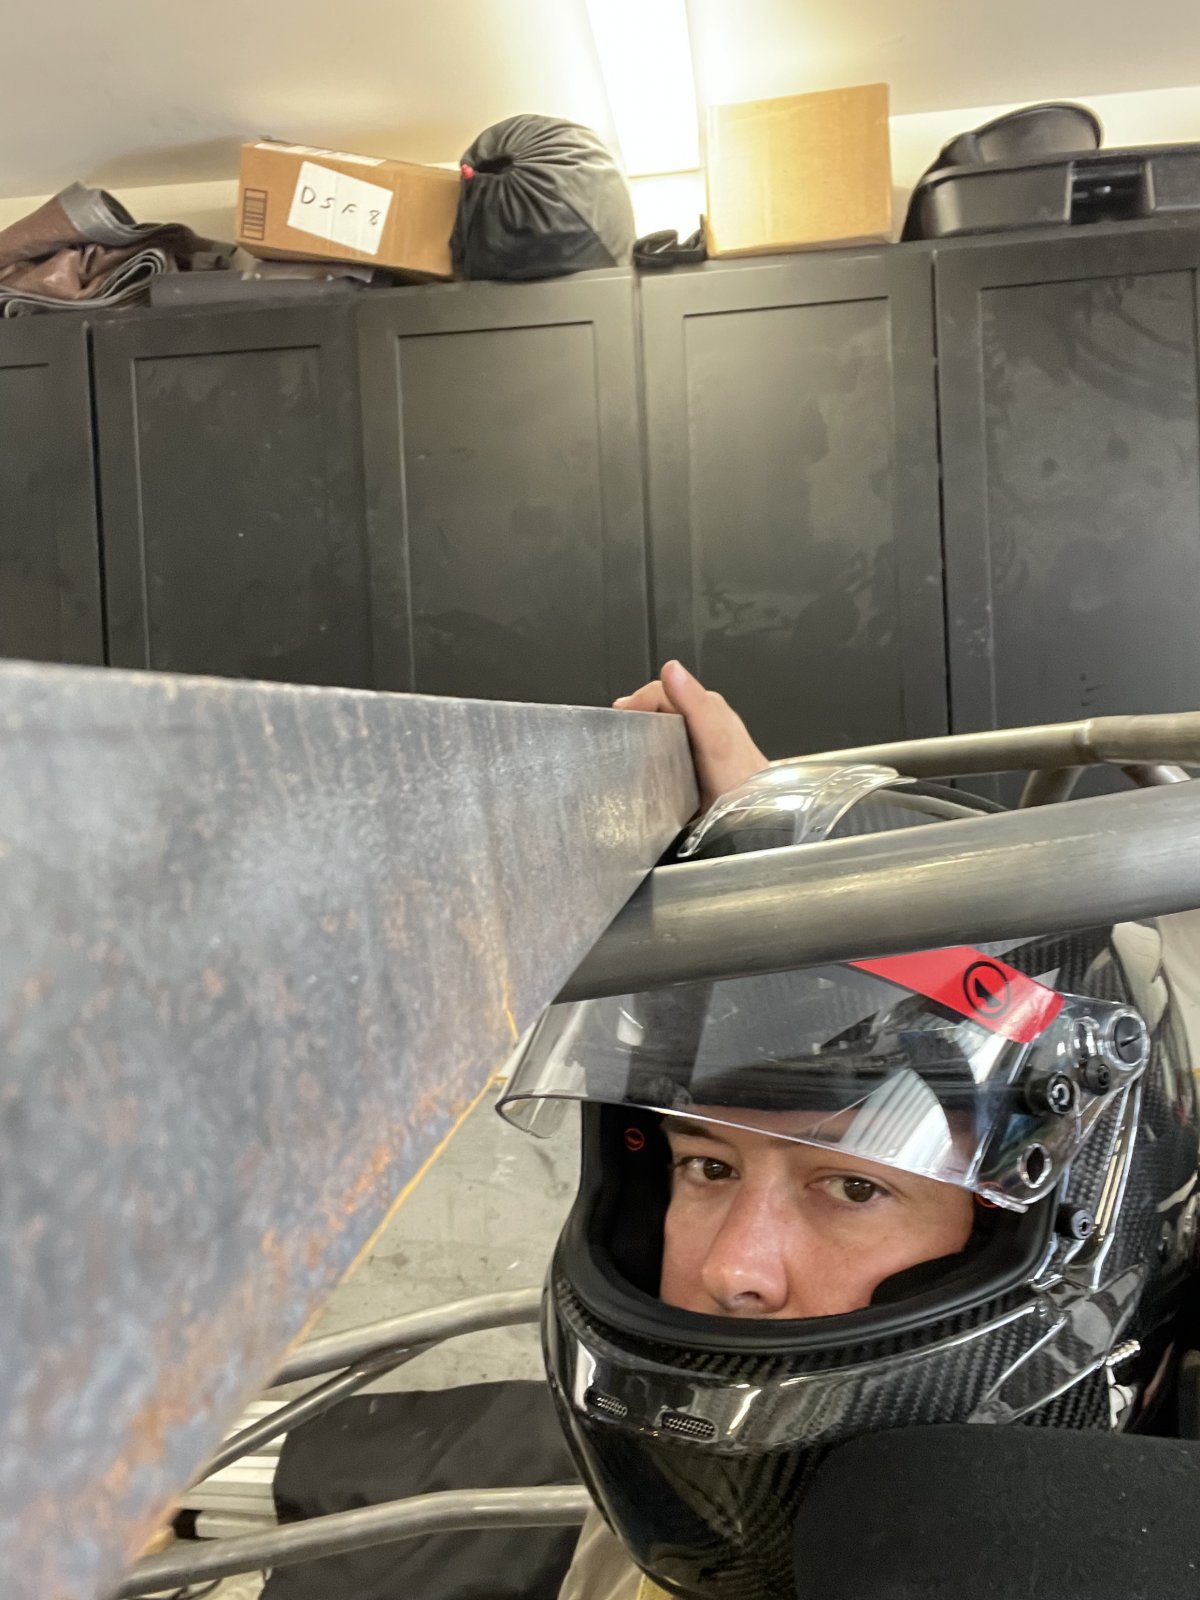
Yup... If I recline the seat a bit less I fit.Looks like a fail on the broomstick test….
I'll be putting in an X brace over the top as well. I might have to dome it a bit for extra clearance.
ATMironov
Well-Known Member
I had another really good weekend on the car.
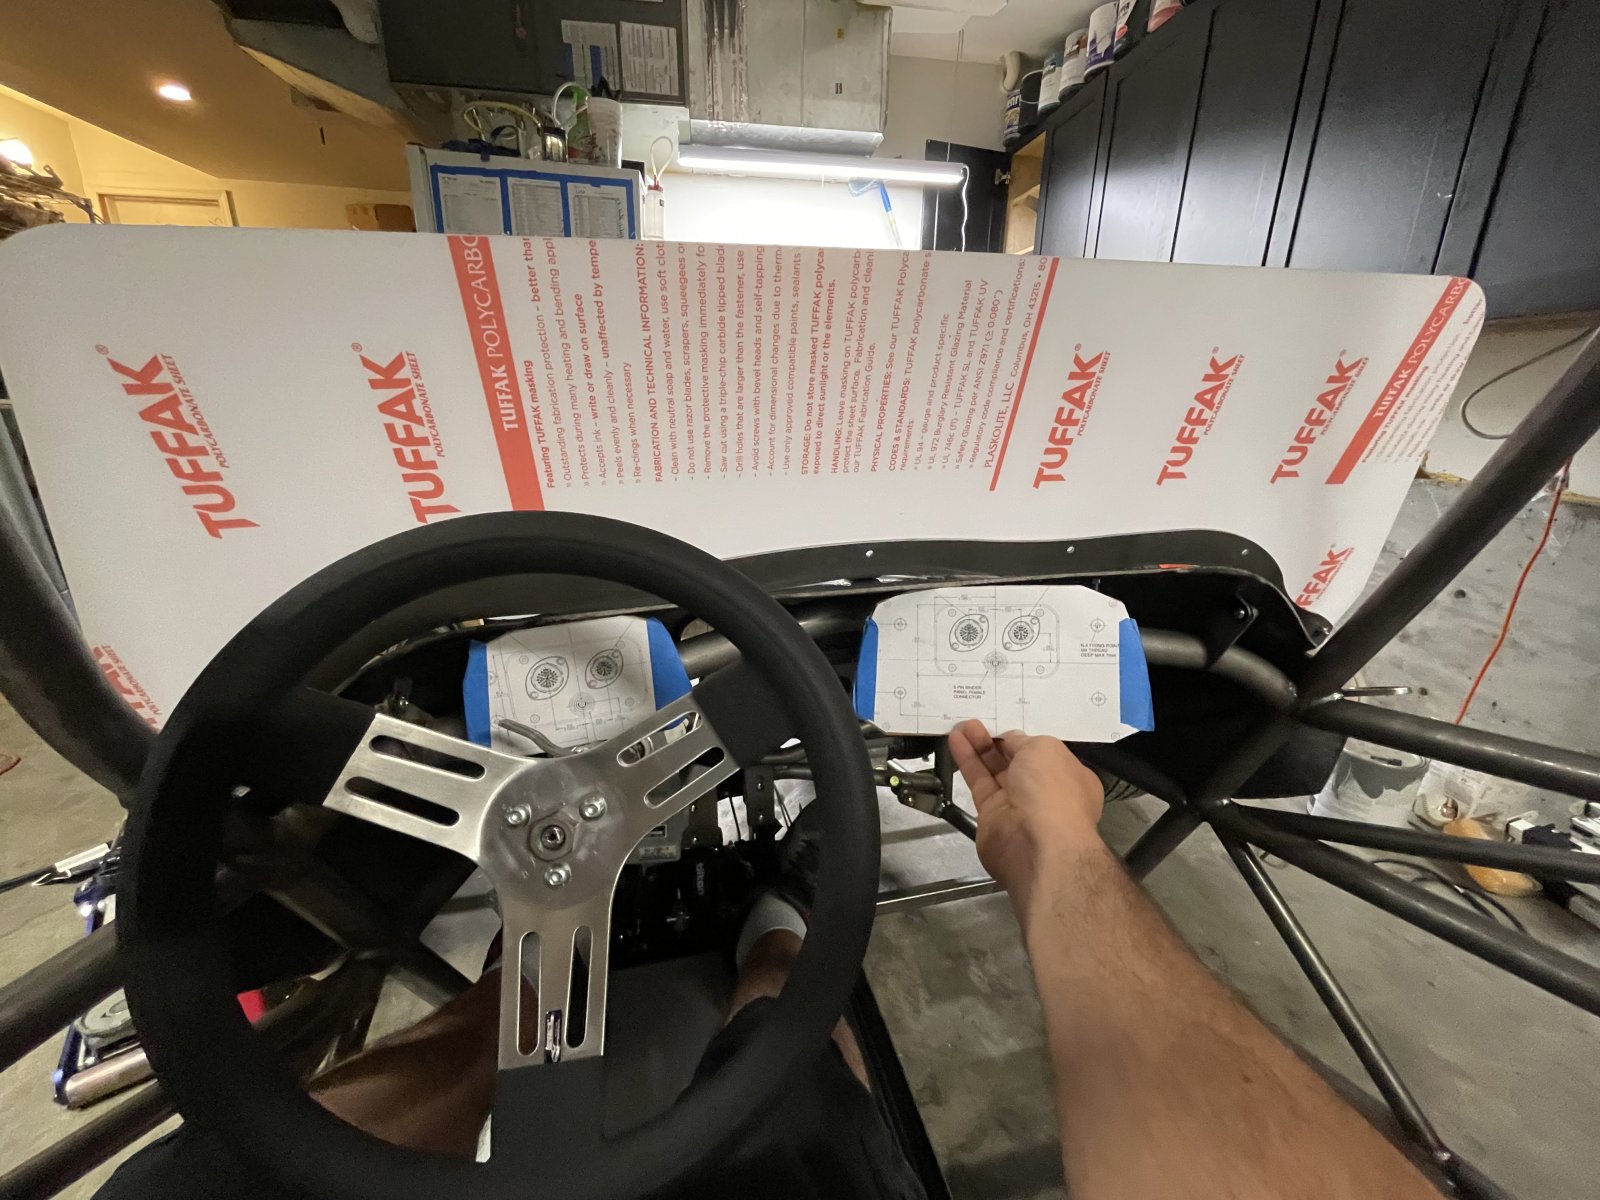
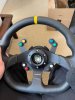
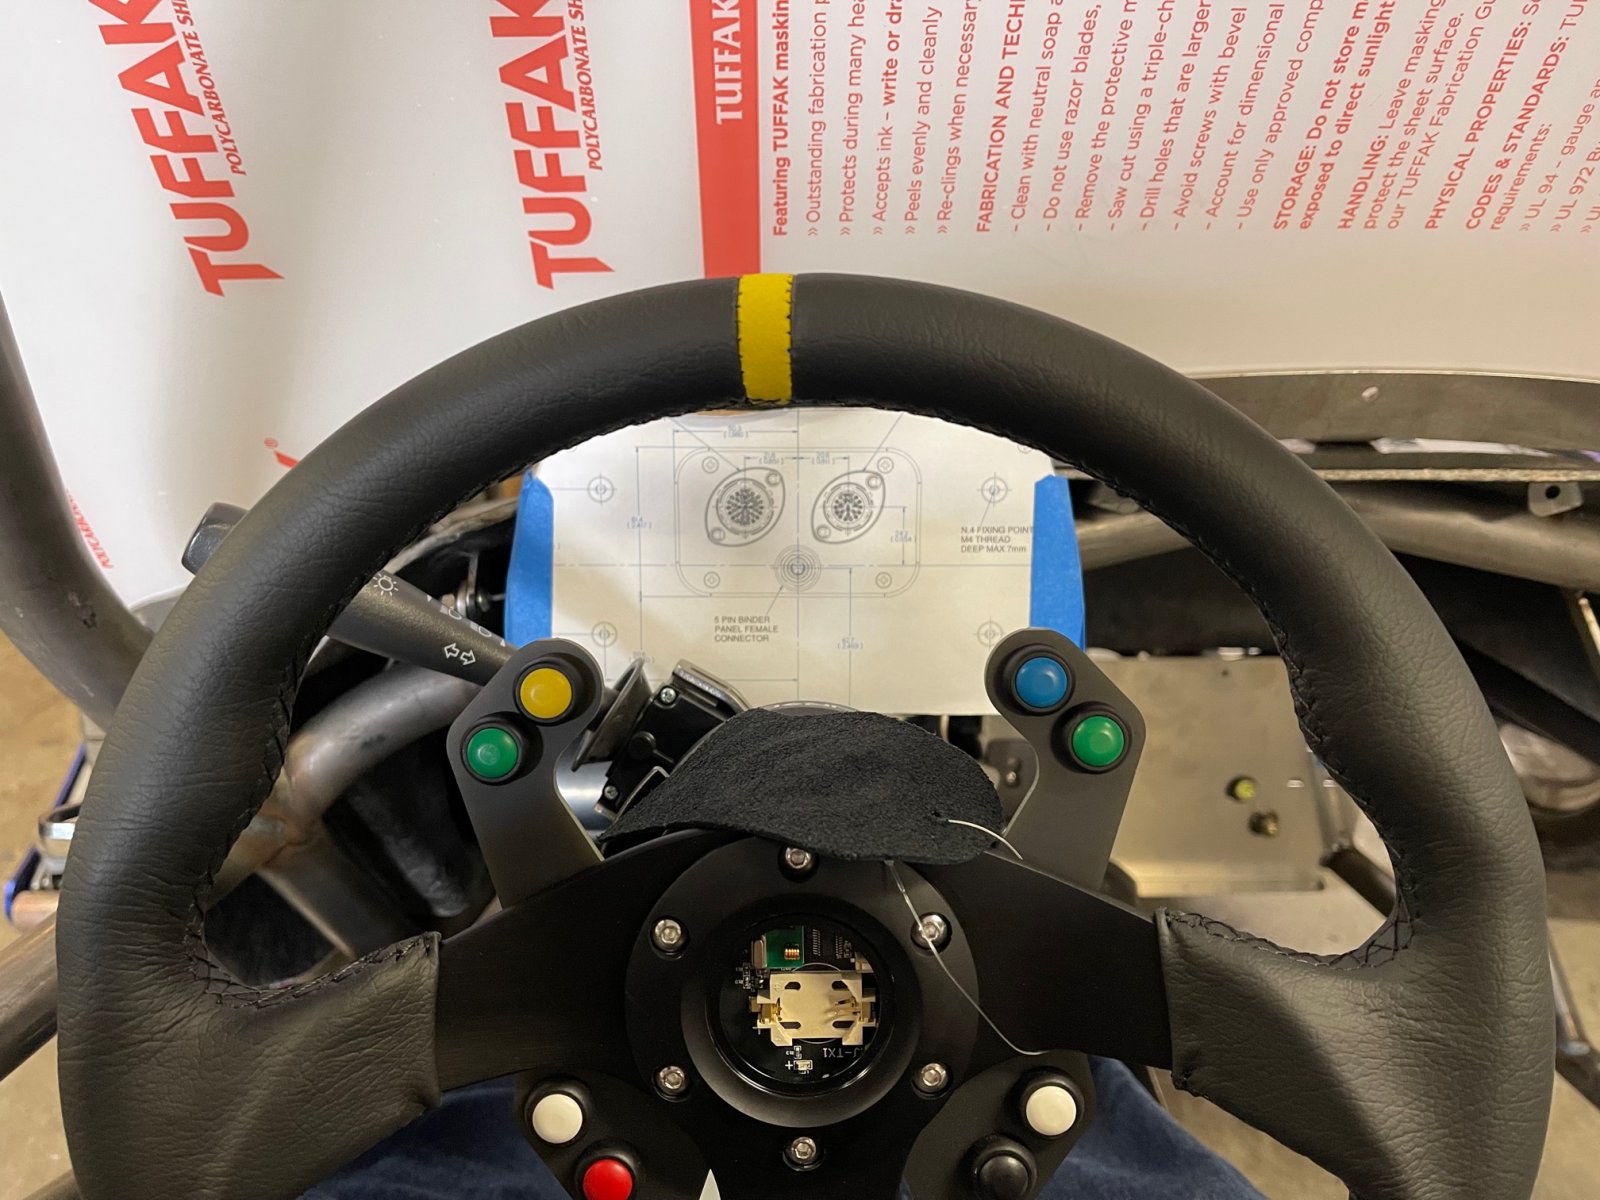
I received all the pieces for the steering wheel and quick disconnections.
I was able to get it all mounted in the car, and I have decided to go with the 7" Dash and try and mount it behind the steering wheel.
From there I worked on fabricating up all the new brake lines. This was my firs time making hard lines... but after a little trial and error, the who system ended up being pretty smooth.
I used a wire coat hanger for an easy mockup.
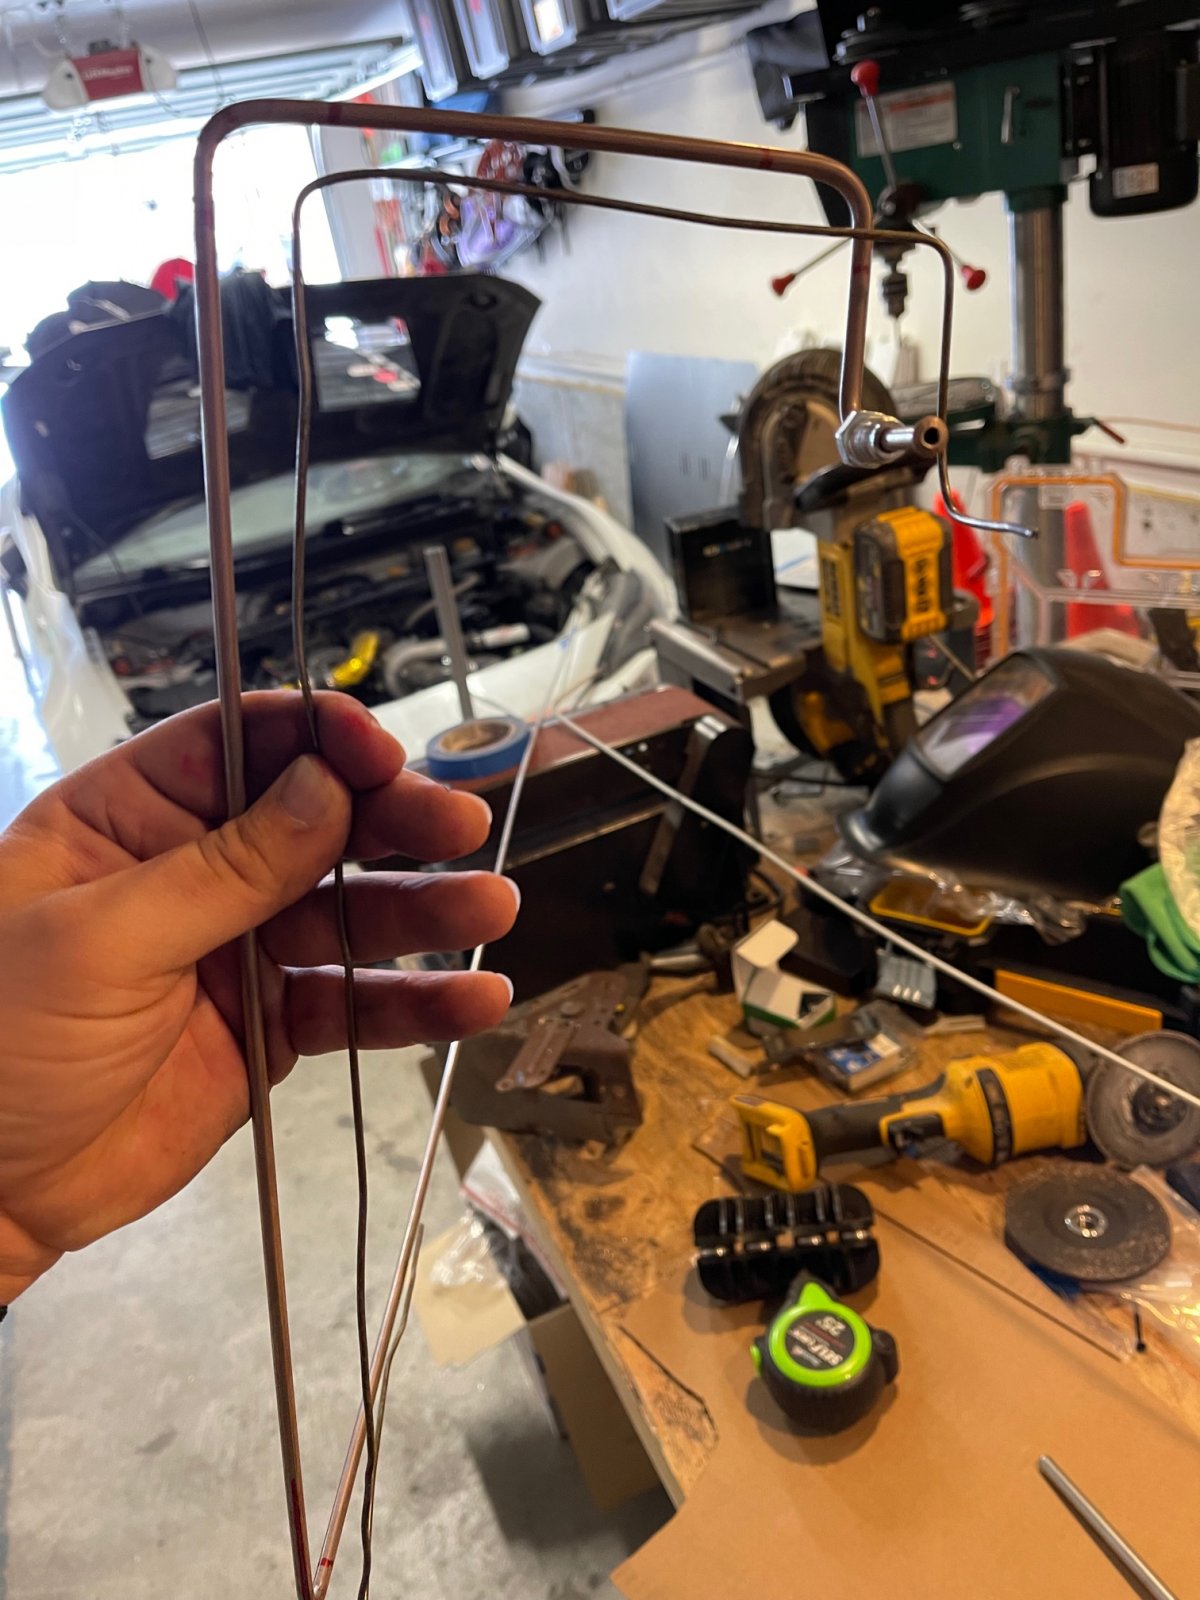
I was able to complete all the hard liens from the ABS pump to the wheel flex lines.
I have paced an order for all the miscellaneous fitting I need and then will be able to order the rest of the flex lines to and from the pedals.
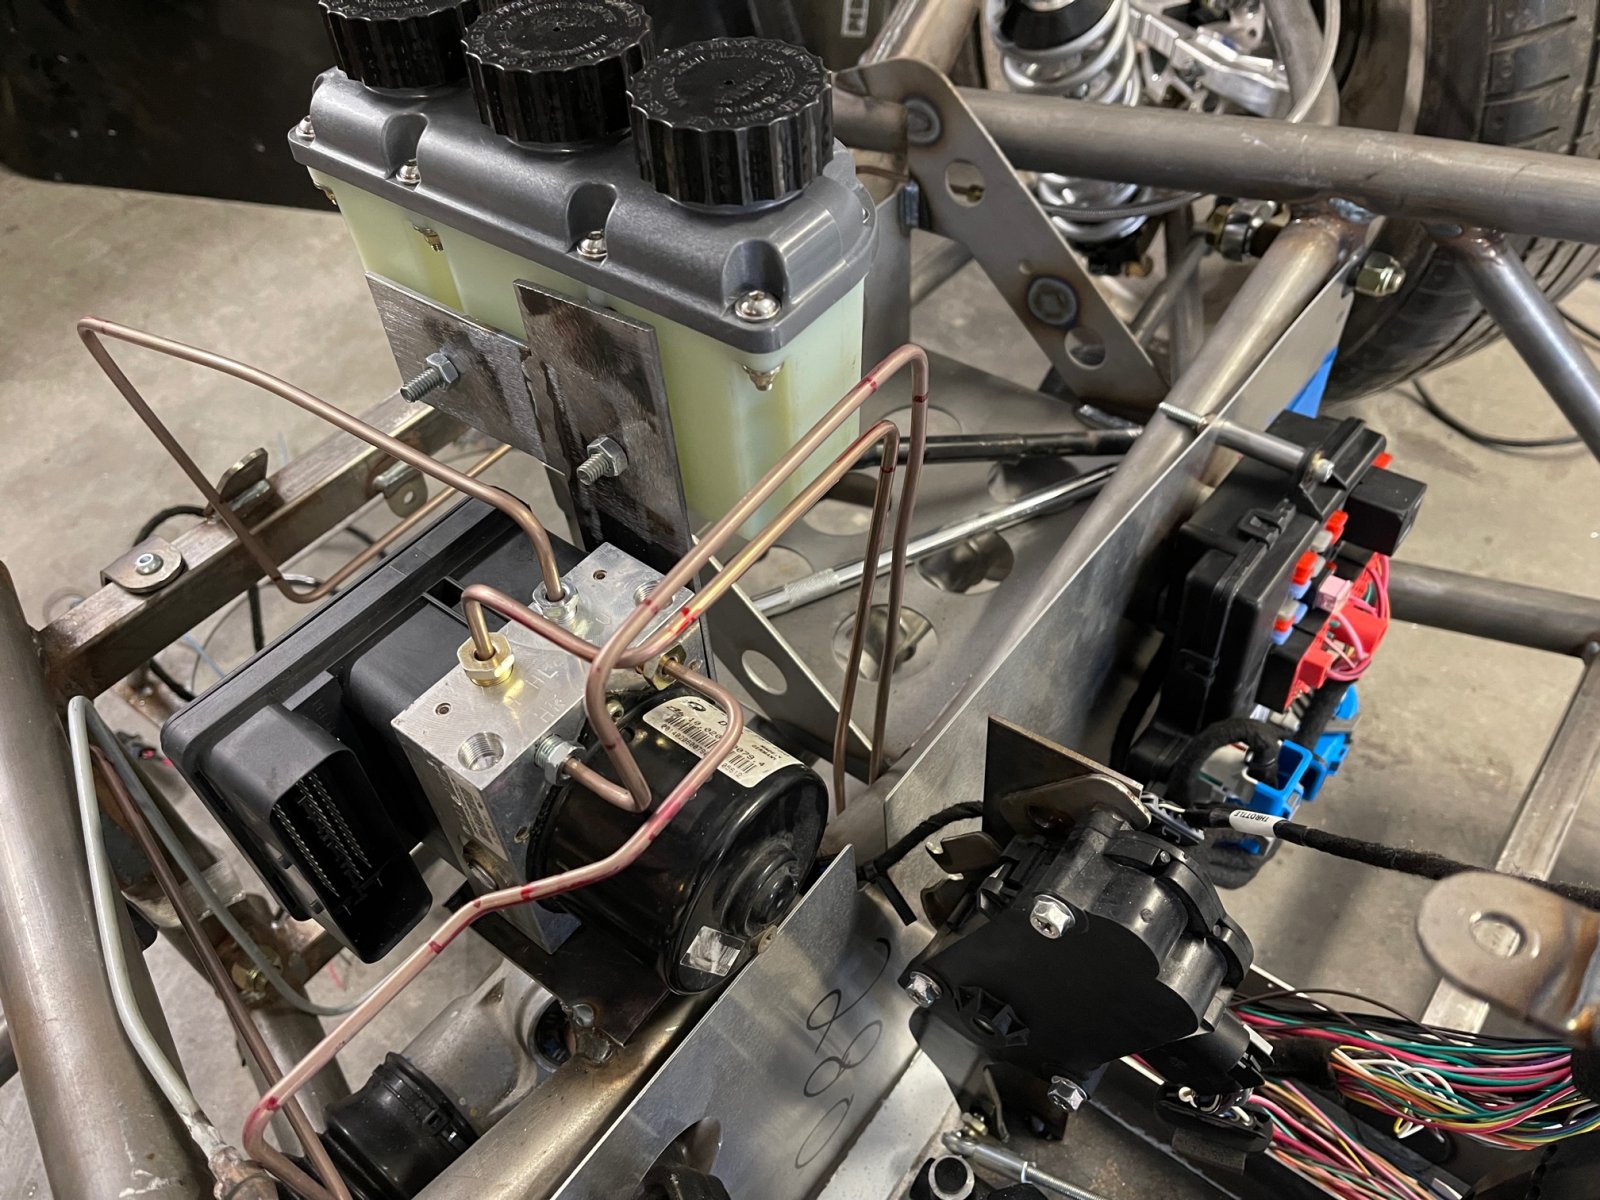
From there I was able to lay the wiring harness in the car and install the fuel tank.
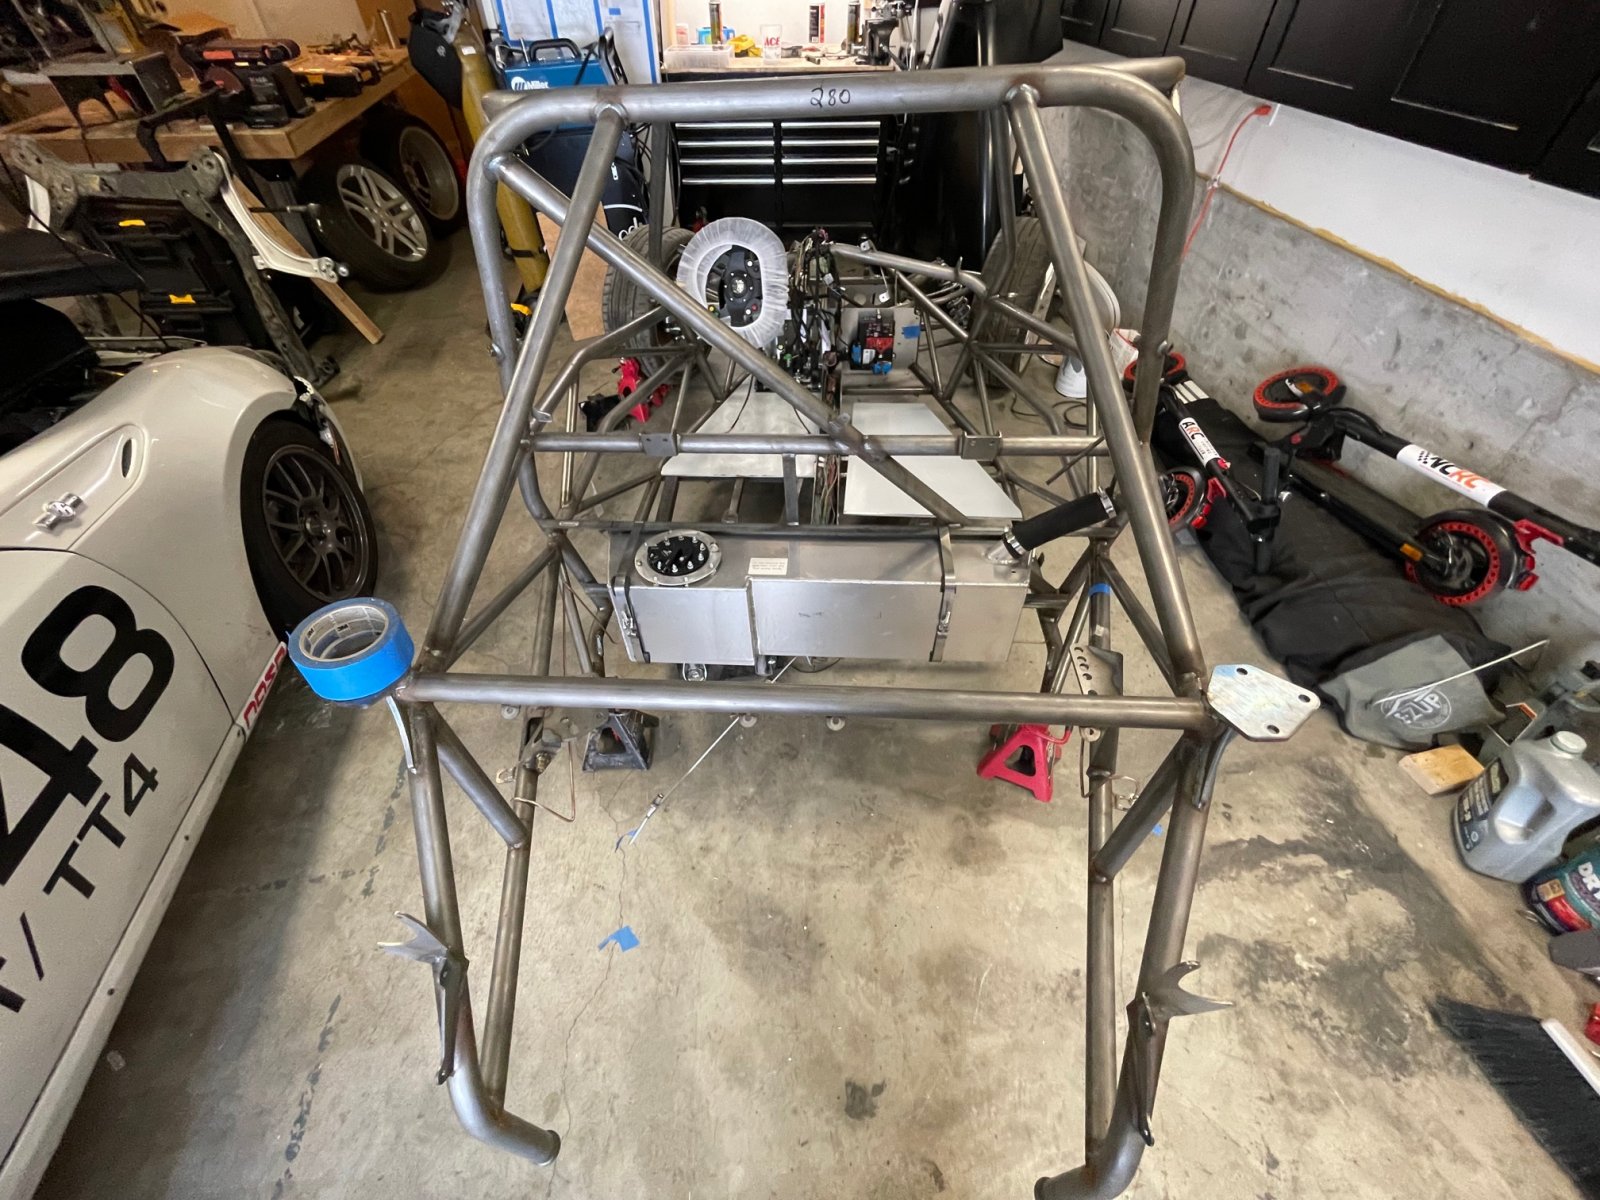
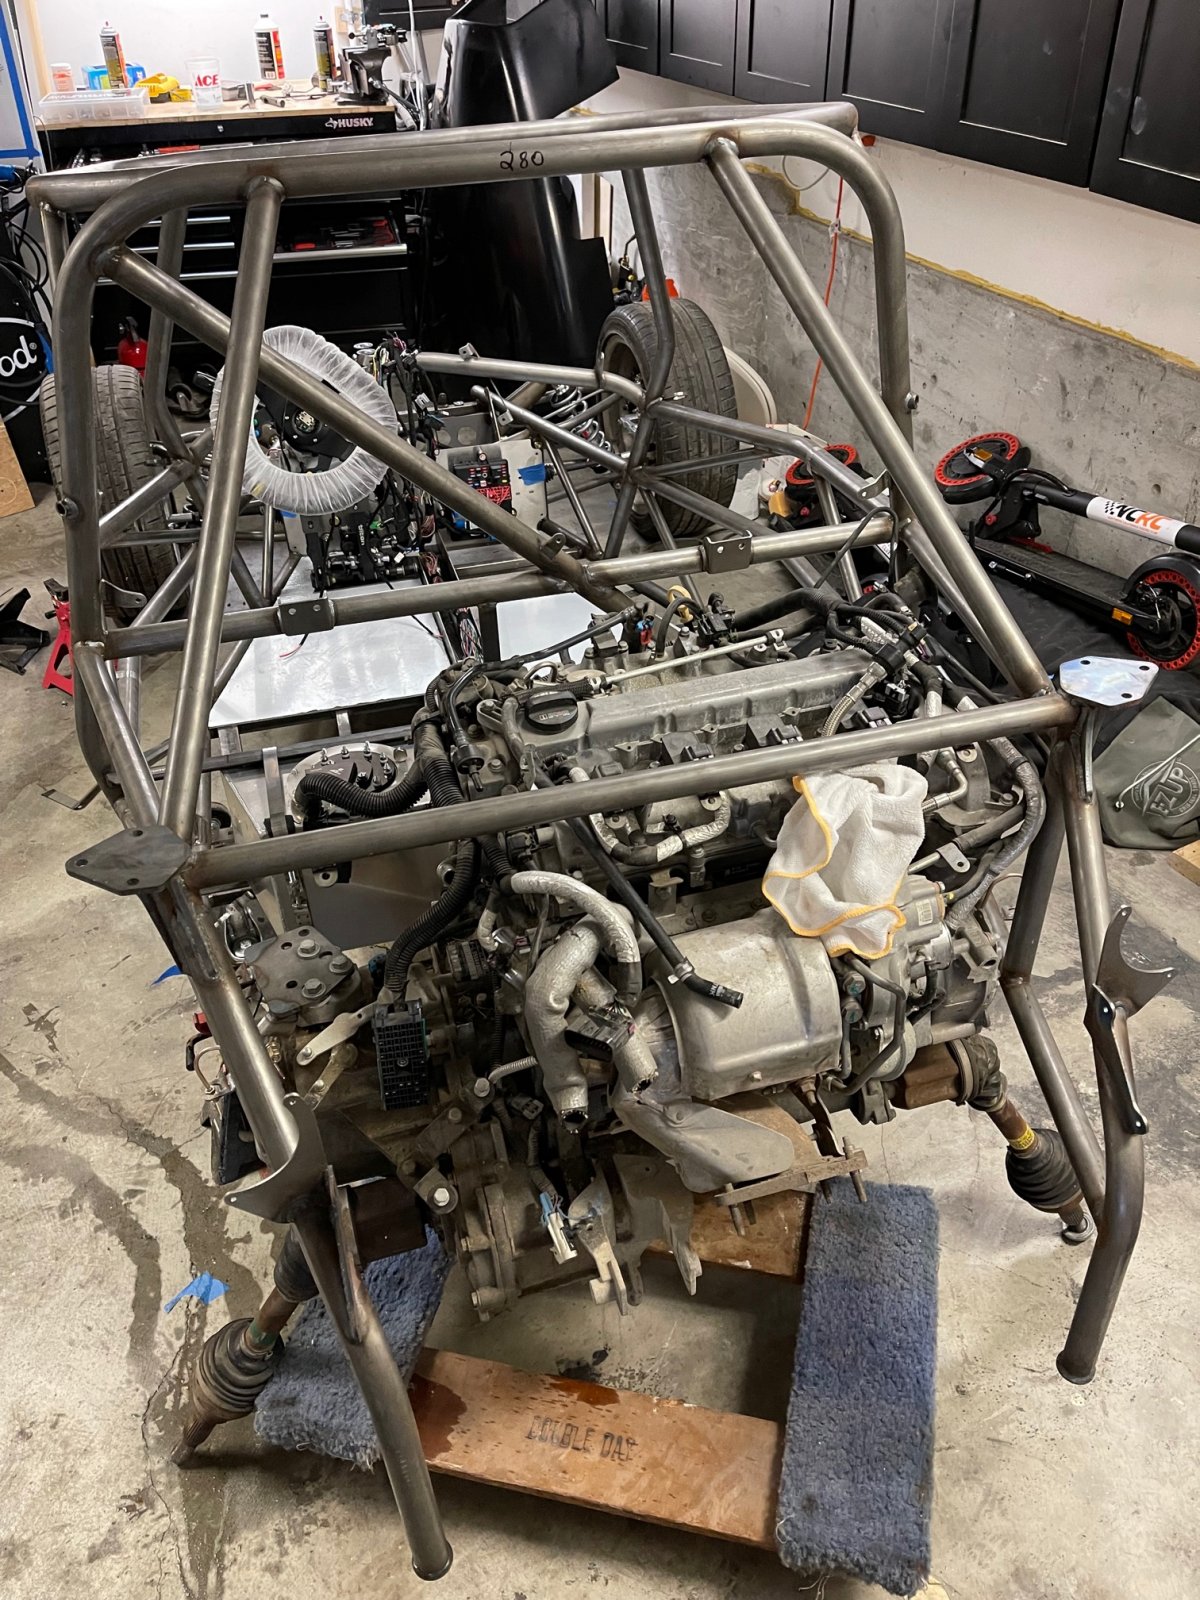
I enlisted the help of a couple of buddies to move the engine from the location that I dismantled the Cobalt.
Once the engine was at my place, we were able to get it in the frame in about a half hour.
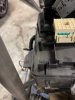
Worked on the wiring for another hour before finding the Fuse Block holder has a broken Mounting tab. I'll see if I can find a used one for cheep before I fab up some new mounting solution.

Next up I want to get the rest of the rear of the car put together so I can start figuring out mounting for the Accusump, oil cooler, intercooler and heat exchanger.
I received all the pieces for the steering wheel and quick disconnections.
I was able to get it all mounted in the car, and I have decided to go with the 7" Dash and try and mount it behind the steering wheel.
From there I worked on fabricating up all the new brake lines. This was my firs time making hard lines... but after a little trial and error, the who system ended up being pretty smooth.
I used a wire coat hanger for an easy mockup.
I was able to complete all the hard liens from the ABS pump to the wheel flex lines.
I have paced an order for all the miscellaneous fitting I need and then will be able to order the rest of the flex lines to and from the pedals.
From there I was able to lay the wiring harness in the car and install the fuel tank.
I enlisted the help of a couple of buddies to move the engine from the location that I dismantled the Cobalt.
Once the engine was at my place, we were able to get it in the frame in about a half hour.
Worked on the wiring for another hour before finding the Fuse Block holder has a broken Mounting tab. I'll see if I can find a used one for cheep before I fab up some new mounting solution.
Next up I want to get the rest of the rear of the car put together so I can start figuring out mounting for the Accusump, oil cooler, intercooler and heat exchanger.
JBINTX
Goblin Guru
Might want to support those axles to protect the ball and cage - unless you are replacing with new ones already.I had another really good weekend on the car.
I received all the pieces for the steering wheel and quick disconnections.
I was able to get it all mounted in the car, and I have decided to go with the 7" Dash and try and mount it behind the steering wheel.
View attachment 25519
View attachment 25517
From there I worked on fabricating up all the new brake lines. This was my firs time making hard lines... but after a little trial and error, the who system ended up being pretty smooth.
I used a wire coat hanger for an easy mockup.
View attachment 25518
I was able to complete all the hard liens from the ABS pump to the wheel flex lines.
I have paced an order for all the miscellaneous fitting I need and then will be able to order the rest of the flex lines to and from the pedals.
View attachment 25514
From there I was able to lay the wiring harness in the car and install the fuel tank.
View attachment 25515
I enlisted the help of a couple of buddies to move the engine from the location that I dismantled the Cobalt.
Once the engine was at my place, we were able to get it in the frame in about a half hour.
View attachment 25513
View attachment 25512
Worked on the wiring for another hour before finding the Fuse Block holder has a broken Mounting tab. I'll see if I can find a used one for cheep before I fab up some new mounting solution.
View attachment 25508View attachment 25510
Next up I want to get the rest of the rear of the car put together so I can start figuring out mounting for the Accusump, oil cooler, intercooler and heat exchanger.
ATMironov
Well-Known Member
Haha, yeah. Those axles are toast. I have some brand new ones waiting to go in.Might want to support those axles to protect the ball and cage - unless you are replacing with new ones already.
DCMoney
Goblin Guru
Nice! I looked into that steering wheel push button kit but remember it not being cheap. Is that the raptor?I had another really good weekend on the car.
I received all the pieces for the steering wheel and quick disconnections.
I was able to get it all mounted in the car, and I have decided to go with the 7" Dash and try and mount it behind the steering wheel.
View attachment 25519
View attachment 25517
What all do you plan on controlling from the steering wheel?
ATMironov
Well-Known Member
The buttons are by NRG. It was right around $350.Nice! I looked into that steering wheel push button kit but remember it not being cheap. Is that the raptor?
What all do you plan on controlling from the steering wheel?
The current thoughts for the controls is:
4 Buttons for digital dash controls
1 for Horn
1 for Hazards
1 for radio communication
1 Spare
DCMoney
Goblin Guru
Sweet! Didn't know NRG made one, not a lot of info out there on them. That price is more acceptable vs the others I saw.The buttons are by NRG. It was right around $350.
The current thoughts for the controls is:
4 Buttons for digital dash controls
1 for Horn
1 for Hazards
1 for radio communication
1 Spare
JBINTX
Goblin Guru
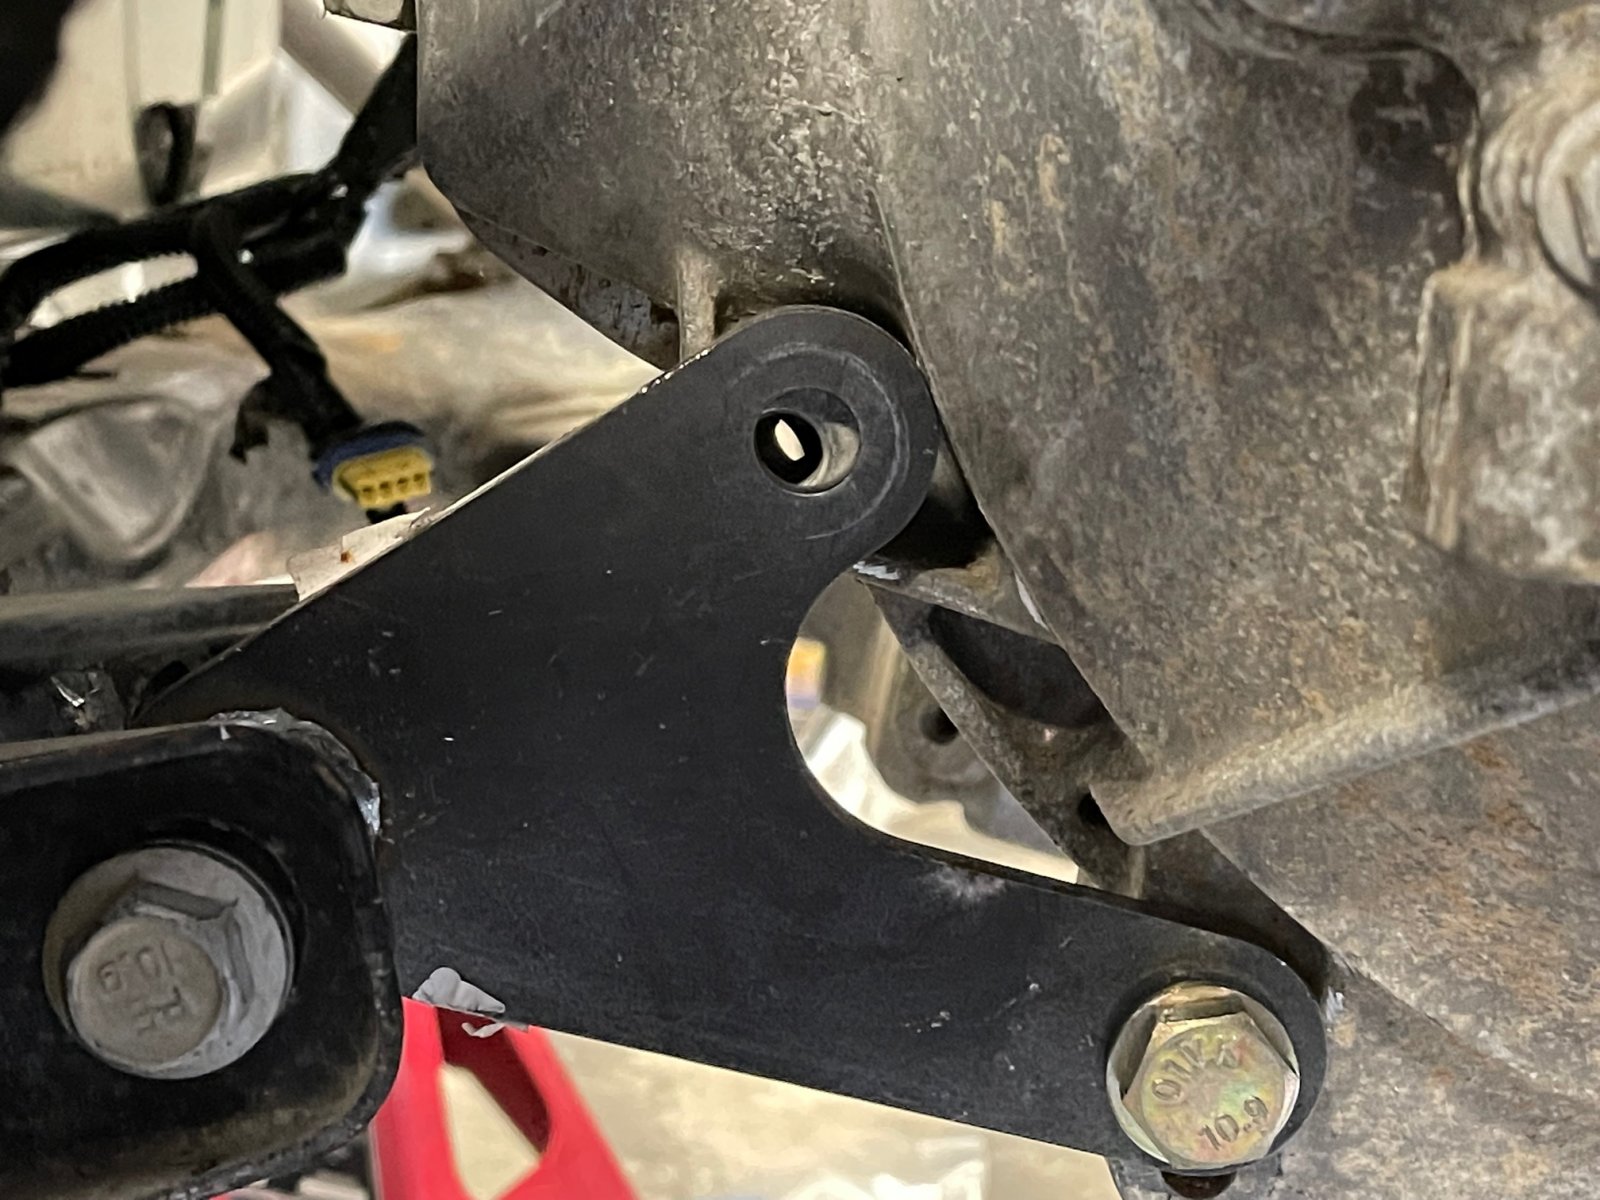
it secures the intake tube just behind the air filter if you mount it in the original location. See pics below.Anyone have a photo of where these intake pieces are used?
View attachment 25647
Here is another option:
Jason in Texas - ext. track - 09 SS/TC
Sunday night ice cream run to Sonic with the family - in each of their rides. Kind of got our own parade going..... :) Goblin on, friends!!

ATMironov
Well-Known Member
Thank you much!it secures the intake tube just behind the air filter if you mount it in the original location. See pics below.
Here is another option:

Jason in Texas - ext. track - 09 SS/TC
Sunday night ice cream run to Sonic with the family - in each of their rides. Kind of got our own parade going..... :) Goblin on, friends!!dfkitcar.com
View attachment 25648View attachment 25649
I may move it outboard like you have done. I think I'll also be doing some scoops for heat exchanges much like you have set up.
Do you know where the coated clamp is used?
ATMironov
Well-Known Member
Well I haven't been able to spend a ton of time on the car the last few weeks.. but I'm making some steady progress.
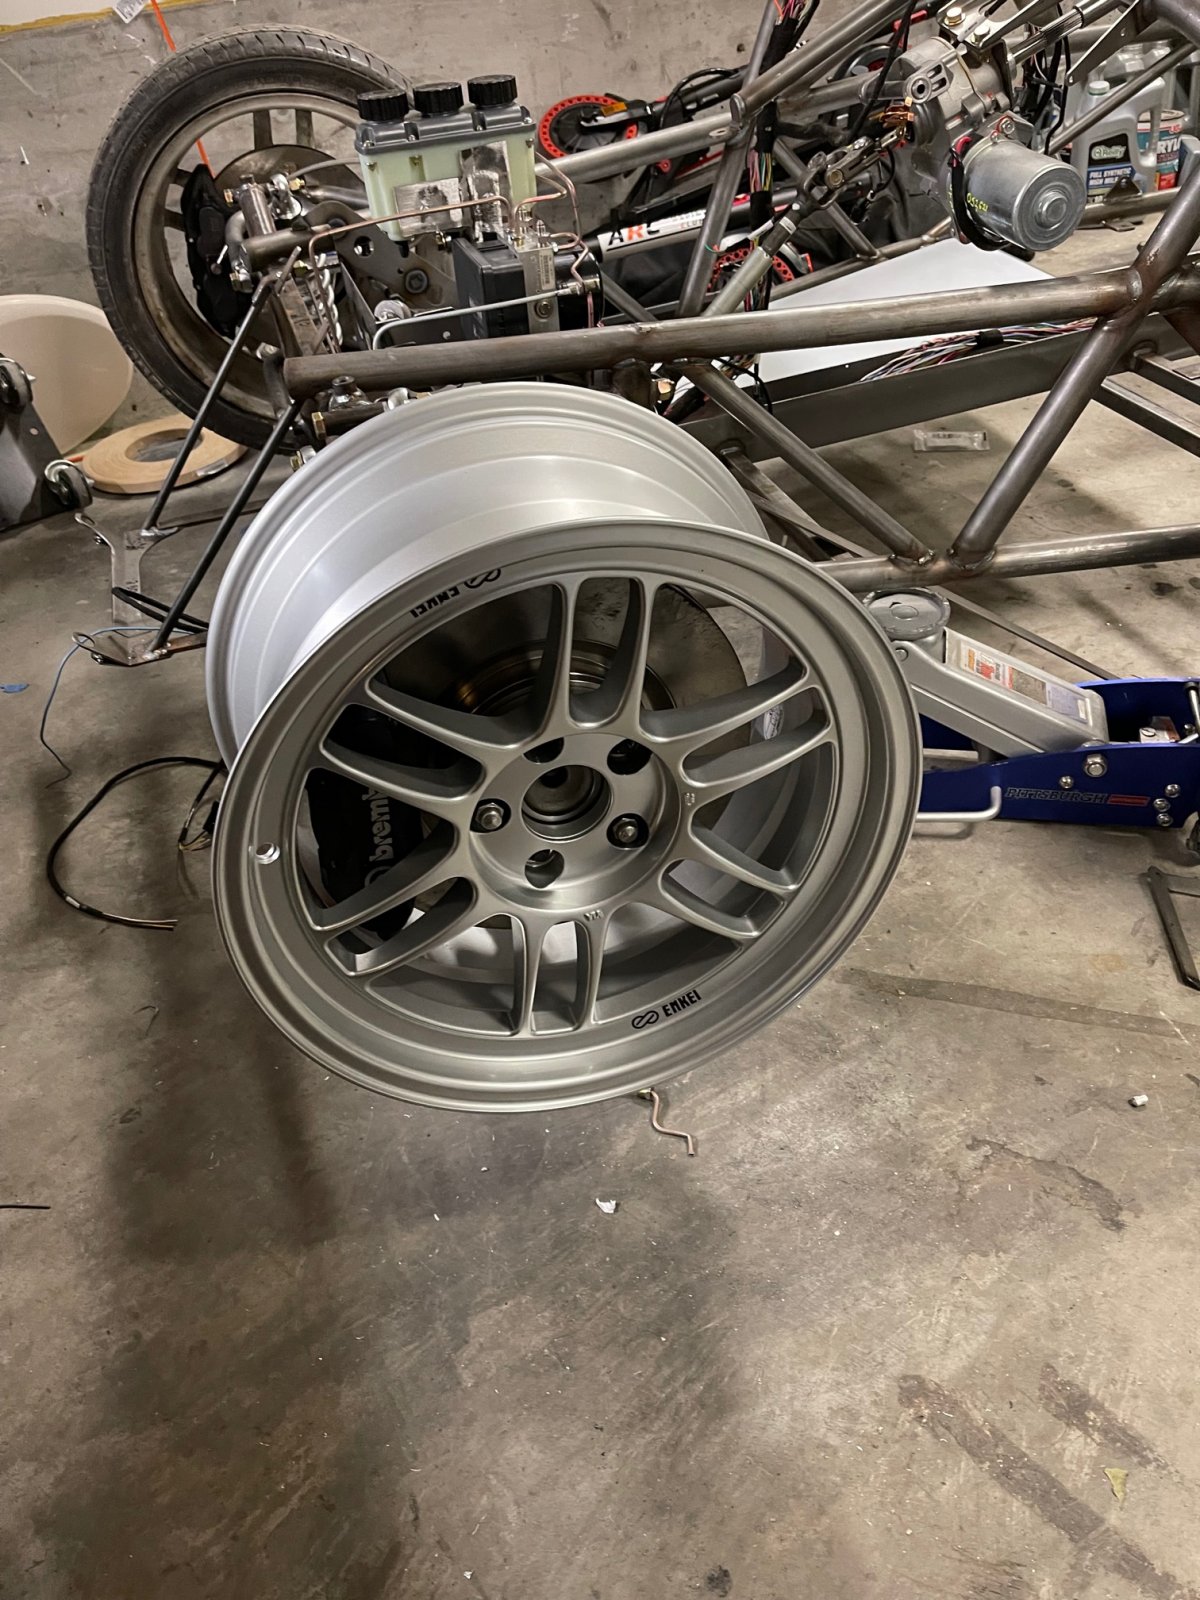
My Custom Drilled 17x9 Enkei RPF1s showed up. I ordered them though FM Wheels and was very impressed with their service.
Originally 5x114.3, they drilled them to 5x110.
I bought 5 wheels. For anyone who tracks their car regularly, having a 5th wheel can save your weekend, its worth every penny.

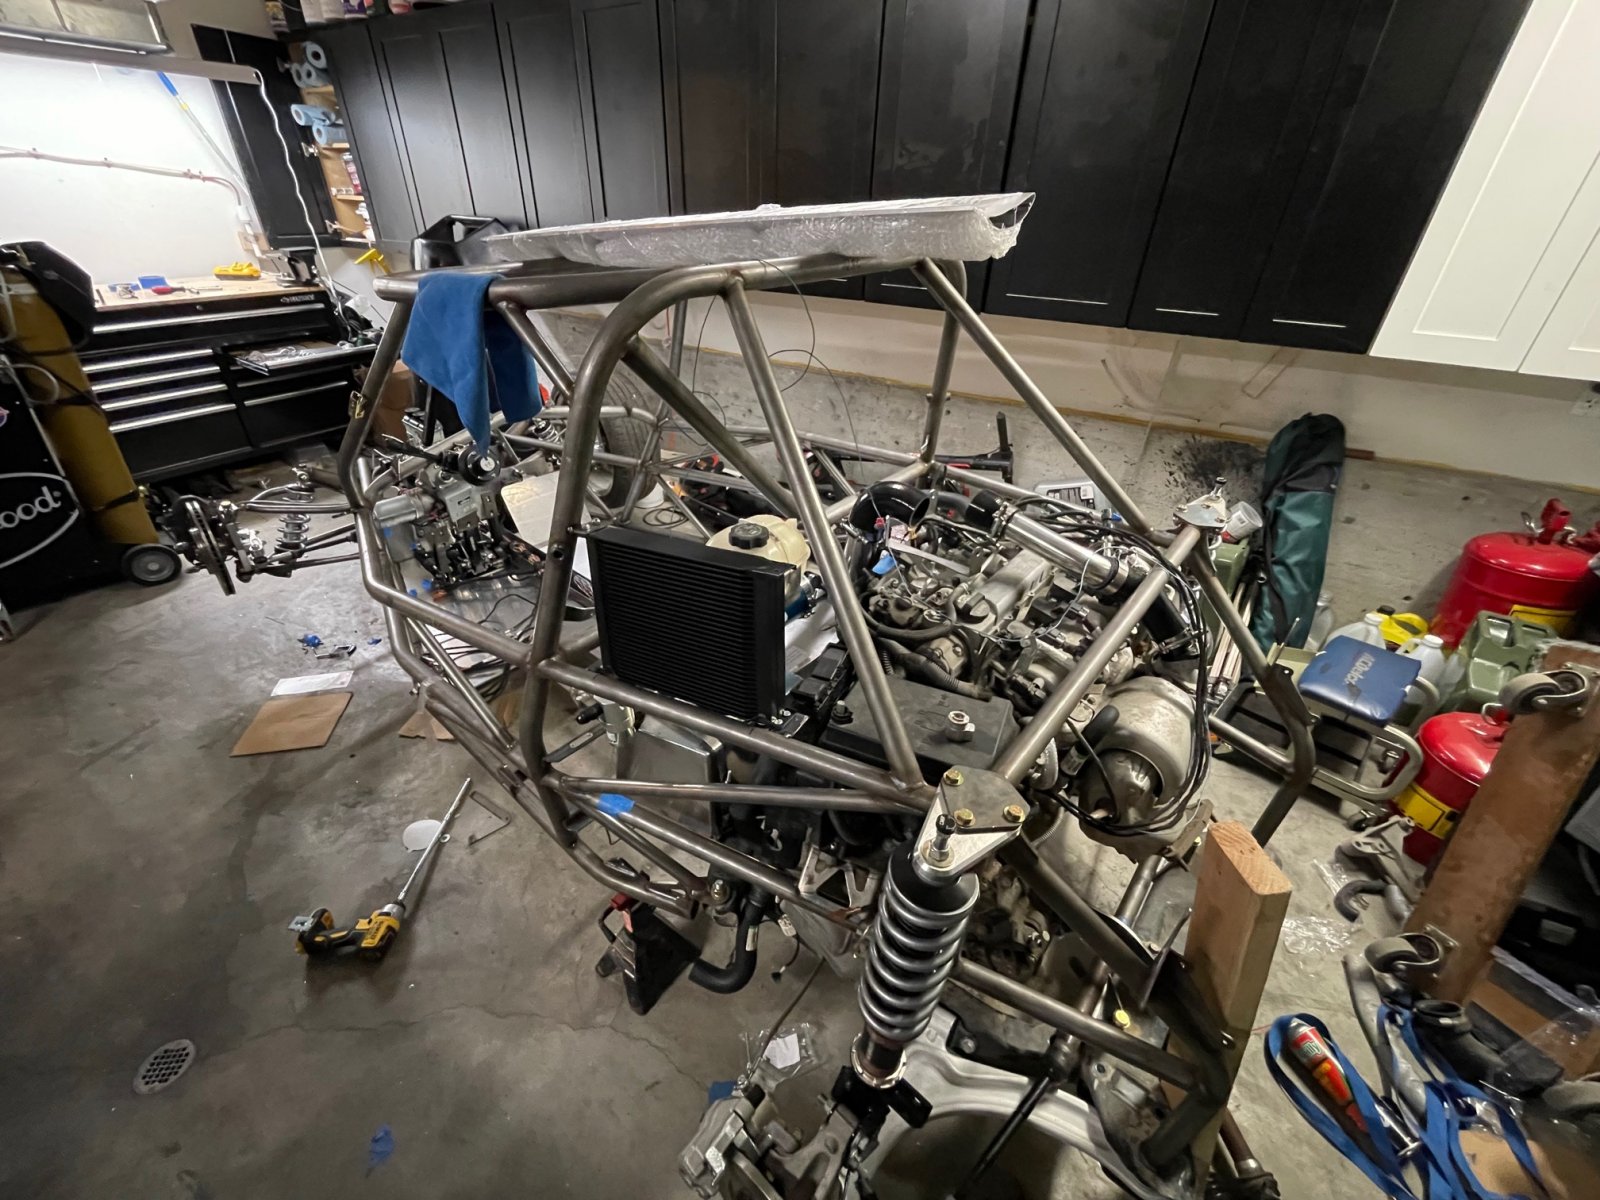
I worked on re-installing the subframe and rear suspension.
I ran into the same problem everyone else has... getting the front solid transmission mount lined up didn't work out.
I'll probably just fight it in on final assembly.
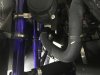
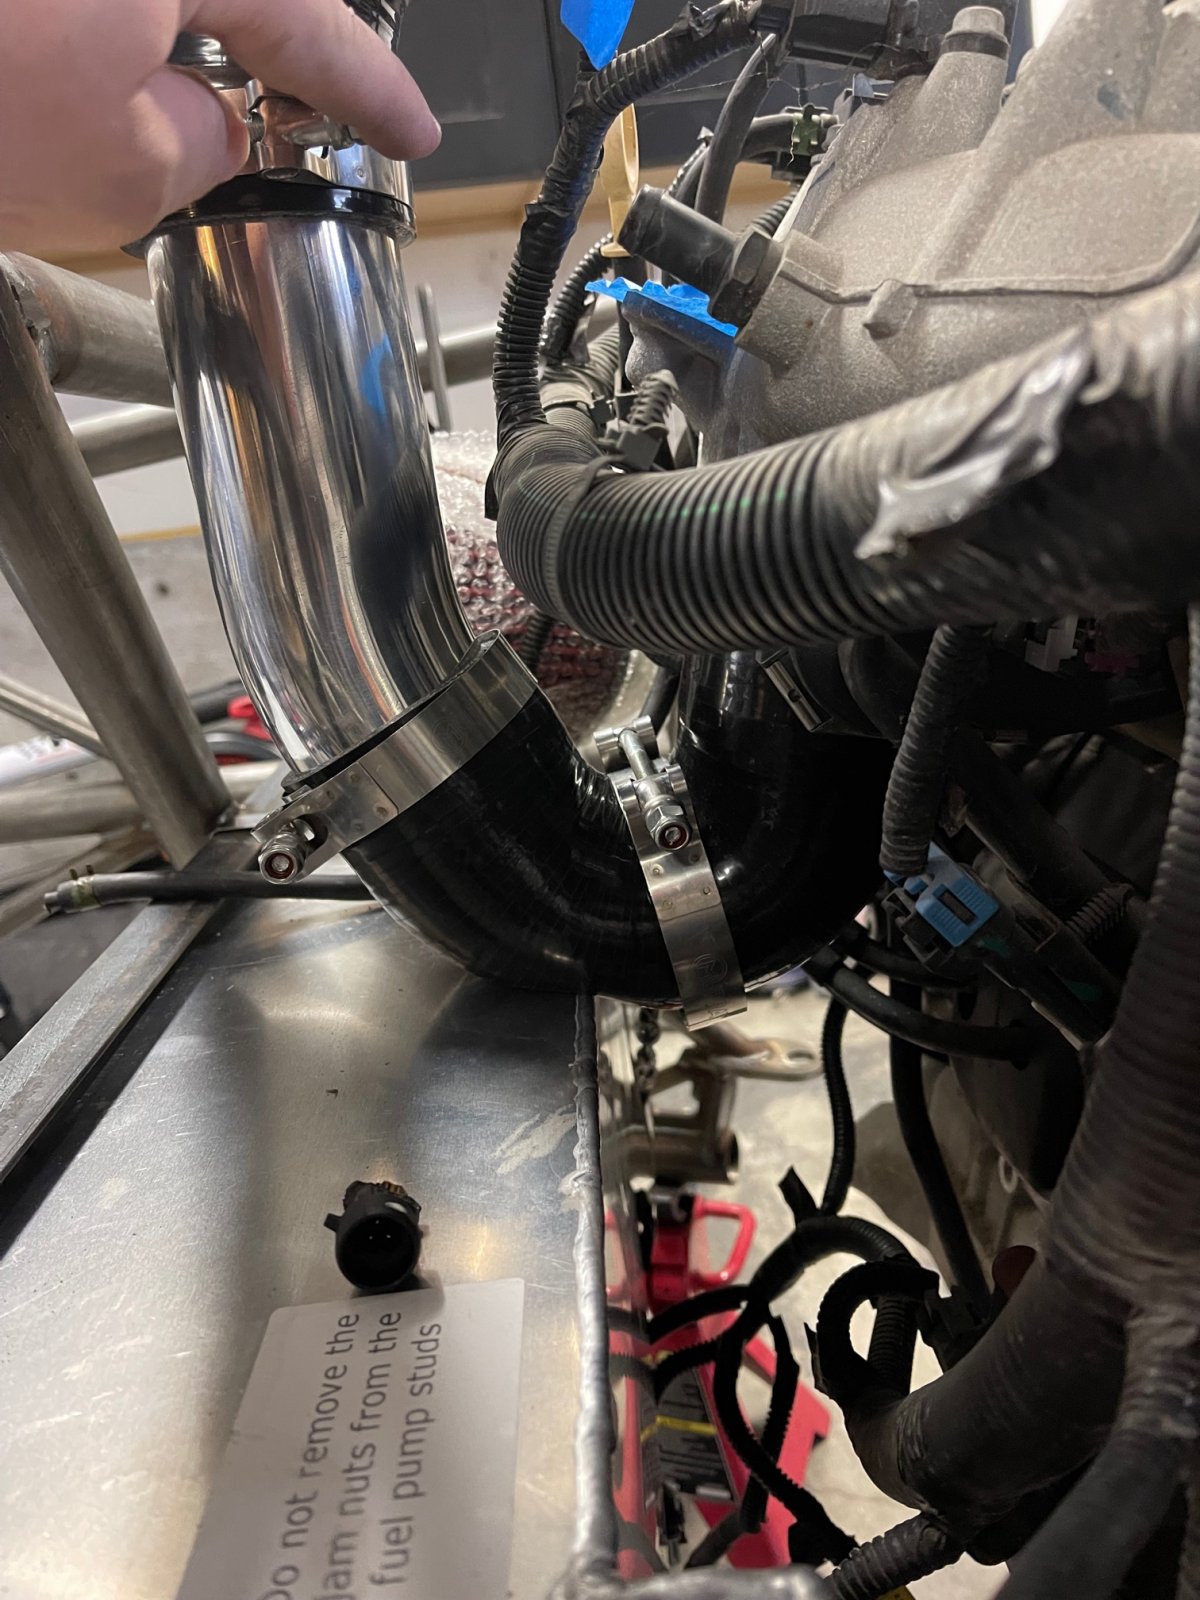
Next I mocked up the intake. I'm still waiting for a air to water intercooler to become available.
I can't seem to find the larger Type 10 Water to Air Intercooler in stock anywhere.
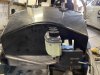
Is it normal for the coupling coming off the throttle body to be pinched like this?
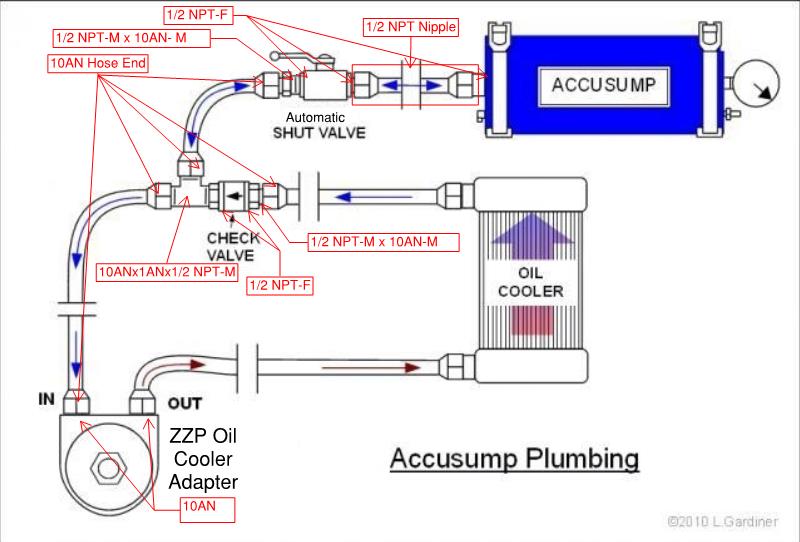
From there I moved onto the Accusump and oil cooler mounting
Here is the general configuration I have planned for the plumbing
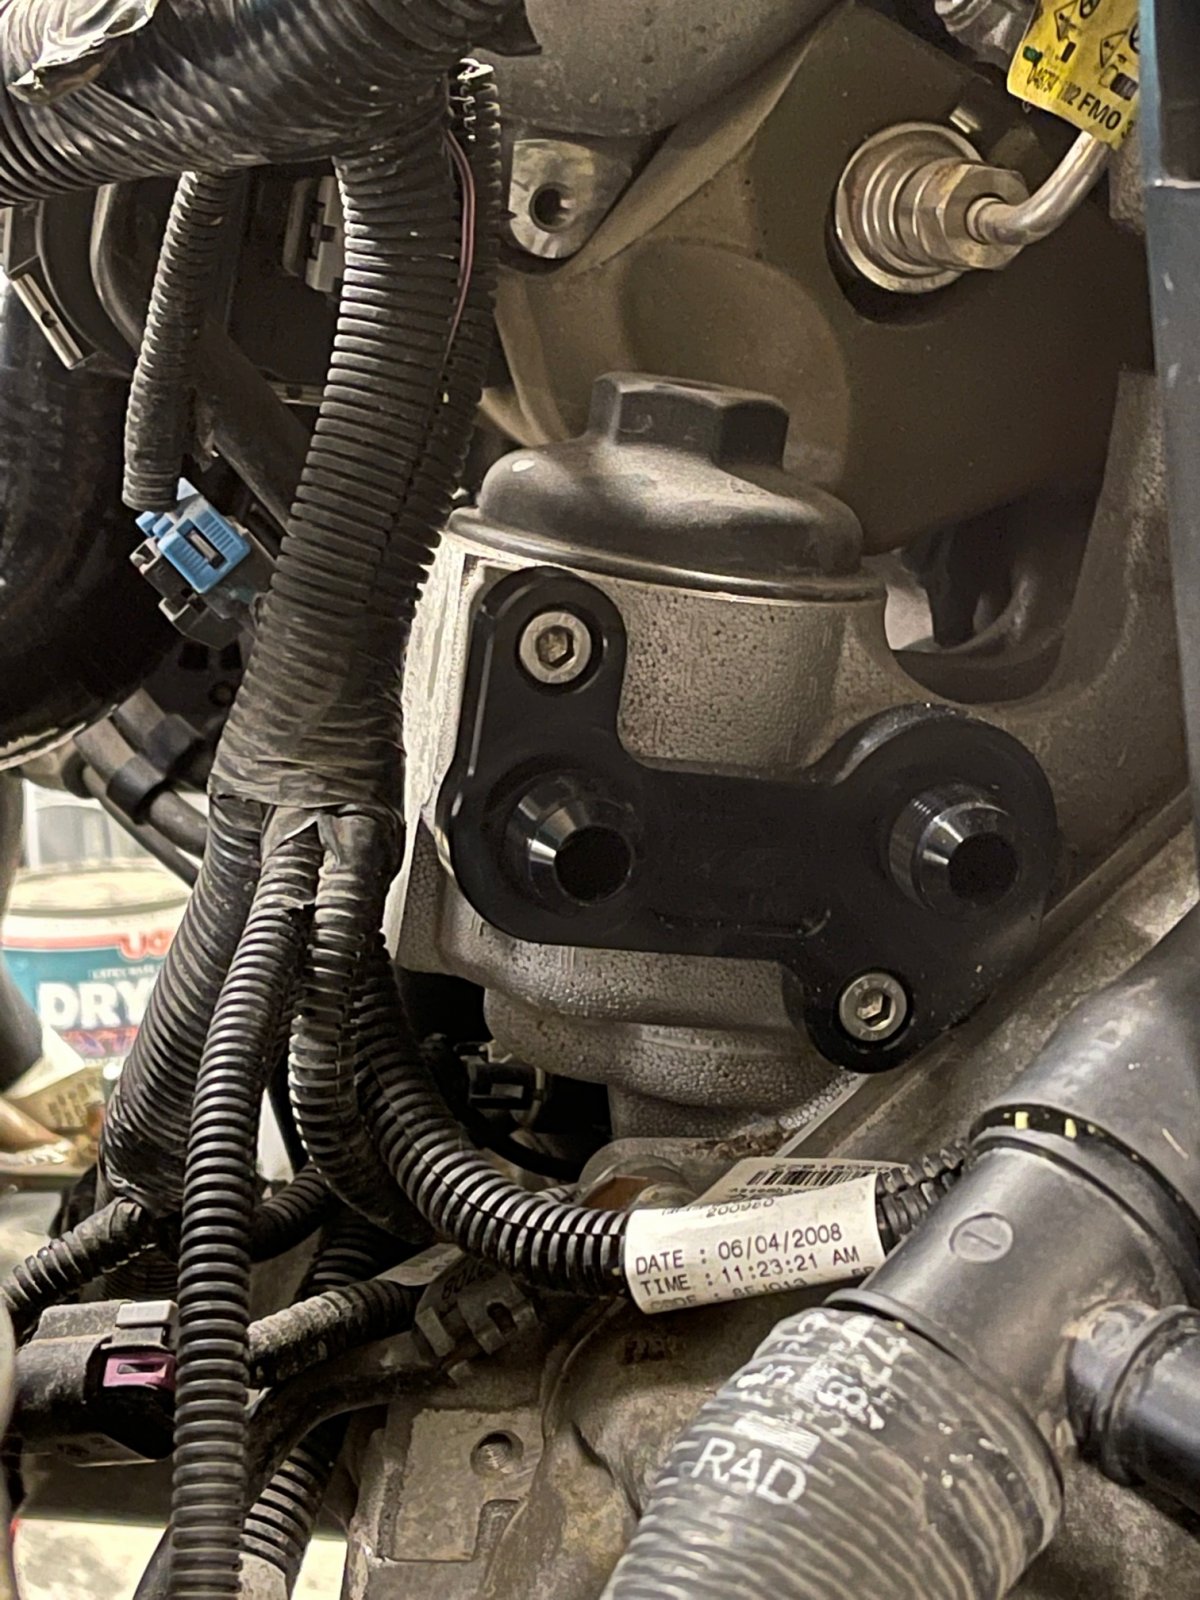
First up, I removed the factory water cooled unit and installed the ZZP Oil cooler adaptor plate
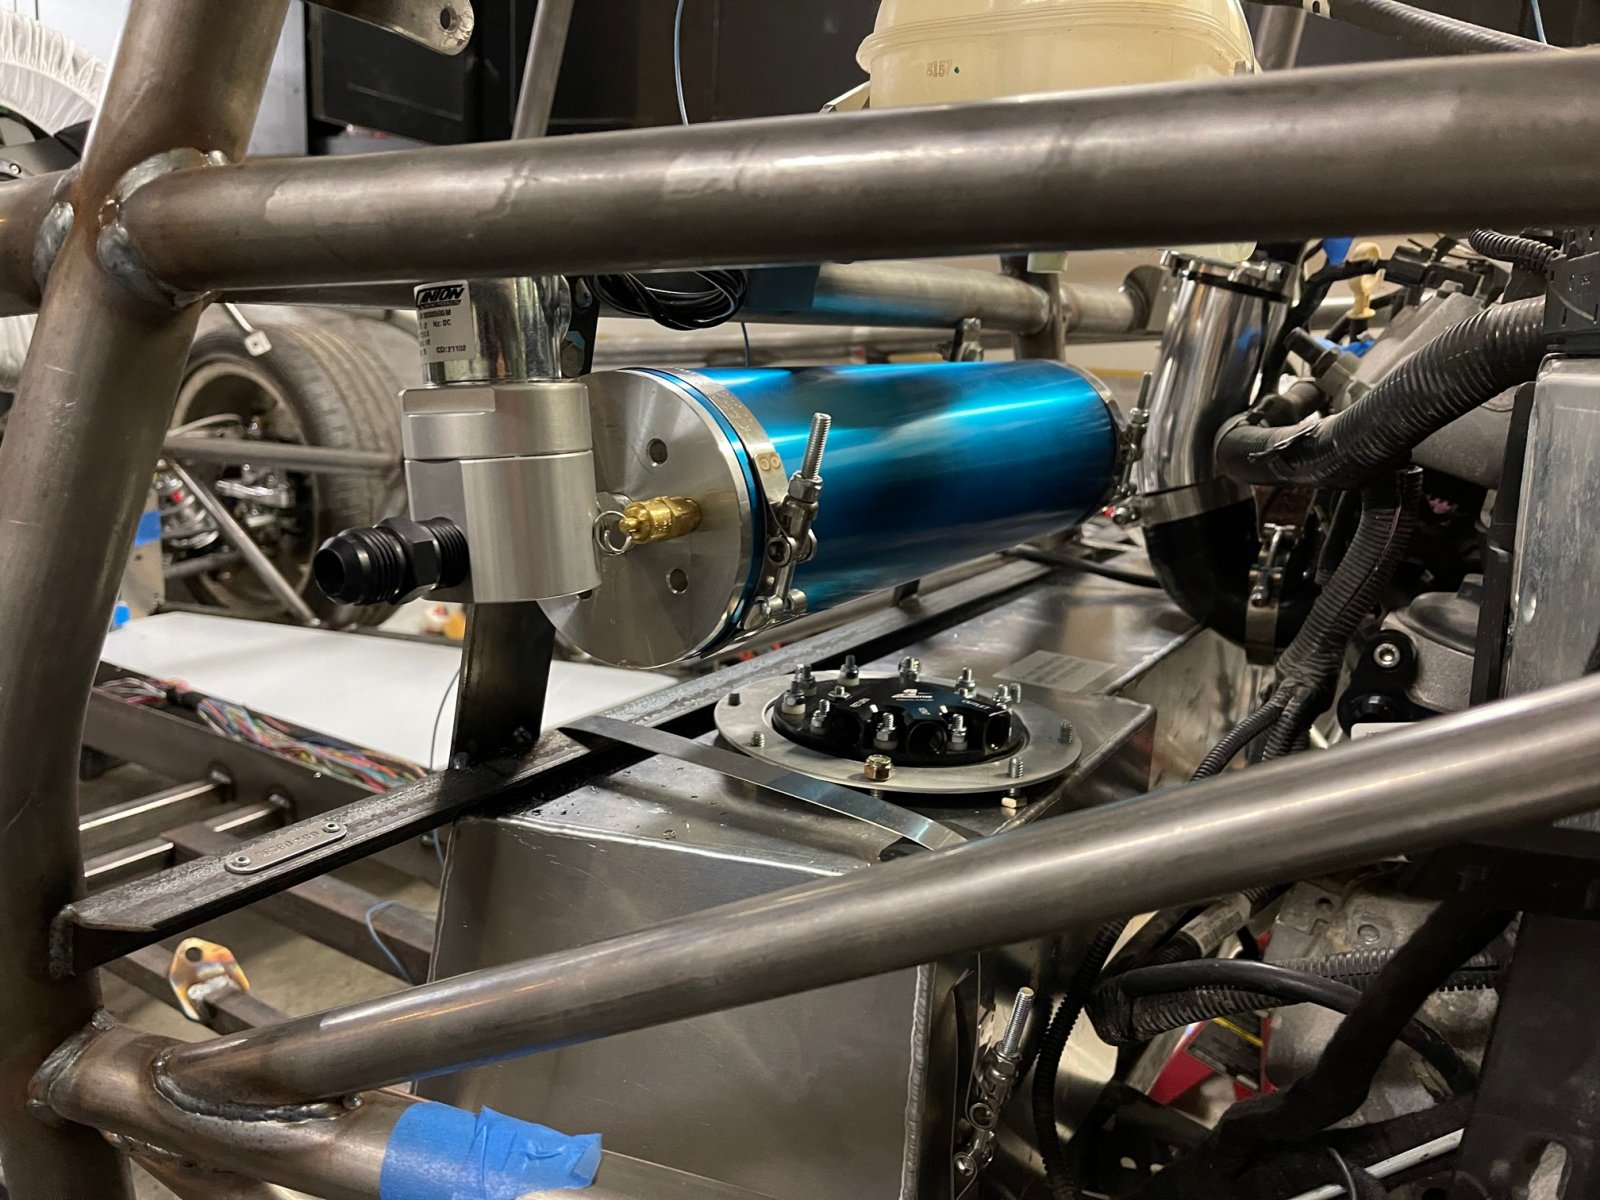
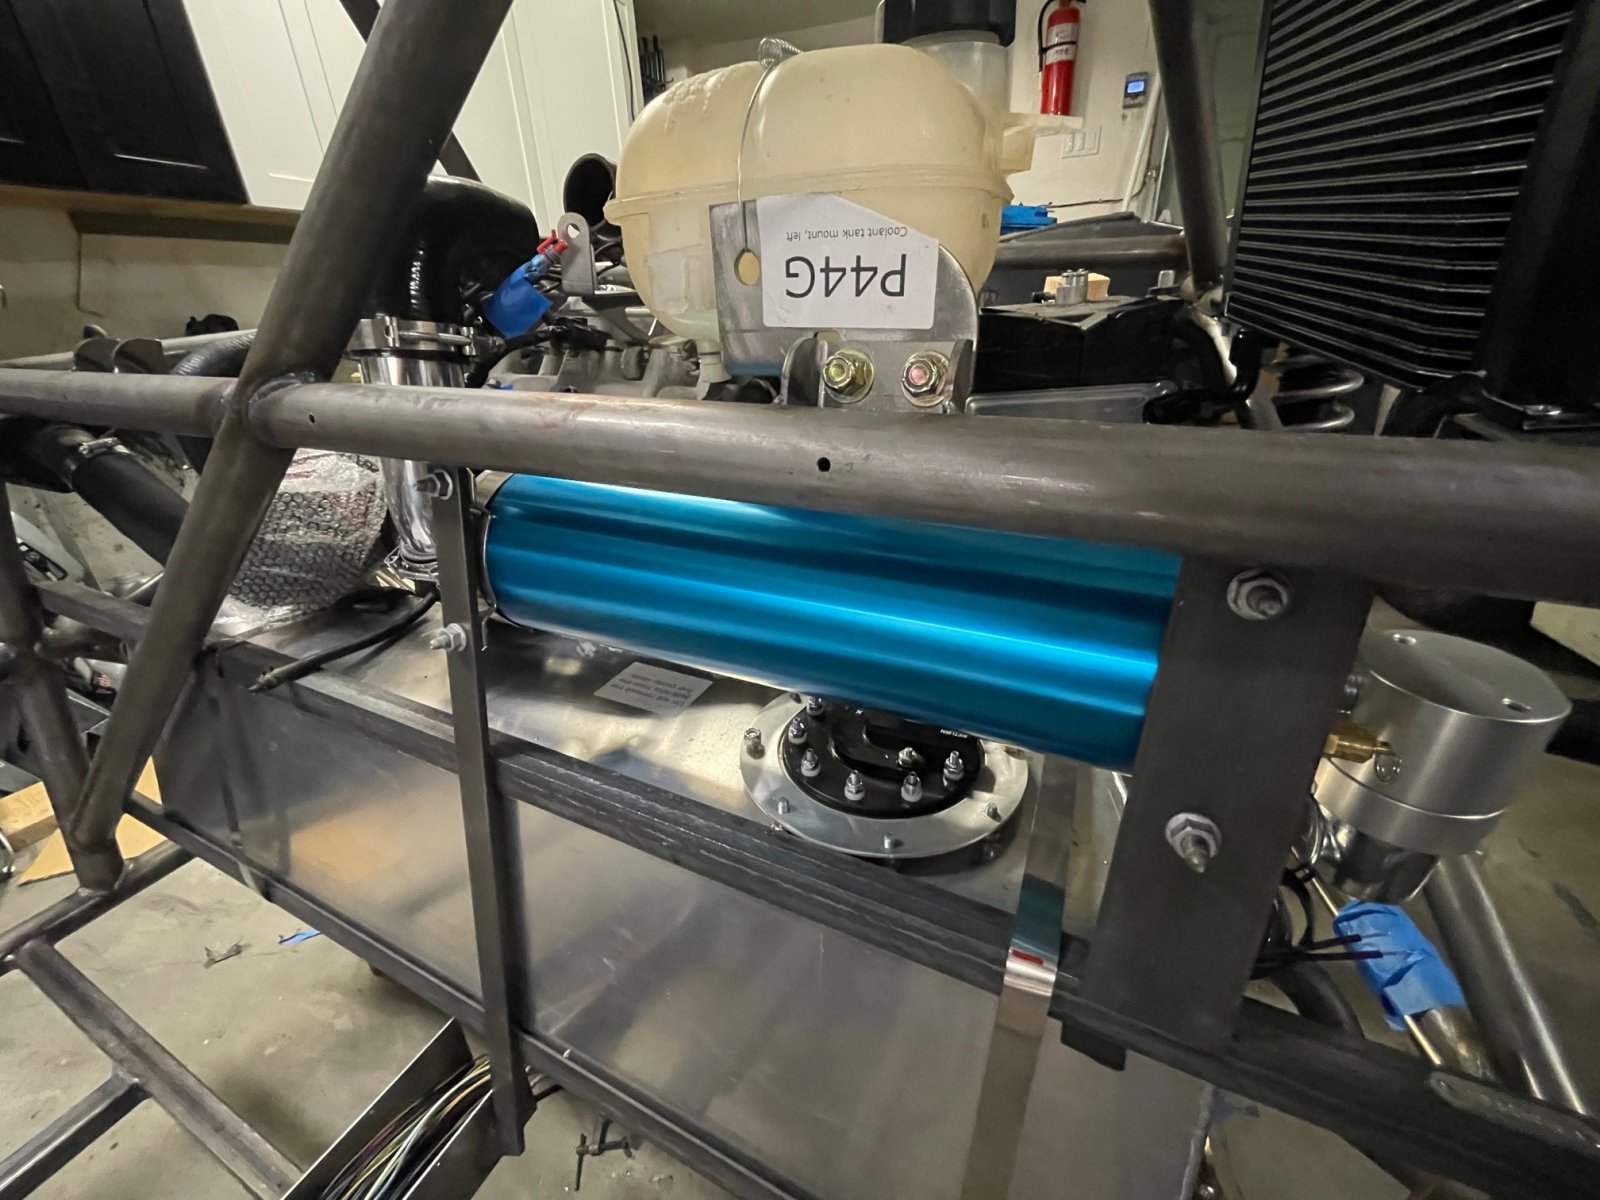
Next I installed the Accusump. I attached the right side of the Accusump to the vertical bar that was installed by DF. For the left side of the Accusump, I welded in a piece of 1/8 flat bar.
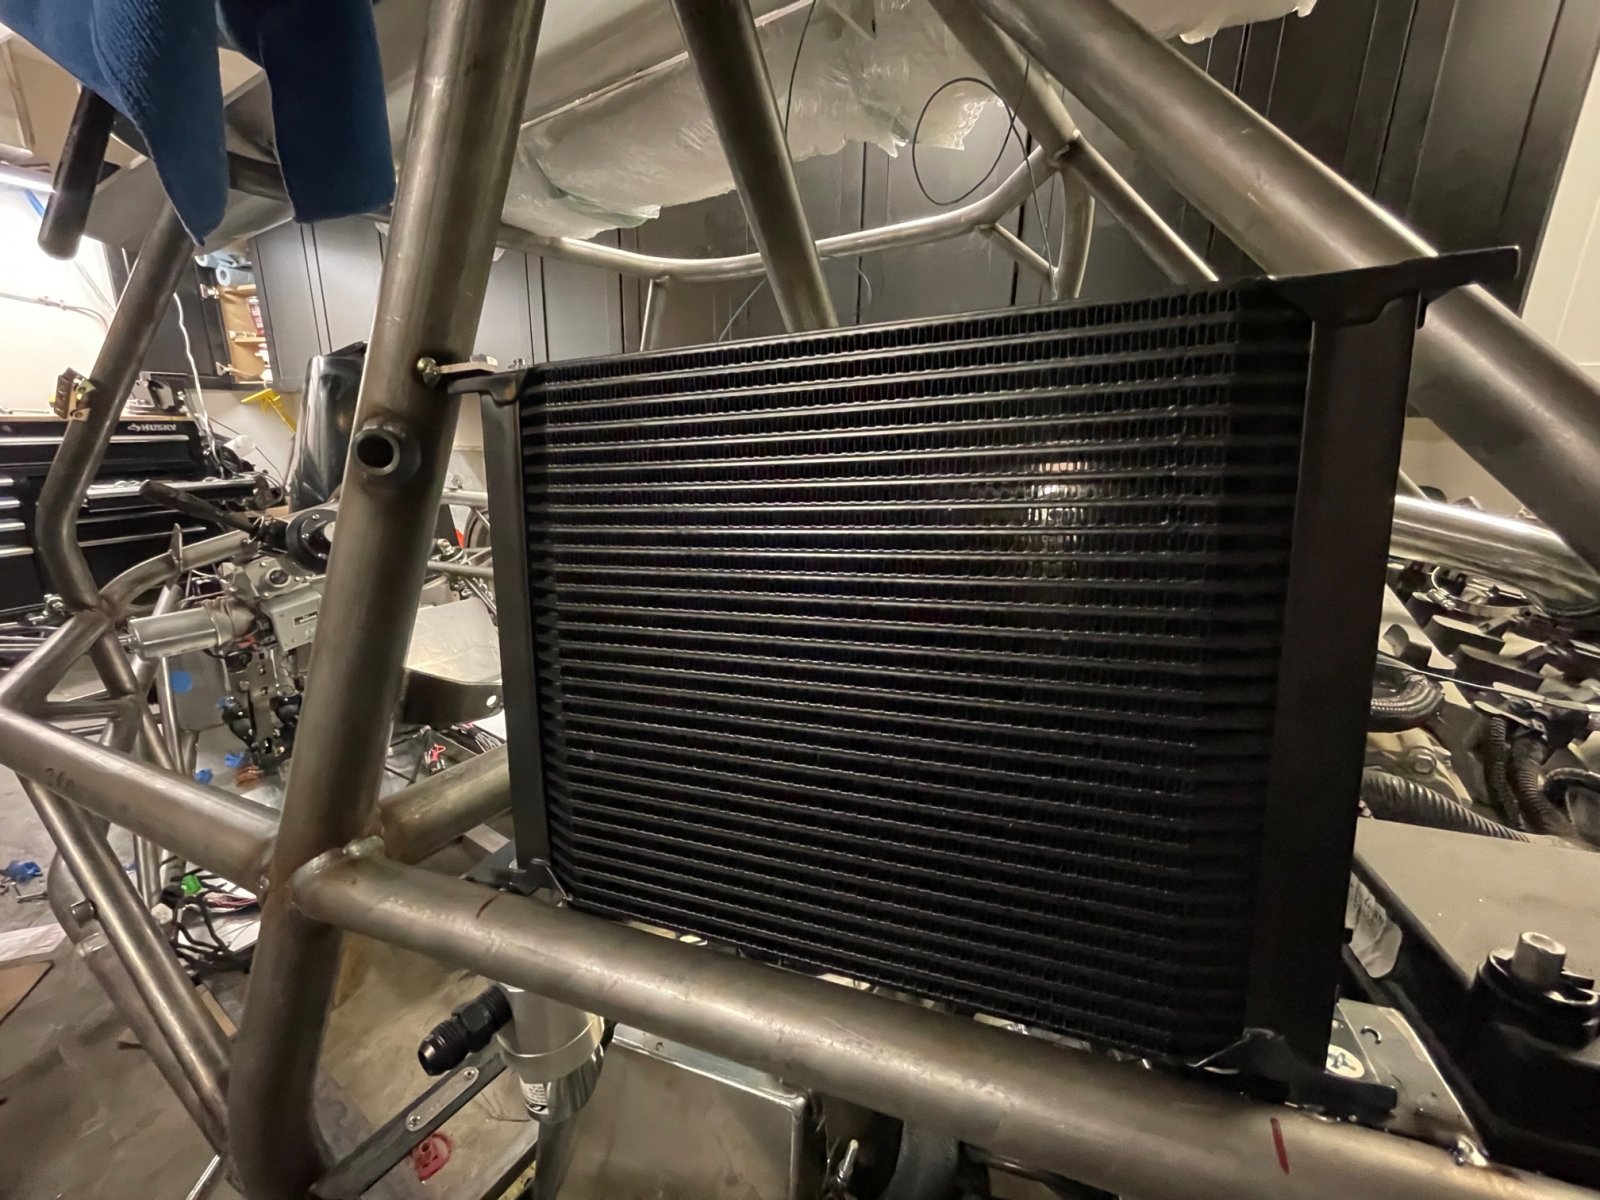
The cooler is a 30 row unit. I'm going to run it with a fan, and if that it no enough, I will build a scoop for it.
I'll be running an identical unit on the other side as the intercooler heat exchanger
I cut a few tabs and bolted them to the exchanger, then held it in place and welded the tabs to the frame.
I finally got all the miscellaneous fitting for the brake system and circled back to the pedals to get them finished up.
I still need to cut down the threaded rods on the master cylinders to get the pedals in the correct position.
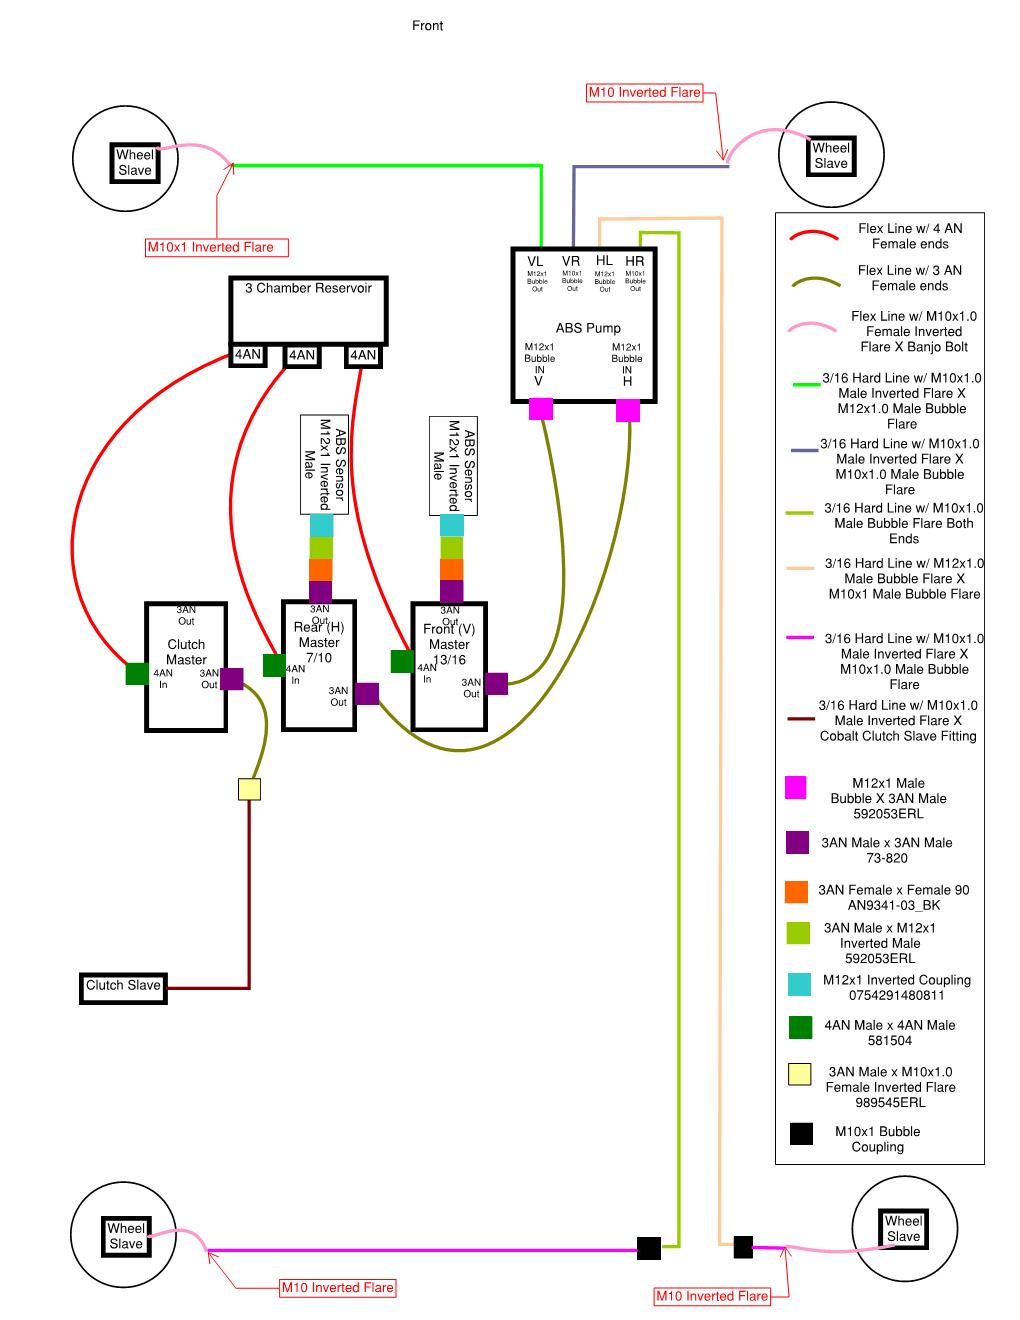
Here is the current plumbing diagram. I really hate that there are soooooo many different types of connectors in the system.
And I am epically annoyed with the number of fittings it took to convert 3AN Female to M12 Inverted Female for the pressure sensors.
I expect to be chasing down leaks when I get the system charged up.
That's the bulk of the progress.
I'm also a bit confused on the coolant hoses. So if anyone has a good guide on the coolant hoses for the LNF I would to see it.
My Custom Drilled 17x9 Enkei RPF1s showed up. I ordered them though FM Wheels and was very impressed with their service.
Originally 5x114.3, they drilled them to 5x110.
I bought 5 wheels. For anyone who tracks their car regularly, having a 5th wheel can save your weekend, its worth every penny.
I worked on re-installing the subframe and rear suspension.
I ran into the same problem everyone else has... getting the front solid transmission mount lined up didn't work out.
I'll probably just fight it in on final assembly.
Next I mocked up the intake. I'm still waiting for a air to water intercooler to become available.
I can't seem to find the larger Type 10 Water to Air Intercooler in stock anywhere.
Is it normal for the coupling coming off the throttle body to be pinched like this?
From there I moved onto the Accusump and oil cooler mounting
Here is the general configuration I have planned for the plumbing
First up, I removed the factory water cooled unit and installed the ZZP Oil cooler adaptor plate
Next I installed the Accusump. I attached the right side of the Accusump to the vertical bar that was installed by DF. For the left side of the Accusump, I welded in a piece of 1/8 flat bar.
The cooler is a 30 row unit. I'm going to run it with a fan, and if that it no enough, I will build a scoop for it.
I'll be running an identical unit on the other side as the intercooler heat exchanger
I cut a few tabs and bolted them to the exchanger, then held it in place and welded the tabs to the frame.
I finally got all the miscellaneous fitting for the brake system and circled back to the pedals to get them finished up.
I still need to cut down the threaded rods on the master cylinders to get the pedals in the correct position.
Here is the current plumbing diagram. I really hate that there are soooooo many different types of connectors in the system.
And I am epically annoyed with the number of fittings it took to convert 3AN Female to M12 Inverted Female for the pressure sensors.
I expect to be chasing down leaks when I get the system charged up.
That's the bulk of the progress.
I'm also a bit confused on the coolant hoses. So if anyone has a good guide on the coolant hoses for the LNF I would to see it.