BAustin's Extended Track - 06 SS/SC Donor - #157 Registered
- Thread starter baustin
- Start date
baustin
Well-Known Member
2 things I'll be working on coming up:

- I'm getting a recurring check engine light for slow O2 sensor response, I think it was P0133.
- I did put in a replacement O2 sensor during my misfire search, Bosch, slightly different tip design than the one my engine came with which I think was the stock one. It's only coming up as a check engine light intermittently: I can reset the light and then it might come back on 5+ times driving the car, not one of the immediate types. I think I can either put back in the original one or buy a true OEM style instead of the Bosch style, I don't have a reason to think the fault is anywhere other than the sensor itself for now, no apparent leaks in the exhaust.
- I need to redo the alignment to improve it.
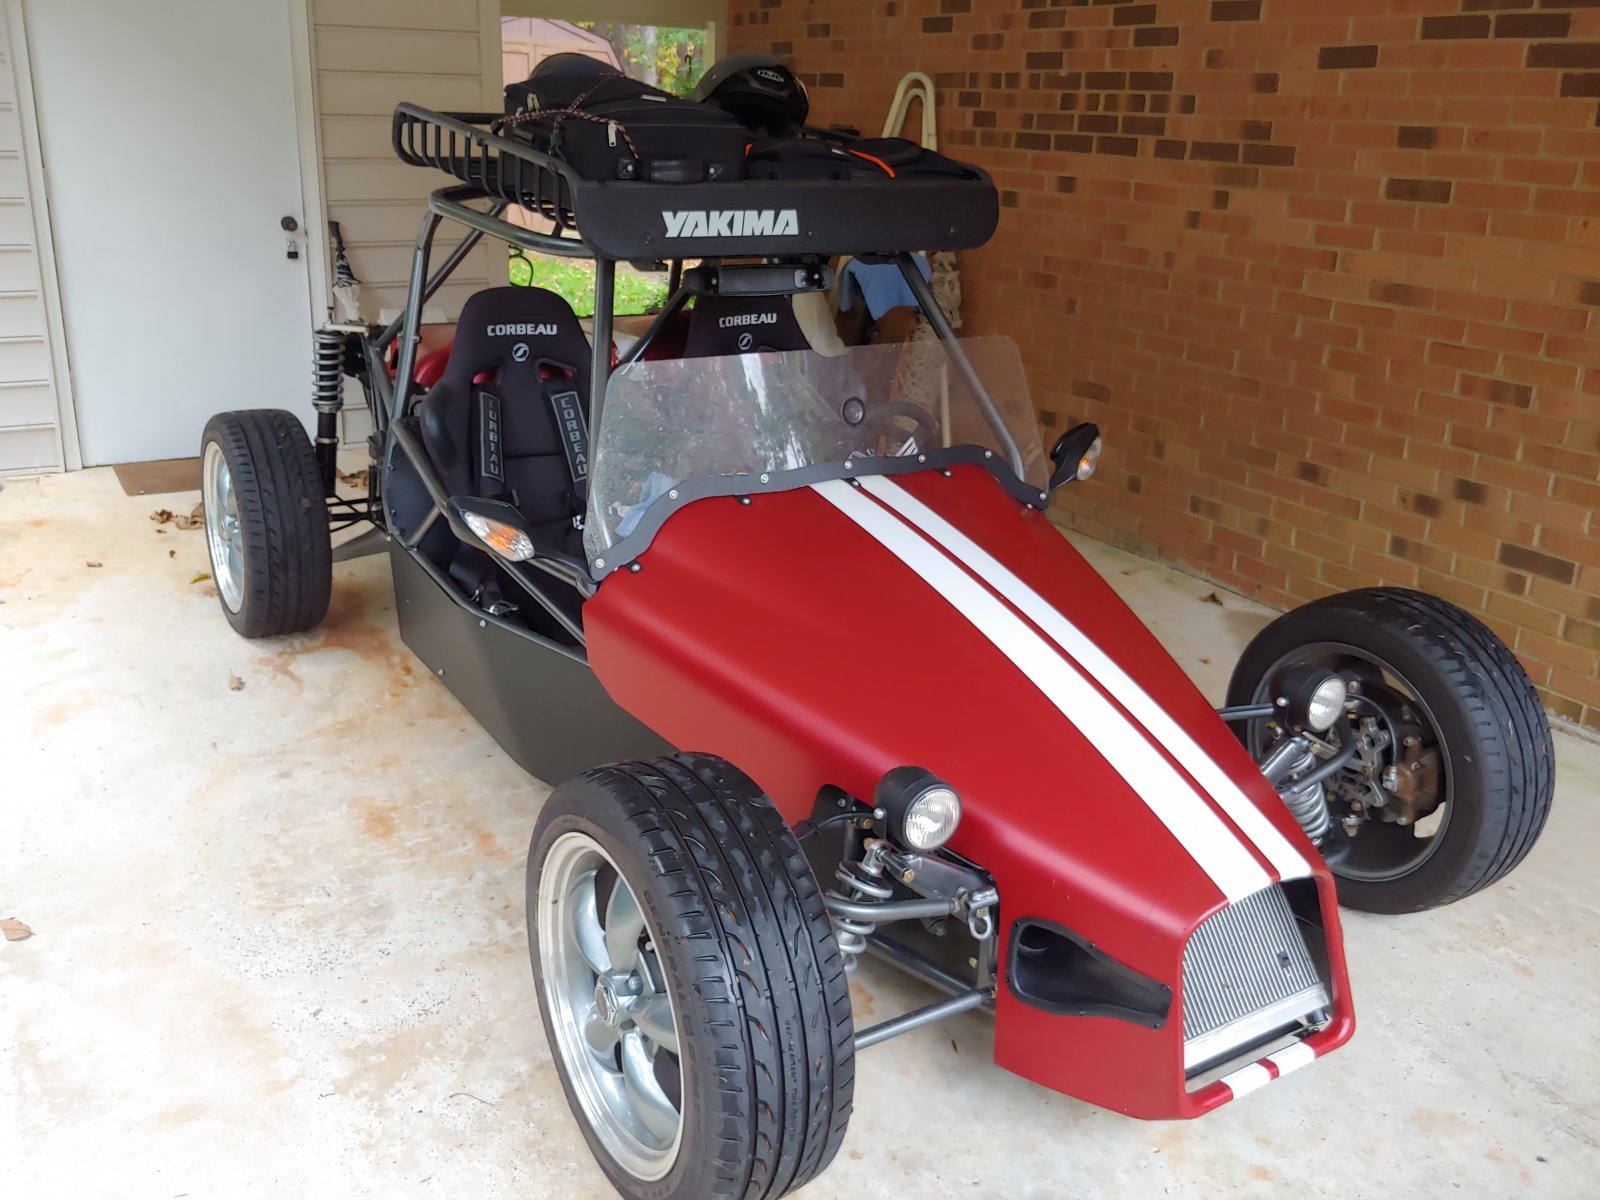
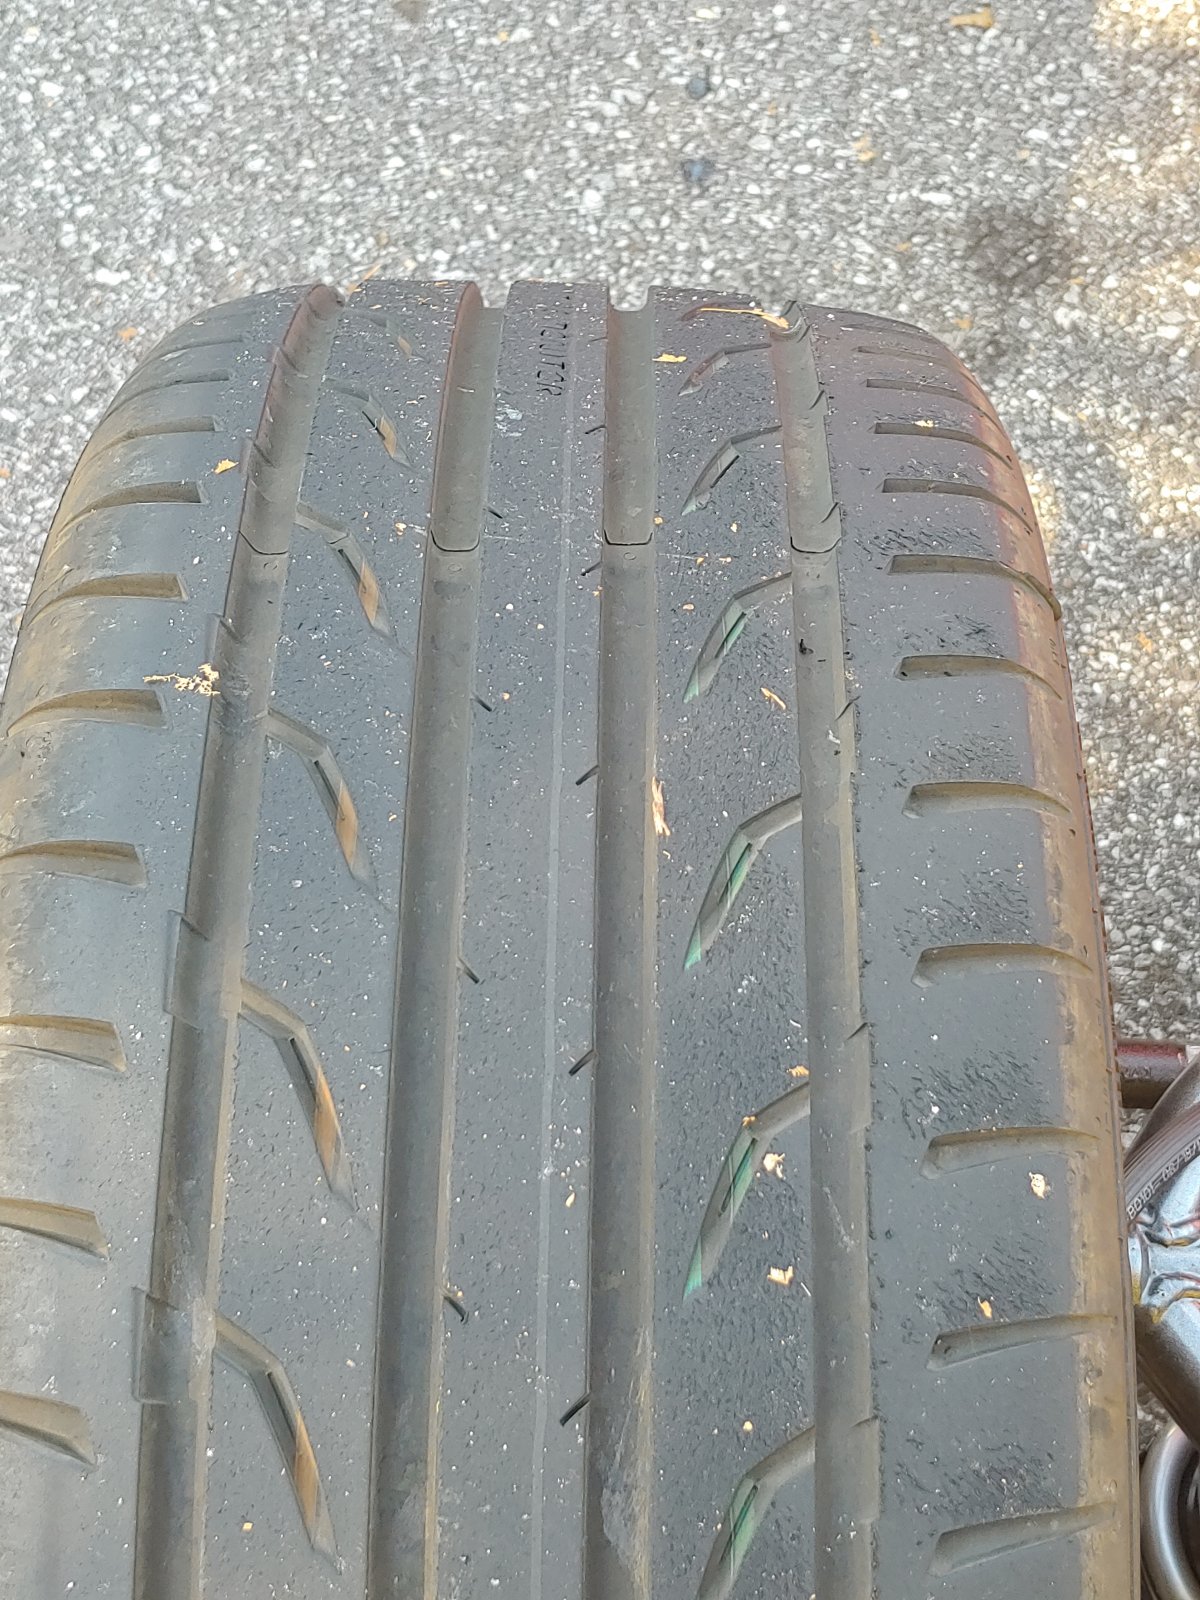
- We took a 4+ hour (each way) drive to the mountains this past weekend, 2 in the car, roof rack with 2 bags up above our heads. The drive there was in the dry, when we made a stop I could see graining on the front tires, only on the inner half. Back tires were showing only slight graining but it was fairly even. I've already got a bunch of front tire inner half wear from staring with unintended toe out, I'm almost to the wear bars on my tires while the outer edge is hardly worn. I don't normally see graining on the surface but we had stopped after driving on a long stretch of concrete highway, similar to the only other time I've seen graining on these.
- I plan on trying to remove some negative camber on the rear, reset the rear toe, remove negative camber on the front, check the caster to see if it's close, reset the front toe.
- I've been getting good wear on the rear tires. The fronts are the ones that are getting heavily worn on the inner half (see picture below). I haven't swapped front/rear just so I can keep track of the wear easier.
- I haven't done any autocross and not sure when I would look into it yet so I just need it setup for street driving.
Last edited:
baustin
Well-Known Member
Another note, I'm still waiting to receive my title from the state. I think paperwork was all submitted on Jan 9 so I'm almost at 10 months and counting for DMV to complete it. I'm coming up on the renewal time to get it inspected and still don't have the actual title yet... maybe posting this will make it show up in a couple days.
baustin
Well-Known Member
The envelope simply has my renewal/tax notice, not the actual title. It's nice that I can see my title number on it and the DMV website lists the title # against my drivers license profile but I still haven't received the real title yet. I know it's just a little piece of paper that I won't need for a long time but I think the actual title means they have accepted and finished my registration, till then it's an open question if they have issues with things.
I think the stopwatch is still going...
I think the stopwatch is still going...
Not sure how it is where you are, but all new titles are electronic in Florida when registering a newly acquired vehicle. You have to pay $2.50 for them to mail you a paper copy or $10 for one printed at the DMV. I paid for the one at the DMV for my donor when I put it in my name. You might need to call the DMV about it and see about a paper title since they have a number assigned to it.The envelope simply has my renewal/tax notice, not the actual title. It's nice that I can see my title number on it and the DMV website lists the title # against my drivers license profile but I still haven't received the real title yet. I know it's just a little piece of paper that I won't need for a long time but I think the actual title means they have accepted and finished my registration, till then it's an open question if they have issues with things.
I think the stopwatch is still going...
baustin
Well-Known Member
So I checked with DMV (had to go to a license plate agency office to get a chance to ask, phone system is overloaded): title hasn't been issued yet. Nothing specifically being requested from me, according to the DMV system they just haven't finished it or gotten to it yet. The title # on my DMV file is essentially the temporary number.
baustin
Well-Known Member
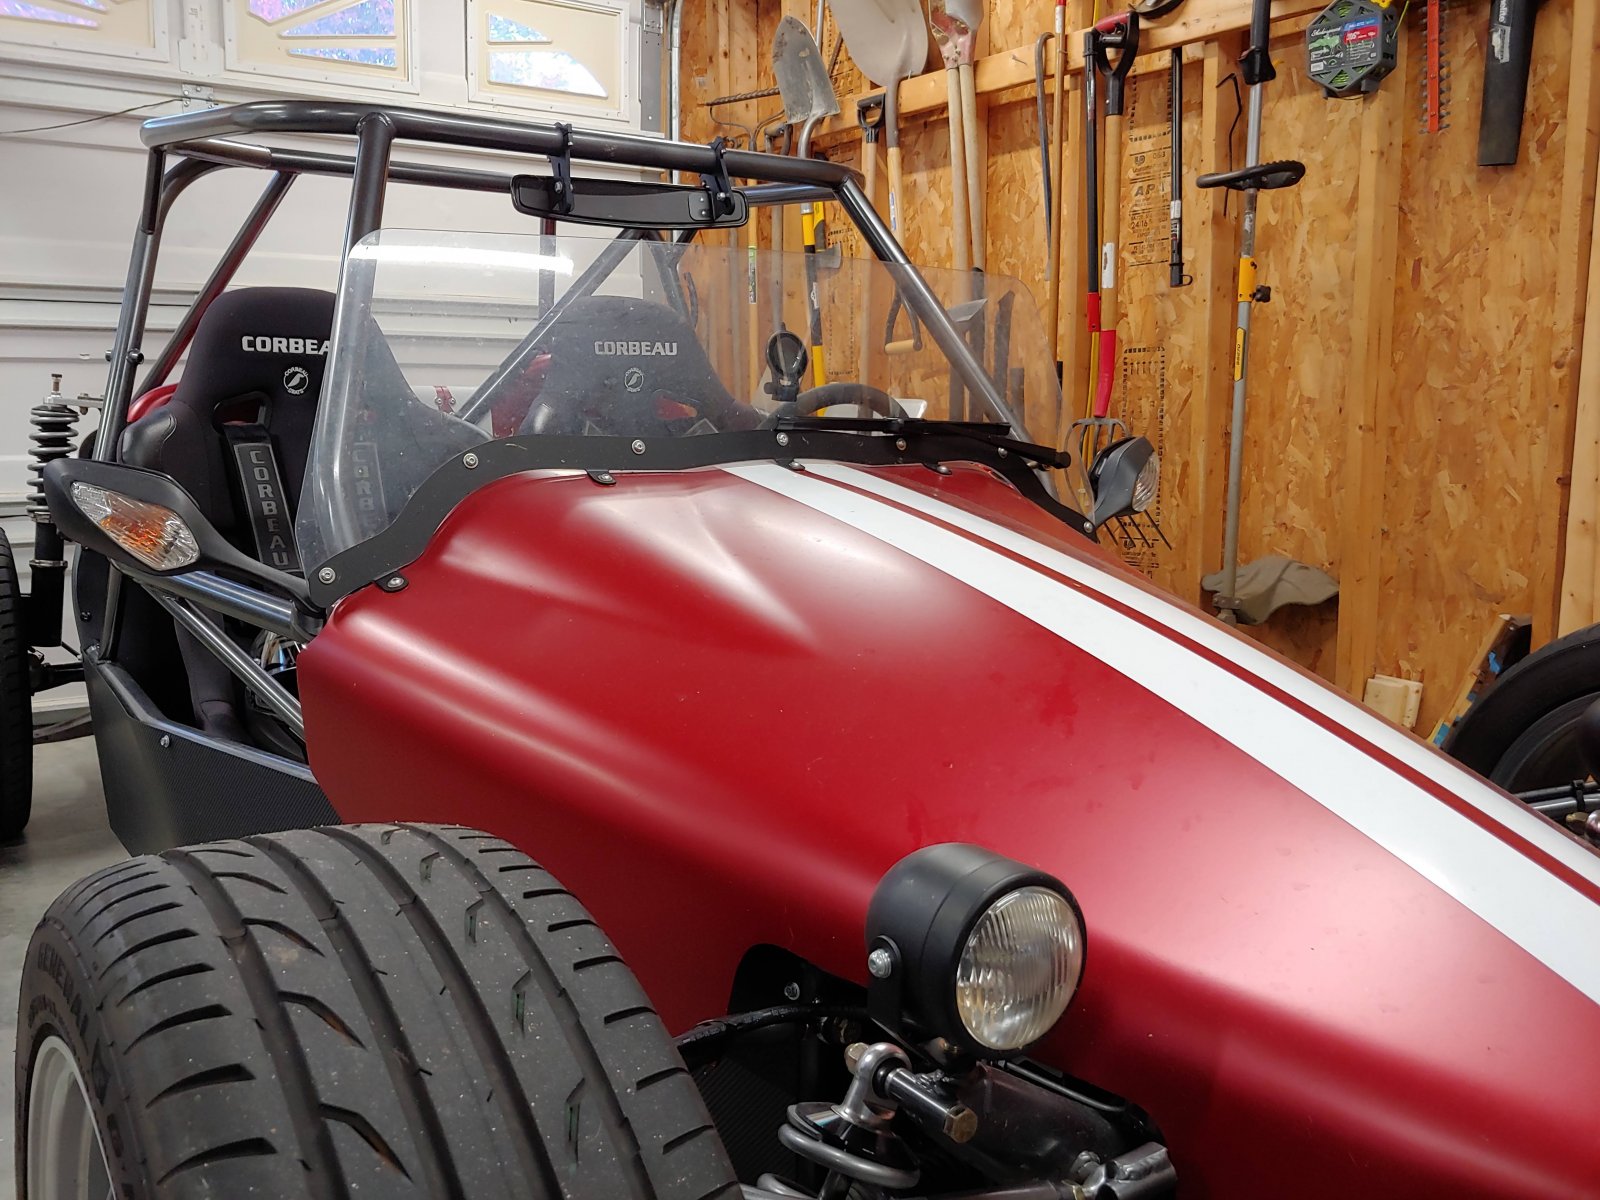
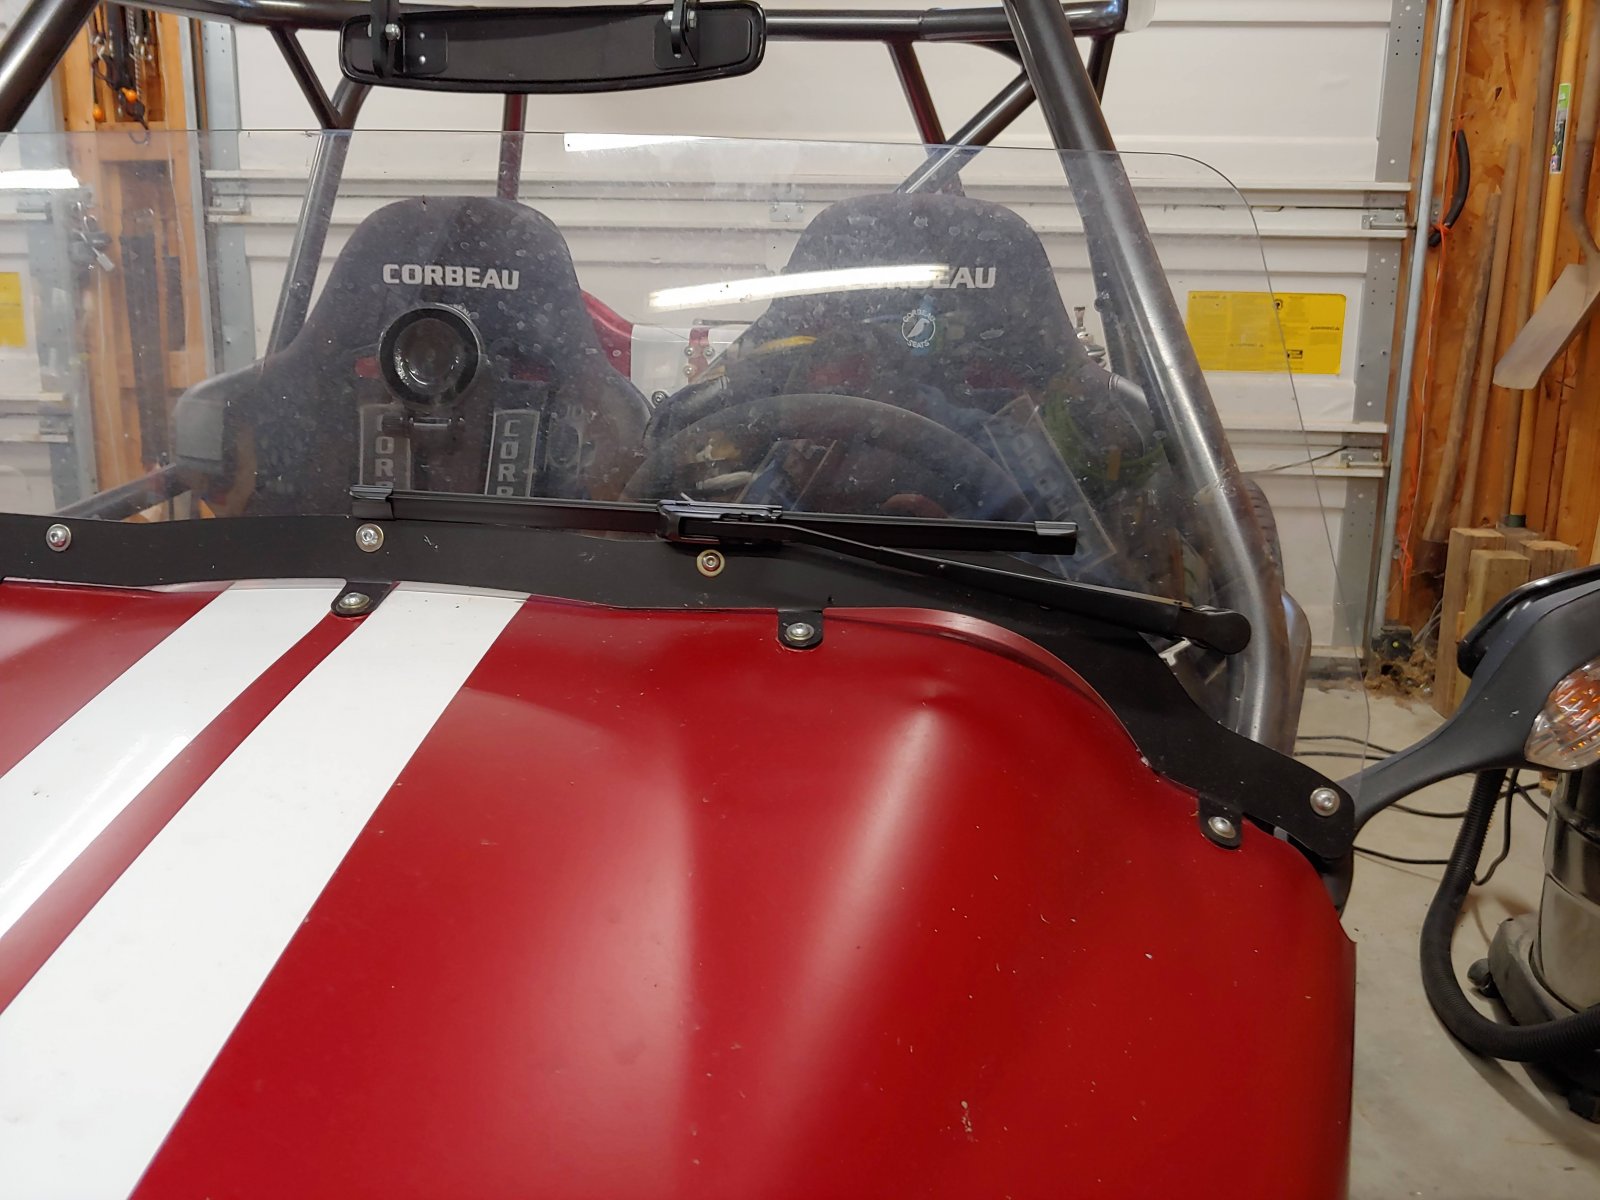
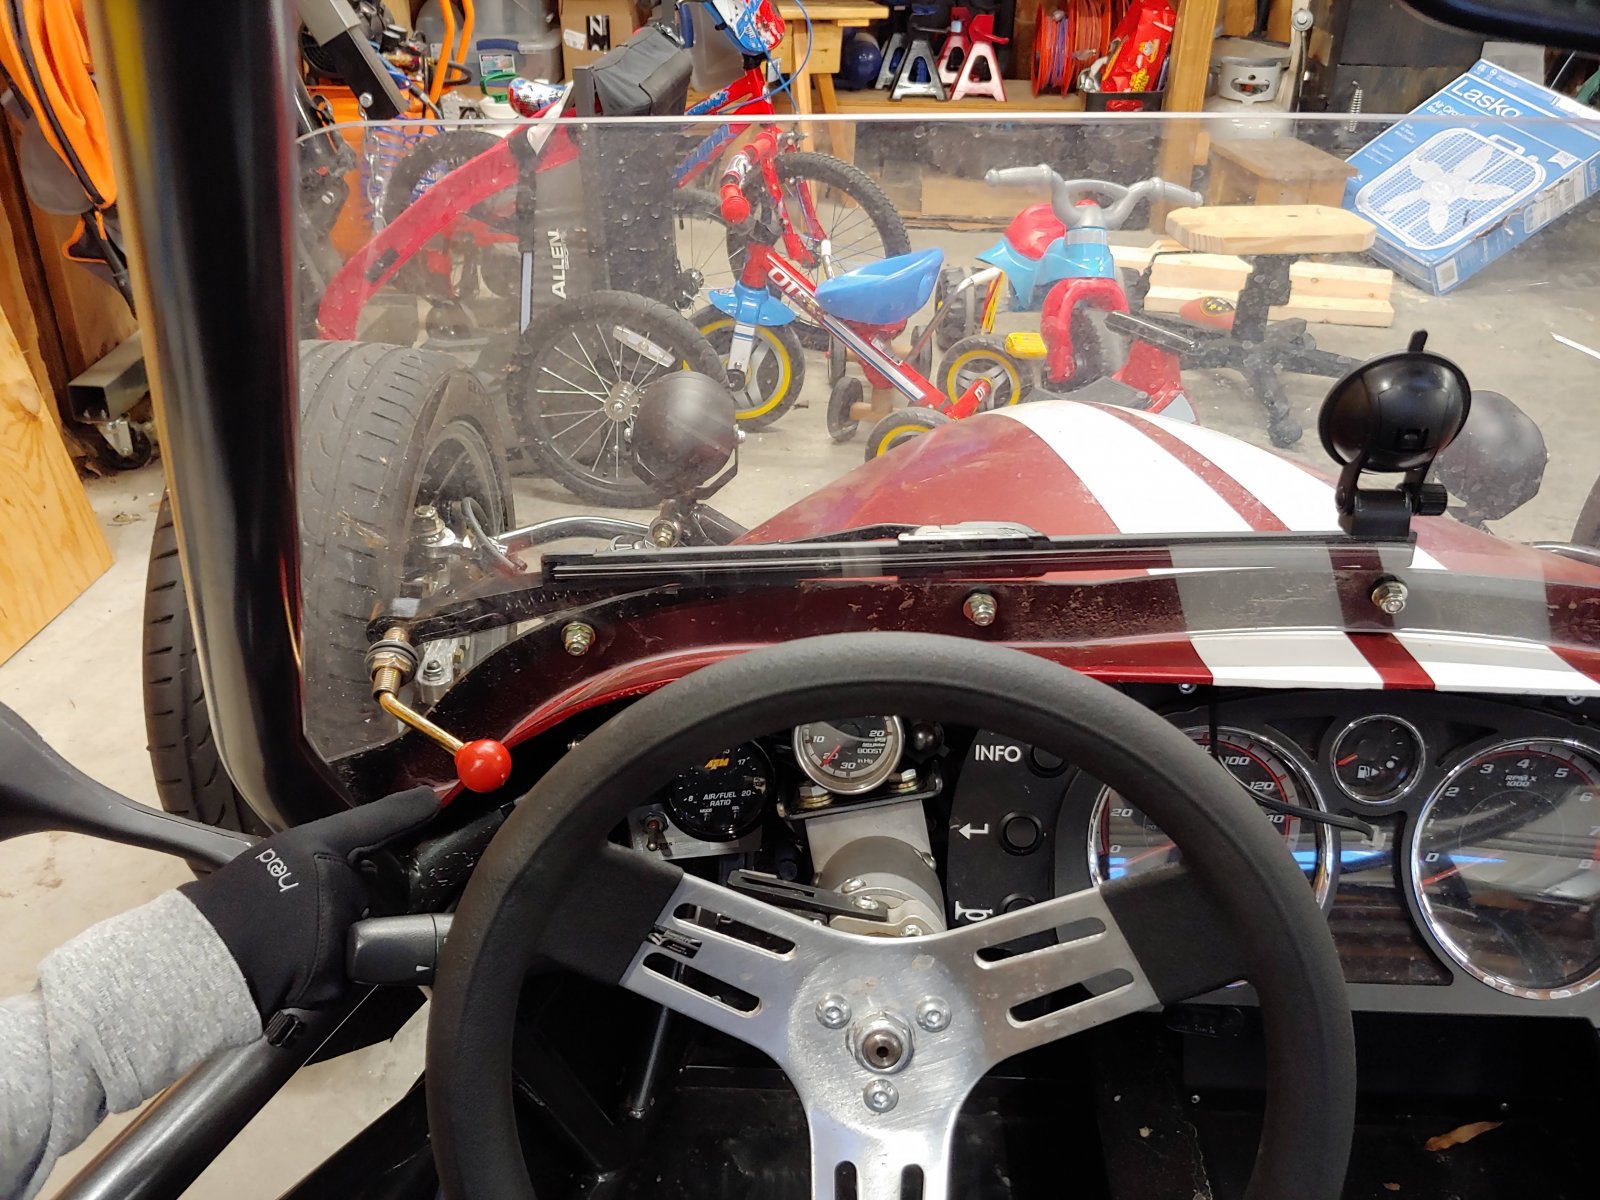
I finally gave in and decided to just install a wiper blade on the windshield. This should mean that every portion of the car is street legal in NC (if they ever want to finish my title). I had been planning on removing the windshield during yearly inspections but found a cheap manual wiper option from UTVs: https://www.amazon.com/Xislet-Operated-Windshield-Kawasaki-Instruction/dp/B07C1BZTVJ. I don't know if it's going to chatter while driving, if so then I'll just have the wiper on when needed but it has a strong enough spring it seems like it won't.
In NC you don't have to have a wiper, if you don't have a windshield but if an officer sees our partial wind deflector and calls it a windshield then it's required. The good thing is the requirements to be a 'wiper' are pretty relaxed. I talked with a neighbor who is a local Toyota dealer mechanic and he said it could be a stick and it would pass when he does an inspection. Granted he came from NY and inspections there have to catch more rust issues and are in general far more stringent than in NC. Other Goblins have dealt with how stringent the NY process is.
Disregard the dirty windshield, I just haven't gotten around to cleaning it recently. Because I mounted it low and beside the windshield bracket, it really isn't too noticeable. Yes, if I rotate the thing it will go off the plastic, I don't think that's an issue since I expect it to never be used. When I drove back from the mountains through light-heavy rain on the interstate I wouldn't have used it anyways. I have the plastic version of Rain-X on my windshield: https://www.amazon.com/Rain-X-620036-Plastic-Treatment-fl/dp/B00T9LR2BQ.

For reference, from the NC inspection guidelines:
19A NCAC 03D .0536 WINDSHIELD WIPER Windshield wipers shall not be approved if:
(1) The vehicle is not equipped with a windshield wiper or wipers, provided the vehicle has a windshield.
(2) The wiper or wipers do not operate freely.
(3) The wiper controls are not so constructed and located that the driver may operate them.
(4) The wiper or wipers are not adequate to clean rain, snow and other matter from the windshield.
(5) Parts of blades or arms are missing or show evidence of damage.
In NC you don't have to have a wiper, if you don't have a windshield but if an officer sees our partial wind deflector and calls it a windshield then it's required. The good thing is the requirements to be a 'wiper' are pretty relaxed. I talked with a neighbor who is a local Toyota dealer mechanic and he said it could be a stick and it would pass when he does an inspection. Granted he came from NY and inspections there have to catch more rust issues and are in general far more stringent than in NC. Other Goblins have dealt with how stringent the NY process is.
Disregard the dirty windshield, I just haven't gotten around to cleaning it recently. Because I mounted it low and beside the windshield bracket, it really isn't too noticeable. Yes, if I rotate the thing it will go off the plastic, I don't think that's an issue since I expect it to never be used. When I drove back from the mountains through light-heavy rain on the interstate I wouldn't have used it anyways. I have the plastic version of Rain-X on my windshield: https://www.amazon.com/Rain-X-620036-Plastic-Treatment-fl/dp/B00T9LR2BQ.
For reference, from the NC inspection guidelines:
19A NCAC 03D .0536 WINDSHIELD WIPER Windshield wipers shall not be approved if:
(1) The vehicle is not equipped with a windshield wiper or wipers, provided the vehicle has a windshield.
(2) The wiper or wipers do not operate freely.
(3) The wiper controls are not so constructed and located that the driver may operate them.
(4) The wiper or wipers are not adequate to clean rain, snow and other matter from the windshield.
(5) Parts of blades or arms are missing or show evidence of damage.
baustin
Well-Known Member
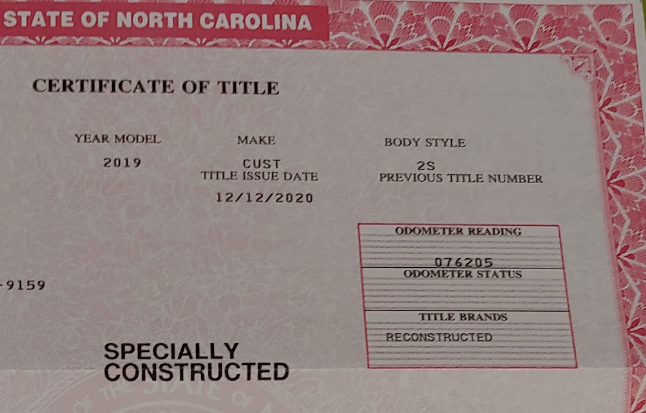
Finally! I just received my North Carolina title in the mail today! Paperwork submitted 1/9/2020... title issued 12/12/2020. Everything looks correct on the title itself, that was the last piece to check.
I actually went to have my yearly inspection completed this past week on the 15th, I noticed that for the first time the NC DMV website referenced the NCSxxxxxxx vin they added to the frame instead of the DFGB0157. I figured this meant that someone touched my paperwork finally, I guess I was right. Inspection was no problem at all, no emission issues even though I'm in a county that normally requires them; since it's a 'specially constructed' it sounded like it automatically was in the computer system as emissions test not required (correct and what I hoped for but wasn't quite sure especially since I didn't have any notice the title had been finished).
Finally, I can consider my build complete! Registered and title received!
Edit: The make saying 'cust' is just how the state entered things, the license and theft initial paperwork typed out DF Kit Car Goblin like I asked but the DMV doesn't use that for kit car builds I guess. I think it's just so it shows it's not a manufacturer built car.
Last edited:
baustin
Well-Known Member
When it gets warm enough I have a couple things to install/change:
I had a small drip spot on my garage floor, I looked into it and had a puddle on the top of the gas tank, directly below the supercharger coolant fill neck. Both hoses were still clamped in place to the fill neck, I could feel a couple drips on the hose end on the driver side of the fill neck. The color and location of the drips all matched coolant, the level of the supercharger coolant was slightly down. I cleaned the drips, refilled the fill neck (to the fill line +1/2" I know there's an overflow tube), and went for a drive. I haven't had any coolant drip out since then and nothing seemed loose. I attribute these random drips to GM plastics and yet we haven't had temps below 20F this winter.
- solid transmission mounts for front and rear
- I currently have the stock ones front and rear and have the DF solid mounts painted and on my workbench
- replace the hex head bolts mounting the tow mount bracket with socket cap screws from DF
- this will make alignment adjustments much easier since the hex head bolt can't take a socket or wrench correctly due to the clearance
- I'll need a new sae allen socket set to install these, I only have metric in the 3/8" bit size range
- install the fancy replacement aftermarket solid shifter that SACTX has been working on (no rush on receiving it, it won't be warm enough to want this change for a while)
- I'll probably try to add a ram ball mount on the back area of the shifter to use with my phone, I've been using the suction cup ram mount on the tunnel cover but it gets loose every 1-2 months since the diameter is just larger than the tunnel cover width. I would either use a medium or long arm to then position the phone far enough from the shifter to avoid interference. Will have to test this idea once the shifter is in hand.
I had a small drip spot on my garage floor, I looked into it and had a puddle on the top of the gas tank, directly below the supercharger coolant fill neck. Both hoses were still clamped in place to the fill neck, I could feel a couple drips on the hose end on the driver side of the fill neck. The color and location of the drips all matched coolant, the level of the supercharger coolant was slightly down. I cleaned the drips, refilled the fill neck (to the fill line +1/2" I know there's an overflow tube), and went for a drive. I haven't had any coolant drip out since then and nothing seemed loose. I attribute these random drips to GM plastics and yet we haven't had temps below 20F this winter.
Ark :D
Goblin Guru
Same thing happened to me this week with my turbo intercooler loop. It hasn't dripped a single drop ever, until this week. I tightened it just a little wee bit tighter, and no drops since. This is the coldest weather we've had since my Goblin was assembled, so it makes sense.
baustin
Well-Known Member
Finally have a couple updates for my build:
There is no play in the engine mounting that could shift it that much, I was jacking the engine high enough the whole car was lifting off the stands so I looked into the dimensions and here's what I found.
A - Stock mount: bolt center distance, subframe to upper transmission point: 83mm
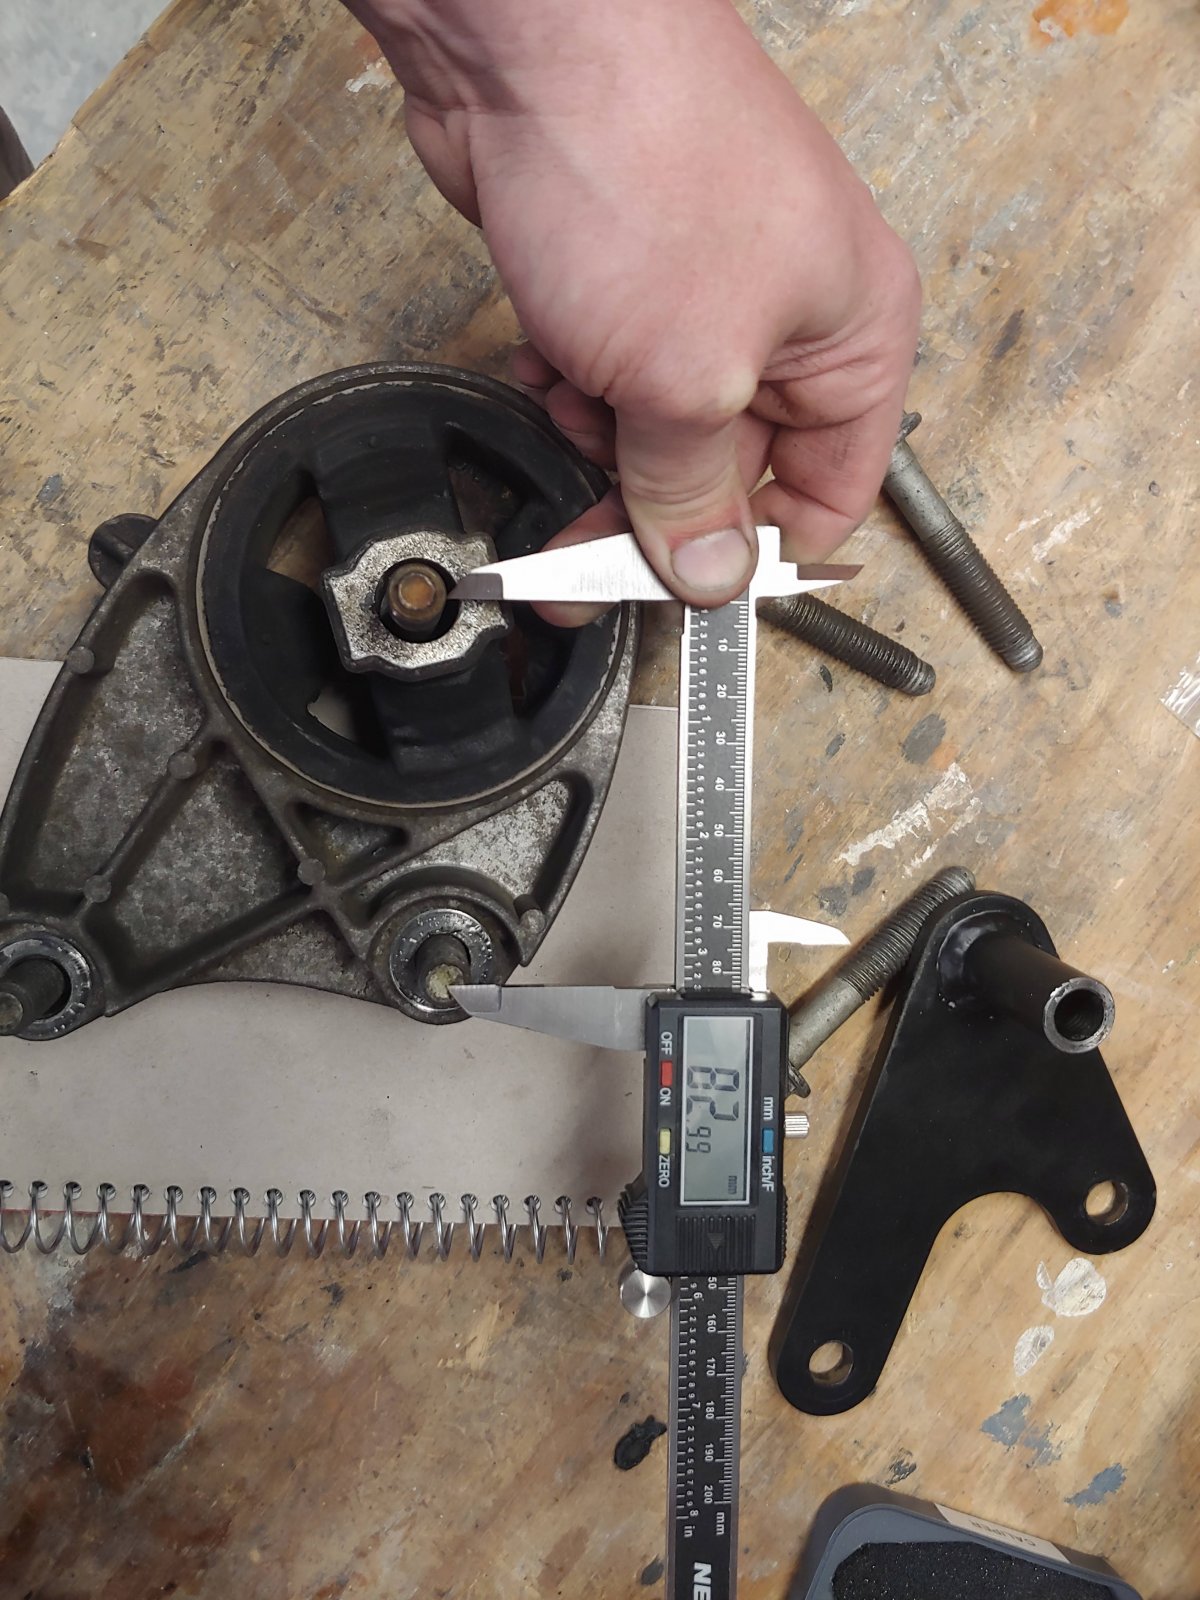
B - Stock mount: bolt center distance, subframe to lower transmission point: 122mm
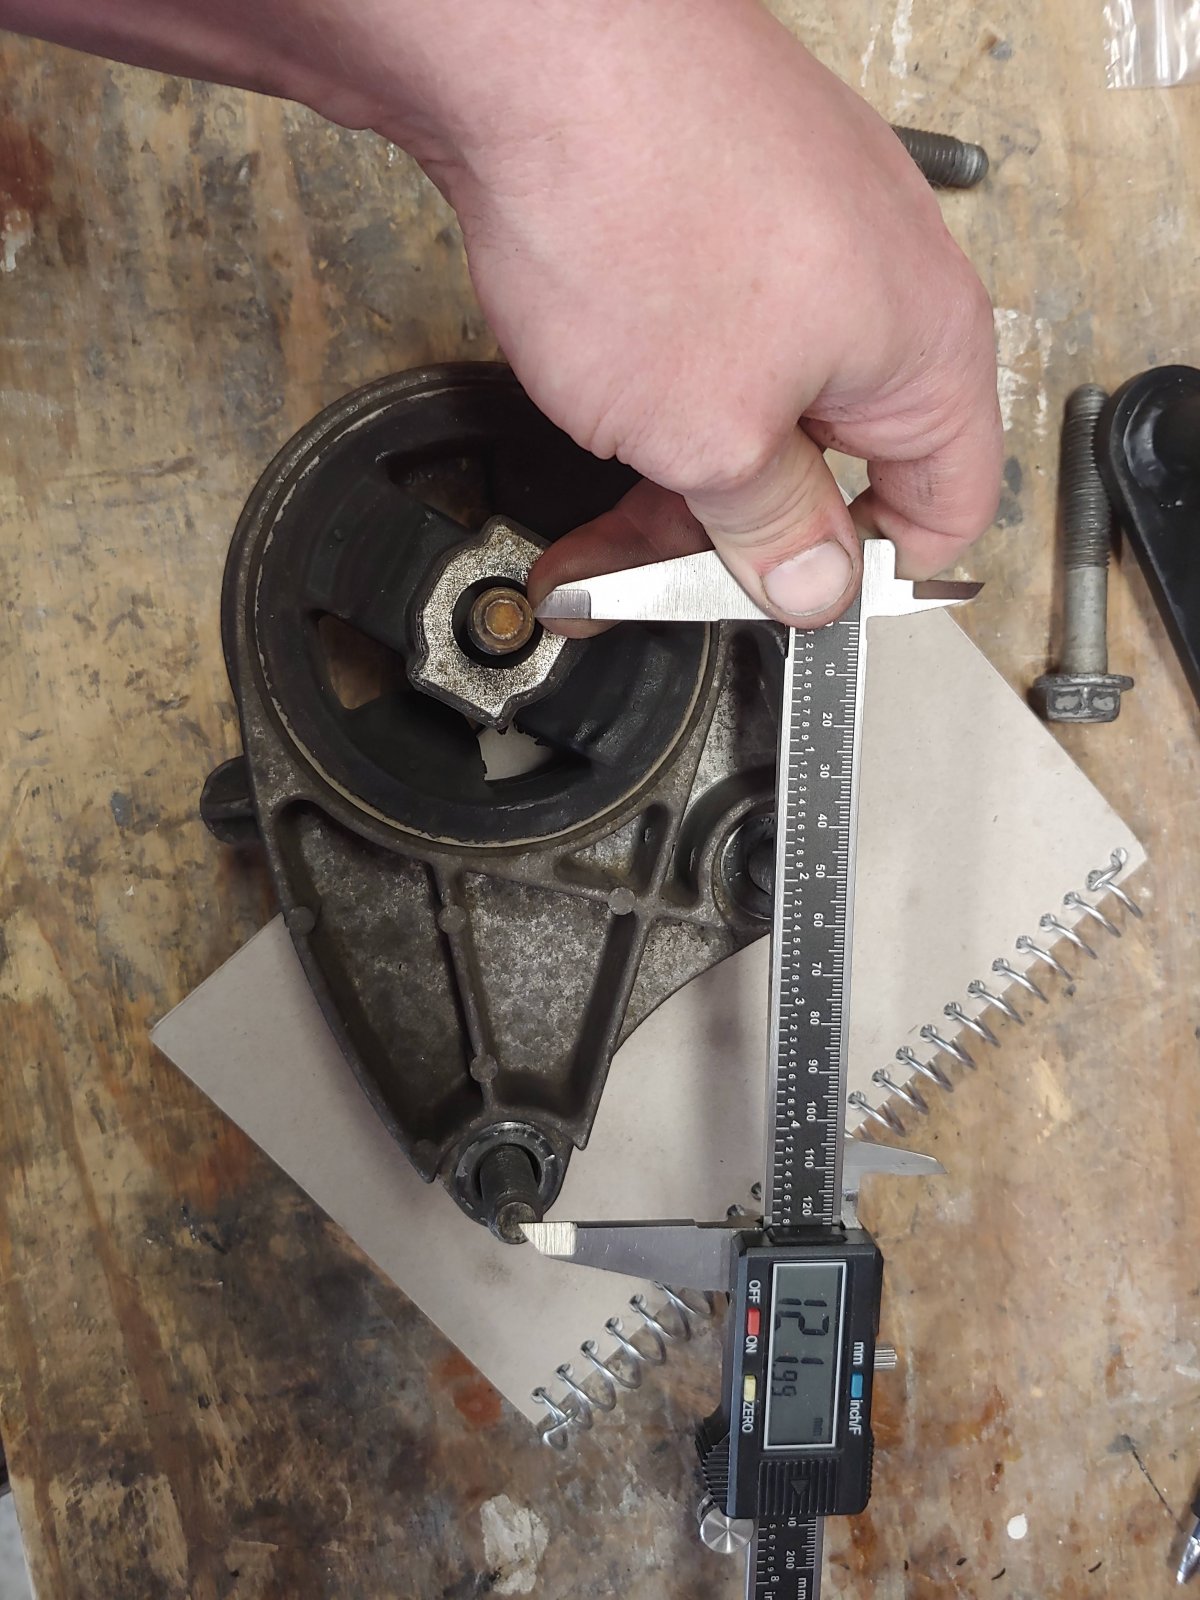
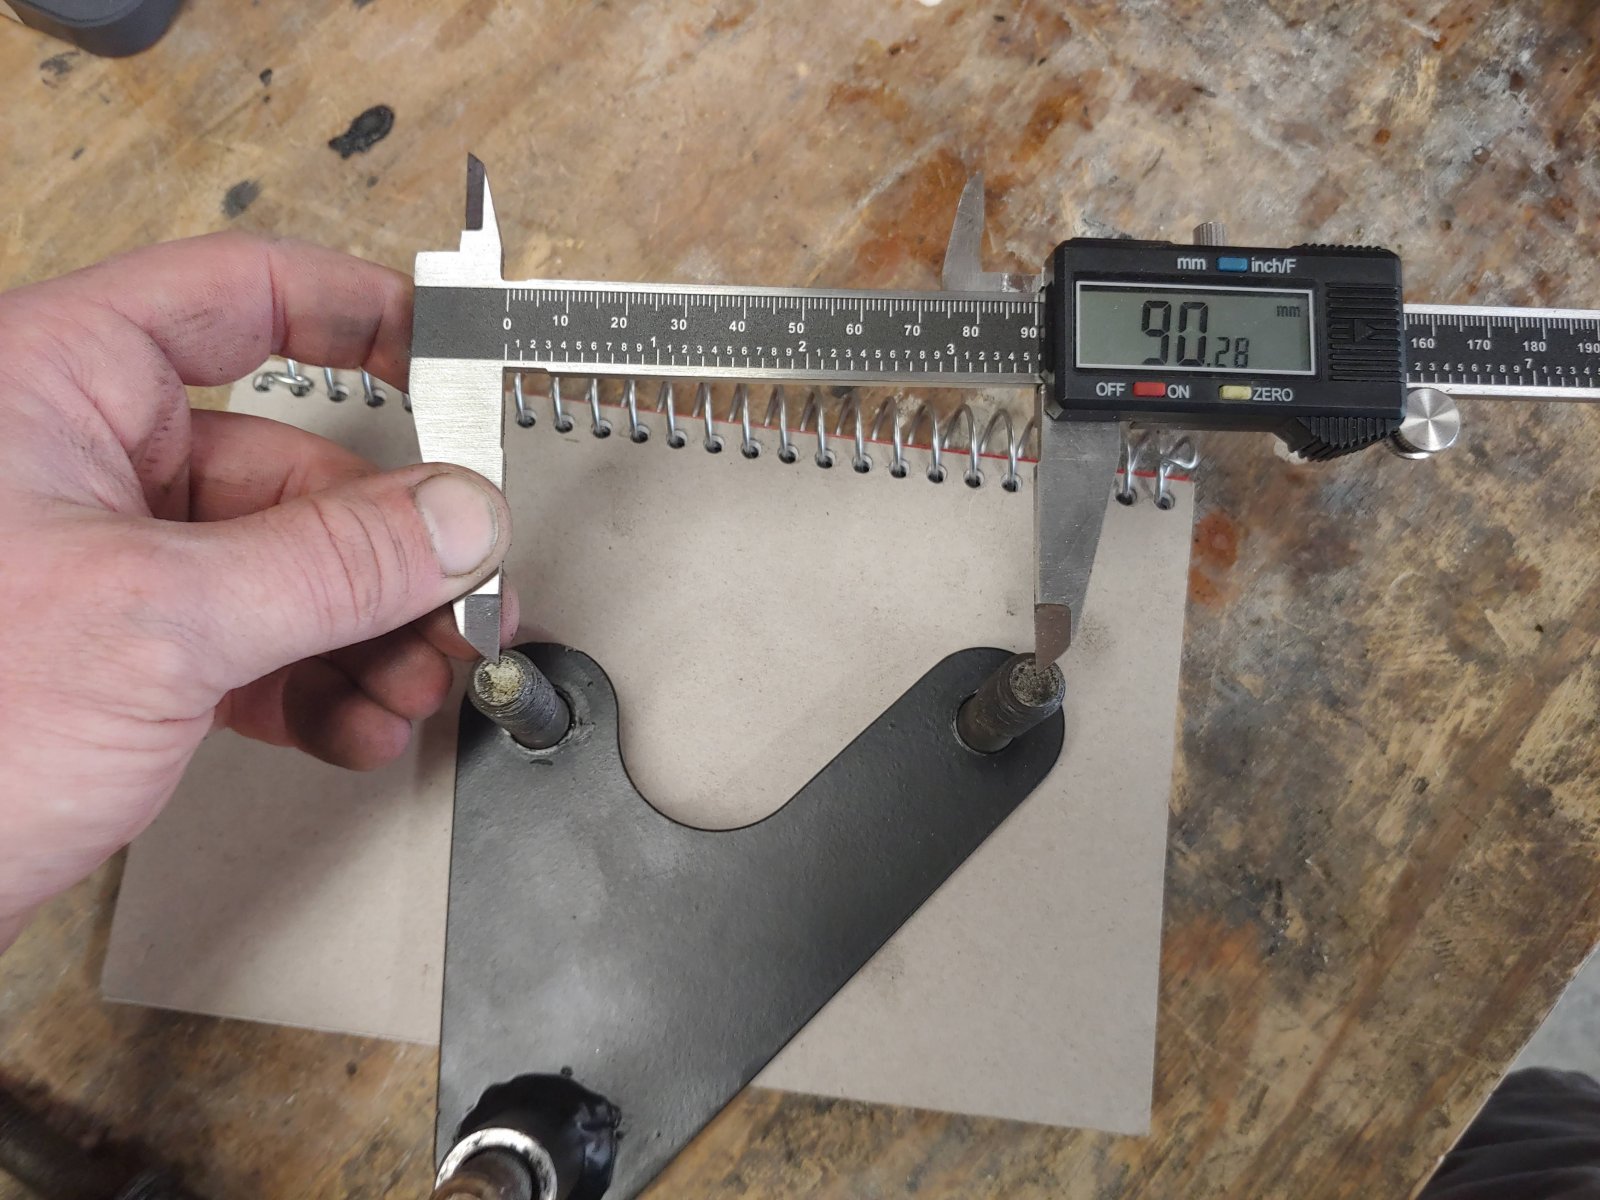
C - Stock mount: bolt center distance, upper transmission point to lower transmission point: 91mm
The stock mount has 3 different diameter bolt holes, upper transmission is a fairly tight fit, lower transmission is a fairly loose fit, subframe is an extremely loose fit.
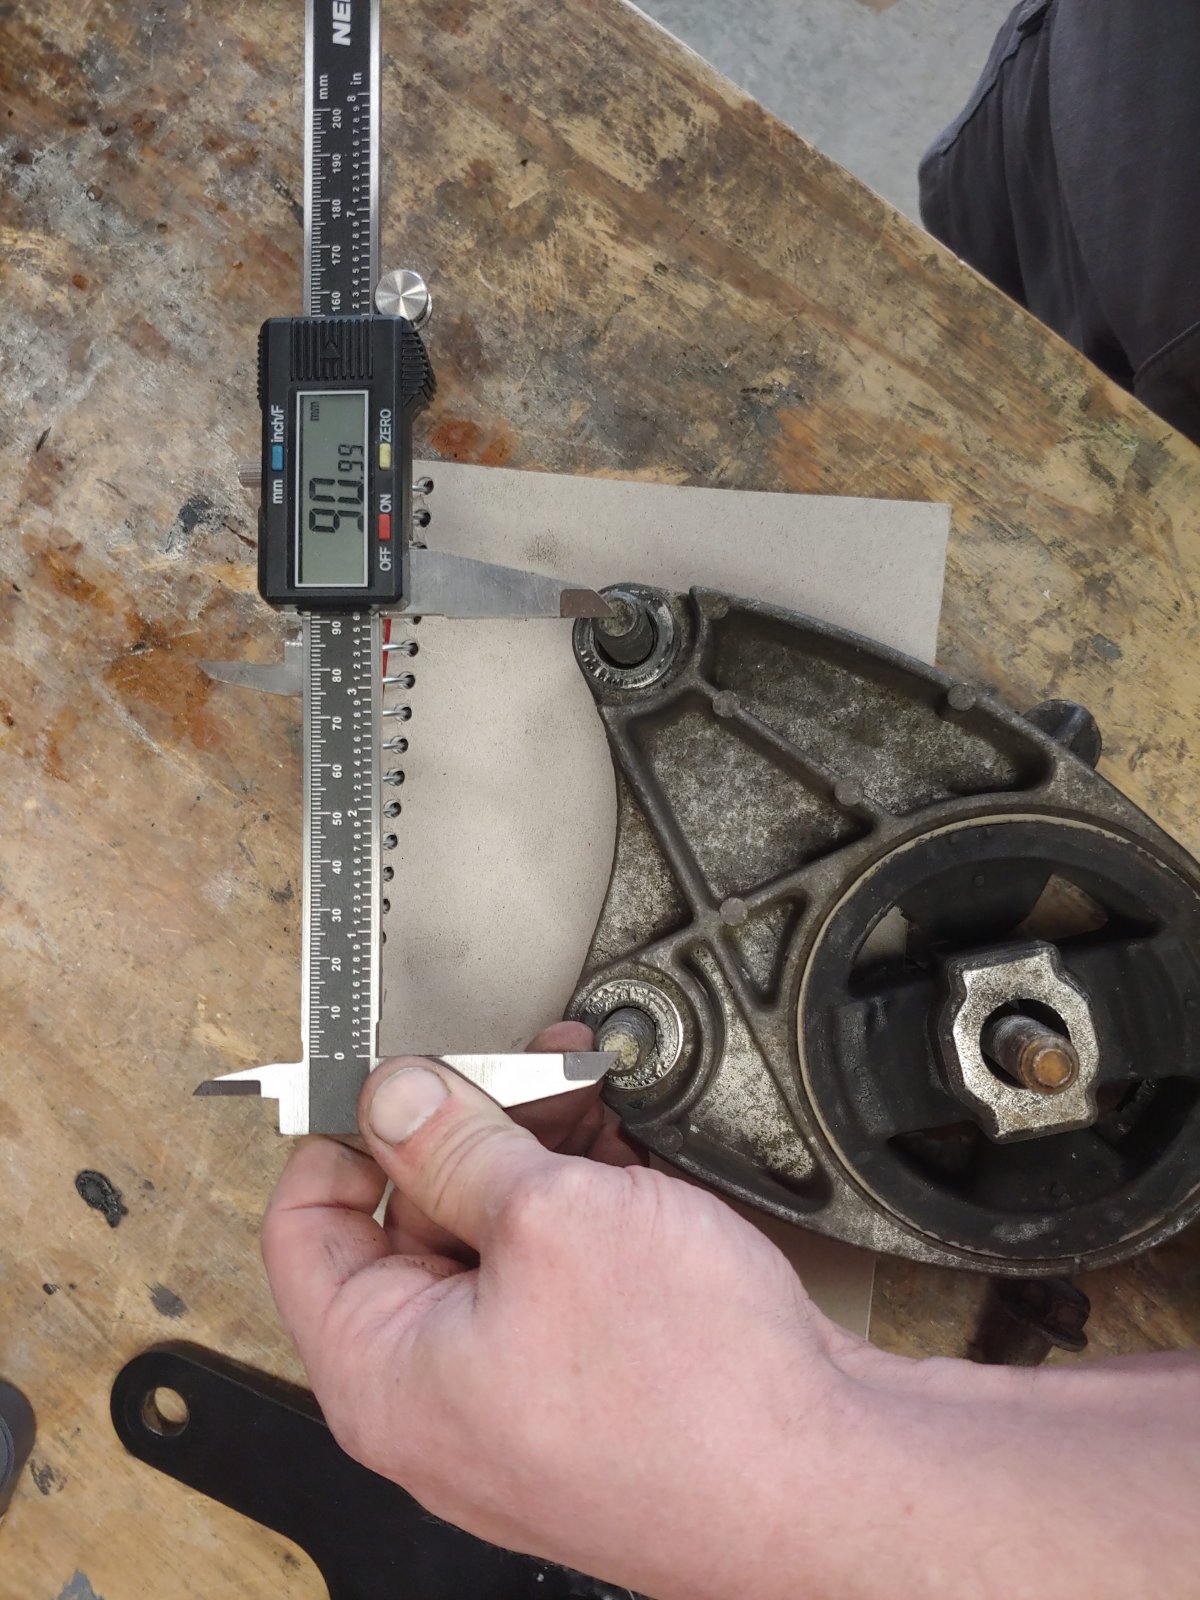
Next I measured the new bracket, same points:
A - New mount: bolt center distance, subframe to upper transmission point: 80mm
B - New mount: bolt center distance, subframe to lower transmission point: 119mm
C - New mount: bolt center distance, upper transmission point to lower transmission point: 90.3mm
The length deltas (stock - new):
A: 3mm
B: 3mm
C: .75mm
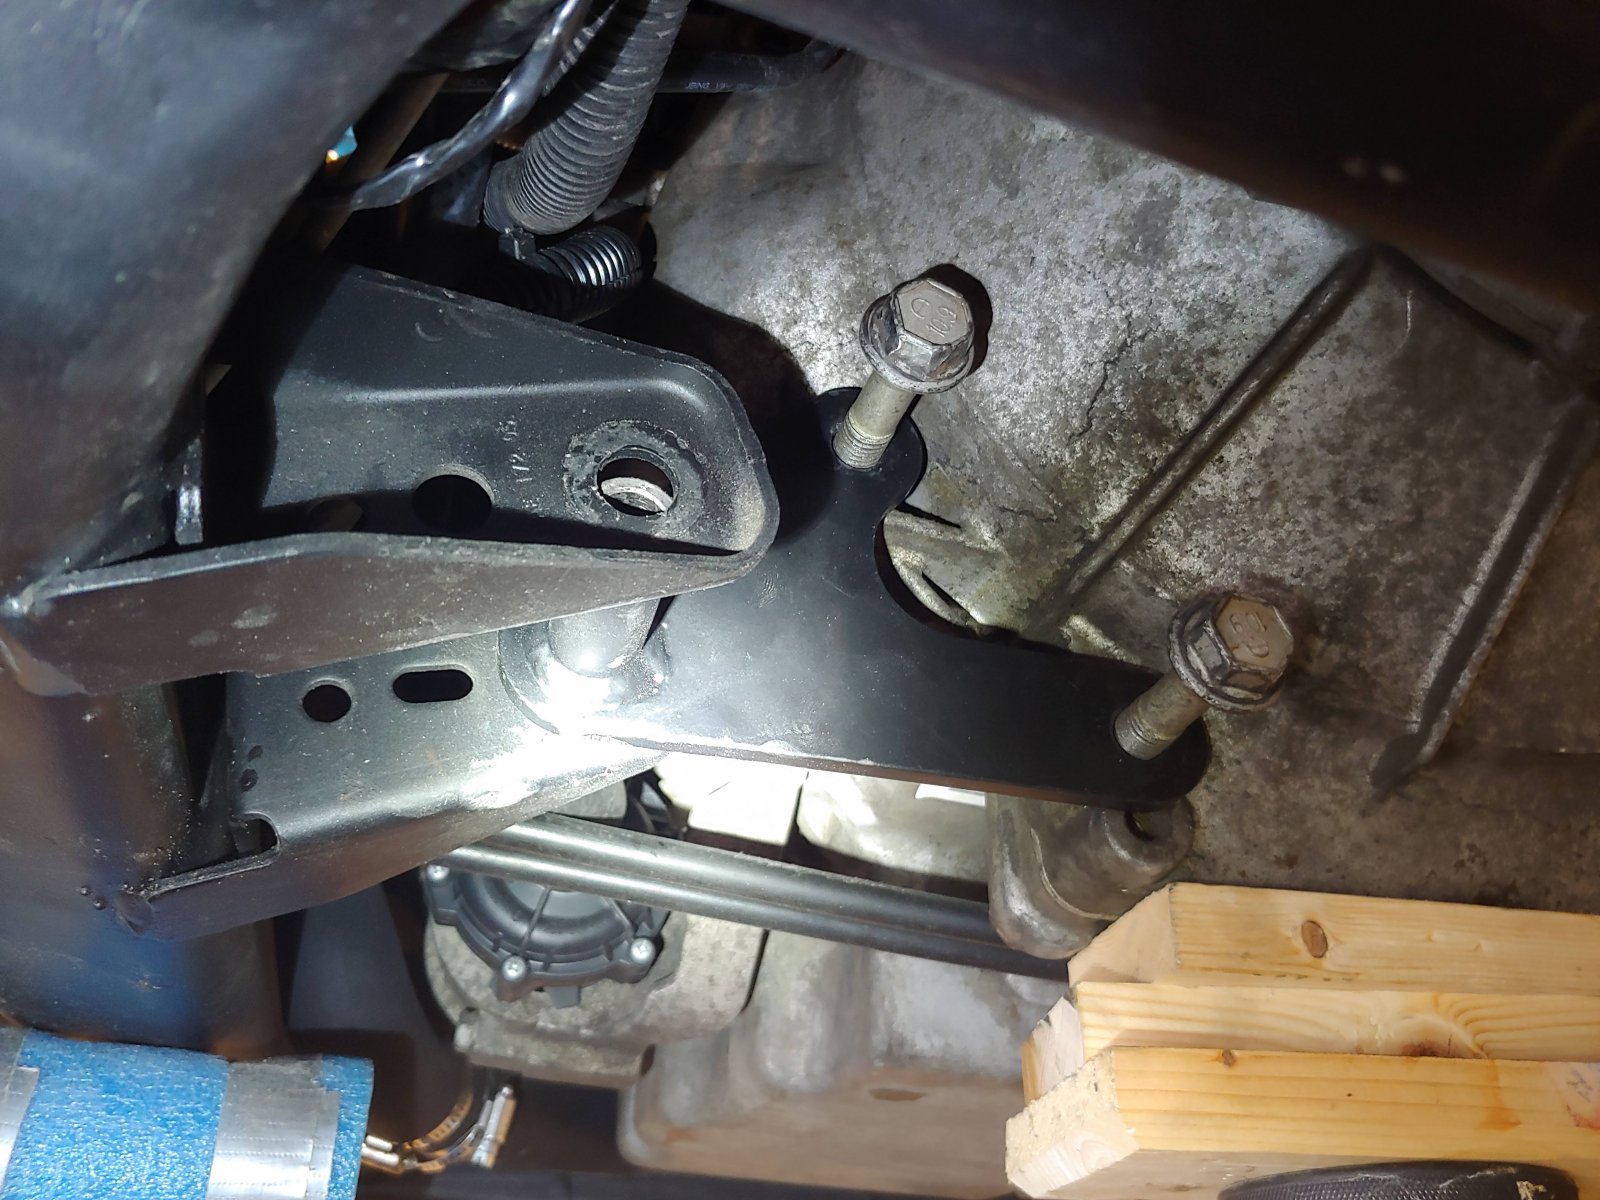
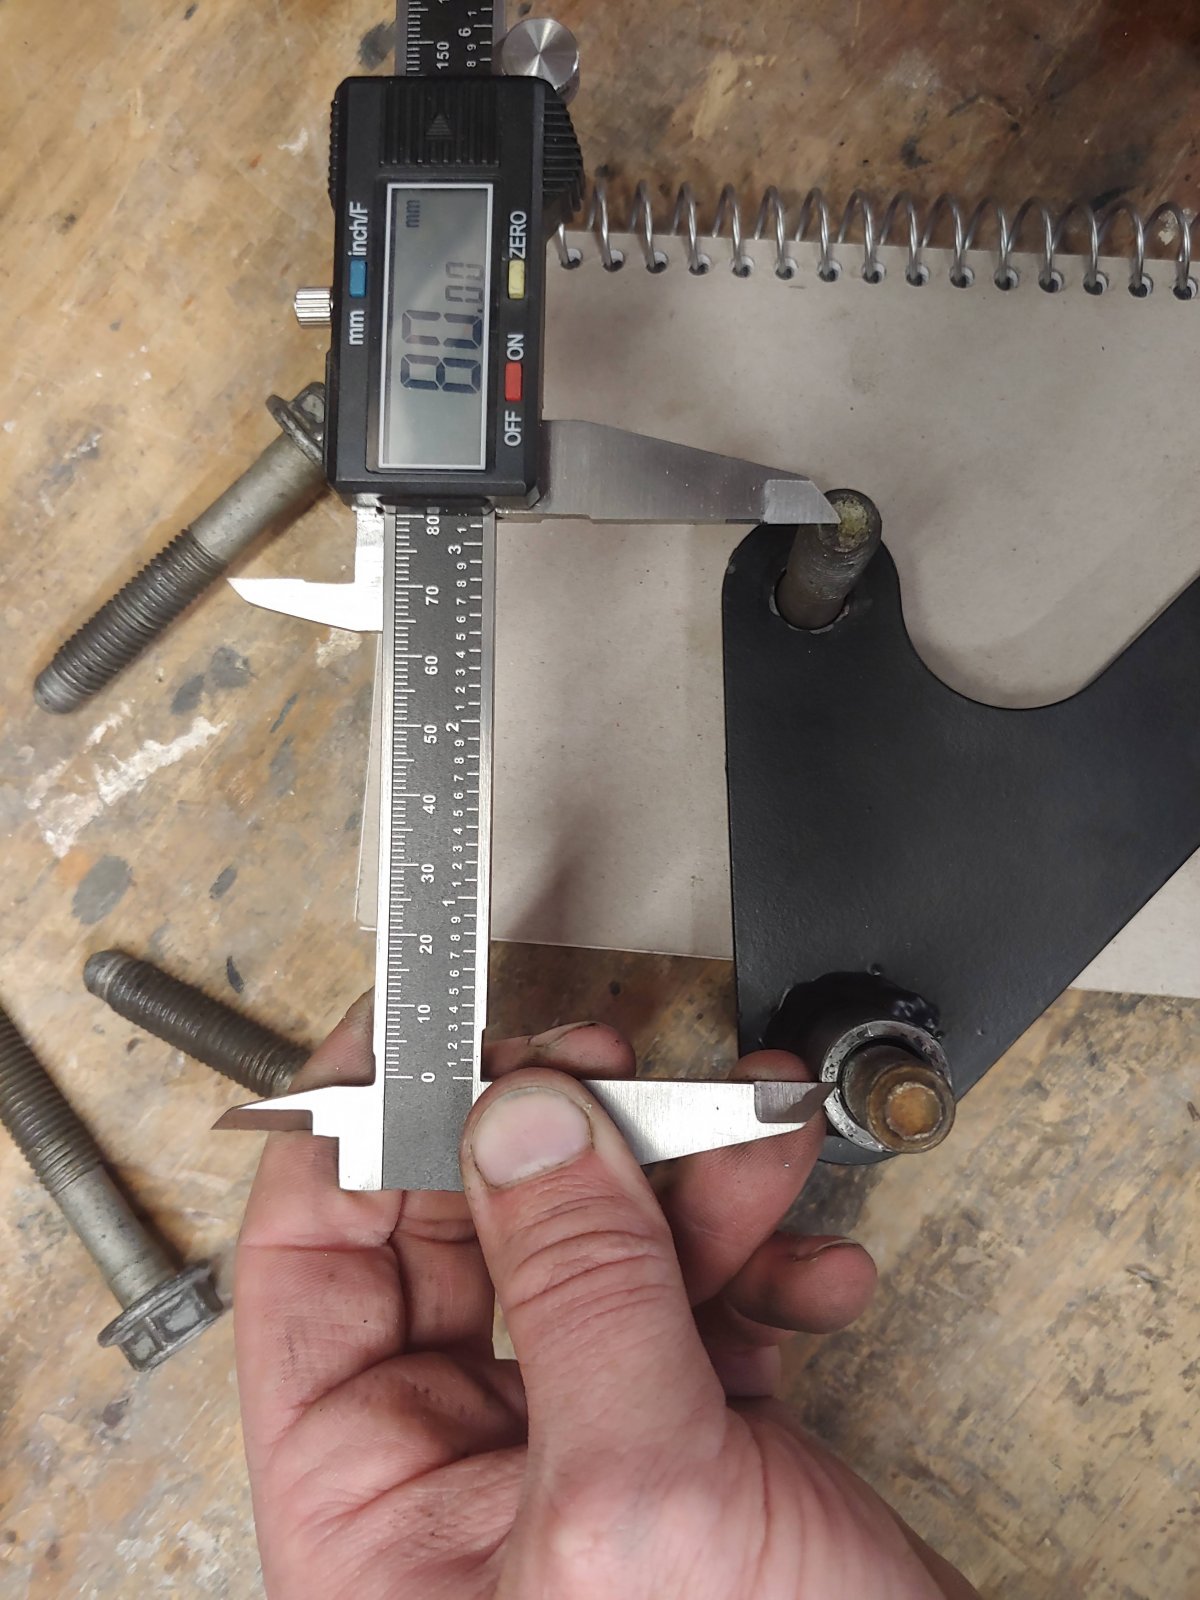
Given how the new transmission mount is designed, there's no way to move the subframe bolt point and I don't want to touch bending the subframe mounts to move them to match. I could insert bolts in only 2 places max, either sets for B or C dimensions above, but the C set of holes didn't give a solution. The good thing is using bolt holes for B meant that I could adjust the upper transmission point hole, check out the misalignment I had to fix here:
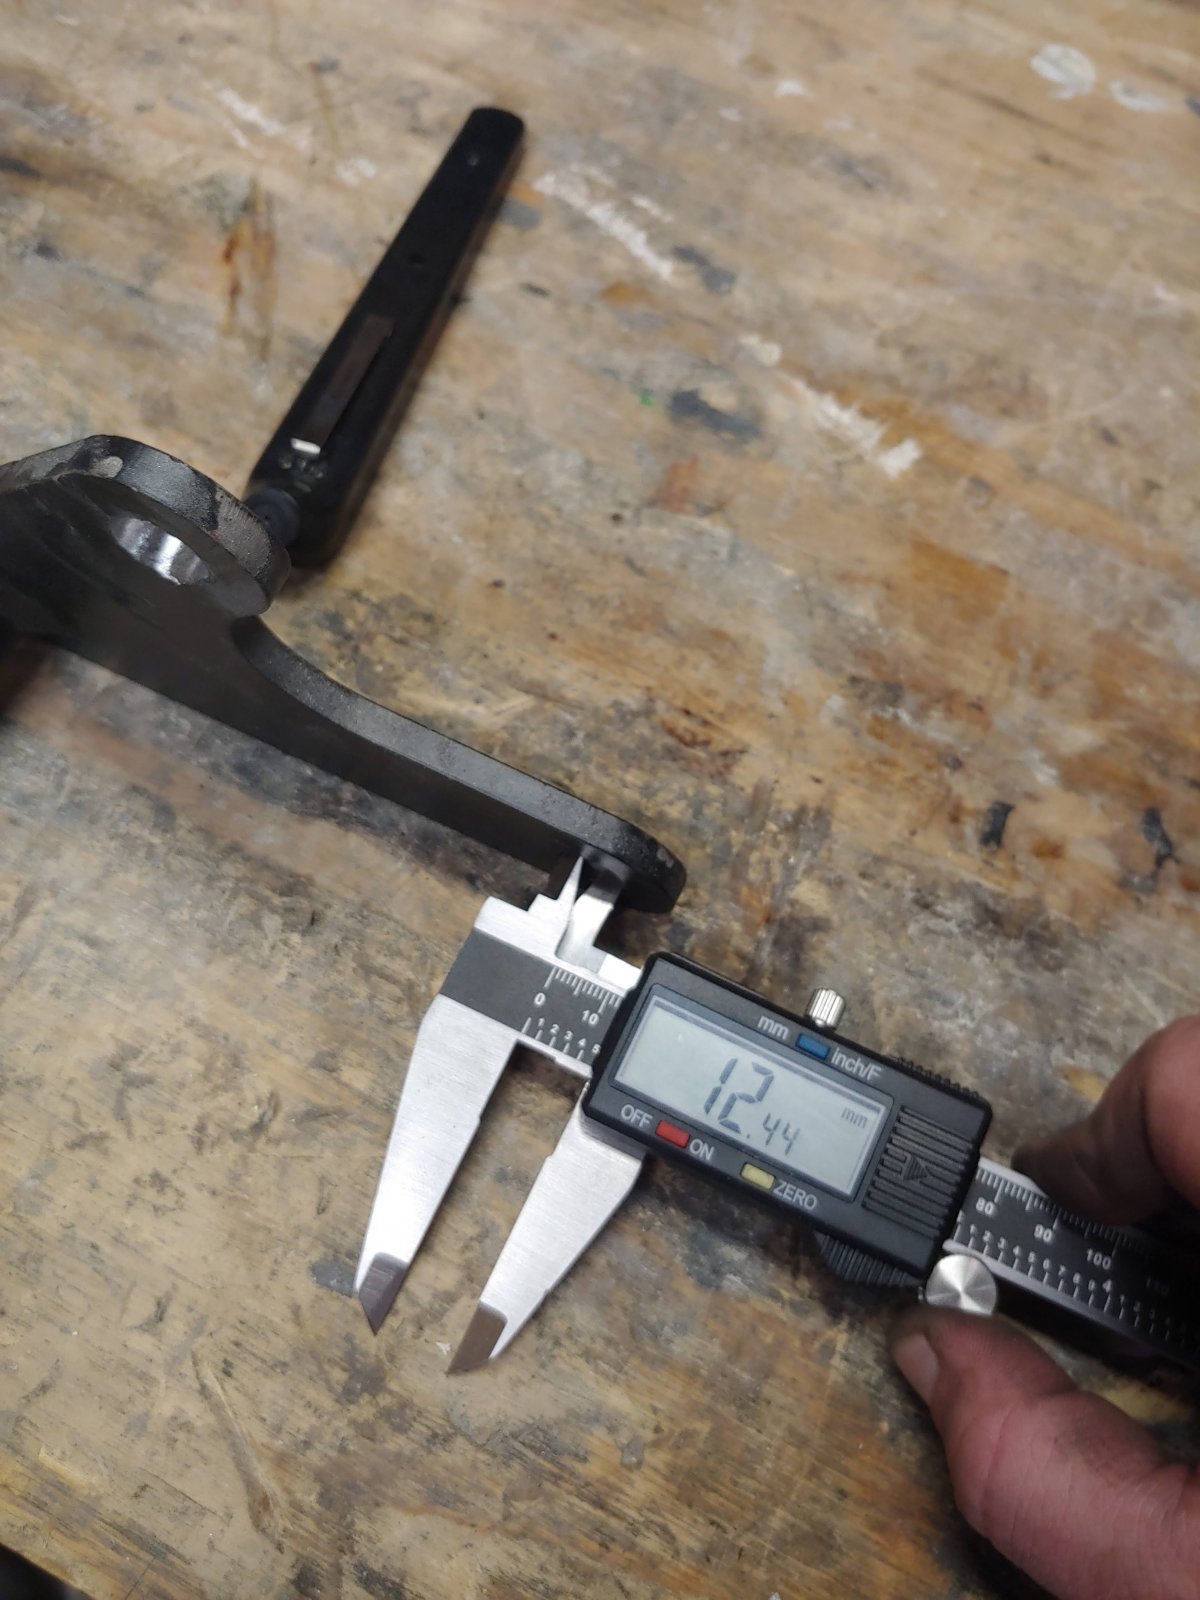
I know it's always better to have all bolt holes be tight fit, but the solution I used is to slot out the upper bracket hole. I see no strength issues with this fix. Holes were originally around 12.5mm, I'm guessing 1/2" punch or laser size before I painted.
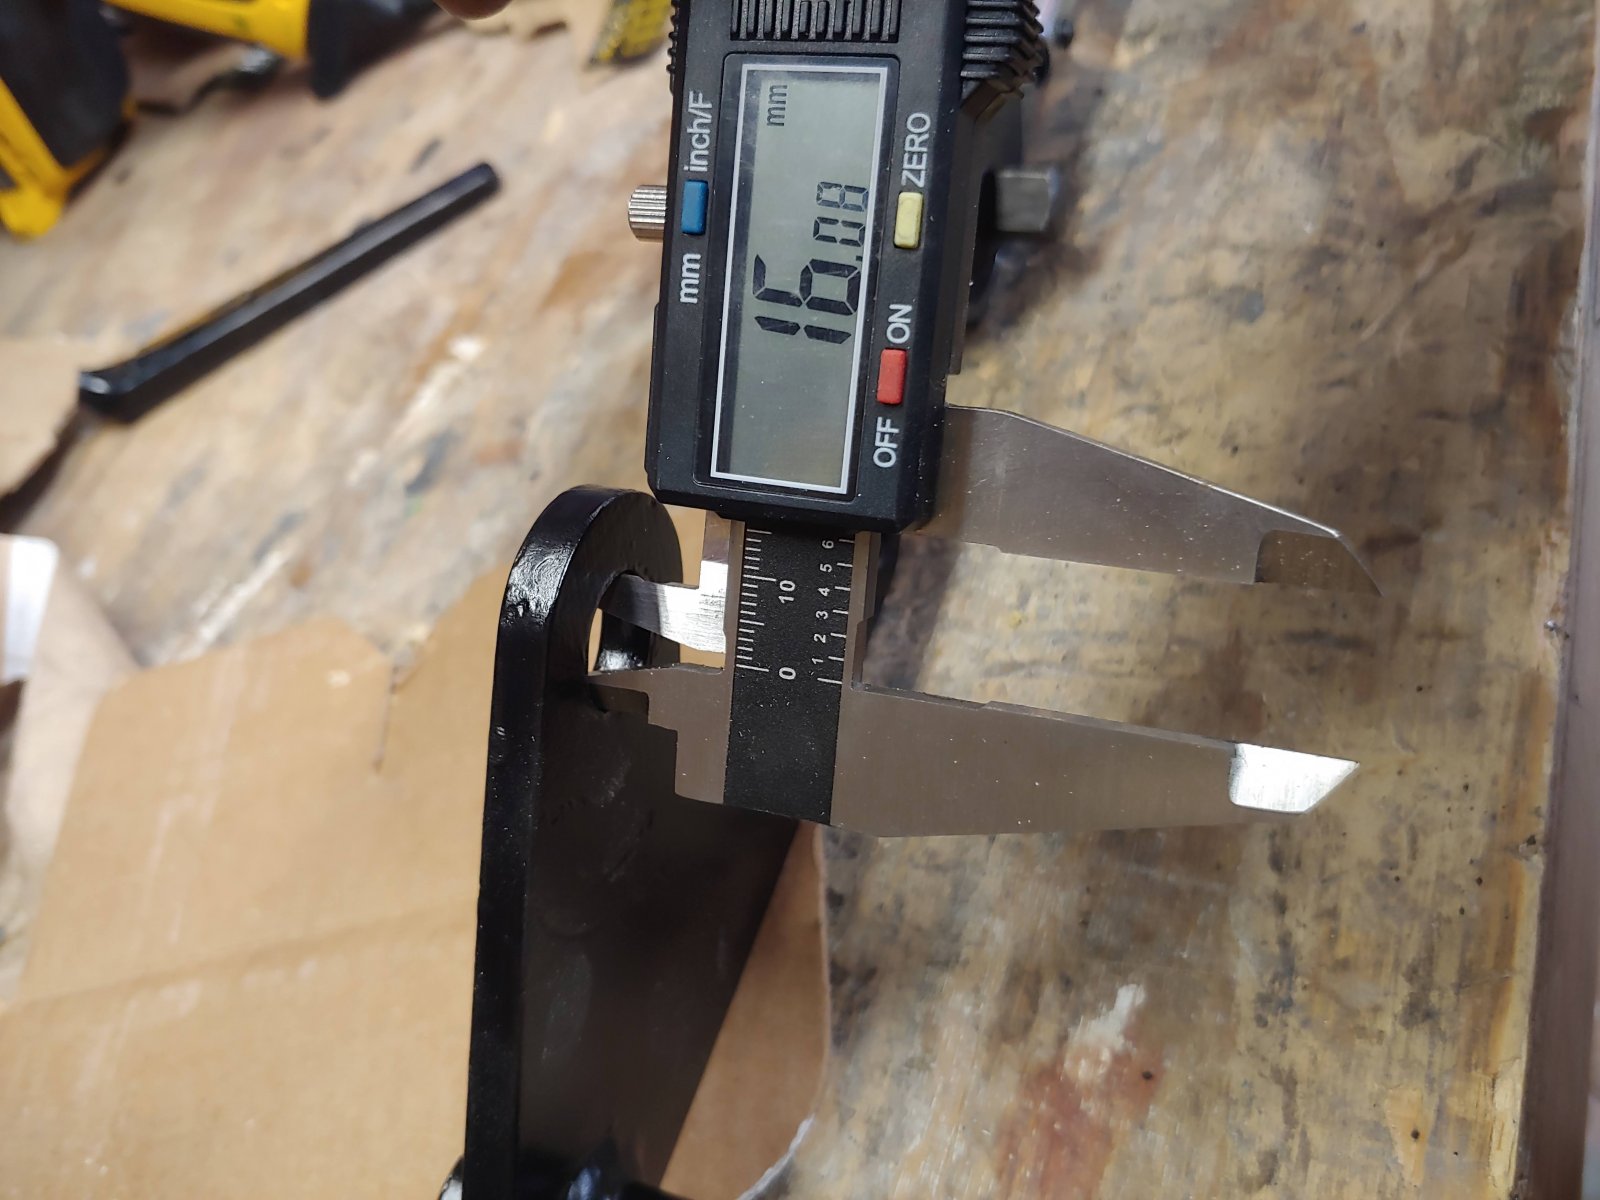
I slotted the top hole with a dremel to keep the same minor diameter but add a ~16mm major diameter to get opening to overlap the bolt hole on the transmission seen above.
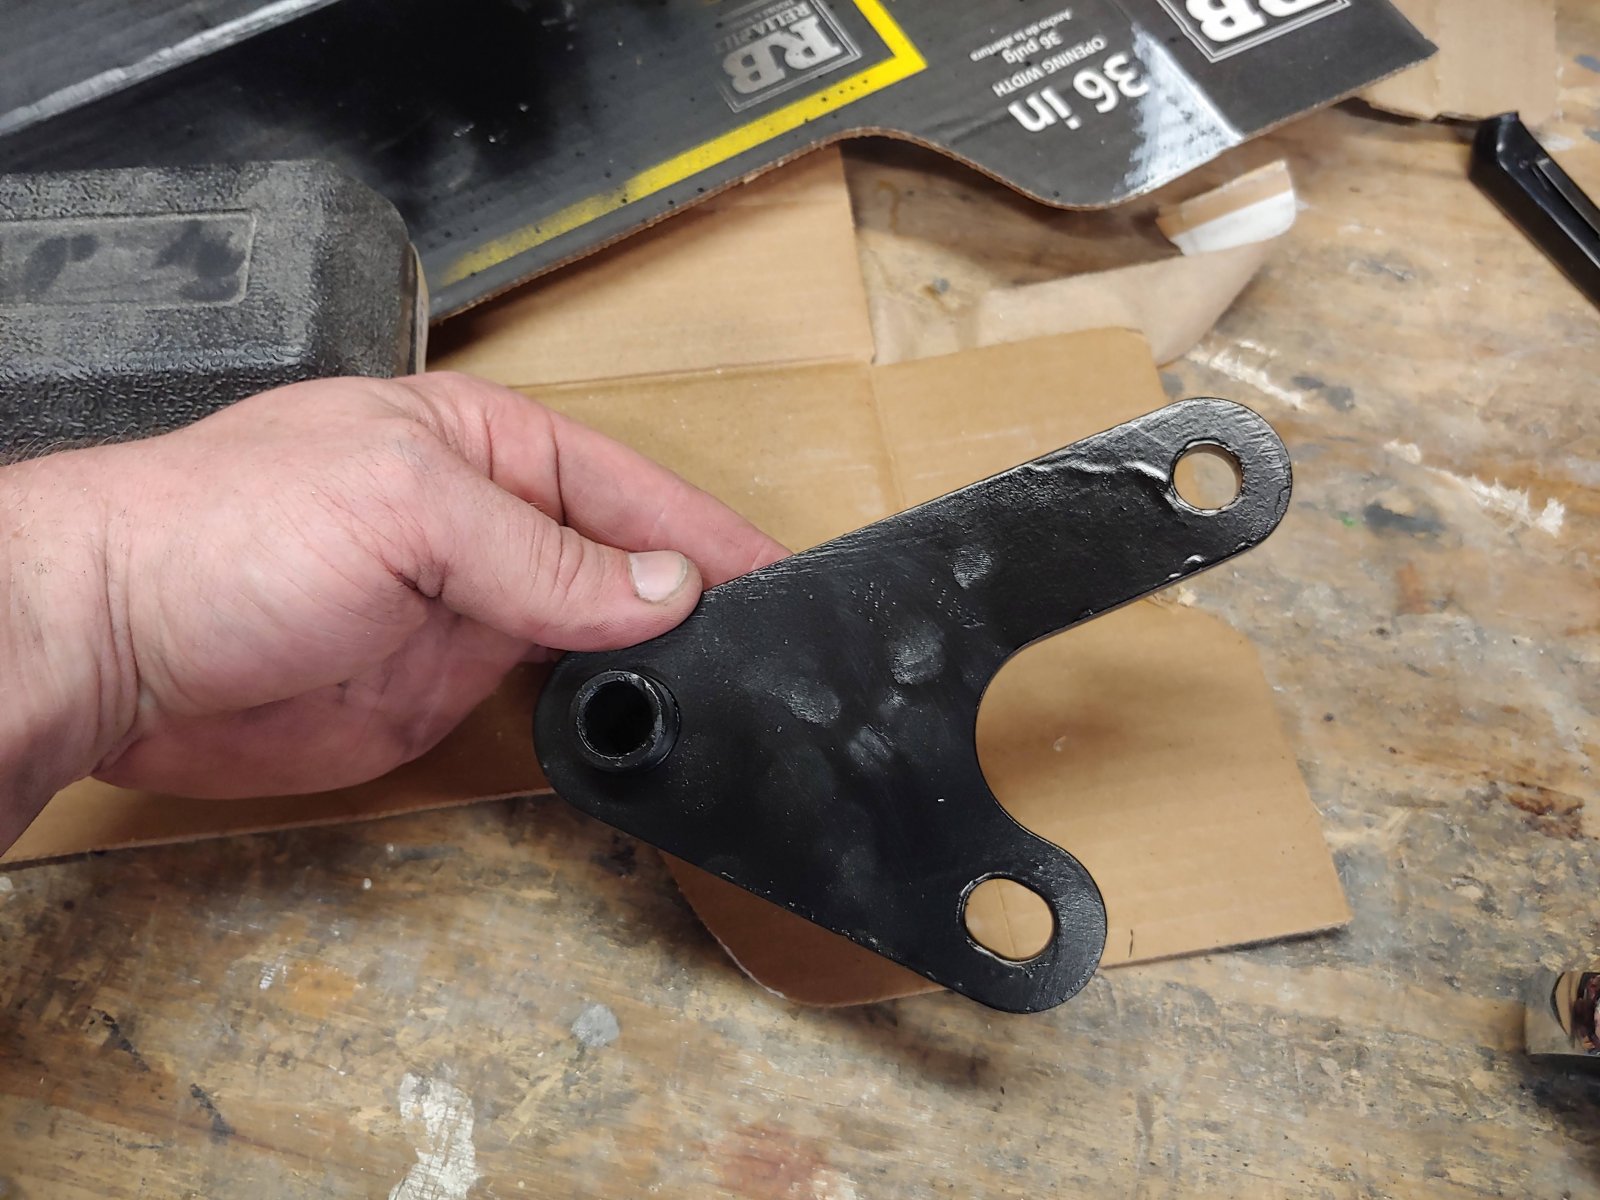
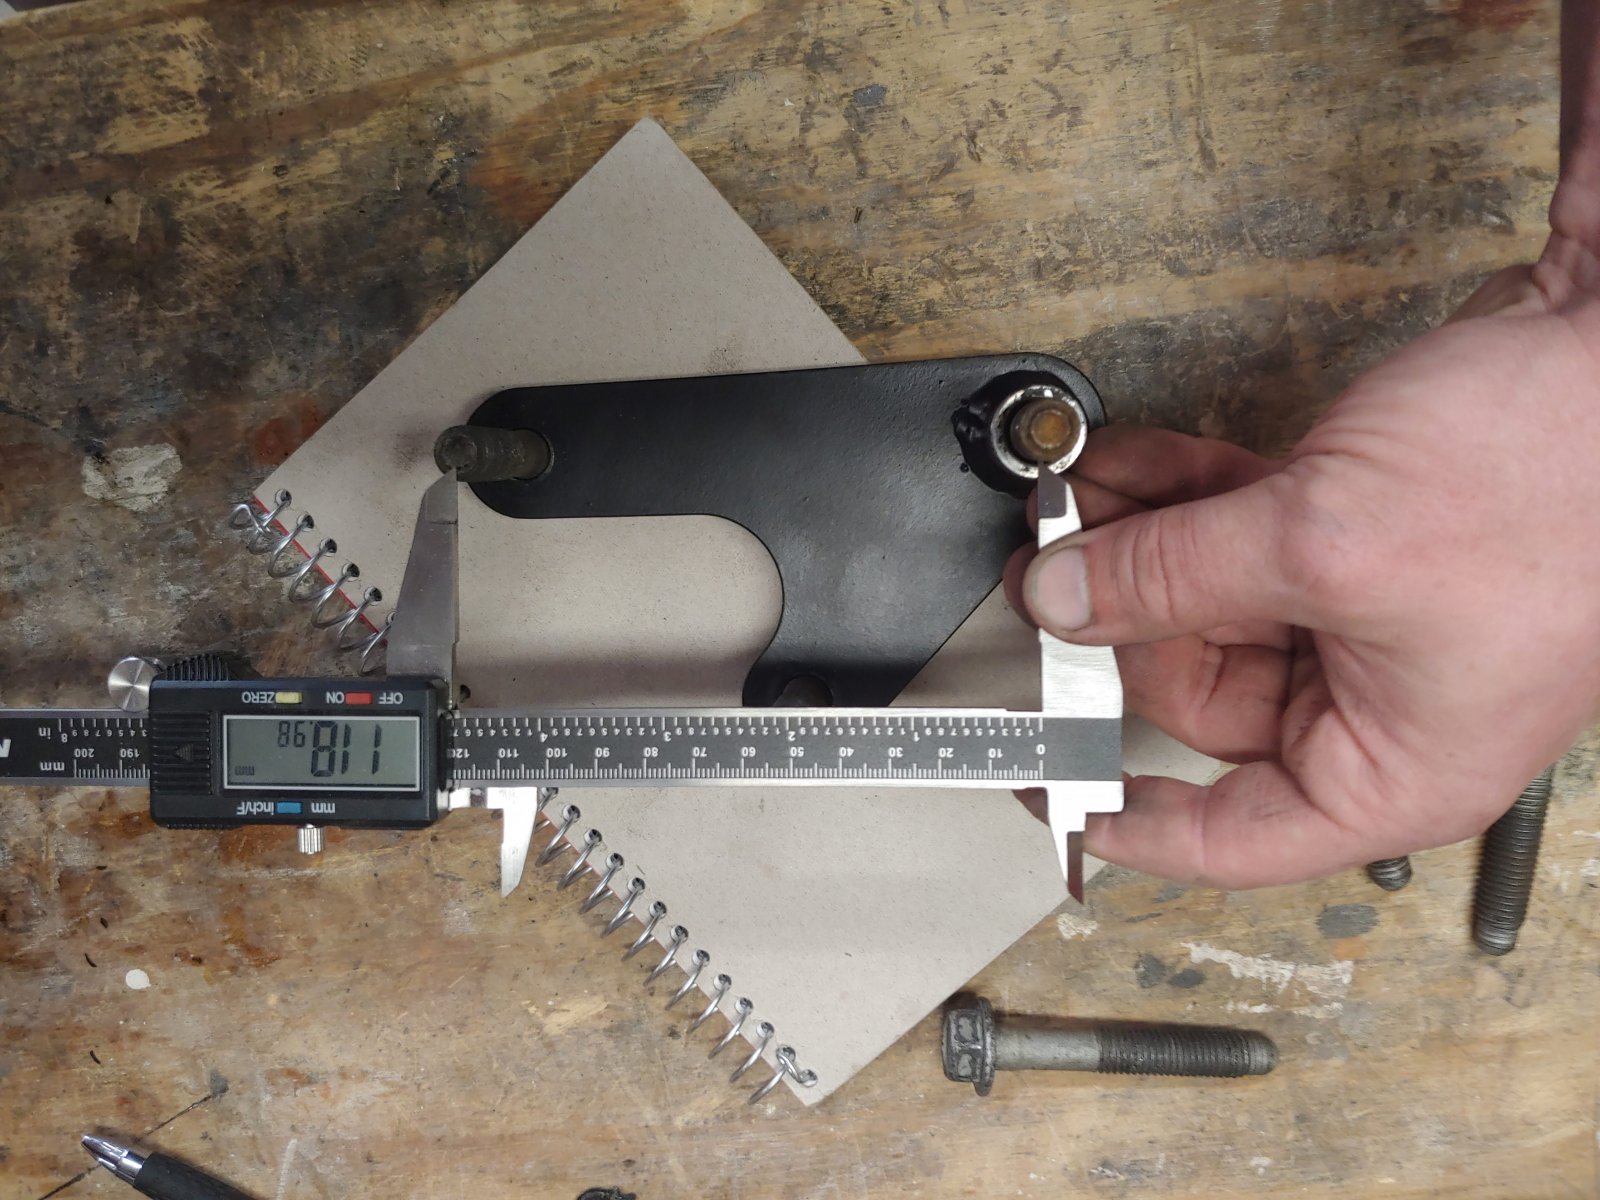
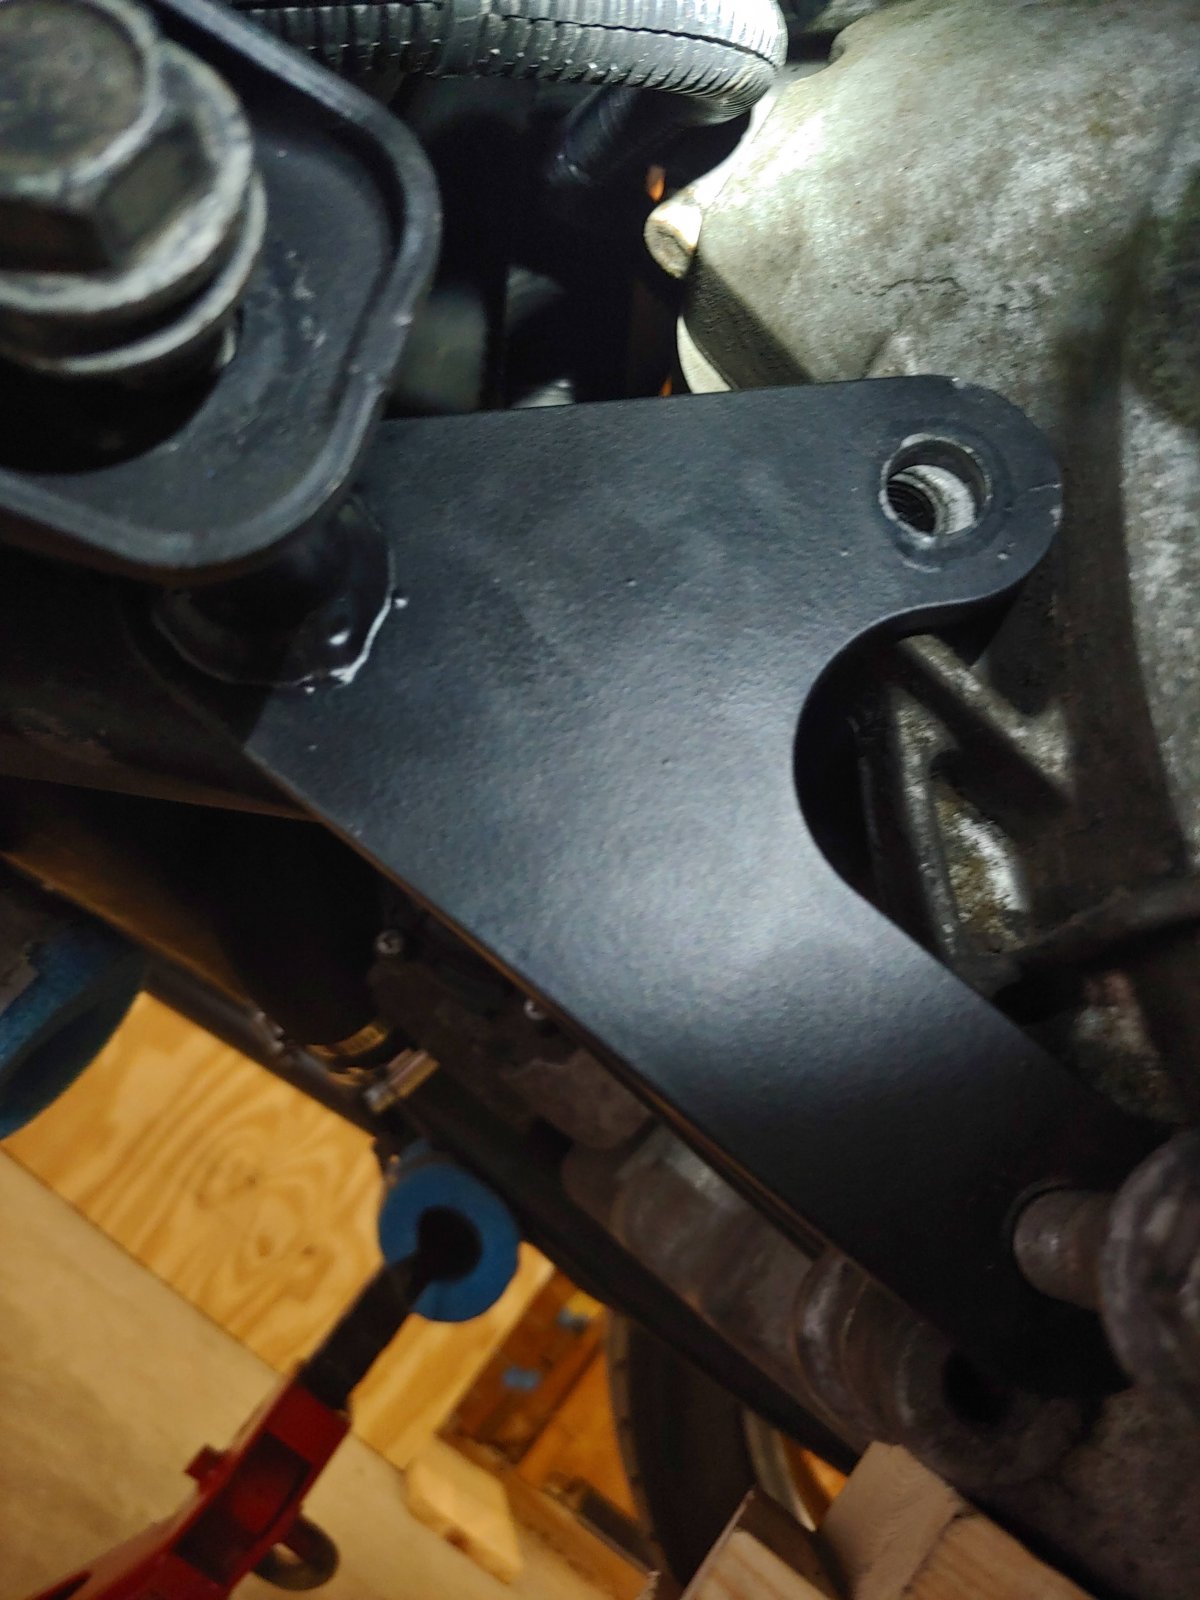
End result with the slot, bracket fit in place. After the following picture, I pulled the bracket out to repaint it before final installation.
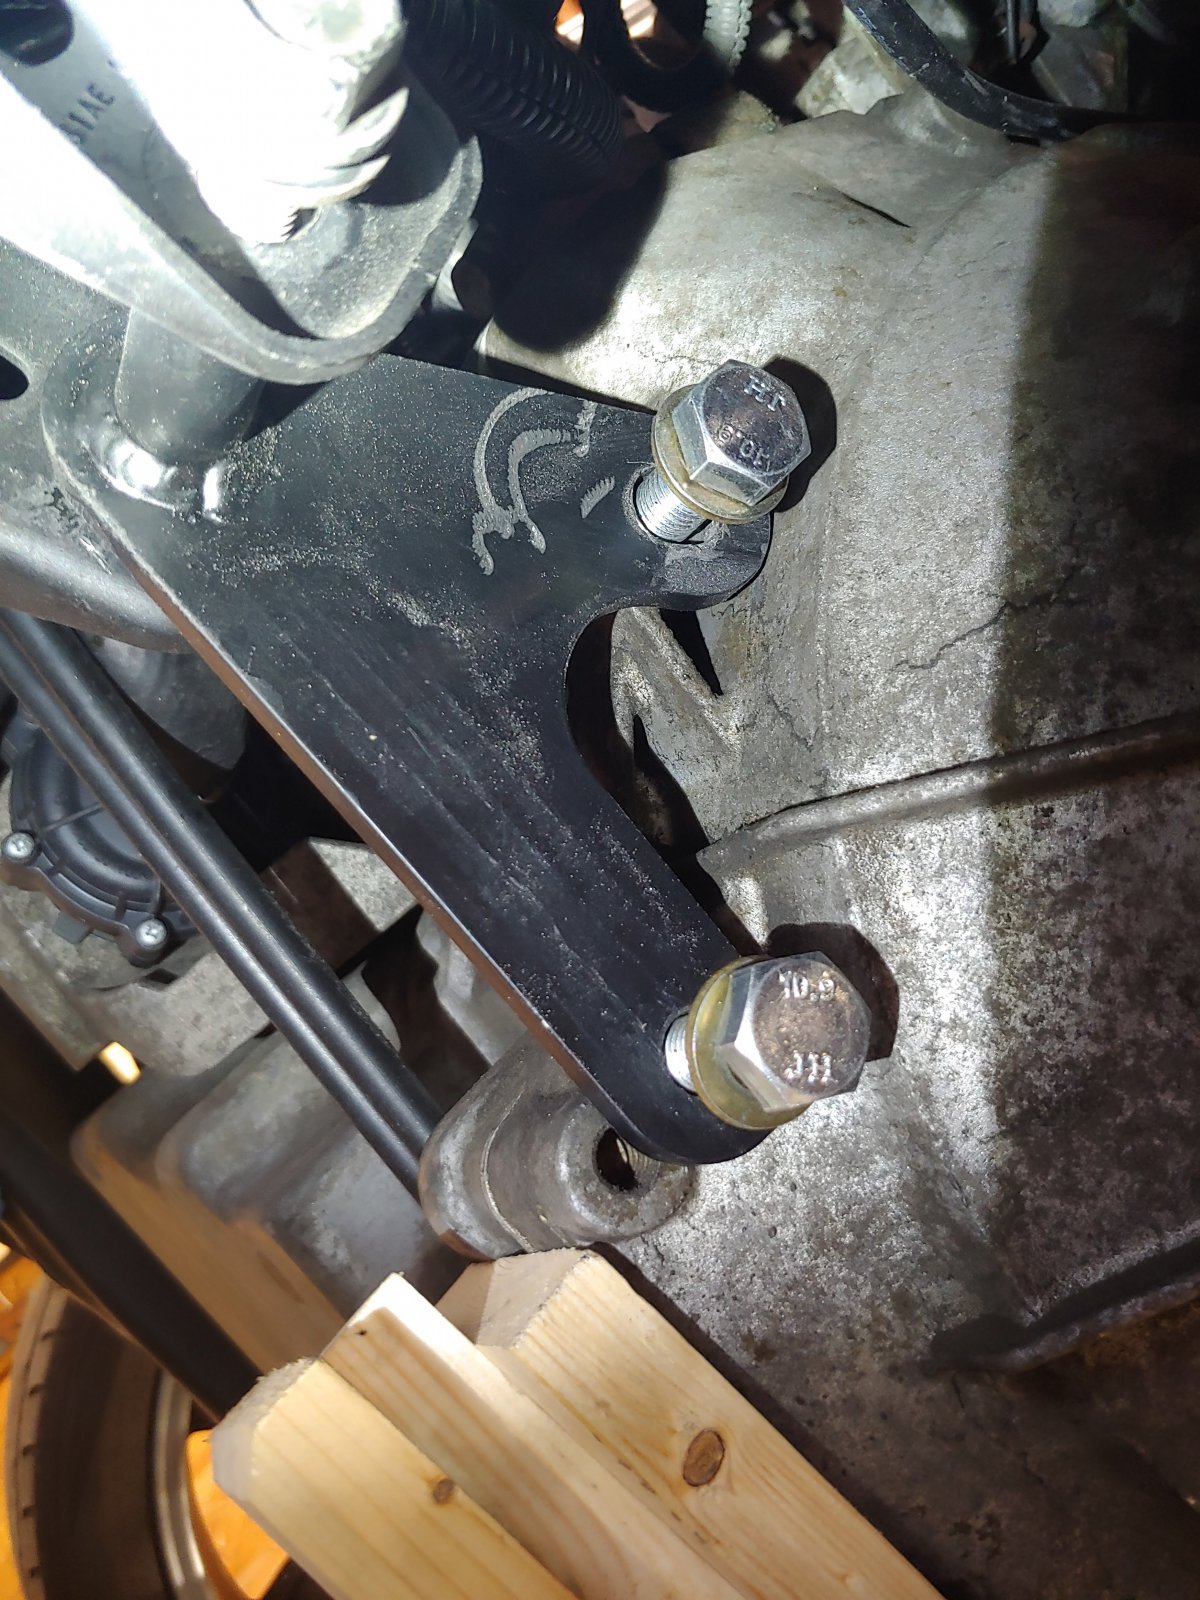
I don't know if the front transmission mount dimensions changed slightly through the years or why the DF version was different for the triangle leg lengths but I got it to work with the slot I added. To use the mount without adjustment, I would've needed to tip the front of the engine higher; this is not possible since the side engine mounts fix the angle and on all side bolt points there is no upward tip option. The only possibility of moving the engine would be slightly front to rear sliding on the side engine mounts. Rear mount was loose during the front install, I torqued all the mount bolts down at the end and had no issues or binding.
- I got the hex head bolts changed out to socket cap bolts for tow bar bracket mounts.
- I got the front and rear transmission mounts installed. The rear one went very smoothly, the front one took some adjustment to get to fit, details below.
There is no play in the engine mounting that could shift it that much, I was jacking the engine high enough the whole car was lifting off the stands so I looked into the dimensions and here's what I found.
A - Stock mount: bolt center distance, subframe to upper transmission point: 83mm
B - Stock mount: bolt center distance, subframe to lower transmission point: 122mm
C - Stock mount: bolt center distance, upper transmission point to lower transmission point: 91mm
The stock mount has 3 different diameter bolt holes, upper transmission is a fairly tight fit, lower transmission is a fairly loose fit, subframe is an extremely loose fit.
Next I measured the new bracket, same points:
A - New mount: bolt center distance, subframe to upper transmission point: 80mm
B - New mount: bolt center distance, subframe to lower transmission point: 119mm
C - New mount: bolt center distance, upper transmission point to lower transmission point: 90.3mm
The length deltas (stock - new):
A: 3mm
B: 3mm
C: .75mm
Given how the new transmission mount is designed, there's no way to move the subframe bolt point and I don't want to touch bending the subframe mounts to move them to match. I could insert bolts in only 2 places max, either sets for B or C dimensions above, but the C set of holes didn't give a solution. The good thing is using bolt holes for B meant that I could adjust the upper transmission point hole, check out the misalignment I had to fix here:
I know it's always better to have all bolt holes be tight fit, but the solution I used is to slot out the upper bracket hole. I see no strength issues with this fix. Holes were originally around 12.5mm, I'm guessing 1/2" punch or laser size before I painted.
I slotted the top hole with a dremel to keep the same minor diameter but add a ~16mm major diameter to get opening to overlap the bolt hole on the transmission seen above.
End result with the slot, bracket fit in place. After the following picture, I pulled the bracket out to repaint it before final installation.
I don't know if the front transmission mount dimensions changed slightly through the years or why the DF version was different for the triangle leg lengths but I got it to work with the slot I added. To use the mount without adjustment, I would've needed to tip the front of the engine higher; this is not possible since the side engine mounts fix the angle and on all side bolt points there is no upward tip option. The only possibility of moving the engine would be slightly front to rear sliding on the side engine mounts. Rear mount was loose during the front install, I torqued all the mount bolts down at the end and had no issues or binding.
baustin
Well-Known Member
Found the reason for my fuel gauge reading low fuel, needle on empty when I expected I would have 1/2 tank or more: the 4 pin connector on the top of my fuel pump has a pin that doesn't contact hard enough. My 3+ hour drive the other day had the fuel gauge on empty the whole way, filled up 6.6 gallons and then 4.4 gallons and it barely moved off empty and then went right back. I never had problems with the fuel pump so it's just the pin for the voltage supply to the level sensor.
I checked the car side of the wiring for ground and everything was consistent for ground, no issues there. I checked the ohm value on the 2 pins from the fuel pump side and it read 77.4 ohms, again makes sense if it ranges from somewhere like 40-248 (previous post Desert Sasqwatch). I turned the key back on and wiggled the connector. Previously it was fully seated and clipped on, however it can still wiggle just a bit. Right then my fuel gauge showed ~3/4 tank but when I released it the fuel gauge went back to empty. I added some dielectric grease on the contact, plugged it back together and it consistently is showing a real fuel level.
For now I'm going to see if the dielectric grease bridges the air and keeps a fuel level working, if it fails then I'll have to pick up a new car side plug and solder it in. I see some companies make the exact 4 pin with pigtail wiring that I would need but that's not needed yet.
ctuinstra
Goblin Guru
Agreed, or the terminals are slightly corroded or dirty and the act of unplugging and plugging them in scraped them clean enough to make contact. You might not be out of the woods just yet. Before replacing, see if you can deoxit the plug and clean the terminals. Bad connections stink.Dielectric grease is non-conductive. The lube likely allowed the connector to squeeze up tighter.
baustin
Well-Known Member
Oh I know, the dielectric grease is just a band-aid that doesn't fix the actual problem. It's a good tool for contacts that aren't seating correctly and proved the fuel level sensor isn't faulty, the issue is at the connection point. Given the tools I have and knowing the connector came out of an '06 GM product, I'll just replace the connector if the one I have stops working again.Agreed, or the terminals are slightly corroded or dirty and the act of unplugging and plugging them in scraped them clean enough to make contact. You might not be out of the woods just yet. Before replacing, see if you can deoxit the plug and clean the terminals. Bad connections stink.
baustin
Well-Known Member
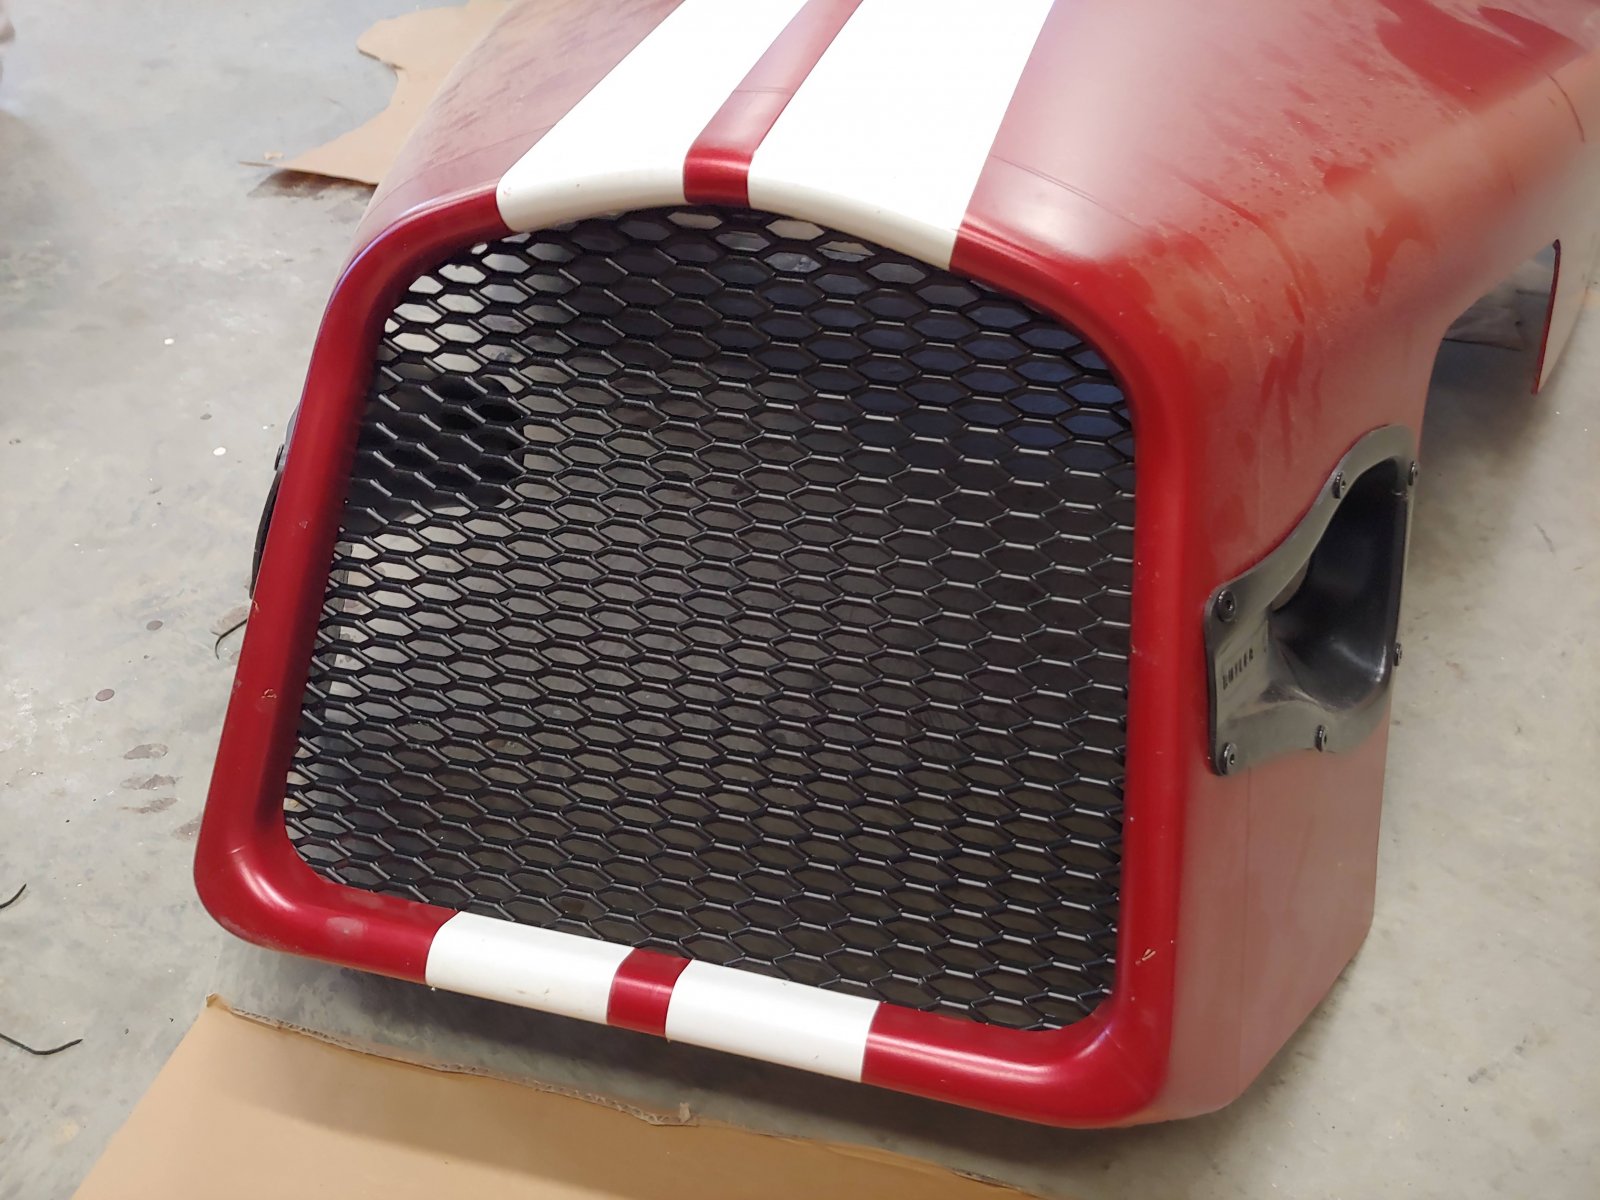
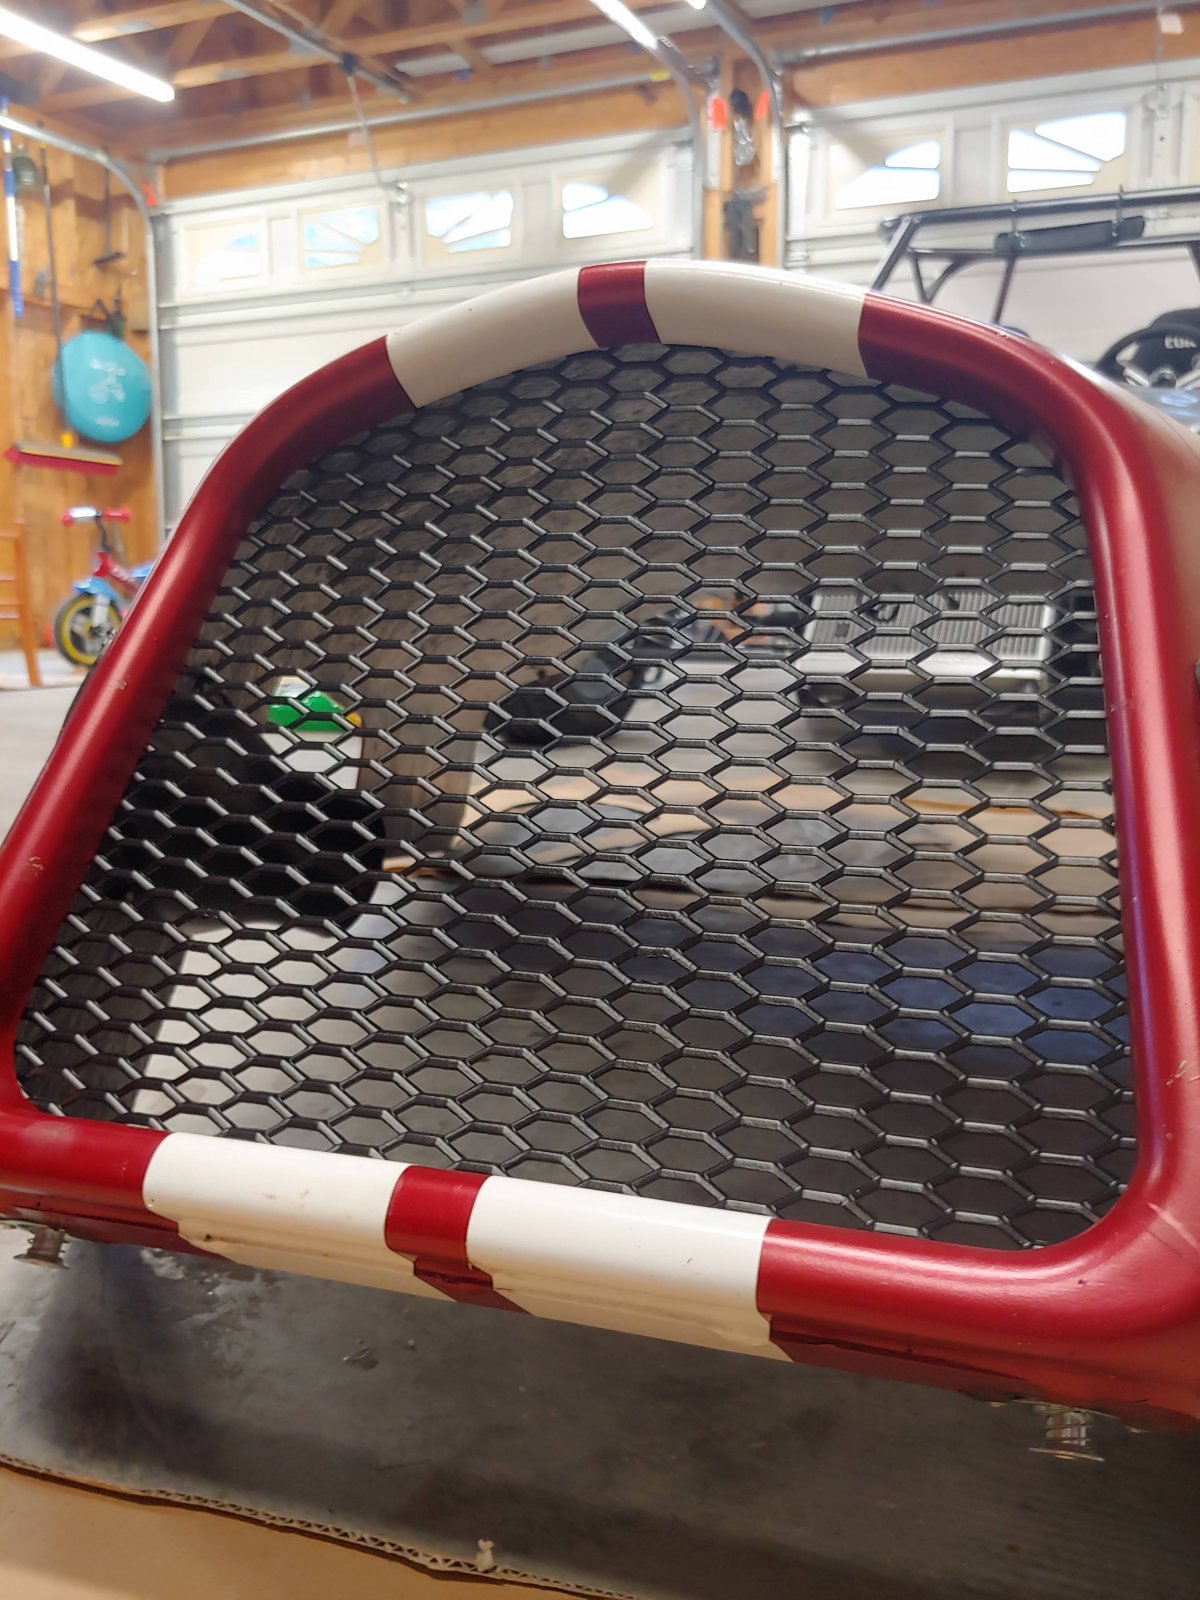
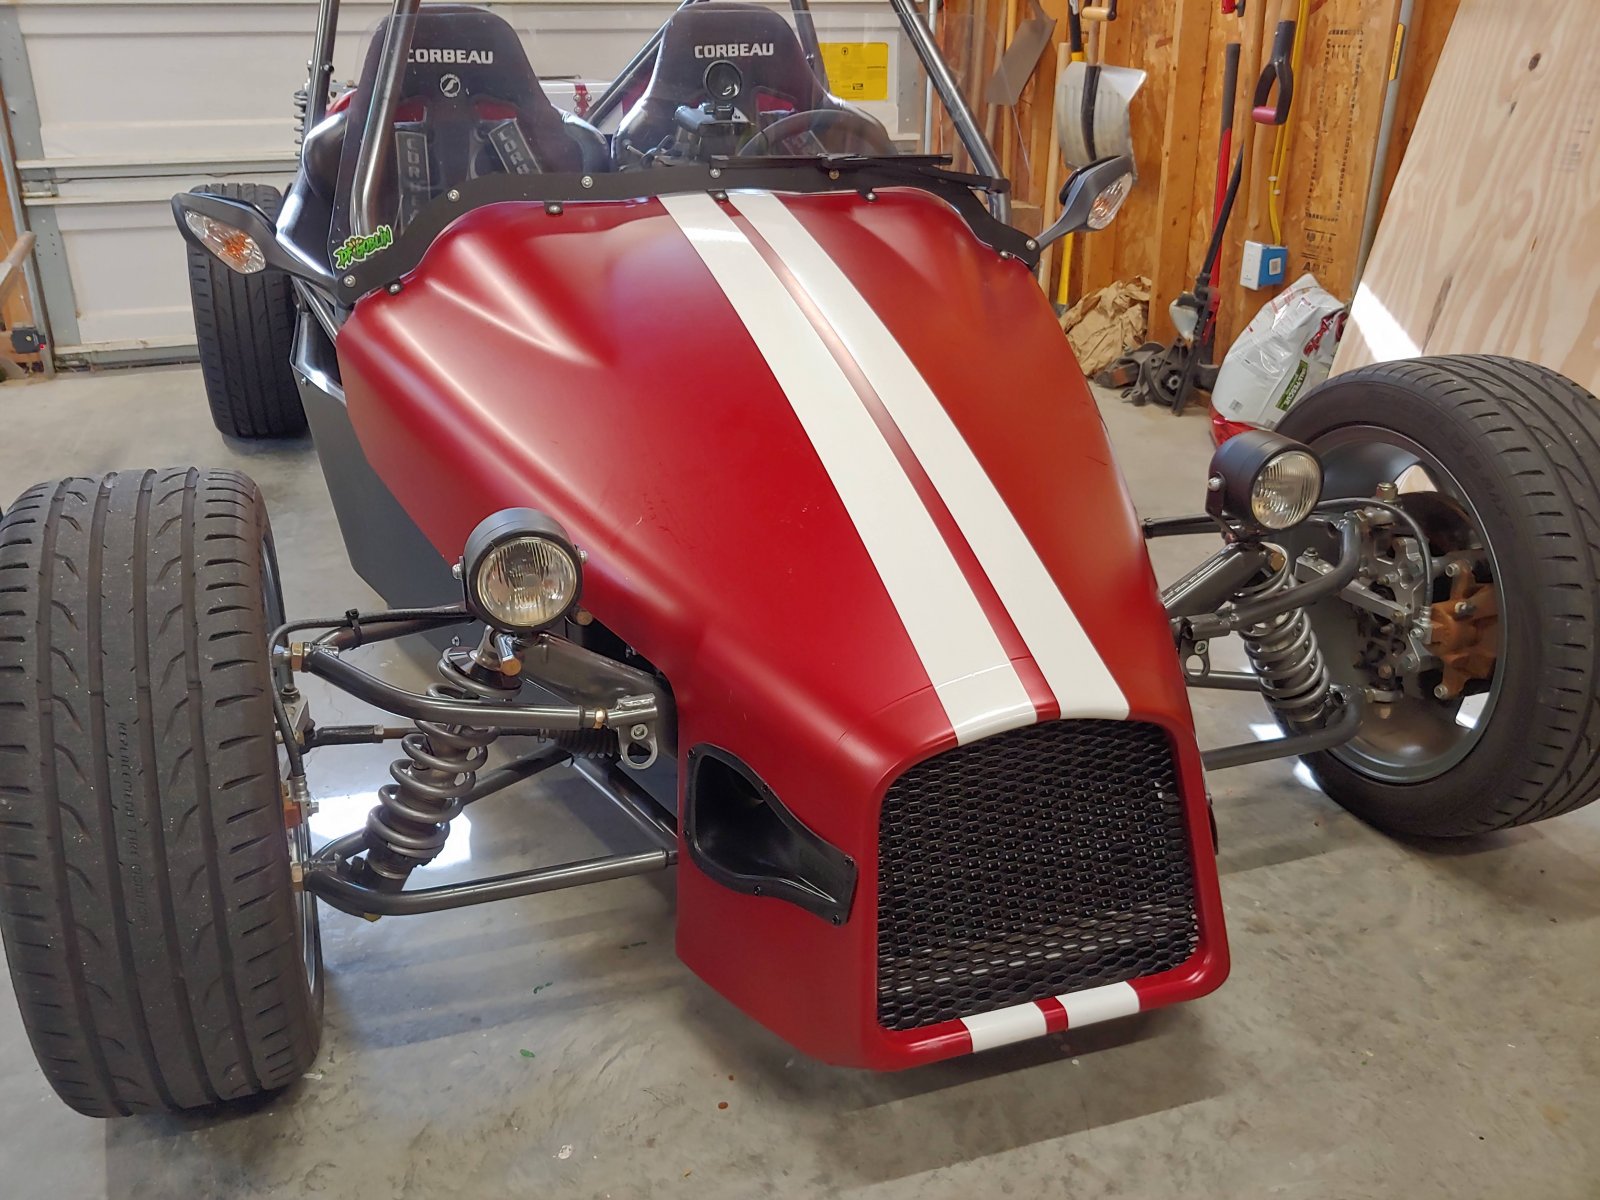
Small update , I added a grill to the hood. I epoxied some washers into the U at the front of the hood and used zip ties to hold the grill plastic to the front like I think I've read some others did. I went overboard and added a bunch of washers but didn't have to use them all (but I did use most of them). So far after a couple drives the grill is doing good. In my case the grill is in contact with the radiator at the bottom edge since there is so little room to the hood nose from the radiator but it's not a problem, just more strength.
jamesm
Goblin Guru
That looks really good. I need to do something like that on mine.Small update , I added a grill to the hood. I epoxied some washers into the U at the front of the hood and used zip ties to hold the grill plastic to the front like I think I've read some others did. I went overboard and added a bunch of washers but didn't have to use them all (but I did use most of them). So far after a couple drives the grill is doing good. In my case the grill is in contact with the radiator at the bottom edge since there is so little room to the hood nose from the radiator but it's not a problem, just more strength.