Brett
Well-Known Member
Hello fellow Goblin builders. I am Brett W in Houston, TX and I am in the midst of my Goblin build. At a high level, I am building an extended frame, full cage, easy entry Goblin using a 2009 Cobalt SS as a donor.
At the beginning of 2020, I decided it was time to embark on a life goal of building a car. I have been researching this subject for many years and the time was right to execute. I have looked at everything from the various Cobra builds, Lotus 7 type vehicles (Stalkers / Caterhams / Westfields and others) and even considered building a Locost from the ground up. After working on my welding, I realized that I would rather put my faith in the welds of an experienced welder over that of my own.
Sometime in 2015, Adam posted on the locostusa forum about the Goblin and that piked my interest. It seemed that it was priced right and used the single donor concept that I preferred. In addition, I would not have to rely on my subpar welding abilities. In 2016/2017, I was about to embark on my dream and then titles began to be revoked in the state of Texas. I decided to take a pause while that issue was resolved. Now, 5 years later and the finances / personal life / work life / legislature / spouse aligned, and I started searching for a donor.
Initially, I started searching Facebook Marketplace / Craigslist for a TC donor however the prices were more than I wanted to spend. I setup searches on Copart and IAAI for the Houston area and eventually a 2009 Cobalt SS became available. I believe that was in February 2020. I noticed that with Copart and IAAI, when a car was listed it might take several months for the vehicle to be schedule for auction. I assume that this is due to insurance / legal issues that are waiting to be resolved. However, for the vehicle I found, an auction date was listed after about 5 days. Now I had 2 weeks to figure out how to bid with IAAI.
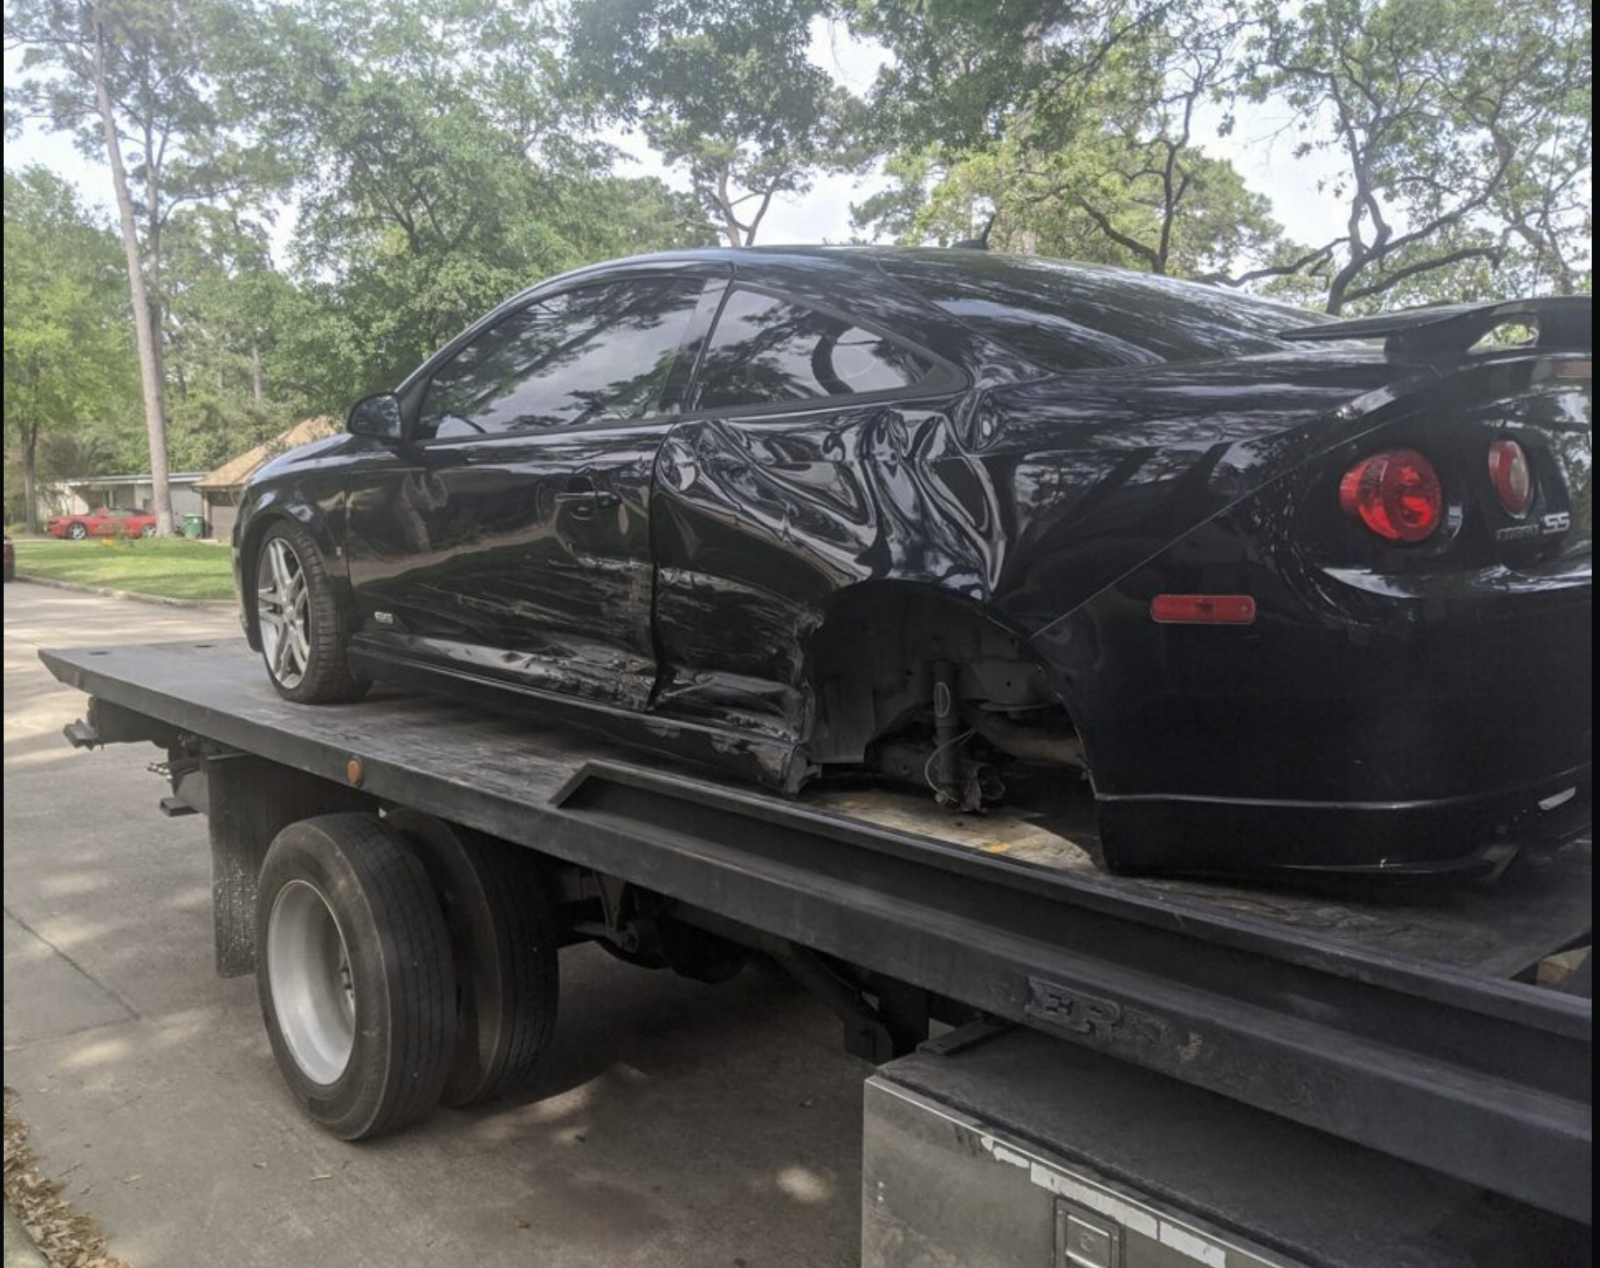
In my case, I chose to go with SalvageBID for the broker to purchase the Cobalt. They were easy to work with and I won the auction with a bid of $1,400.00. After fees, cost was $2,204 for the vehicle. Delivery was another $196 for a total of $2400. I ended up with a 2009 Cobalt SS that had be t-boned in the back left. The left rear wheel had been ripped of and the rear axle was broken.
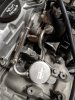
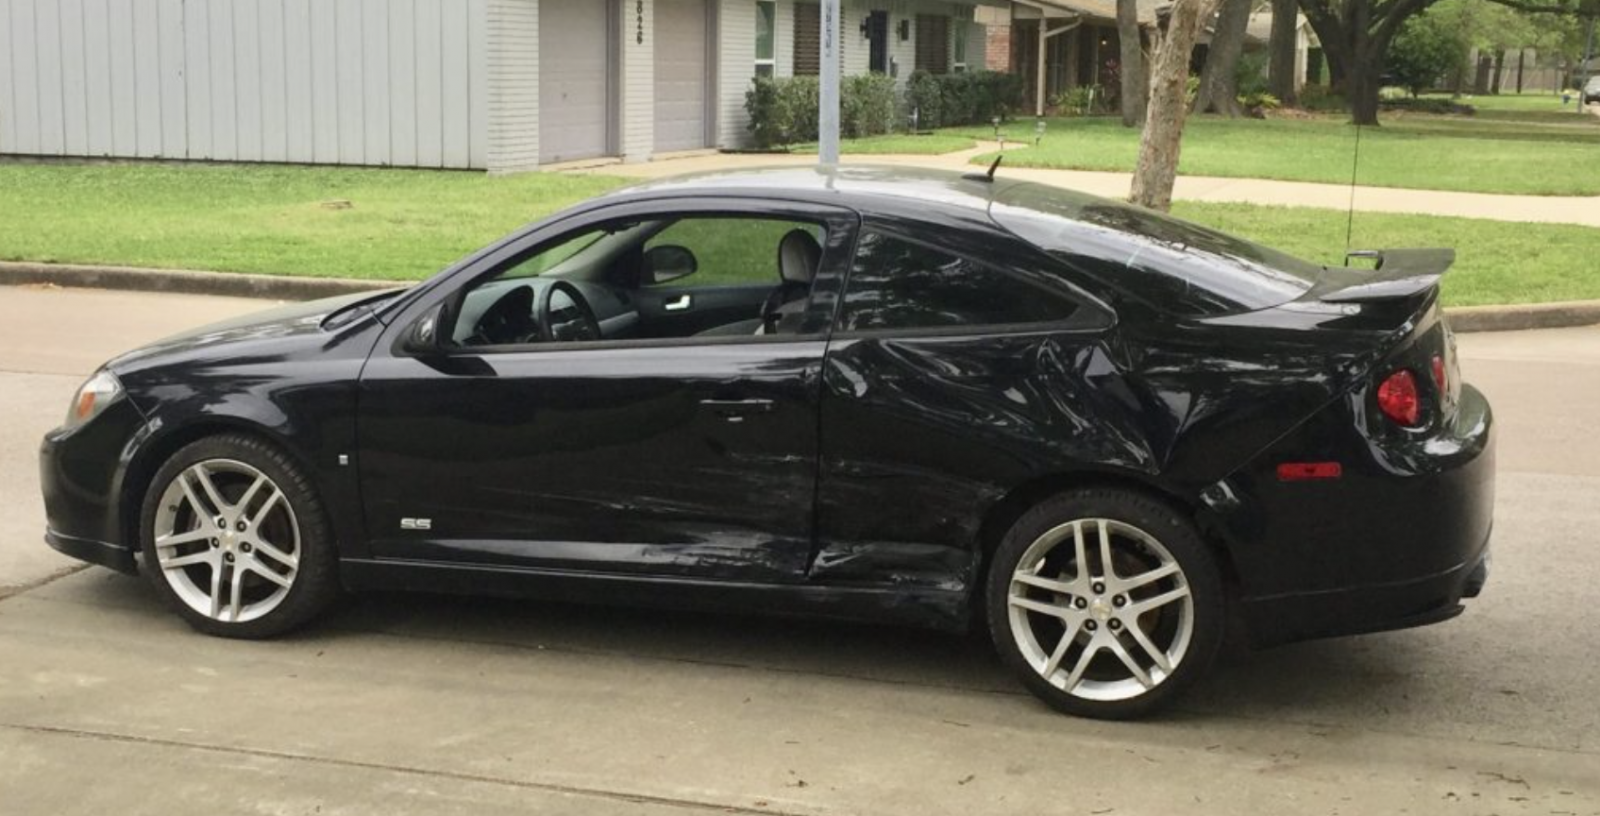
After a quick trip to the local pick-a-pull junk yard and picking up a replacement axle. I was able to get the Cobalt back on all four wheels. However, I was unable to find a spare rear axle for an SS with disc brakes (at a reasonable price). Due to this, the rear brakes were plugged with a bolt and the brakes were kind of sketchy. Once I checked the fluids and charged the battery, the car started right up.
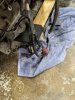
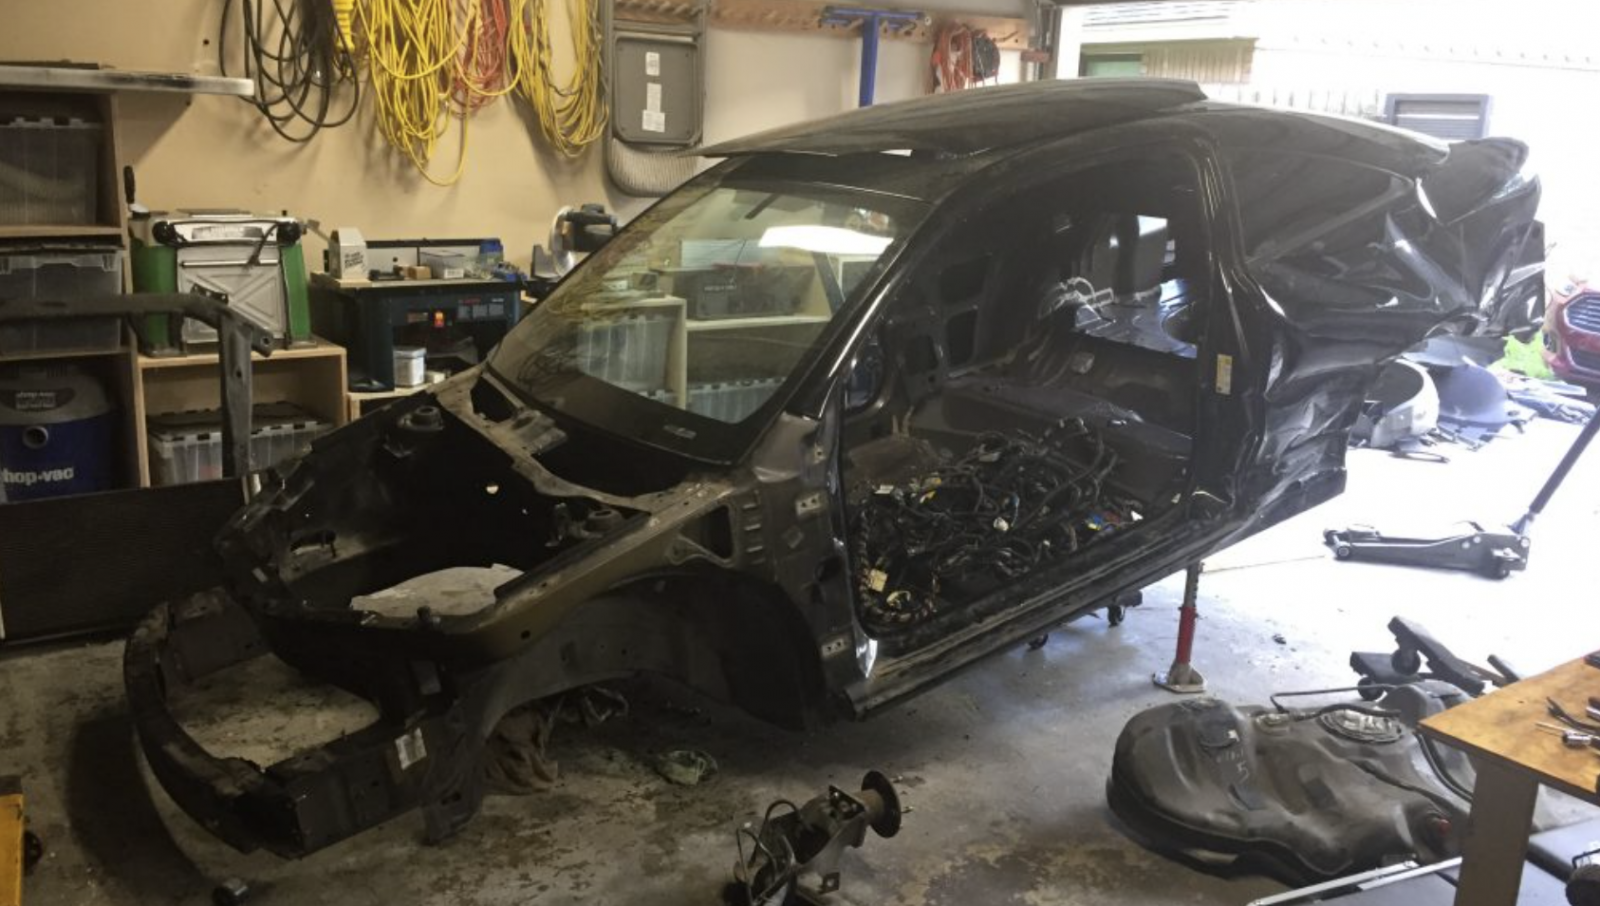
In July of 2020, my son and I spent about a week stripping the donor. We were able to sell off several parts and netted about $600 in revenue. Honestly, I was less concerned about recovering cost from the donor and more concerned about my HOA complaining about a vehicle without plates.
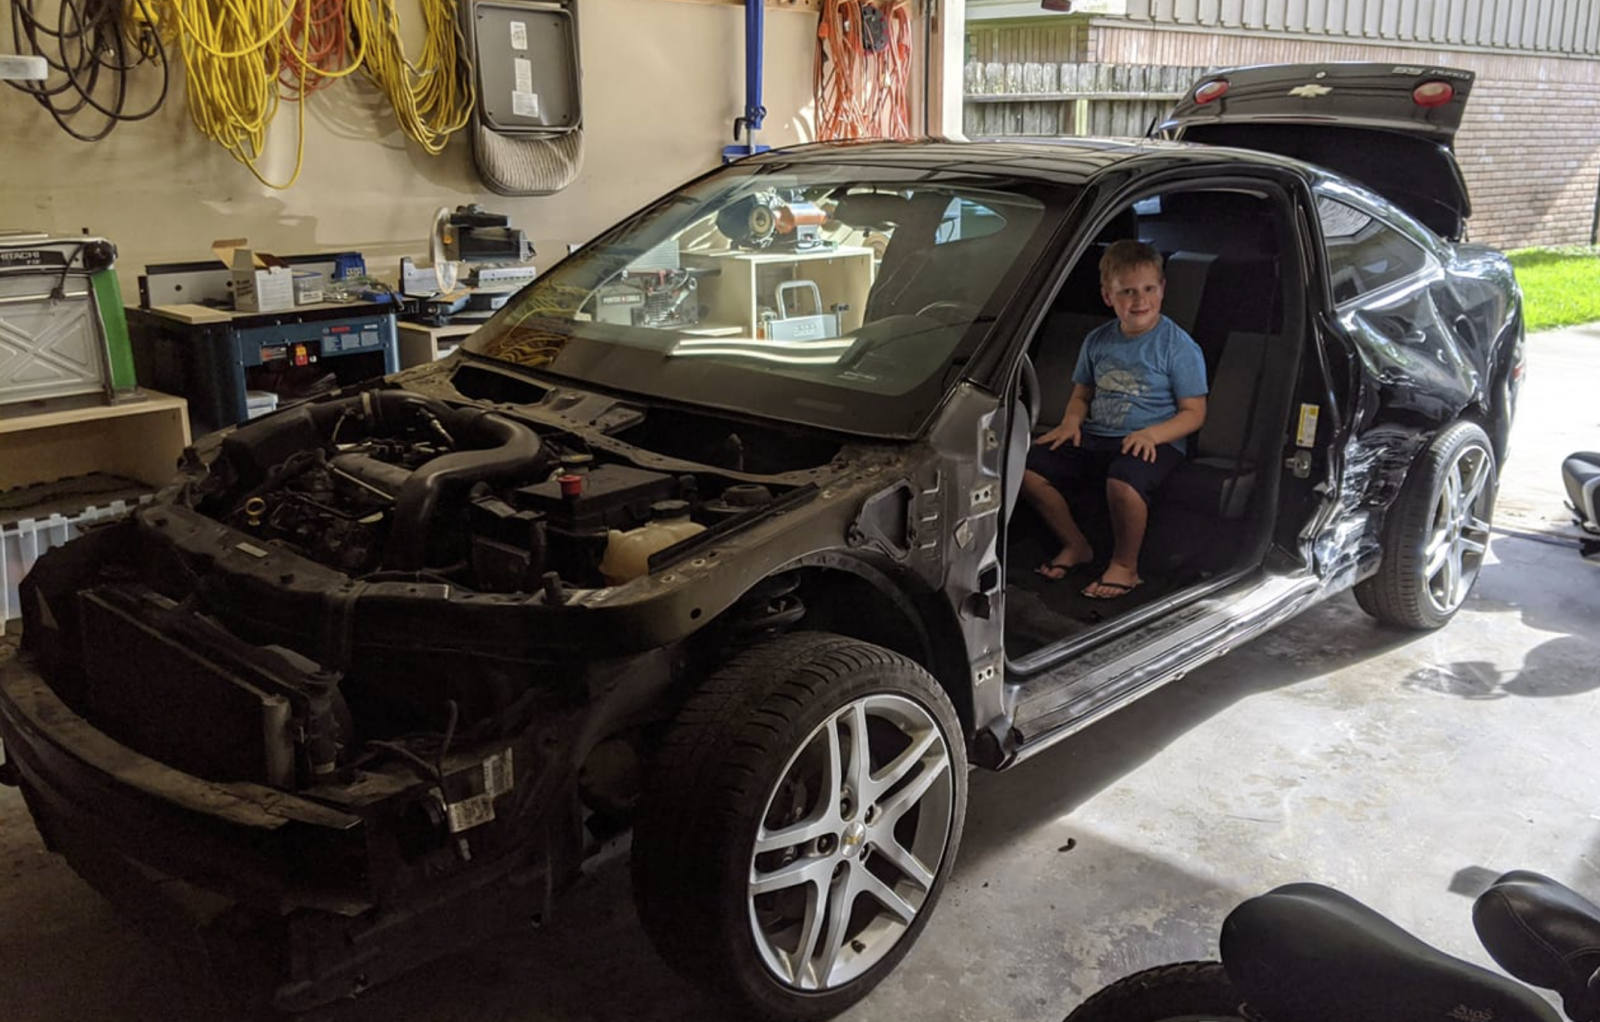
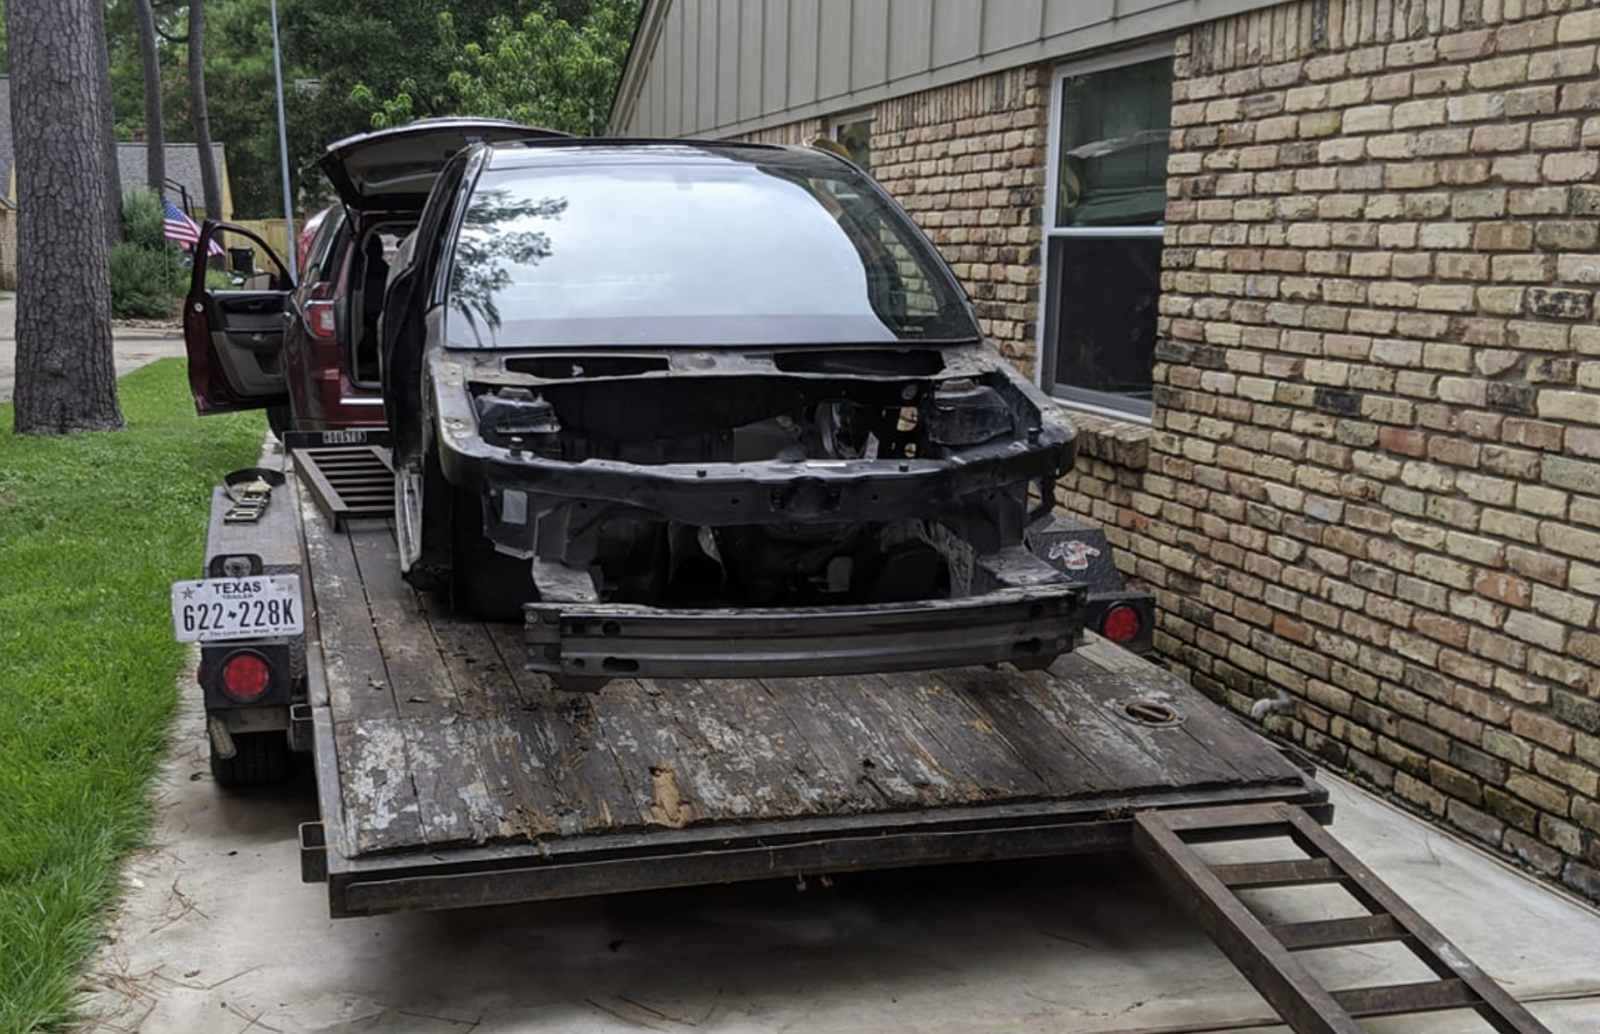
My wife took out an add on facebook for a “free shell” no title and, after filtering through the trash reply’s, a gentleman came and hauled off the shell. Zero cost to me and minimal effort. With the current low cost of scrap metal, I felt this was a win / win.
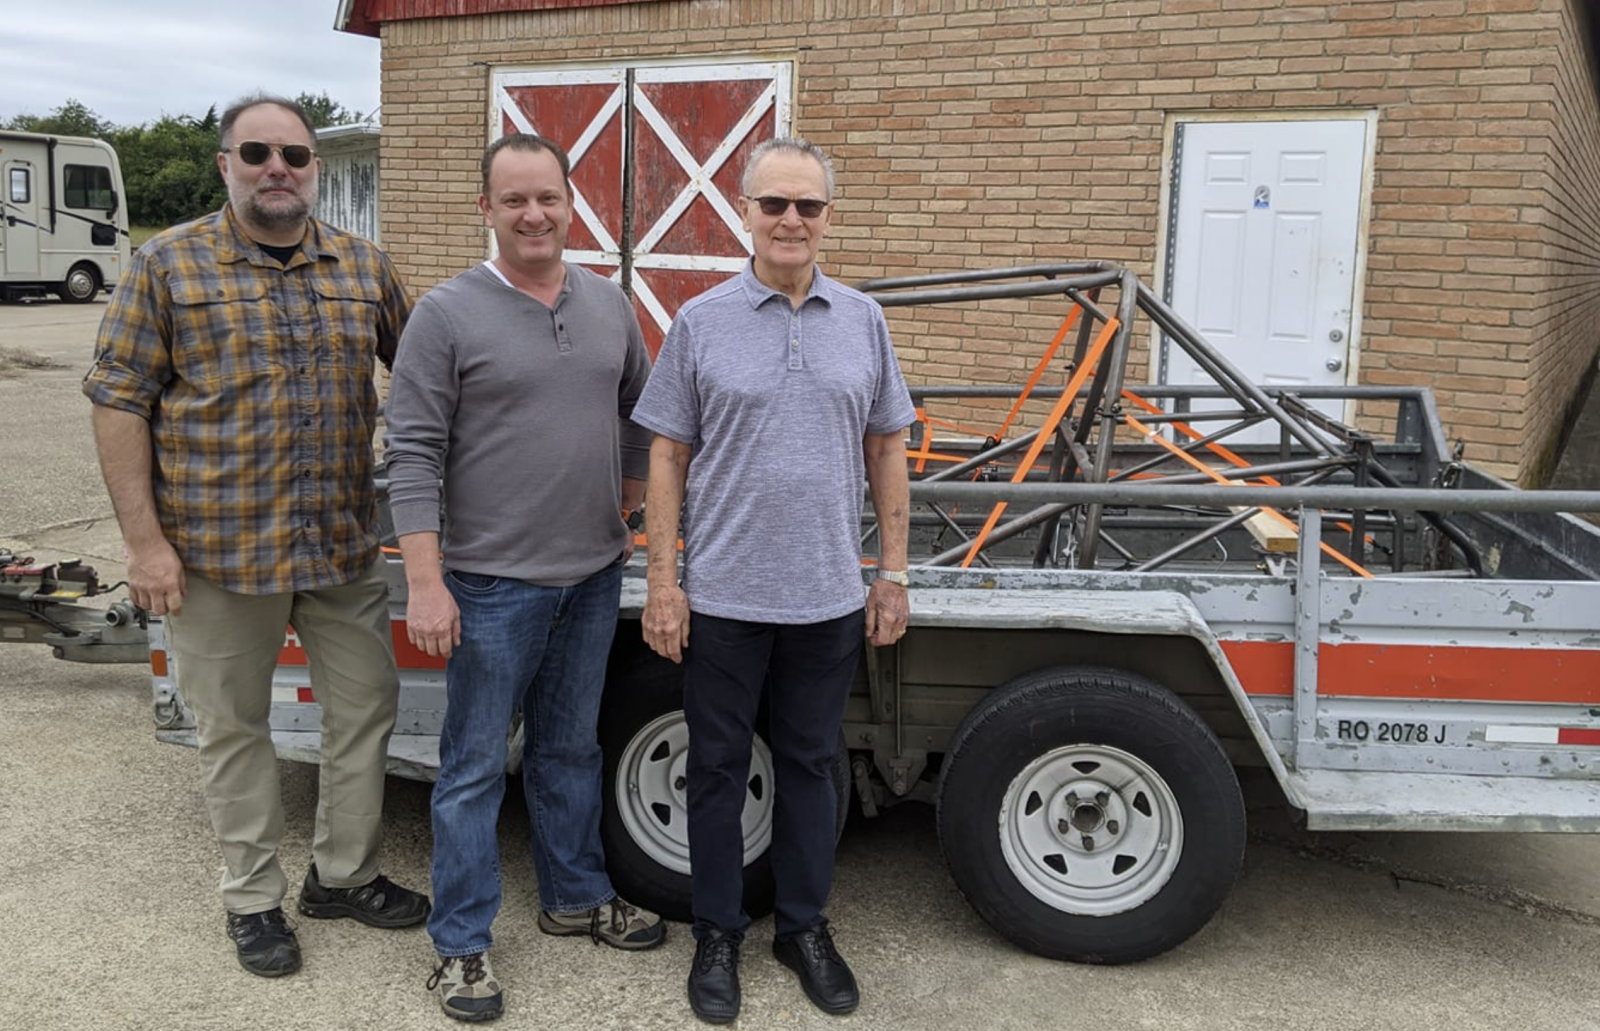
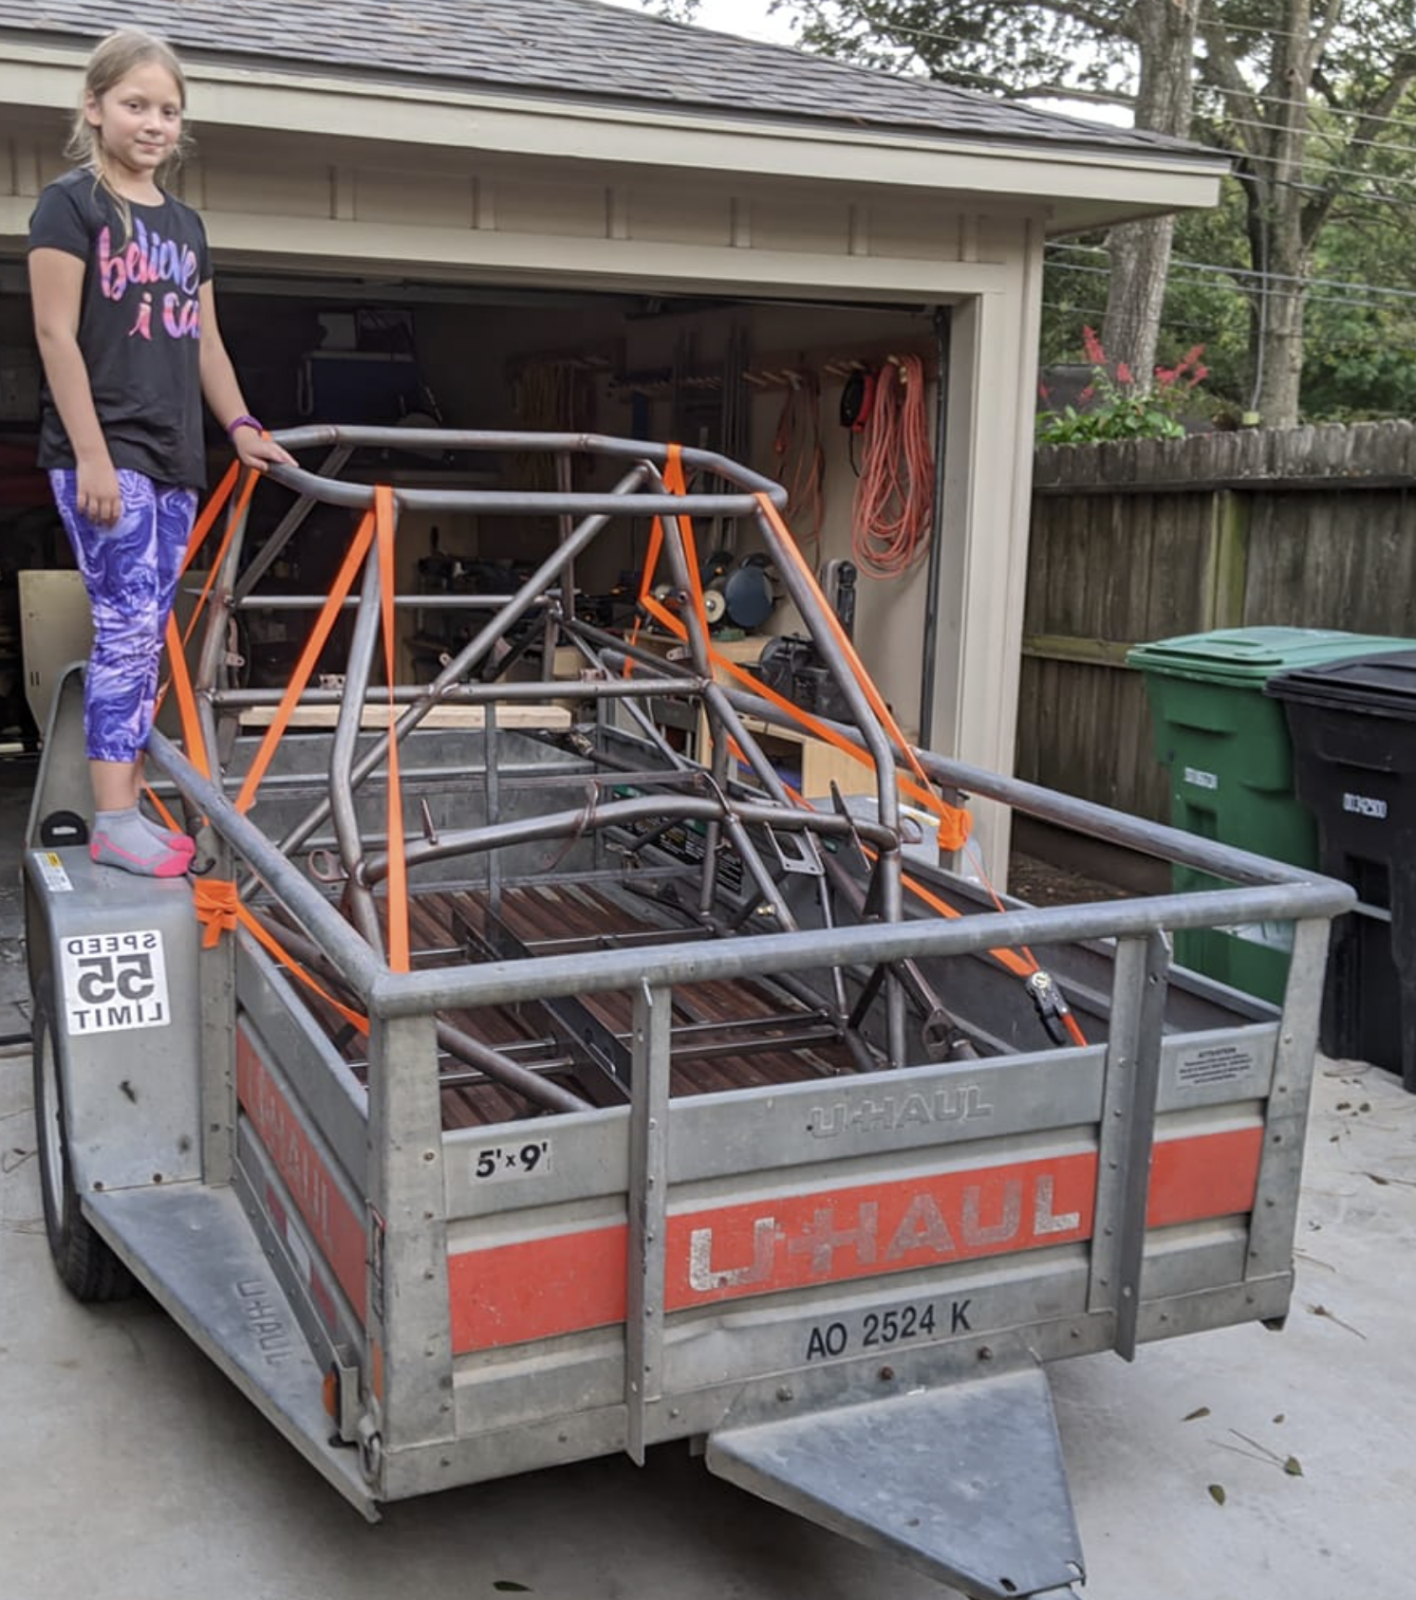
I ordered my kit in the end of July and was able to pick it up on October 17. I rented a 6x12 U-Haul trailer and pulled it behind my wife’s Kia Sedona minivan. While the gas mileage suffered, the minivan handled the 500+ mile trip with no issues. Here is a pic of a buddy of mine that made the trip with me, myself, and my father that drove down from north Dallas for the pickup. As always, Lonnie and his team were great host and we ended up visiting for about 1.5 hours before having lunch and heading back home to Houston.
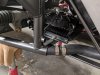
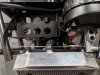
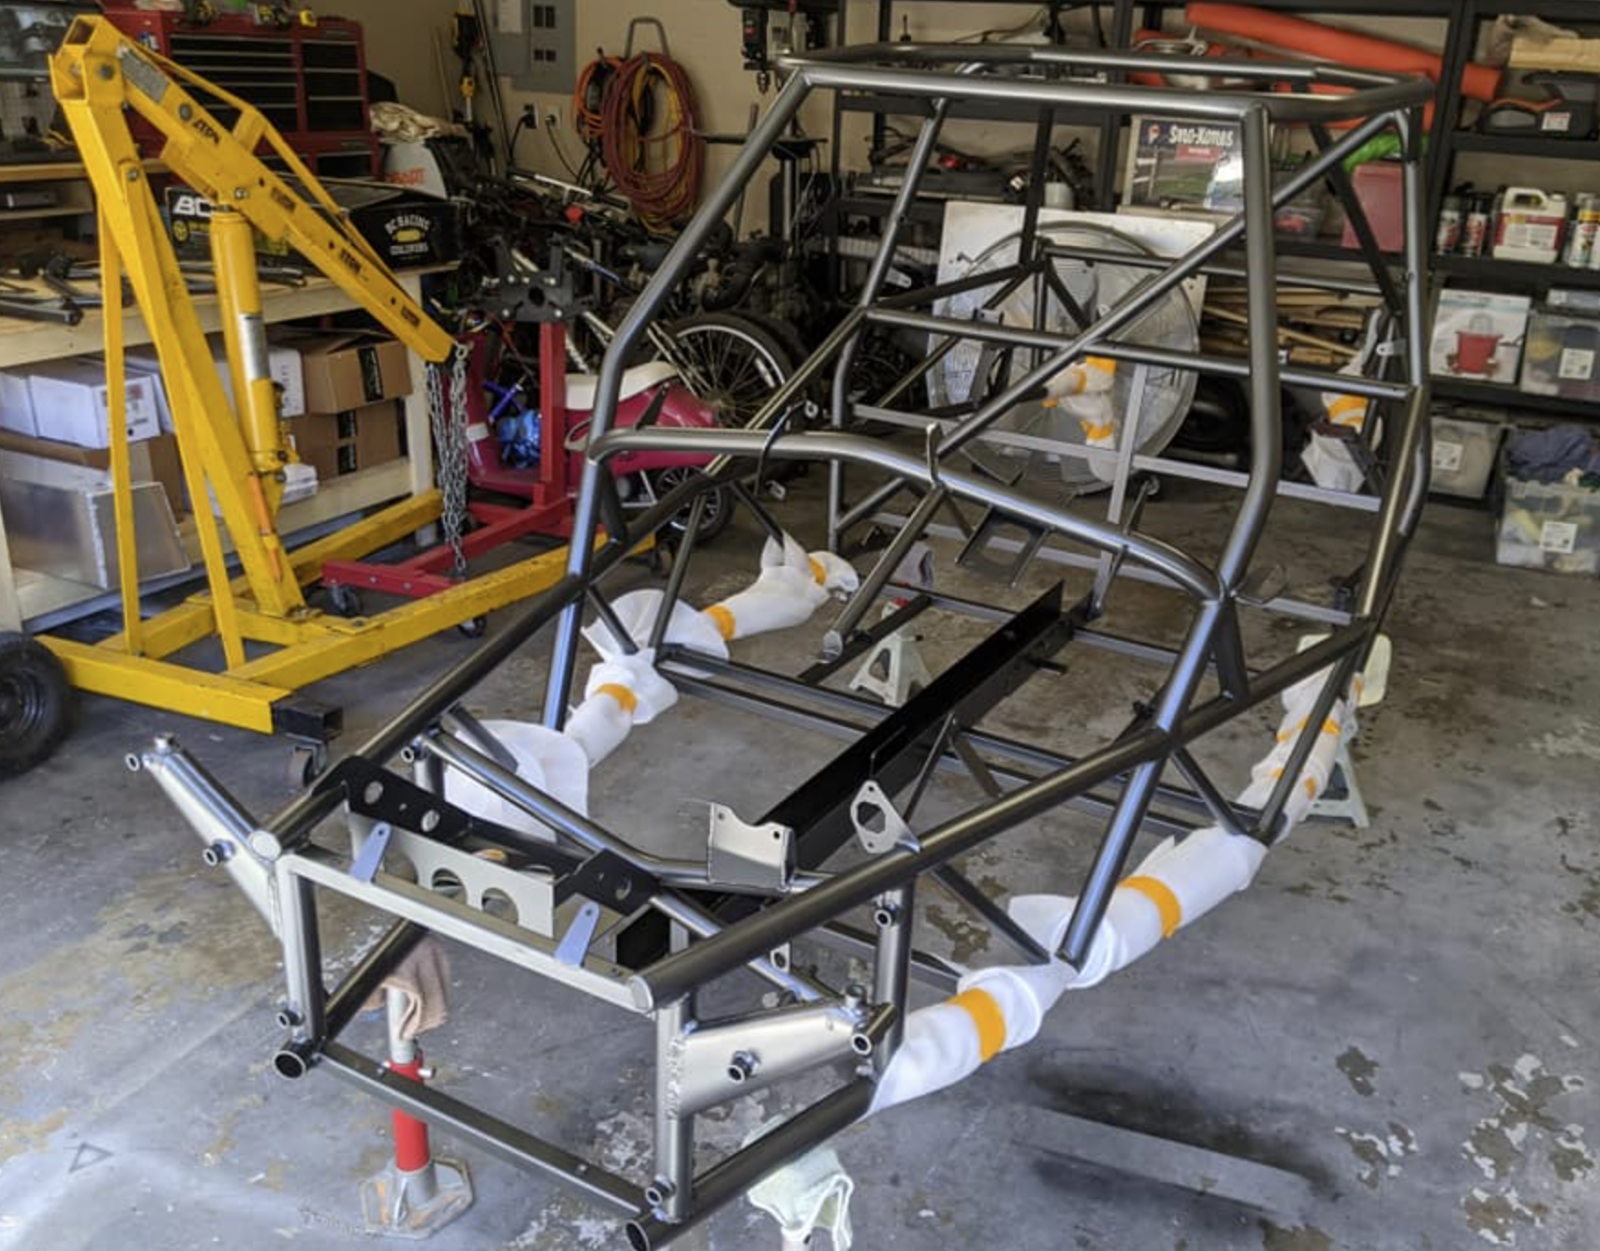
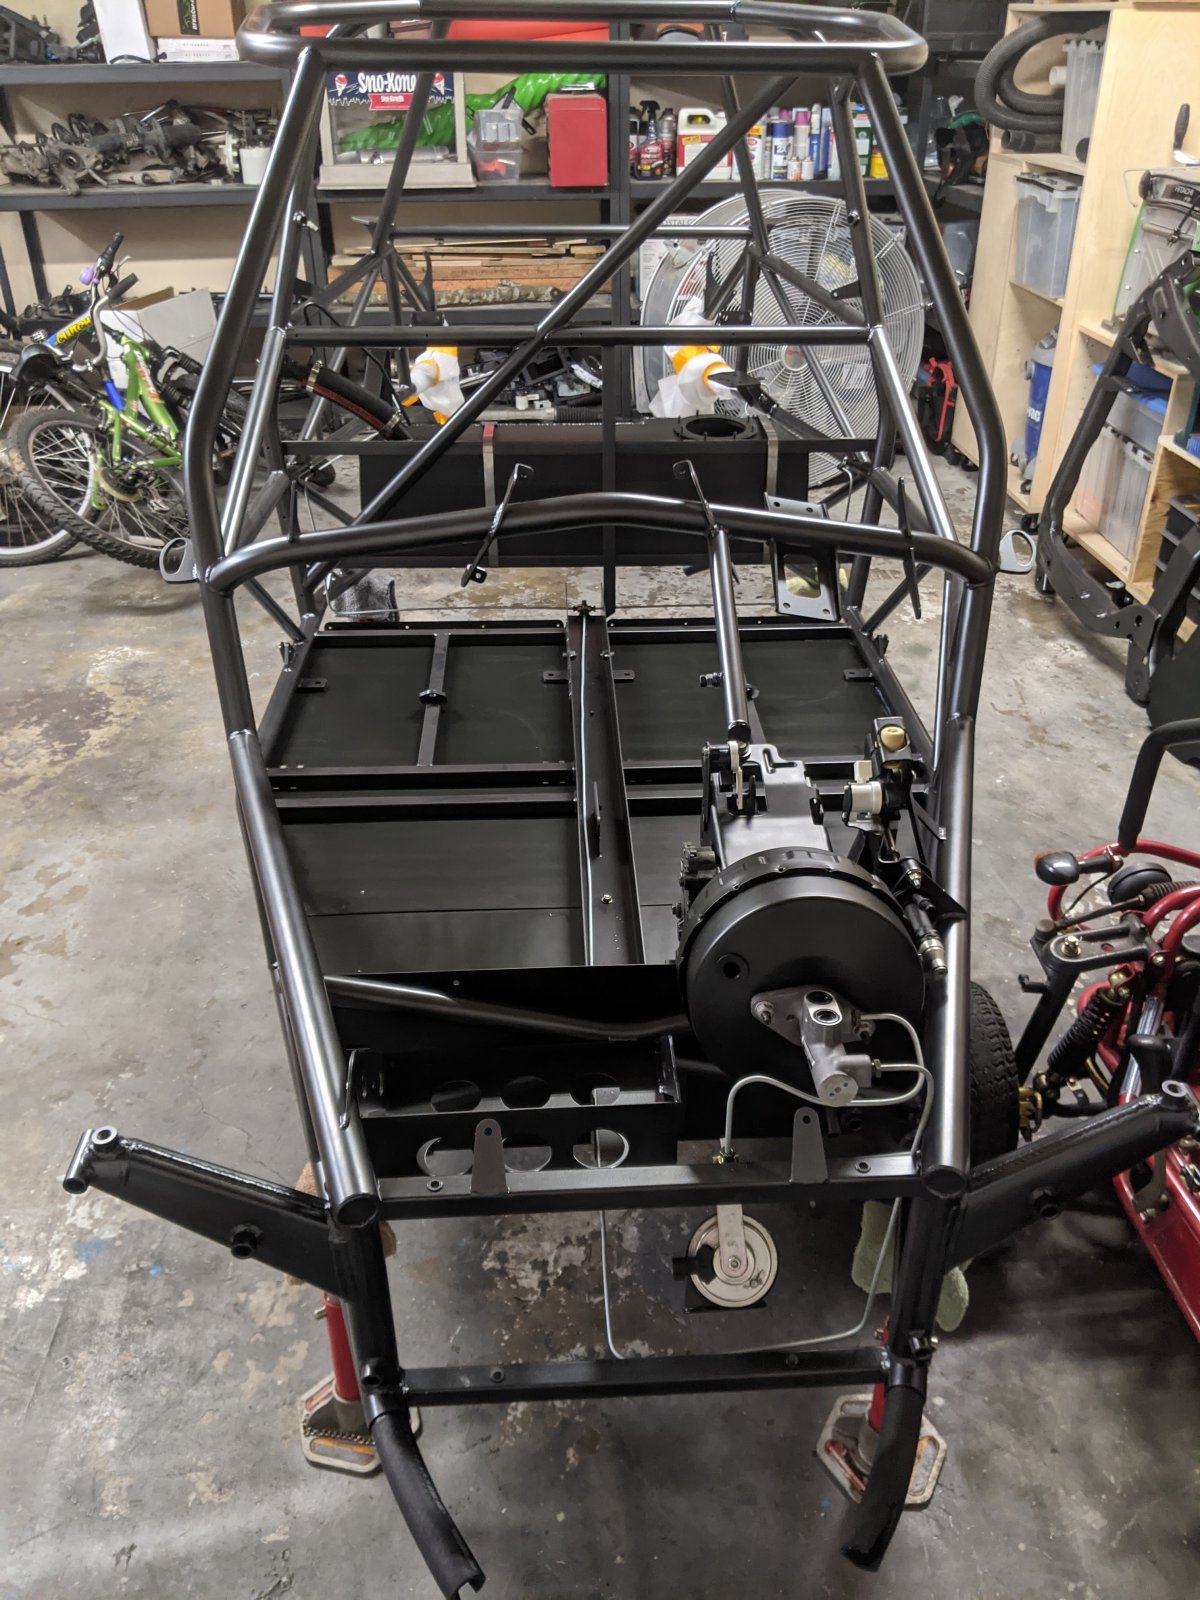
While waiting on my kit to be ready, I started researching powder coating companies in my area. I ended up taking my frame and 23 other parts to get powder coated. While this was an expensive option, Cutting Edge Powder Coating did an outstanding job on the frame and various brackets. If I were to do it again, I think I would go ahead and get the sheet metal powder coated along with the fuel tank. I went with Graphite Charcoal from prismatic powders. Total turn around was 7 days. The following are a couple of pic’s of the frame headed to powder coat and the finished product.
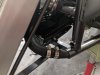
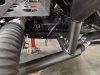
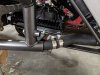
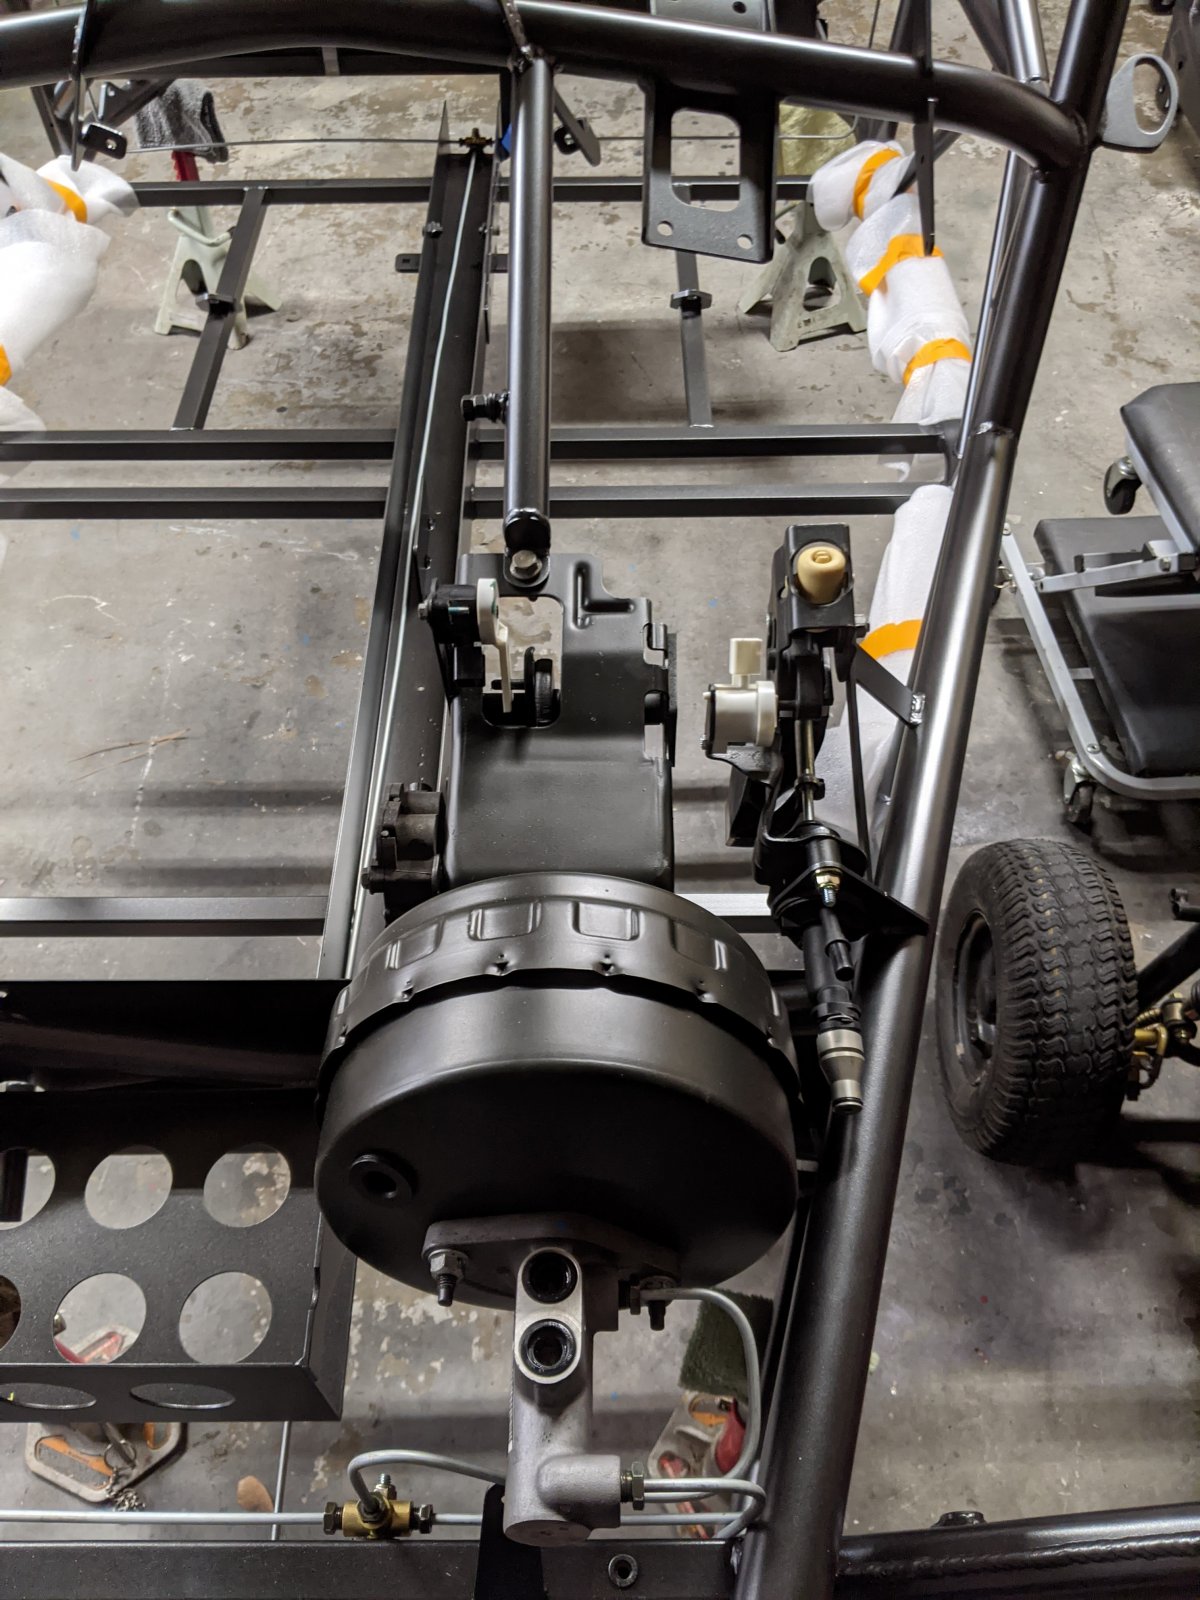
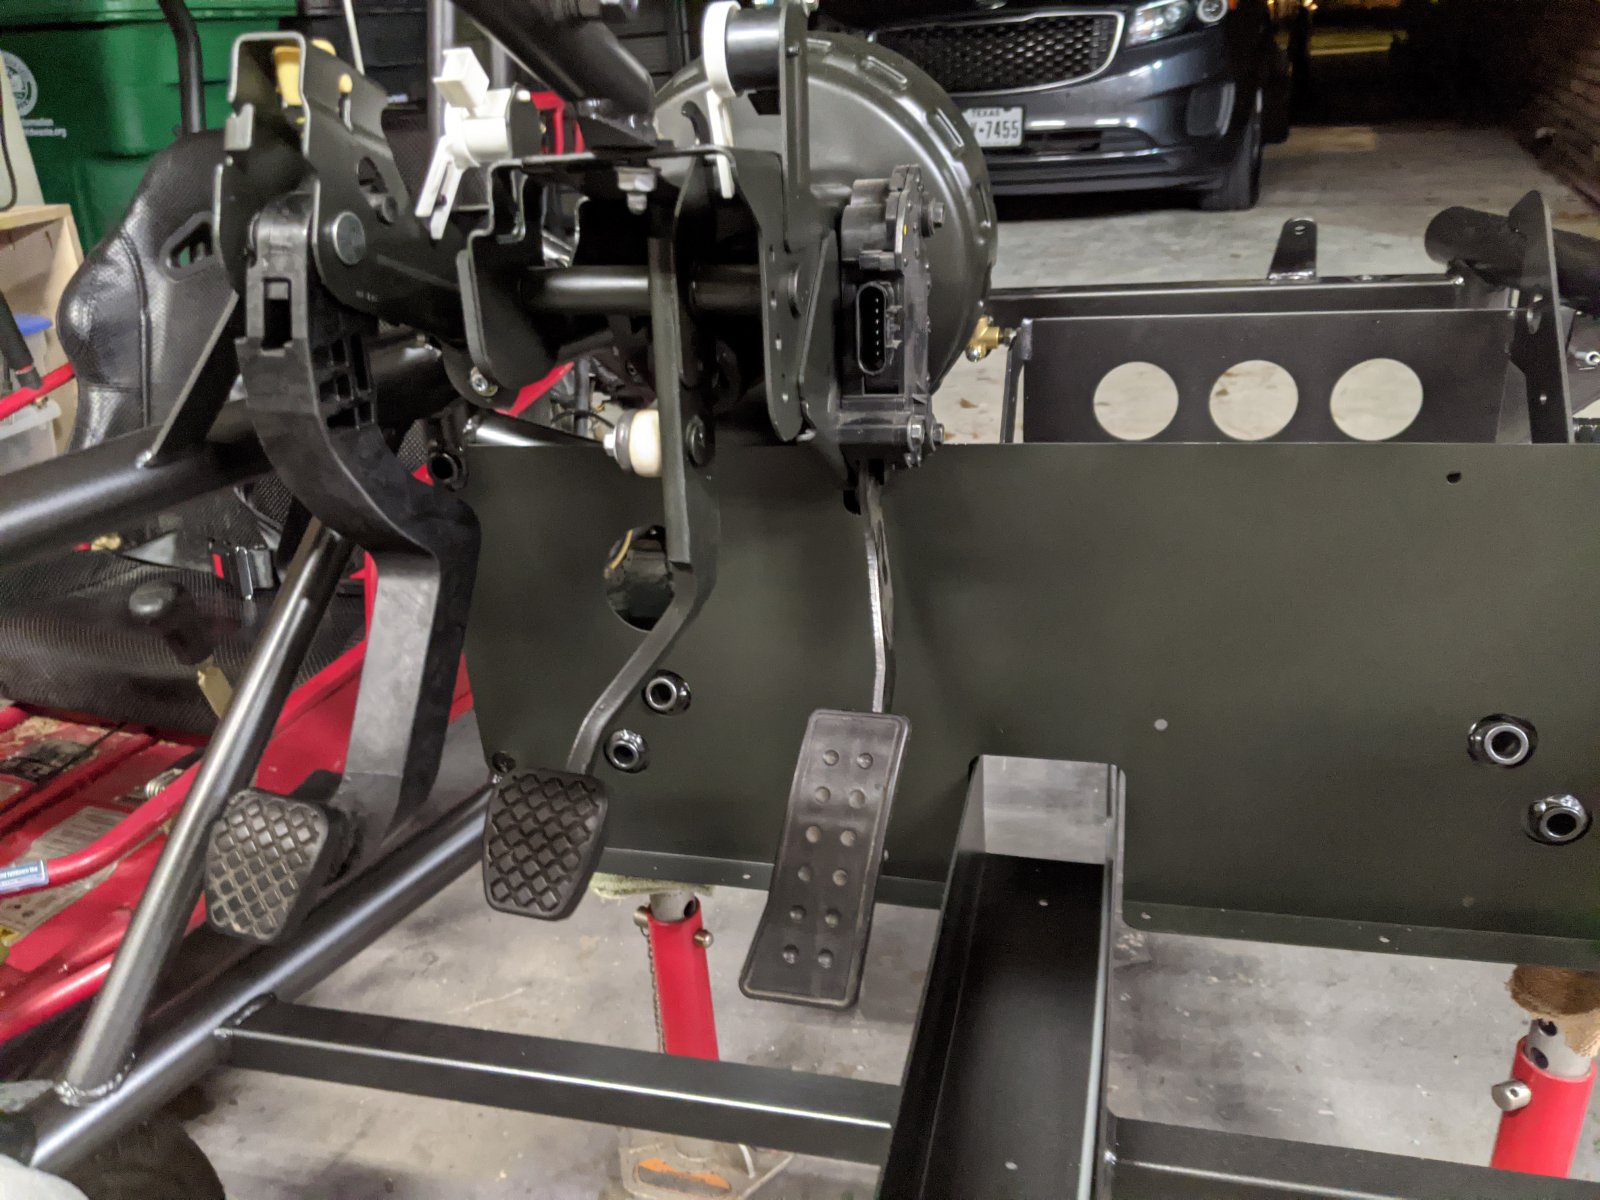
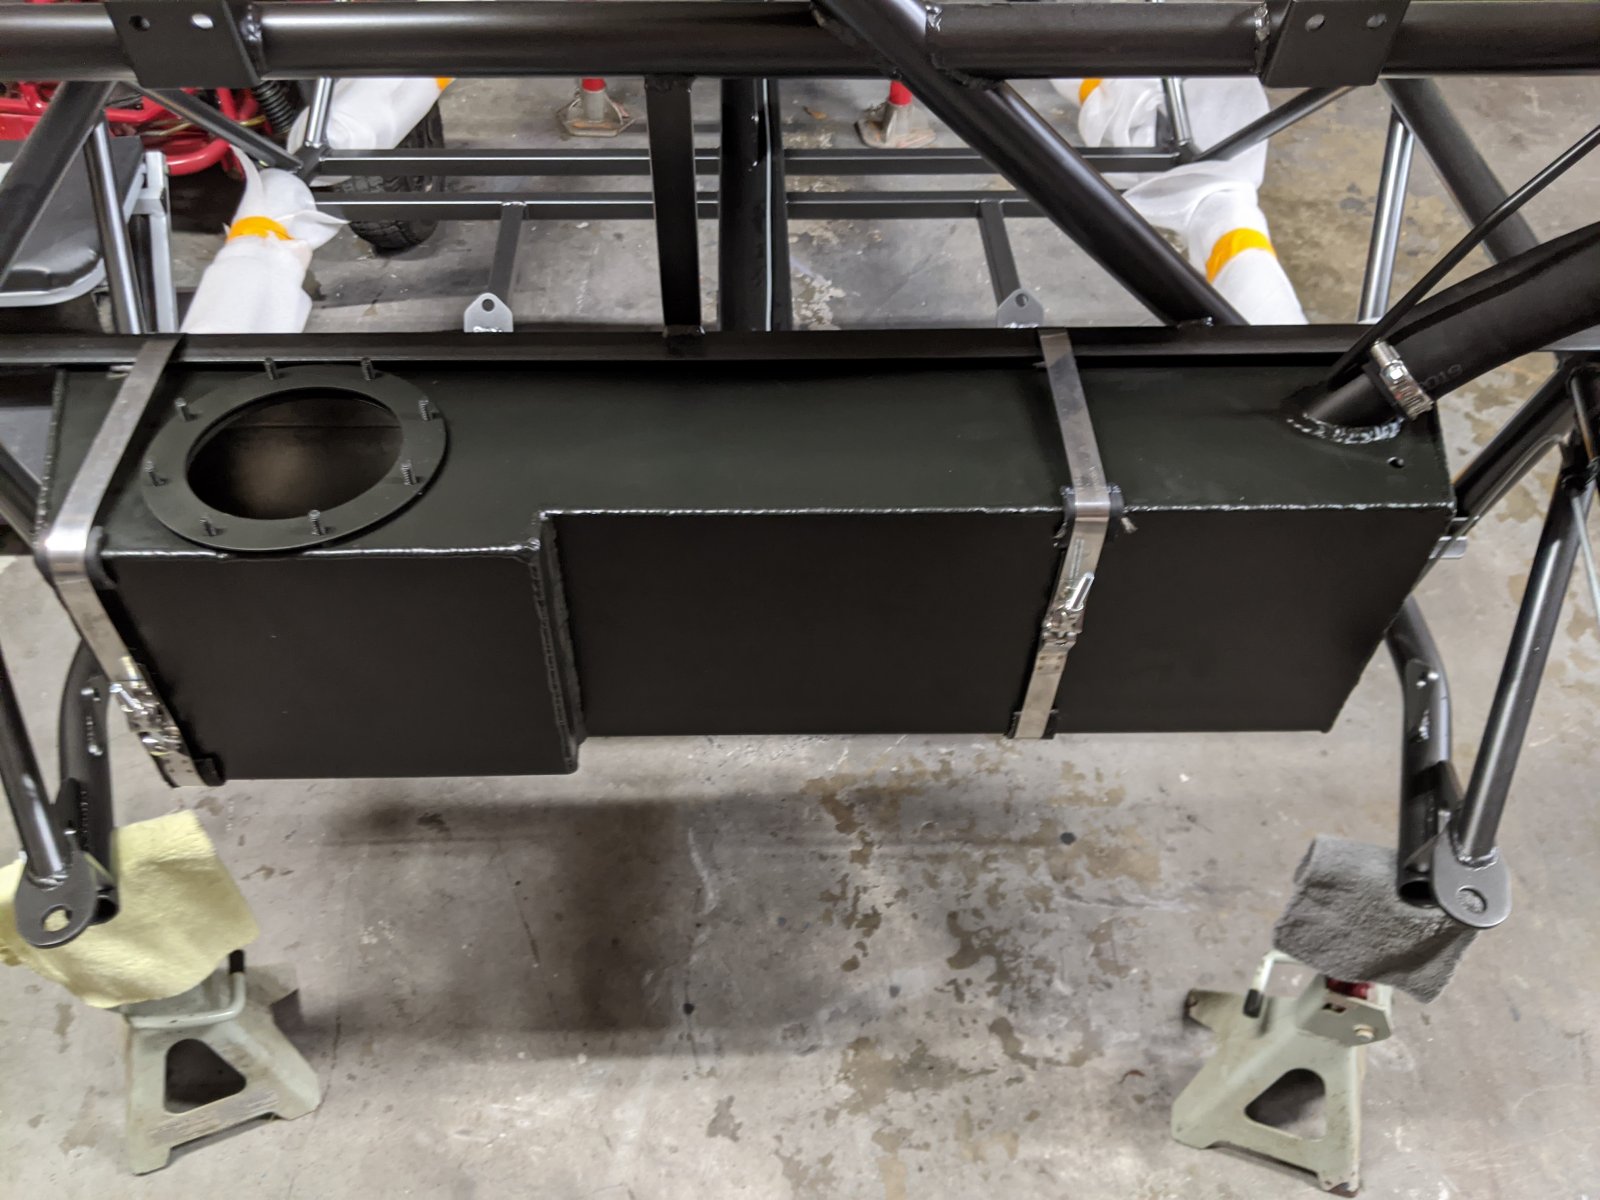
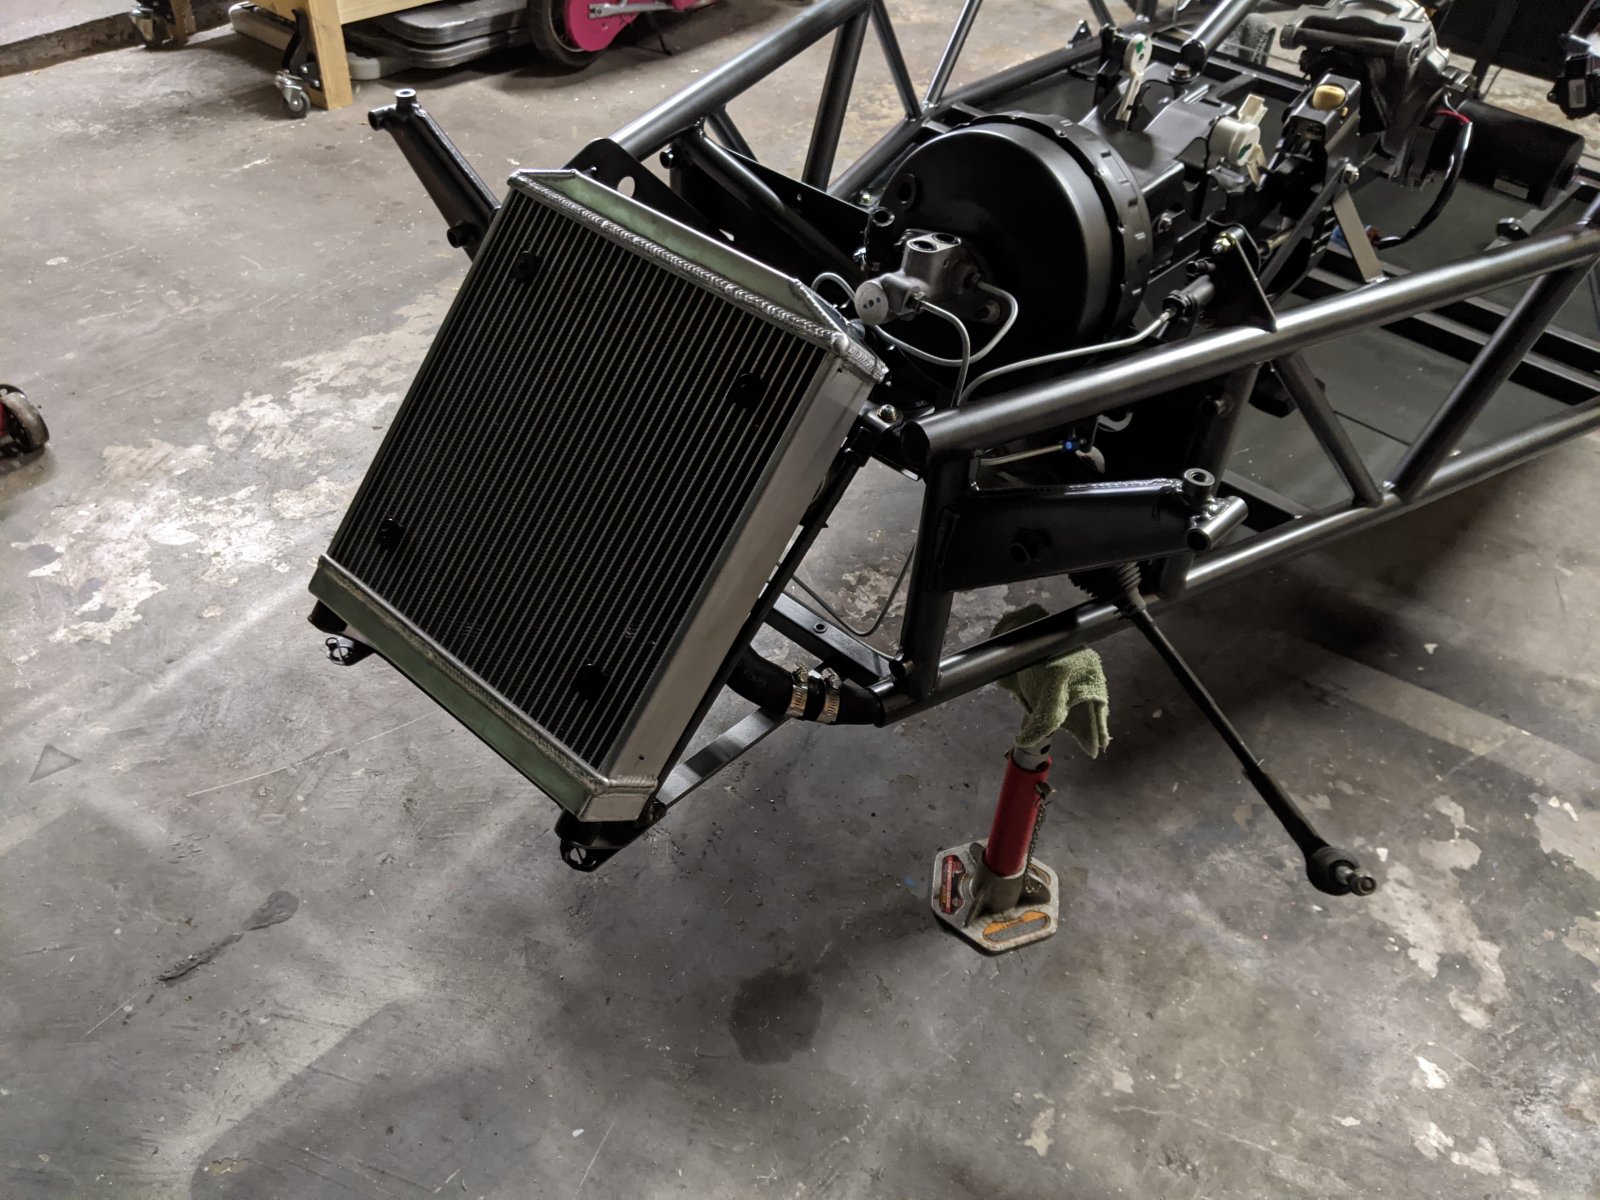
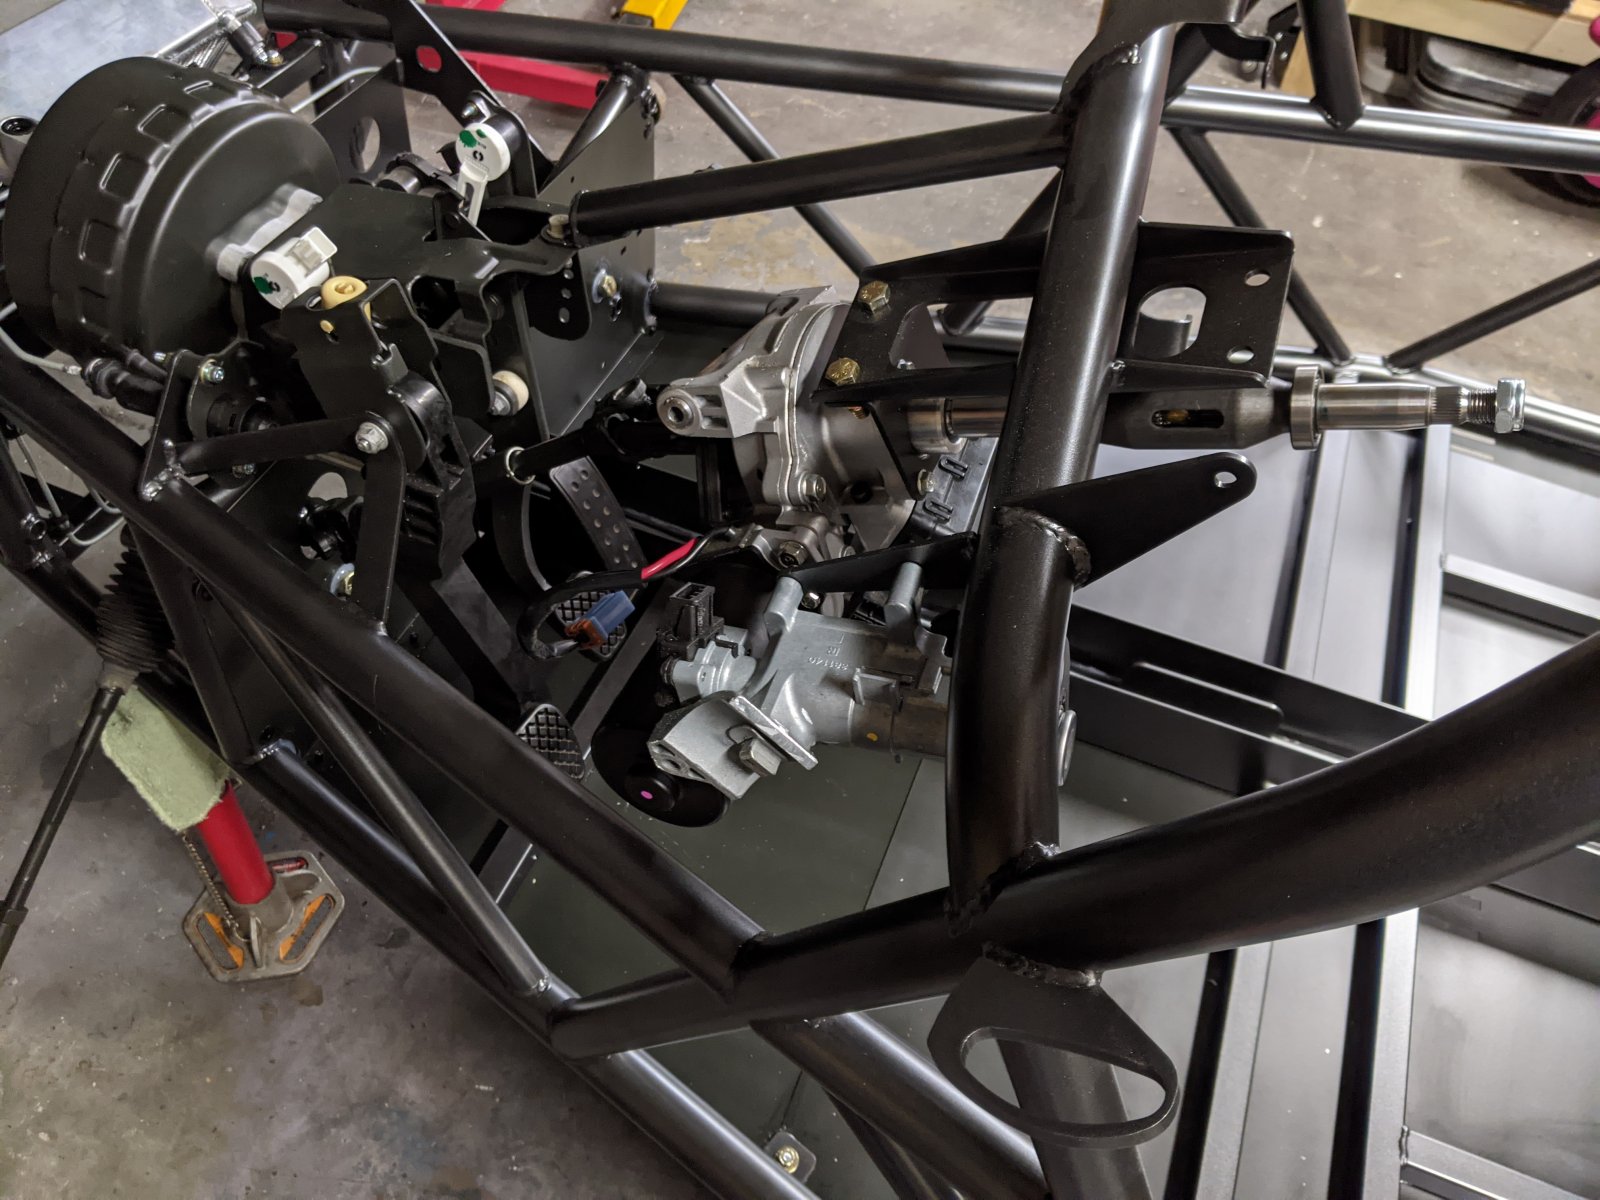
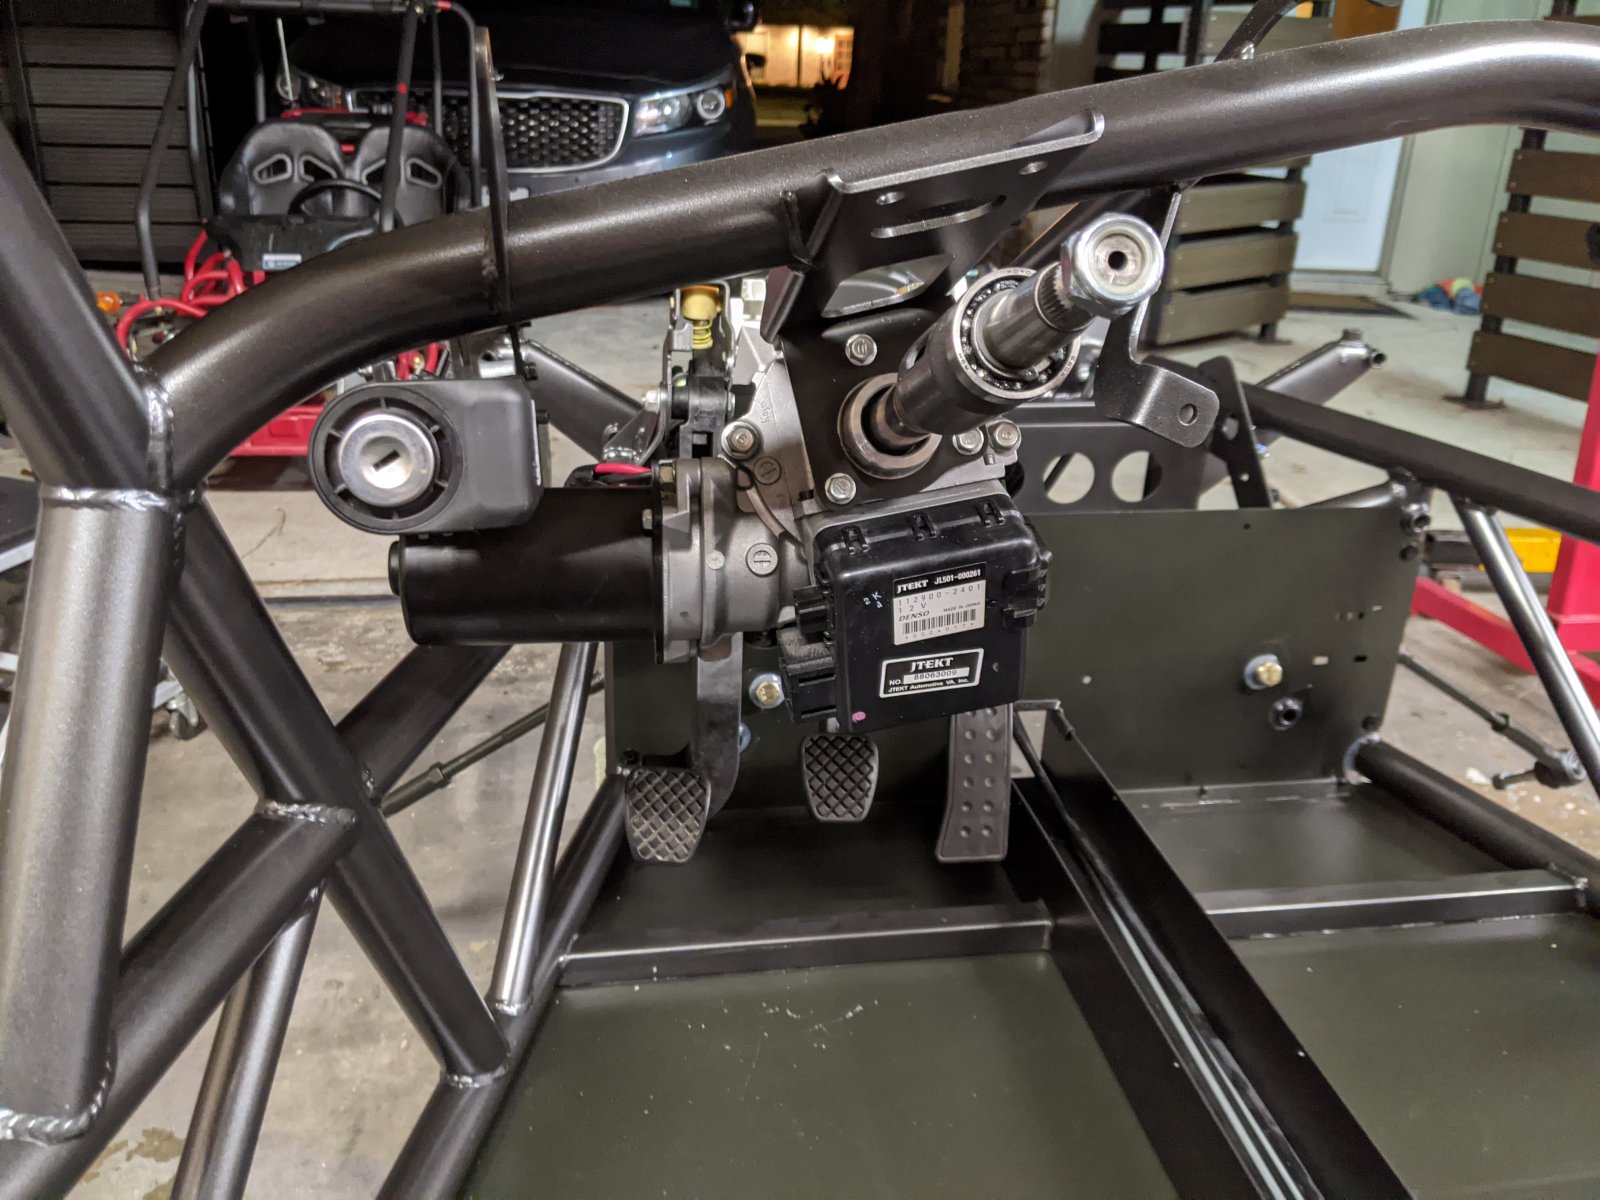
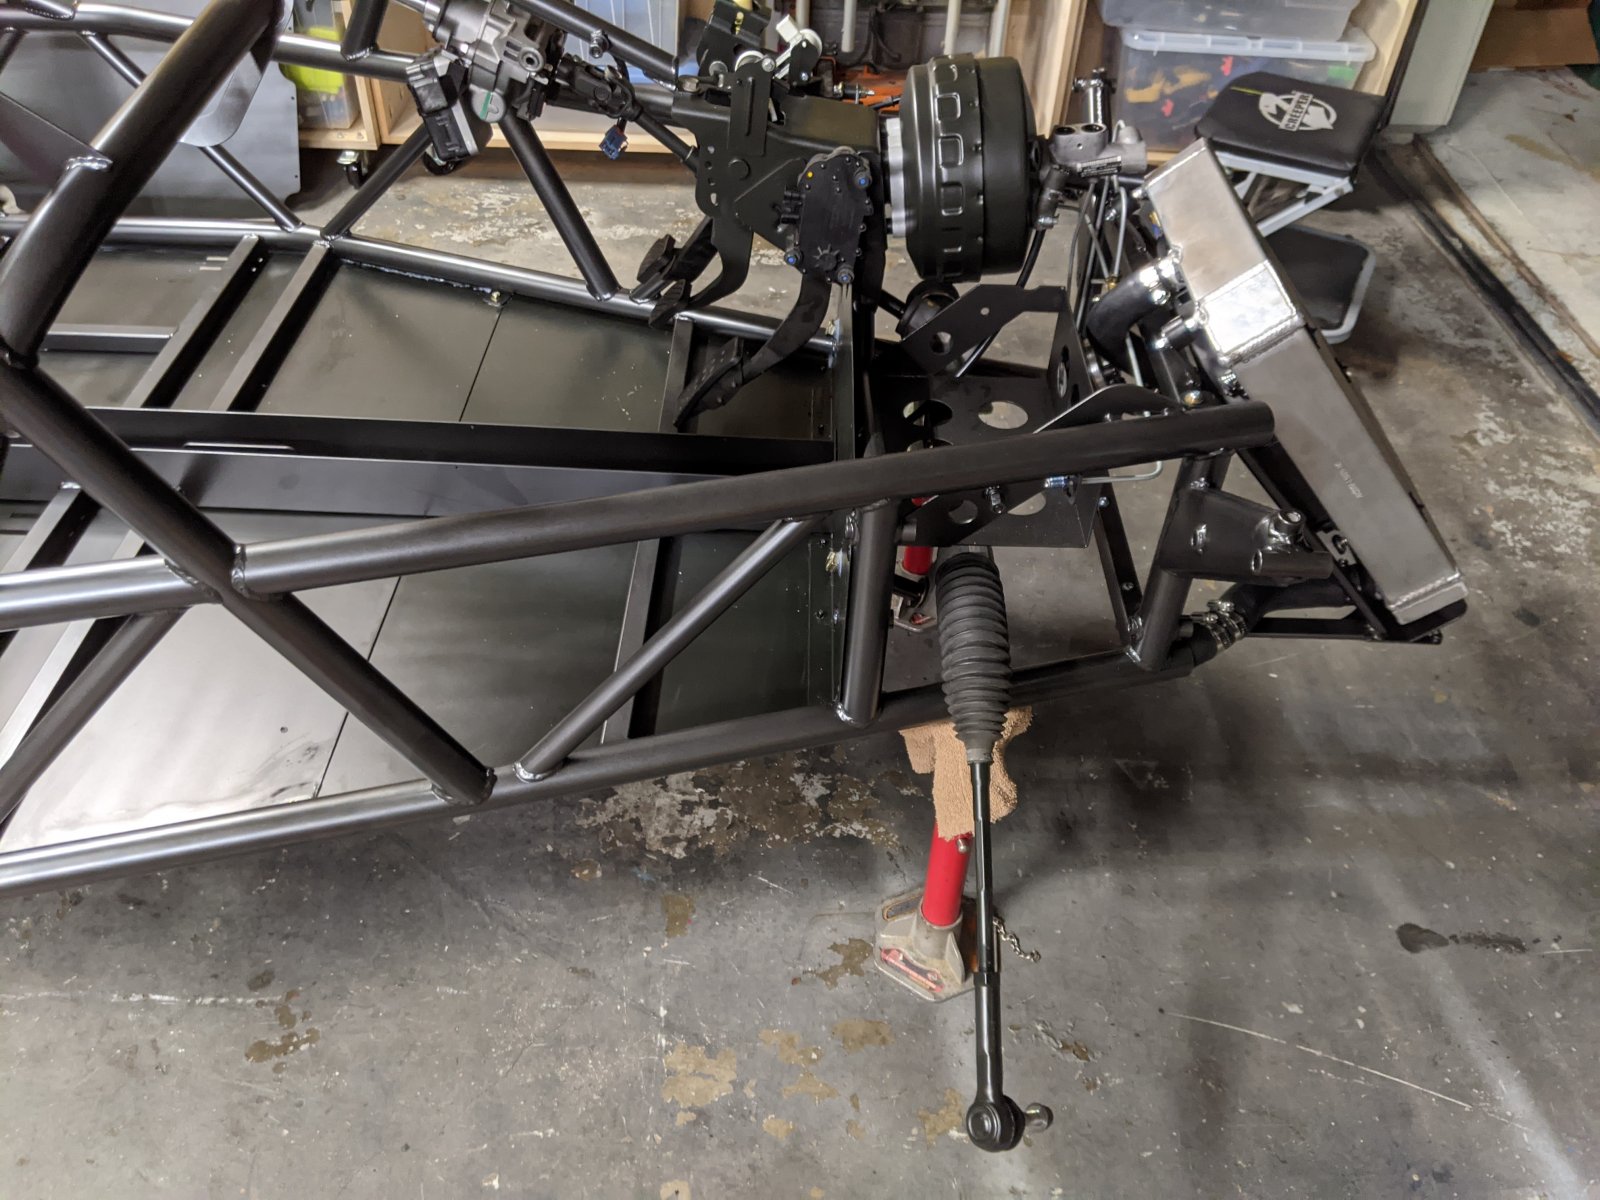
My son and I have been busy working on the kit. So far, we have installed the cooling hoses, brake lines, horn, brake booster, pedal box, ignition switch, sheet metal, fuel tank, and some other random items.
One last item, a neighbor and good friend writes for Hagerty. He has started writing up my build for their social media platform. My Goblin project is featured along with one of his restoration projects. I know Hagerty has been unwilling to insure Goblins, maybe we can change that. Here is a link to his first article:
https://www.hagerty.com/media/maintenance-and-tech/two-neighbors-two-garages-two-project-cars/
Please let me know if you see anything that I have done incorrectly or am missing.
Thanks,
Brett
At the beginning of 2020, I decided it was time to embark on a life goal of building a car. I have been researching this subject for many years and the time was right to execute. I have looked at everything from the various Cobra builds, Lotus 7 type vehicles (Stalkers / Caterhams / Westfields and others) and even considered building a Locost from the ground up. After working on my welding, I realized that I would rather put my faith in the welds of an experienced welder over that of my own.
Sometime in 2015, Adam posted on the locostusa forum about the Goblin and that piked my interest. It seemed that it was priced right and used the single donor concept that I preferred. In addition, I would not have to rely on my subpar welding abilities. In 2016/2017, I was about to embark on my dream and then titles began to be revoked in the state of Texas. I decided to take a pause while that issue was resolved. Now, 5 years later and the finances / personal life / work life / legislature / spouse aligned, and I started searching for a donor.
Initially, I started searching Facebook Marketplace / Craigslist for a TC donor however the prices were more than I wanted to spend. I setup searches on Copart and IAAI for the Houston area and eventually a 2009 Cobalt SS became available. I believe that was in February 2020. I noticed that with Copart and IAAI, when a car was listed it might take several months for the vehicle to be schedule for auction. I assume that this is due to insurance / legal issues that are waiting to be resolved. However, for the vehicle I found, an auction date was listed after about 5 days. Now I had 2 weeks to figure out how to bid with IAAI.
In my case, I chose to go with SalvageBID for the broker to purchase the Cobalt. They were easy to work with and I won the auction with a bid of $1,400.00. After fees, cost was $2,204 for the vehicle. Delivery was another $196 for a total of $2400. I ended up with a 2009 Cobalt SS that had be t-boned in the back left. The left rear wheel had been ripped of and the rear axle was broken.
After a quick trip to the local pick-a-pull junk yard and picking up a replacement axle. I was able to get the Cobalt back on all four wheels. However, I was unable to find a spare rear axle for an SS with disc brakes (at a reasonable price). Due to this, the rear brakes were plugged with a bolt and the brakes were kind of sketchy. Once I checked the fluids and charged the battery, the car started right up.
In July of 2020, my son and I spent about a week stripping the donor. We were able to sell off several parts and netted about $600 in revenue. Honestly, I was less concerned about recovering cost from the donor and more concerned about my HOA complaining about a vehicle without plates.
My wife took out an add on facebook for a “free shell” no title and, after filtering through the trash reply’s, a gentleman came and hauled off the shell. Zero cost to me and minimal effort. With the current low cost of scrap metal, I felt this was a win / win.
I ordered my kit in the end of July and was able to pick it up on October 17. I rented a 6x12 U-Haul trailer and pulled it behind my wife’s Kia Sedona minivan. While the gas mileage suffered, the minivan handled the 500+ mile trip with no issues. Here is a pic of a buddy of mine that made the trip with me, myself, and my father that drove down from north Dallas for the pickup. As always, Lonnie and his team were great host and we ended up visiting for about 1.5 hours before having lunch and heading back home to Houston.
While waiting on my kit to be ready, I started researching powder coating companies in my area. I ended up taking my frame and 23 other parts to get powder coated. While this was an expensive option, Cutting Edge Powder Coating did an outstanding job on the frame and various brackets. If I were to do it again, I think I would go ahead and get the sheet metal powder coated along with the fuel tank. I went with Graphite Charcoal from prismatic powders. Total turn around was 7 days. The following are a couple of pic’s of the frame headed to powder coat and the finished product.
My son and I have been busy working on the kit. So far, we have installed the cooling hoses, brake lines, horn, brake booster, pedal box, ignition switch, sheet metal, fuel tank, and some other random items.
One last item, a neighbor and good friend writes for Hagerty. He has started writing up my build for their social media platform. My Goblin project is featured along with one of his restoration projects. I know Hagerty has been unwilling to insure Goblins, maybe we can change that. Here is a link to his first article:
https://www.hagerty.com/media/maintenance-and-tech/two-neighbors-two-garages-two-project-cars/
Please let me know if you see anything that I have done incorrectly or am missing.
Thanks,
Brett
Last edited:
")