Brian74
Goblin Guru
I don’t know why, but the lighting looks really weird on the video. Looks much better IRL.Oooh, mood lighting! Stereo sounds great.
I don’t know why, but the lighting looks really weird on the video. Looks much better IRL.Oooh, mood lighting! Stereo sounds great.
I have been curious about using Rivet Nut's, has there been any issues in using them on the curved surface of the tubes?I decided to work on the firewall. I got the pax side sound deadener installed. I decided to use 4mm rivnuts to bolt the firewall panels to the frame. There is no way to get a rivnut installer in a few of the outside holes, so I fabricated my own compact rivnut installer from some hardware I bought. It ended up working out really well.
Variable steering control - did you get the Saturn steering box and install it? What are the linear actuators for? I need to take a road trip soon to see all of this.Current Stage 2 to do list; just updated last night. I’m sure I’m missing a few things.
Kit Car To Do Stage 2:
Electrical:
Steering wheel connector splices
Dash connector main plugs
Install + wire oil PSI sending unit
Install AIM channel module
GPS module
120 ohm CAN bus termination resistor
fog lamp relay
Install variable power steering control
AIM calibration
Wiring harness wrapped
Tunnel accessory plug
Cupholder illum (main lighting circuit)
boost sensor circuit
Parking brake sensor
Fuel sending unit pigtail
Power on CAN bus checks ECM
Power on CAN bus checks BCM
Random ****:
Dynamat tunnel
Dynamat shifter
build fuel lines
Build coolant lines
Fuel filler neck mockup
Shift linkage bracket adjustment
Parking brake lines
Resolve cockpit shift linkage routing
Fasteners:
Side panels
Driver side firewall holes tapped / rivnuts
Tunnel cover mounting/split
Cowling mounts
Suede shifter boot (wife will make)
Suede E-brake handle wrap (wife will make)
Floor panels
Seat rubber isolators?
Windshield mounts
Diagnostic connector mounts
Resolve shifter cable cockpit routing
Frame Welding:
CHMSL mount
Side panel stays
Ground lugs
Fog lamp actuators/mounts
Wire harness stays
Heat exchanger mounts
Air/liquid separator mounts
GPS/AIM module bracket
Coolant tank
Intercooler surge tank
Dead pedal? Is there room?
Steel Fabrication:
Fog lamp actuator mounts
Cupholder
Upper cold air box mount
Shoulder harness mounts
Fog lamp housings
Amp mount
Front grille
Shave cold air intake pipe flange
Parking brake mount
Intercooler surge tank mount
Aluminum Fabrication:
Side air dam
Rear wang
Coolant reservoir/bungs
Front splitter/wing?
Admin:
Full powder coating parts inventory list
Buy:
Linear actuators (5lb side load rated, 3”travel)
Fog lamps (the hella ones)
Wheels
Tires
MAF sensor
Coolant reservoir
DZUS fasteners for lower front cowling
Beer
More beer
Research:
Rear wing
Front spoiler/dam/splitter/wing
Yes. Got a Vue box out of a pull your own yard for dirt cheap. Its a direct fit, other than needing to install a 120 Ohm resistor to make a new CAN bus termination.Variable steering control - did you get the Saturn steering box and install it? What are the linear actuators for? I need to take a road trip soon to see all of this.
They should work fine assuming you drill the proper size hole. I had no issues with them holding inside the tubes. Make sure to use steel ones to avoid galvanic corrosion. You’ll need to either make or buy a low profile installer for the side firewall holes as there is not much clearance.I have been curious about using Rivet Nut's, has there been any issues in using them on the curved surface of the tubes?
 www.eastwood.com
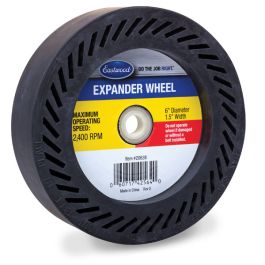
Nice; I’m always looking for more finishing tools to add to my arsenal.Every time I use this I think of you, Have had one for about 16 years and love it.
Eastwood Expander Wheel
Conforms to slightly contoured pieces and leaves a smooth uniform finish.

 youtube.com