Desert Sasqwatch
Goblin Guru
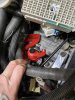
Found the radiator air-blockers in your build log post #254. Definitely push all the air through your radiator. ")
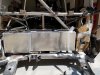
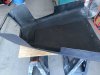
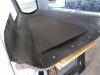
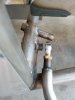
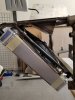
Or use that tank for a methanol/water cooling system on the intake manifold.Another weekend (still nice weather for Phoenix in the 80's) and more time to tinker with the car. Made the decision that the fuel tank needs to slide over to the driver's side (someone let me know if this will not work) to make room for a water supply tank - seems there is plenty of room to do this and allow for a custom tank on the passenger side. I pulled out the cardboard and tape and made a compound-trapezoid shaped tank that fits into the fuel tank rails, between the right side of the fuel tank and the frame rails. The overall size is 6X8X14 (WxLxH) that should hold just under 2 gallons - plenty for the intercooler heat exchanger spray system. Just have to queue up someone with good aluminum welding skills to build it.
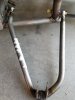
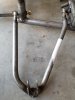
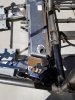
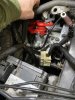
I remember Lonny or Adam Saying a while ago that during welding the arms will warp some. Use some force and tighten the bolts up.Question: is there supposed to be a 3/8 plus gap when I try to install the lower control arms? The front rod end is flush and the gap is between the rear rod end and the frame mounting bushing.
BTW, my laptop died and I'm trying to this on my phone, hope this works.
OOOOHHHHHH!!!!!!! Caught a guru...........I see you have the spring mounts on the top side, was that intentional? I glanced back at the gallery pics and the mounts are on the bottom side.
They all have that gap. Ours did too and we questioned it and then just bolted them up. It's not a issue.Seems that gap will put some stress into the arms when they are pulled into place. Not sure that can be good for the welds over time.
Yes, the arms are upside down, doesn't matter, just checking fit and they came right back off again.
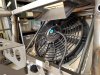
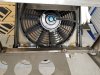
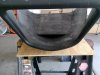
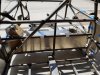
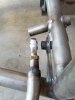
Wow looks good. I have to admit though I looked at the pics and thought why is Tim mounting the radiator upside down? Then I had some coffee and realized the whole frame was upside down.While I was doing some thinking/ engineering about the additional cooler that will be mounted behind the radiator, in nearly the same location as the stock heat exchanger, I decided to go with a different and more easily implemented way to get cooling air to the cooler. Rather than pull air from the sides of the radiator and loop it around to the cooler - similar to the NACA ducts only inside the nose next to the radiator - the air will be picked up from under the front of the nose below the radiator.