devianteng
Well-Known Member
Hi, and welcome to my build log!
About me:
My name is Derek (or you can call me devianteng), and I'm out of the Louisville KY area (just south of). I'm a computer guy by trade (Information and Data Security), 3D printing nerd, and also enjoy turning wrenches and "playing" in my workshop. I have a few bikes (2020 Honda Monkey Z125, 2020 Moto Guzzi V85TT) and enjoy riding whenever the wife lets me. I also enjoy building and riding mini bikes and go karts; recently bought a Rogue Fab tube bender with the goal of making a crosskart one day, and I'm an okay-ish welder (trusty Hobart Handler 140).
I've been following the DF community for a few years now, but just recently was able to order my kit. I previously had a 2006 SS/SC that I become real familiar with, learned a lot, got my first hands on experience with HPTuners, but decided to sell the car as I had no ability to order my kit any time soon. Fast forward 18 months, and here we are!
My Goblin will formally be known as the "Deviant Goblin". Why? "Deviant Engineer" is an online name I coined nearly 10 years ago now. I have a tech blog (albeit, not updated frequently at all) with the same name, and I often use "DeviantEng" or "DevEng" as short hand. It would feel wrong to NOT use "Deviant Goblin" for my build.
Donor car:
For this build, I have picked up a 2007 Cobalt SS/SC to use as my donor. As far as I can tell, the powertrain is stock and never modded. The car has the factory exhaust with cat intact, factory pulley on the supercharger, no dual pass endplate, and the factory intake.
The odometer reads just over 171k miles, but the engine was reportedly rebuilt by a local speed shop earlier this year. From what I was told, that includes new rod bearings, new main bearings, new piston rings, cometic head gasket, ARP studs, valve job, new timing chain kit, and new sensors. I was told that the reason for the rebuild is the car had sodium-filled valves installed at one time, and late last year one of those valves burned and was no longer sealing. I didn't find a cometic sticker and an ARP document in the car so I have no reason to believe the previous owner lied to me.
After this supposed work, the clutch slave cylinder died and the previous owner parked the car and never drove it any longer. The clutch has very little resistance so something definitely is wrong there, but I'm not sure if I will troubleshoot or attempt to fix, or just start doing the tear down. To start, I am going to spend time cleaning out the car (trash, etc) and removing the Viper alarm/remote start system.
Immediate build plans:
I placed my kit order on November 15, 2021. My order was pretty simple; frame is extended length, with full cage and full door bars. I selected no optional items at time of ordering, and paid my deposit for the full kit. As far as options, I may later add a few such as the the button panels (or maybe 3d print or custom make something), coilover adapters, and 5x114.3 bearing hubs (TBD -- haven't decided on wheels yet). Seats, steering wheel, wheels/tires, mirrors, turn signals, headlights, taillights, etc are all TBD and I will do research into what's on the market and what's available from DF directly. I likely won't be ordering the DF body panels and instead doing my own thing.
With the current estimated ready date of 12-13 weeks, plus another 2 weeks for shipping, I'm realistically expecting to take delivery of my kit around the middle of March 2022. This gives me plenty of time to do my tear down, clean up the engine, do some mods, and get things ready. From experience with my previous 2006 SS/SC, I want to clean the intake manifold and inspect the laminova cores, and replace those o-rings. I will also install a dual pass end plate, new intercooler and water pumps, and likely a clutch upgrade, but still undecided. And of course, replace any parts that look worn or damaged. Basically do all the supporting mods now, keep the M62 blower stock setup and go crazy with v2.
Goblin will be used for a mostly for street cruising, but future state is so I can get into drag racing with it.
Future build plans (1+ year post build):
This is still pretty much TBD, but expectation is to go LSJ-t, with the S257 or Z57. Head work (port and polish, oversized valves, stage cams, etc), maybe a ZZP short block, with diamond pistons, etc. Goal would be 450whp, but suspect I'd be getting suspension, tires, and aero dialed before this happens.
BUILD LOG:
*I will include updates as edits to this original post. I will also reserve the next 3 comments for future build log entries. When I post a new entry, I will also add that as a new comment at the end of the thread. Why? This way it will be easier to see all information without having to read the entire thread.
November 15, 2021
THE BIG DAY! Placed my order for my kit. Extended length chassis, full cage, full door bars. Did not specify any optional addons at the time of my order but this may change in the coming weeks. Goblin #373!
November 16, 2021
Went to look at a local Cobalt, and bought it. I now had my donor! 2007 Chevy Cobalt SS Supercharged, G85 package. Car has body damage, mostly on the rear. Battery was dead but with some jumper cables it started right up and the engine idled well. The clutch pedal had no resistance, and the previous owner tells me he has bled the slave cylinder but that didn't help. He suspects the slave cylinder needs to be replaced, which is why he hasn't been driving it.
Inspected for as well as I could for the items I cared about, and was satisfied. $1800 cash, a bill of sale, and then I had the title in hand. Got the car on the trailer and headed home. Immediately unloaded into my shop and got the car on my trusty Harbor Freight wheel dollies, and snapped a few photos. She's dirty inside and out, so a good cleanup will be the next task I do. Undecided if I want to investigate the slave cylinder prior to disassembly (if I can fix it, I can at least run it down the road and back for a little shakedown test), or just dive into the disassembly.
November 17, 2021
Nothing too exciting, just cleaned out the car. Made about $18.50 in loose change, found a FireStick, a good pair of black/blue Nikes (in my size), several USB cables, and otherwise cleaned out the trash and vacuumed out the car. I did find some standing water in the trunk, due to the damaged rear but nothing that would effect my Goblin build.
November 21, 2021
Today was my first real day working on the disassembly. I basically made it through the first 2 videos which took me about 75-90 minutes to do. I'm basically committed at this point to leaving the donor where it's at in my shop, up on the QuickJacks, until she's completely tore down. Will use the tractor to get the shell out, but that's probably after the new year.
Before tearing into it, I did (with some help) bleed the clutch slave cylinder, which definitely had air in it. Got it flowing fluid, but the pedal still isn't grabbing. Oh well, not going to let that slow down progress and I'll go over everything once the engine is out (new slave and master cylinders, since I'll already be there; upgraded clutch, hopefully find a LSD to add in, etc).
Already have the hood and front bumper sold for $400, so now I'm only in the donor for $1400. Hoping to see $100 for the fenders, $250 for the doors, and $100 for the spoiler pretty quick. I will probably sell the stock wheels and tires, and maybe the sunroof if I can find a buyer first. Hoping to pay off my donor and have extra cash to put toward new wheels/tires, seats, and steering wheel. Oh, and I'm probably going to make a recining shop couch out of the factory front seats (unless I can sell the seats for decent money). They need to be reupholstered, but I think it would look awesome!
Anyway, pictures aren't anything too exciting, but it feels great to finally get started!
[CLICK HERE FOR PHOTOS]
November 26, 2021
Black Friday got me. I ordered the ZZP Entry Level K04 Turbo Kit, along with their S3 Heat Exchanger and Dual Pass Endplate. This wasn't in the plans, but plans are made to change; right? Looks like my "version 1" build will now be a LSJt K04 setup with 80# injectors and tuned on 93 Octane. Hopefully this can get me 300whp and 350 ft-lb torque!
I fully expect to also buy neutral balance shafts and a new intercooler pump before the kit is built. Otherwise I'm going to try and stay off ZZP/OTTP for the time being.
[CLICK HERE FOR PHOTOS]
November 28, 2021
Made it through videos 3 and 4, removing the powertrain. Really wasn't too bad, just time consuming making sure I label everything. Definitely was a little messy but manageable.
Next up is getting the interior stripped and dash out, which I don't think will be too daunting. Thinking ahead, I'm hoping to have the donor completely stripped and the shell out of my shop by the end of the year. Should be doable as long as I can find the time to get out to the shop!
[CLICK HERE FOR PHOTOS]
December 01, 2021
Made it through the first half of video 5, in about a hours worth of work pretty much stripping the interior minus the dash. Only 1 of the seatbelt T50 bolts gave me trouble, otherwise my ICON brand T50 held up great. Also got my first touch of old sticky harness. I'm actually looking forward to reworking the harness, but do dread the stripping and cleanup of old tape/loom. Part of the fun though.
Hoping to get 2 hours in tomorrow and get the dash and harnesses out of the car.
[CLICK HERE FOR PHOTOS]
December 07, 2021
Finished video 5, and got the dash out. Progress has been slow due to life and kids, but I think we all have run into that during a project like this. Not to mention the below freezing temps, but my torpedo heater has been doing a great job keeping the shop comfortable.
Previous Cobalt owner had a Viper alarm/remote start installed, so it took me a good 20 minutes to unwire and remove that. I also didn't have an extra set of hands so I had to get creative to get the dash out, but I did it without damage. With any luck, the donor shell will be out of my shop by the end of the weekend so I can setup spots to tear down the dash and start the wire harness work.
Oh, I've also canceled my K04 kit order. After thinking about it for a few days, it just didn't make sense. Instead of the Siemens 80# injectors, I want to run the FIC 870cc split spray injectors. The kit came with a downpipe that I don't need, so it's just a waste of money. The K04 turbo wasn't an endgame turbo fro me (I want a z54 or z57, probably), I'll eventually have to replace the stock LSJ intake manifold and I want to go with the OTTP turbo intake manifold, I want to go with an external wastegate setup, I'll probably end up air-to-air instead of air-to-water, etc. Just did not make sense to buy that K04 kit for $1600 and the S3 heat exchanger for another $200 knowing that a lot of it would be replaced within a year. So to keep things moving forward with this build, I will be building the Goblin with the stock LSJ setup. I may do a few things like neutral balance shafts, 82# valve springs with titanium retainers...standard supporting mods that don't require returning at this stage. Then once the car is built, I can enjoy it for the rest of the 2022 season and next winter can do all the go fast stuff.
[CLICK HERE FOR PHOTOS]
December 08, 2021
Video 6 complete. Harness has been removed, and all that's left is parking brake, shifter linkage, and fuel pump assembly. Really debating not dealing with dropping the fuel tank and instead buying a new pump and filter. I guess I'd probably still have to get the fuel filler neck out, and not sure about any wire harness down there. I'm sure I'm not the first to avoid dropping the fuel tank so I'll search the forums and see what I can find.
On track to have the donor out of my shop by Saturday, and get to stripping the dash. Might even have the harness all ready to go by end of the year.
[CLICK HERE FOR PHOTOS]
December 11, 2021
Completed video 8, and got the shell ready to leave the shop. Threw all the things inside the car I don't care about or need, and someone is coming to pick up the shell to get it out of my way. Picked up a sheet of MDF to make a 4x8 table to get ready for wire harness work, but next up will be stripping the dash and taking inventory of all my donor parts (fingers crossed I have everything, or most everything).
Car is off the lift and sitting on a pair of wheel dollies, ready to be pushed to the edge of the shop and winched onto a trailer. Good riddance!
[CLICK HERE FOR PHOTOS]
December 12, 2021
No big updates, but the shell is gone and I made a table from MDF and 2x4s. Table will sit on sawhorses for now, but will eventually make legs. Will seal it with some kind of urethane before using it for harness work, and hope to keep it around for a long time. Hope to get the dash disassembled and donor parts inventoried in the next week.
[CLICK HERE FOR PHOTOS]
January 17, 2022
Happy New Year! I call this the "year of the Goblin".
I took a long break from dealing with my donor (got cold, holidays, laziness...typical excuses) but finally finished the dash disassembly, which means I am done with disassembly. I got my donor shell out of the shop mid December, so it's been gone a while now. I made a table (2x4 frame, 3/4" MDF top) for my wiring work, which I'm actually looking forward to. Been thinking about any extras I want to add into the harness (wide band, additional accessories, etc), and plan to take my time. Solder/de-solder, de-pin connectors instead of cut, wire loom tape, etc. Afterwards I will be taking inventory of my donor parts, ordering replacements for anything that needs to be replaced (likely to replace any consumable parts which makes the most sense to me) and doing cleanup/prep/paint.
Side note, new heater is working great in my shop (30x40x16, insulated). Less than 30 minutes and it went from 30 to 68 degrees in there, burning diesel. Held the heat well and made it comfortable enough for t-shirt and no jacket. Really need to invest in a new audio setup for the shop, though.
[CLICK HERE FOR PHOTOS]
January 23, 2022
Found a little time to get started on the main harness thinning. Completed video 2 (thinning the harness 1) and 2/3 of the way through video 3 (thinning the harness 2). I found 1 broken wire that I need to trace and determine where it goes, but a wire diagram should make that easy but waiting until I finish thinning the harness because that may be a wire I don't even need. Pictures below show a before and after of the work I did yesterday, which was about a hour. I did realize that I traced and removed grounds from the lugs, that it seems I shouldn't have done but not a big deal as I can make a new lugs as needed for grounds.
[CLICK HERE FOR PHOTOS]
February 17, 2022
No updates on the harness or donor part prep. Really waiting for the cold weather to break before I refocus back on that stuff. But, on Feb 07 my frame went on the jig, and only 2 days later on Feb 09 passed inspection! This morning I got my invoice and got that paid for stage 1. Shipping quote is $700, and estimated "ready date" for carrier pick up is Mar 07.
[CLICK HERE FOR PHOTOS]
March 15, 2022
Happy Thursday morning. Stewart Transportation showed up, as expected, at 7:20 this morning to drop off my frame and stage 1 kit. It is now safely in my shop!
I had originally hoped to have the wire harness done by now, but that definitely hasn't happened. However, I figure this let's me test fit the harness before final tape up so not a big deal. I've got a few frame mods planned, then off to powder coating. Going to add a few top bars, a higher harness bar, and tabs to the side to mount in aluminum panels (very similar to what @DCMoney has done).
Color...still undecided. Likely doing a blue/orange theme, but not sure which color the frame will become.
It's a shame that I'll be working all day today and can't even unpack the frame yet to really get a look at it. Maybe this evening?
[CLICK HERE FOR PHOTOS]
March 20, 2022
Been a productive weekend with nice-ish weather! Unpacked the frame and inventoried all frame 1 piece, and all was there. My oldest was eager to get in so he had me put a seat in for him to try things out.
Picking up some tubing this week to made roof bars, but I'm still undecided which I like best. Would love to hear opinions of others, but I'm leaning more toward the third photo (open V in the front, with the bars meeting in the middle of the rear).
And fortunately, I was re-motivated to continue with my wiring so I finished up video 4 and am about half way through video 5 (up to the point of introducing the headlight harness). Harness is taking shape and things have been pretty smooth and uneventful so far, which is good!
[CLICK HERE FOR PHOTOS]
March 28, 2022
Another productive weekend on the wire harness. Earlier this week I finished video 5, and between Saturday and Sunday I completed videos 6, 7, and 8. Watching ahead a little, I'm expecting the next 3 videos to be a little more time consuming and with upcoming plans for this coming weekend, I suspect it will be 2 weeks before I finish the wiring harness.
I've spent a lot of time thinking about roof bars, and I believe I'm just going to keep it simple and do the double roof bars down the middle (picture 2 in my previous post). One of my personality traits is to do things different than everyone else, and that's the primary reason I was considering alternatives to picture 2. But, there's a reason that style is the most popular amongst other builders and I need to stick to that. Hope to pick up a tubing soon and get those cut to length, notched, and welded up around the same time I finish the harness. I also need to pick up some sheet steel (currently thinking thickness around 14 to 16 gauge) to cut and weld some tabs in for side panel plates. The last thing I need to figure before is I need to weld in a new harness bar, but I haven't fully decided my seats yet (thinking Kirkey 65's, 18.5" wide). So decide seats, order a seat, test fit, determine if a new harness bar is needed, the cut/weld one in. Maybe I can get the frame ready for powder coat before the end of April.
[CLICK HERE FOR PHOTOS]
April 09, 2022
Quite a bit done between yesterday and day. Wire harness video 10 completed, leaving only video 11 left which is basically tying grounds together, testing, and final harness wrap. Getting close to a big mile stone!
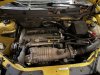
Also spent some time on my donor engine (stock LSJ). When I bought the donor, it had "no clutch" and was told by the previous owner that it had a new clutch installed but he could get the slave to bleed properly (I suspect he installed it himself). I had planned to swap a new stage clutch either way, so this wasn't a deal breaker with the car and the engine itself ran well. Today I separated the trans from the engine and immediately saw issues with the clutch. The clutch looked new, but the fingers were stuck in it seemed, which was very odd.
Started to take the clutch off and clutch plate just started falling apart. My guess, it was installed incorrectly and blew apart on first start. Throw out bearing looks good, but it's VERY greasy and nasty in here.
Got the engine on the stand, so I can start cleaning it up and giving everything a once over. Got absolutely robbed by Ace hardware for a few bolts to mount the engine to the engine stand...$28 for 4 bolts, 8 washers, 2 lock washers, and 2 nuts. Will order and install a dual pass endplate, but not sure that I really plan to do anything else. Long term plan is turbo swap, so no sense buying a smaller pulley, phenolic spacer, or anything else that would require retuning. But, I want to go through the intake and inspect the laminova cores, replace o-rings, etc.
[CLICK HERE FOR PHOTOS]
April 10, 2022
Finished the wire harness (well, basically)! Still need to tape up the headlight wires and other things on that end, but otherwise I have completed everything with the harness (including testing of the grounds). Feels like a huge milestone!
I have a question though and hope to get a quick answer. The 2 purple wires that I zipped tied to the harness (one near the EPS connector, and the other back near the fuse block), these are power-on-key wires, right? What about the red with white wire that I also zipped tied to the harness near the EPS connector, is this always-hot or another power-on-key wire?
Aside from the harness, I also got the transmission cleaned up decently well, and visually inspected what I could.
And lastly, stripped the engine down to just the long block. Definitely need to clean the engine up, clean and tape up the engine harness, and find missing bolts. Exhaust manifold was missing 2 nuts. The big bolt on the bottom/rear of the intake manifold was also missing. Transmission bolt was missing, and so were a few other miscellaneous things were missing, or just "finger tight". Definitely worth taking the time to go through everything.
Good news is the top end looks great, as it should since it was professionally gone through a few months prior to me buying the donor. Valvetrain looks fantastic and confirmed things like new gaskets (valve cover and head gasket), ARP studs were used, new style timing chain tensioner, timing chain good and tight, etc. I can also tell the oil pan has been off somewhat recently, and I was told the previous owner put in new rod bearings so this makes sense. All in all, should have a good, healthy stock-spec engine (which was running fine before teardown).
Next up, start making a list of engine/trans parts I want to replace or add. No mods that would require a retune at this point though, as I will save that after I am on the street. But I know I need a new clutch, throwout bearing, flywheel, for example. Just need to get all these things listed out. I am also considering replacing the OEM water-cooled oil cooler, and going with a remote mount air-cooled oil cooler (using ZZP or OTTL Oil Cooler Adapter). Lastly, I'm starting to think about seats and wheels. For seats, I'm thinking the Kirkey 65 Series 18.5", if they'll fit (would like to order one, test fit, and if it's a go order the Kirkey floor mount and get that welded in before powder coating). For wheels, I am thinking I should get the redrilled hubs from DF (5x114.3) but I'd like to get feedback on that. Wheel size, I'm thinking 17x7.5? No clue on the offset...picking out wheels is something I've always struggled with. Any feedback would be awesome!
[CLICK HERE FOR PHOTOS]
April 11, 2022
Wire harness is officially finished. Sharing photos for later reference, or for others.
Next up, cleaning up the engine harness.
[CLICK HERE FOR PHOTOS]
April 14, 2022
Engine harness, including injector and coil harnesses, have been cleaned up.
Time to turn my focus to my frame and get roof bars and trick tabs welded in, then prep all parts for powder coating. Has anyone made a list of all the small parts I should get coated/painted? Would be quicker than figuring out my own list.
[CLICK HERE FOR PHOTOS]
April 24, 2022
Unfortunately not much progress lately, other than welding in some roof bars. Was hoping to get my trick tabs welded on by now but didn't get the chance. (photo is just bars tacked in -- I'm not sharing photos of my welds, haha)
On another note, I finally got the chance to meet up with @MR.812 and go for my first Goblin ride! Unfortunately I didn't fit great in his standard frame, and my knee broke a tab of his gauge cluster that he has mounted below the dash cluster. (again, sorry!)
My immediate feedback about the Goblin platform is that 200hp in a 3200lb car is way different than 200hp in a sub 2000lb car. I definitely plan to still turbo swap mine once it's on the road, but even with the stock LSJ it's got more than enough power to walk just about anything on the street. Riding in his also confirmed that I want to do a square tire setup, oh and that I really liked his seats which fit me pretty good (I'm 6'2" and 280lb, so a big boy).
I've got some out of town travel coming up this weekend and next week, but once I'm back my focus will be getting this frame coated. Also hoping to meetup with a few other Goblin owners this weekend (@jaredthenav and/or @r3drckt) if their schedules allow. I promise not to break anything else!
[CLICK HERE FOR PHOTOS]
August 01, 2022
Last update was April, and here it is already August!
Been busy with non-Goblin things, unfortunately. Moved into a new house, made updates to our previous house and got it on the market, spent a bit of time getting the new shop organized (still not done; but is it ever done?), and trying to get my 78 Vette back on the road (new radiator, fans and thermostat; minor refreshes like new intake, exhaust, and valve cover gaskets, reseal oil pan, new fluids, etc). Anywho, about a week ago I dropped my frame off for powder and was able to pick it up this past Saturday. I think it turned out great!
I decided to go with Blue Diamond from Columbia Coatings, and for accents I will be using an orange (debating between Illusion Mandarin and Dormant Orange currently). Valve cover, wheels, wing uprights, and a few other things will be in this orange. I've decided that my floor pans/firewall will be done in a black truck bed liner, and smaller things like battery hold down bracket, brake booster, etc will be done in a rattle can black of some kind.
Powder work was done by Rainy Day Coatings out of Willisburg, KY. First time using them but very happy with the work so far (I'll be picking up A arms, tunnel cap, trans bracket, and sub-frame this coming weekend).
Hopefully I can get the 78 Vette back together this week and out of my working bay by this weekend, so I can start working toward my first startup!
[CLICK HERE FOR PHOTOS]
Oct 02, 2022
I see that I haven't posted an update in a while.
September was a busy month for me (new routines with kid starting school late Aug, birthdays, selling a house, family trip, etc) but I managed to get 7 hours of build time for the month...it's something. Mounted floor pans, steering rack, brake lines, clutch line, pedal box, clutch pedal, brake booster/master cylinder, front brake lines, ignition switch, radiator...good progress. Floor pans, pedal box, and some other pieces were all painted with rattle can truck bed liner, and it turned out great I think!
Seems I've misplaced the upper radiator house, so I have a new one ordered. Hoping by end of next weekend to be ready to install the engine...but I still have my engine to clean up, paint, install a new flywheel/clutch, dual pass endplate, laminova o-rings, etc. Unless something major happens, I expect to have my first start before the end of the month!
Oh, still waiting on my stage 2 kit quote from DF...so that's not ordered yet.
[CLICK HERE FOR PHOTOS]
Oct 12, 2022
Some progress. Bought a new fuel pump (Delphi FG2064-11B1) and got that installed, misplaced my upper radiator hose and had to order a new one (Dayco 71796).
Focus has been on engine prep. I previously stripped everything off the engine, basically to a complete long block and it's sat on the engine stand for ~6 months. Got it out, and spent a good bit of time with degreaser and the pressure sprayer to clean it up. Taped it off, and sprayed it with a couple cans of Flat Black DupliColor Engine Enamel. I've also taken the intake manifold apart, cleaned it up real well, soaked the laminova cores and installed new o-rings, and put on my new dual pass endplate. Taped it all up, painted, and put it on the engine to see how it looks. Needed a new intake gasket so instead ordered a ZZP phenolic spacer, so currently waiting on that. Also cleaned and painted the lower bracket for the intake manifold, and the intercooler pump bracket. Ordered a new ZZP upgrade intercooler pump, as well as an oil cooler bracket so I can ditch the water-cooled oil cooler, and go with a remote mount air cooled oil cooler.
Next up is to clean/paint the alternator bracket, clean the alternator, gut and clean the A/C compressor (not deleting the compressor, but gutting everything from inside to decrease weight and pulley resistance). After that, to finish the engine I need to clean and paint the thermostat housing (new thermostat ordered), mount the supercharger, new flywheel and clutch, paint the trans, mate the trans to the engine. That should only leave plumbing and top end things like fuel rail, injector rail, etc...which I can do after the engine is in the Goblin.
I left the valve cover unpainted with the intent to powder coat that, and the supercharger housing at a later date.
[CLICK HERE FOR PHOTOS]
Oct 17, 2022
Small update. Alt bracket painted, AC compressor painted, alternator cleaned up. Phenolic spacer installed, ZZP intercooler pump mounted, and ZZP oil cooler adapter installed. Thermostat housing cleaned up and ready to go on with new thermostat.
Got some Duplicolor Chevy Orange Engine Enamel on order, planning to paint the m62 supercharger and valve cover; was planning powder, but I eventually plan to swap the m62 for something else (TVS1320? Turbo? Undecided), and want the valve cover to match.
I think the next thing to do though is clean/paint the intermediate axle bracket, then get the engine back on the hoist. Then trans goes on the engine stand to get it painted up and then mate to the engine.
[CLICK HERE FOR PHOTOS]
Oct 23, 2022
Got a lot done this week! Supercharger painted and installed, ZZP aluminum flywheel and GMPP clutch installed, new throwout bearing and clutch pipe/slave cylinder installed, trans painted and mated to engine, new thermostat and painted thermostat housing installed, transaxle bracket painted and installed, and probably other little things I'm forgetting.
I seemed to have lost my belt and starter, so got some on order. Also ordered a pair of -10AN caps for the oil cooler plate, so I can do my first start without the oil cooler. My injector insulators are also toast, so new ones on ordered. Injector rail is painted and ready to go, so once the insulators, belt, and starter show up I should have the engine complete and ready to mount into the frame. Was hoping to have my first start by end of Oct, but I don't think that will happen...but I'm getting close! Really need to get my stage 2 ordered, but DF isn't replying to my emails...I need to remember to call them this week.
[CLICK HERE FOR PHOTOS]
Oct 31, 2022
Another productive week. Got the following installed; new starter, belt, oil cooler plate caps, injector/fuel rail (new insulators and o-rings), fuel regulator, coolant overflow tube, throttle body, header, o2 sensor, and engine harness. Then I got the engine mounted in the frame, which to me is a big milestone. I haven't done my battery positive cable yet, so we'll see how easy that is to get to with the engine already in the car.
I was hoping to have my first start by end of Oct, but that didn't happen...but I'm close. Lots of little things to do first though! To-do before first start:
1) Fuel filter/lines - Need to order a new fuel filter, also some 3/8" fuel line. I want to replaced the factory lines on the fuel pump and run new lines for a cleaner look.
2) Coolant lines - Need to plumb frame tubes to the engine, loop the oil cooler fittings on the thermostat (similar to what's done with the heater core fittings), and figure something out for my overflow tank thermostat fitting.
3) Overflow tank - I have my factory overflow tank, but I think it looks ugly on the Goblin. Looking at a few aftermarket options (Mishimoto has one I really like), but not sure what will happen if I eliminate the overflow tank sensor from the engine harness. Suppressing the CEL in HPT is easy, but I'm not sure if there are any other side effects.
4) Battery cables - Need to shorter the positive cable, and get it connected; Also need to connect the battery ground.
5) Fuse panel - Pretty straightforward, need to mount the box and get all the plugs hooked up
6) Engine harness cleanup - Earlier this year I decided to re-tape the engine harness (it was looking rough from the donor) and I didn't account for eliminating anything. So I'll probably pull the engine harness and spent a little time on that; To get rid of are the radiator fan connectors, waster fluid level sensor, and the AC compressor connector; maybe coolant overflow sensor??
7) Oil temp sensor - At least I think that's the sensor mounted on the oil cooler. Need to decide if I want to plumb that in to an oil cooler (along with a thermostat); I suspect it's entirely possible I won't need an oil cooler at all on this build given that the engine is so exposed. Target oil temp is what, 230-250F in these cars?
8) Fluids - Lastly, but most importantly, need to fill the engine with oil and coolant. Let's hope I don't get in a rush and forget!
[CLICK HERE FOR PHOTOS]
November 08, 2022
Big progress has been made, and I've successfully cranked over the engine! Fuel system connected (made some fuel lines using 3/8" ID 300 psi rubber fuel line), all coolant plumbing finished up (driver side I ended up using two pipes for a perfect fit; Dayco 70789 and a Dayco E7188 -- passenger side I used the included Dayco 72049) coolant tank mouted. Fuse box mounted and all connected up, battery cables put in. Fresh fluids (Valvoline VR1 20W-50 oil, coolant).
At this point I was ready for my first start and it went something like this:
key in, turn key, dash lights up, turn key to crank...nothing. Double checked all my grounds, and a few other things then I found a bent pin on the bottom of my fuse box, and after correcting that was ready to crank again. Crank, started, runs for about a second, then dies. After reading a little, I believe this is because I do not have my MAF sensor connected (my donor's was trashed, and I have a new one on order which should be here later today).
Overall I consider this a win, and fingers crossed connecting a MAF sensor later will let it run and idle as expected.
[CICK HERE FOR PHOTOS]
February 13, 2023
Not much of an update other than to share since I've done nothing with the Goblin since Nov. Sold my house though, and moved. Expecting kiddo #3 any day now, so needless to say I've been busy.
But! Stage 2 kit has officially been ordered. Also got the DF Shifter (orange), redrilled hubs, DFKC steering wheel, and rear coilovers. From what I can tell they gave me the 2021 pricing (to be fair, I first started asking for my stage 2 invoice back in like October), but came out to $6,370. Also ordered 2 things I've needed since Nov; Intake Air Pressure/Temp sensor (ACDelco 213-3907) and a ZZP rear trans mount (lost/trashed my donors. So that was another ~$180.
Also got my wheels ordered. Went with the Konig Hexaform, 17x8/+38 for the front and 17x9.5/+20 for the rears. Wheels are matte black, but I plan to get them powder coated with a nice metallic orange (doing a blue/orange theme). Also plan to get my valve cover sprayed at the same time so they'll match the wheels. Tires undecided on brand, but probably do something like a 245 up front and 275 on the rear.
Lastly, I've pretty much talked myself into going with a TVS1320 future build instead of LSJ-t. LSJ-t is easier to do big power, but I realistically don't think I'll do much beyond spirited street driving, or casual straight line stuff. So the TVS is going to be more linear for the street driving, plus the sound. OTTP got a batch of new stock in for $3k, so really trying to decide if this is the way I'm going to go or not (it wouldn't get installed until the car is on the road regardless). Part of the thinking is I already bought a phenolic spacer, dual pass endplate, and ZZP shorty headers. That'd be like $500 wasted if I went LSJ-t, on top of whatever a s252 setup would have costed me. With the TVS I'd go smaller on the pulley, add another heat exchanger in the loop, bigger injectors...and that'd pretty much be it. I think 350-375 at the wheels should be achievable, and be plenty of go.
Here's to getting on the street this summer!
February 21, 2023
Small update, but a big step back working on this thing. Replaced the brake booster, MAP sensor, fixed a coolant leak on the radiator, and new spark plugs. Little things, but important things. Got an email earlier today that my stage 2 will ship out tomorrow, so that's exciting. Also heard that my powder coat guy got the Illusion Blaze in that he ordered for my wheels/valve cover. I suspect it'll be another week or so on those, and when I go to pick them up I plan to drop off the coil cover plate and the coilover shocks. Not sure what colors those will get, but I want to do something.
Feels good to work in the shop again!
March 06, 2023
Another small update; got my wheels and valve cover back from powder coating, Columbia Coatings Illusion Blaze color. Absolutely love how they came out. I also stripped my donor control arms (FE5 suspension, with the aluminum arms) and ordered new bushings and ball joints. Went with the OTTP leading and spherical bushings, and Mevotech TXMS50510 ball joints. Control arms, coilover springs, and coil pack cover plate are all with my powder coat guy and I expect I'll go get them this weekend. Control Arms will be in the same Illusion Blaze color, springs and cover plate will be matte black. No work done to the actual car though, but I expect to get back into it very soon.
First up will be to get the engine harness back installed (took it out to thin it out and fix a connector). After that, I need to get the sub-frame in and ready for control arms to be put in. I THINK after that, I'm officially done with my stage 1 and will be starting on my stage 2 (A-Arms, hubs, suspension, and brake stuff to start). Part-wise, the main things left to order are my tires and seats. So at this point, unless I'm forgetting anything, the only thing not new on my Goblin is the engine, trans, PCM, BCM, dash cluster, gas filler neck, pedal box/pedals, steering rack, and wire harness. The cluster will one day be replaced with a AEM display, but that's an enhancement project for another day.
My goal is to be able to move her under her own power before the end of April, and start my registration paperwork sometime in April as well!
[CLICK HERE FOR PHOTOS]
March 13, 2023
DFKC Quick Attach Steering wheel installed, picked up LCAs, coilover springs, and valve cover coil plate from powder coating. Started work on front control arm install, but one of the front upper control arms had messed up threads and I destroyed one of the small rod ends. Got a new rod end on order, and a helicoil kit to attempt replacing the threads in the control arm (1/2-20 threads). Pressed in the OTTP spherical trailing bushing into the LCAs, and got the OTTP leading bushings installed as well. Discovered I trashed my steering knuckles, so I can't assemble the front or the rear wheel/brake/suspension yet. Found a pair of knuckles on Facebook, should be able to get for under $100 shipped...just hope they are in good condition. Also, updated my costs table (second post in this thread) and officially hit the $20k mark. Pretty close to having all my parts though, just missing seats, harnesses, mirrors, and lights, I think!
March 14, 2023
Got ball joints mounted on the LCAs, and got the LCAs on the Goblin. Seem to have lost one of the leading bushing bolts, so will have to find a replacement. Nothing else really done, but got a couple pictures to share.
[CLICK HERE FOR PHOTOS]
March 26, 2023
This update covers the past week or so, about 8 hours of work. Got my rear end together (knuckles, hubs, suspension, tie rods, rotors, calipers, brake lines, etc), and had a bit of fighting with the rear brake setup but finally got it figured out. The caliper guide pin bracket would not fit on the DF provided aluminum spacer, and I ended up having to shave a little off of that guide pin bracket, and on the passenger side add a washer to space the rotor evenly in that bracket. Still need to hook up the parking brake cables, but waiting on a new parking brake lever assembly to show up.
Also got my front end together (uprights, hubs, suspension, steering tie rods, rotors, calipers, brake lines, etc). All went smooth on the front.
More exciting, I got my wheels/tires mounted and balanced, and mounted on the car. Lowered the car on the ground for the first time ever and she rolls smoothly. She'll be back in the air on the QuickJacks soon enough, but it was exciting to see the car on the ground.
What's next? A lot. Heat exchanger cooling loop, fuel tank vent tee, brake proportioning kit, fill/bleed brakes, rear firewall, tunnel cap, shifter and cables, parking brake and cables, button panel, order and mount seats, footwell/hood/windscreen (once they arrive), order and mount head/tail lights and turn signal mirrors...so much to do, but it's starting to look like a drivable vehicle!
[CLICK HERE FOR PHOTOS]
April 05, 2023
Progress is slow, but it's moving forward. Got my brake proportioning kit in and installed, installed the brake reservoir relocation kit (new reservoir, -4AN fittings and braided lines). Sent off my BCM to Odo-Pro.com to have it reprogrammed to 0 miles, ordered and received my parking brake lever assembly (old one was rough) and got it painted black. New parking brake cables should be here later this week. Ordered some M3 aluminum rivnuts and started drilling the tunnel to take M3 screws to mount the cap. Shifter installed on the tunnel cap. Decided to give the Kirkey Series 55 20" seat a try, so ordered one of those and the driver side Planted seat bracket. Still waiting on the bracket, but got the seat and it at least fits between the tunnel and the sides. Seat bracket should raise it up some and give a slightly better fit, but need to wait on the seat bracket to fully understand fitment.
Hoping later this week to add brake fluid (DOT4) and bleed the brakes, get the shifter cables installed and hoses in for the heat exchanger and close up the tunnel. By that point I should be able to move the car under it's own power. Still have a list of stuff to do, but I feel like I'm getting real close to calling this an actual car and starting the registration process!Cost wise, I'm about $650 under $25k, and I expect I'll go passed that after buying my other seat, covers, and harnesses. My goal was $25k for a "most everything new" setup, and I've really spared no expense so far, so I'm happy with where my budget it. Once I mod for performance, my goal was under $30k so I'll have around $5k for either TVS swap, or s252/s257 setup.
[CLICK HERE FOR PHOTOS]
April 10, 2023
As they say, the last 10% of anything takes 90% of the time.
Received only one parking brake cable, instead of two. The second one will be here soon, then I can get the cables run and connected. Parking brake lever trimmed, cleaned up, painted, and installed. Filled and bleed brakes and clutch line, all feels good there. Swapped over to M5 rivnuts for the tunnel, and got those drilled out and set. Connected shift cables to shifter and trans, and set in h/e coolant lines in tunnel. Installed all 3 tunnel cap pieces with M5x12mm torx bolts. Painted one side of firewall panel (truck bed liner), and will paint the other side soon, then rivet on. Started making bracket for my h/e loop coolant tank. Planted seat bracket will be here this week, so can do proper test fitment for my seat and either order a second Kirkey 55, or switch to the 18.5" Kirkey 65.
If all goes well, and my BCM returns from Odo-Pro by Friday of this week, I may get to do my first "drive" this coming weekend. Still waiting for my hood/windscreen to ship from DF, which is required in order to pass inspection in KY. Hoping to start my registration with the state of KY by the start of May and be street legal in June.
[CLICK HERE FOR PHOTOS]
April 14, 2023
Parking brake cables installed, and verified working. Reassembled the brake reservoir system to fix a slight leak I had, and that seems resolved. Rear firewall painted and riveted on. Passenger footwell plate painted and ready for install. BCM returned from Odo-Pro and validated milage reset correctly to 0. Also went and picked up my crate from DF yesterday, from a local-ish YRC hub -- I now have my hood, windshield, footwell cover, and a few little things missing from my stage 2.
I received a package from Planted earlier this week, but they sent the wrong bracket (what I got was for a Miata). Emailed same day and got a response, next morning the correct bracket was shipped out and received yesterday. Also ordered a single harness set to test fit with seat and bracket, so fingers crossed all lines up well.
Hope to get a lot done this weekend, and maybe move the car under it's own power for the first time!
April 24, 2023
I'm behind on sharing updates, but I've been trying to finish up a lot of little things. Modified the Planted seat bracket and got it mounted; stacked 2 1/4" aluminum bars as spacers, drilled holes in the bracket and rivnuts in the frame. Also cut off the seatbelt hole on the Planted bracket, as I don't need it and it got in the way of the Kirkey seat.
Also painted up some remaining brackets (boost gauge, heat exchanger brackets, and battery hold down). More importantly, the car moved under it's own power for the first time ever. Found some little issues, like loose toe links (didn't tighten all the way), leaking brake fluid from the DF reservoir adapter, etc. I've "fixed" and bled the brakes 3 times now, and it seems I'm leaking between the o-ring on the reservoir and the DF bracket; new o-rings, reseating...nothing works. So I'm giving up, and I ordered a Tilton 72-578 -- this was a long term plan of mine (separate reservoirs for brakes and clutch) but I'm doing it now because I'm tired of fighting the issue I currently have.
Kirkey 55 series 20" seats fit great with the Planted brackets. I have 2.5" square aluminum (.120 thick) between the bracket and the seat which gives me the perfect ride height. I still need to mount the square bars to the bracket, and seat to the bars, but that should happen soon. After which my driver seat is done (other than buying a Kirkey cover). To-do list is shrinking, and my goal is to do my roadworthy inspection in the next couple of weeks, with the aim to be street legal by end of May.
[CLICK HERE FOR PHOTOS]
May 01, 2023
As they say, the last 10% take 90% of the time. Lot getting done though. Used 2.5" x .120 thick aluminum square tube as seat spacers between seat bracket and seat, which raised it exactly where I needed. 4 Lag bolts through the seat base to the square tube, but I still need to make 2 small angle brackets to support the rear of the seat, but should be good to go afterwards. Seat is solid.
Made a basic bracket for a 1L reservoir tank, mounted behind passenger seat and will be used as an expansion/fill tank for the h/e loop. H/e has been mounted, but still need to plumb it all.
After fighting brake fluid leaks, I've decided to replace the factory reservoir and DF relocation bracket. My donor's reservoir was toast, so I bought a new one. Accidentally ordered one for an automatic, so it didn't have the barb fitting for the clutch, so I drilled and tapped the plug and put a fitting in there. No leaks there, but I don't trust it long term. However I'm having leaks from the o-ring and coming up and over the DF relocation bracket. Disassembled the system twice, and decided if I had to do it a third time it was getting replaced. Went with the 3 chamber Tilton 72-578, which I really like. It has -AN4 fittings for each chamber, so I have new pre-made braided lines on order and should be here today. Will remove the factory reservoir today as well.
Went with the DF offered mirrors and taillights, which have been mounted and tested but I need to solder the wires and tape up/zip tie to frame. Headlights ordered from Amazon -- Audexen 7 inch round high/low light with DRL, DOT and SAE rated. About half the price as the Dominator, and I like the look. I don't expect to drive much at night, so spending a lot on lights were not a priority. Still waiting on more button panels to be made and sent to me, so I will likely have to temp wire a horn button so I can do my roadworthy inspection next week (KY cares about headlights with high/low, tail light/brake lights, turn signals, mirrors, horn, and windshield). I will start a separate thread for the KY registration process, but I don't expect it to be anything too difficult. By design, KY would want to register a "partial kit car" (meaning with parts from a donor) with a rebuild title, and that's a no go with me. I had a great conversation with my county clerk and he was explaining that there is a process for a clean title if it's a "full kit car". He alluded that if I show receipts for the kit, I can call it a full kit and not have to call out specifically the engine/trans or other donor parts (minimal for my build -- engine, trans, subframe, bcm/ecm, dash cluster, parking brake tubes...that's it). My to-do list below is basically everything left to do to be on the road, but I'm focused on the items needed for my county sheriff roadworthy inspection first. I'm off work next week, so big plans.
[CLICK HERE FOR PHOTOS]
May 05, 2023
Received my headlights, got them mounted and wired. Bleed brakes and clutch, so hopefully I'm all good there now. Mounted up hood and windscreen, and I'm pretty well ready to go for my roadworthy inspection now. I'm expecting to get that done early next week, and my paperwork off to Frankfort to get a title and get on the road!
I am having an issue with my back up lights, they just aren't coming on. I tried jumping across the connector for the back up lamp switch, but still get nothing so I think I have a wire issue which is odd since that'd be on my engine harness, which was minimally touched. I found a wiring diagram, so just need to trace through things and possibly replace a wire, but I'll get it fixed eventually. I don't think they'll specifically ask to see that for my roadworthy inspection, so fingers crossed. Finally did my fuel tank vent as well, so that's done. List is getting small, but the big thing is the heat exchanger loop, which will be my next priority (hopefully tomorrow)!
[CLICK HERE FOR PHOTOS]
May 09, 2023
All roadworthy items completed, and successfully passed my inspection yesterday (performed by local sheriff's department). I've had some great conversations with my local county clerk (who handles DMV-type functions), and he's supportive of me getting this registered. Figuring the process out has been a little tricky, mainly because it's an uncommon thing for him, but I think we got it. Thursday I go back to sign some papers, submit the MCO, and with any luck, on the same day I'll pay taxes (based on the kit amount; ~$13,500) and get a plate. Not celebrating yet, though.
For insurance I've shopped local for a few quotes, and most think Hagerty. One did call Hagerty who said, "oh it's like an Aerial Atom? We don't insure tube frame cars." Per suggestions on the form, I spoke with Kelsey Bell from Rally Insurance out of IL, and she got me a quote in less than a hour. I'm happy with the rate, which was just under $1k/year. $27k agreed value policy, $500 comp/collision deductible, and $100k/$300k liability coverage. 3,000 miles per year, which I suspect will be sufficient.
I still have my reverse light issue to sort, but it's low priority right now. Also, it seems that with my front heat exchange fan connected, the engine will continue to run for ~3 seconds after the key has been removed. If I disconnect the fan, start the car, turn it off with the key, the engine stops immediately as expected. Not sure what that's about, but I think I'll just wire up a relay to an accessory wire and power it that way.
Another interesting call out, my stage 2 came with a set of inner tie rods and tie rod ends. I assumed these were both for the rear, but turns out the stage 2 included rod ends are meant to go on the steering rack up front. In short, all 4 tie rods are Cobalt standard, rear tie rod ends are Cobalt standard, but the front tie rod ends are NOT Cobalt spec. Kit came with Quick Steer ES2382, for future reference. Oh, and my stage 2 came with the wrong brake pads up front (thanks to @snirtman for posting about this!); bought Power Stop Z23-956 pads that should fit correctly.
All that aside, I still need to plumb up the heat exchange in the rear of the car. That's probably the big thing left to do, but I keep getting caught up in the little stuff (like adding in a battery disconnect switch, somewhat hidden behind the dash cluster). I put 4 miles on the car on Sunday, and overall it ran good. The alignment definately needs work, and I'll probably let a local-ish speed shop take care of that for me.
[CLICK HERE FOR PHOTOS]
About me:
My name is Derek (or you can call me devianteng), and I'm out of the Louisville KY area (just south of). I'm a computer guy by trade (Information and Data Security), 3D printing nerd, and also enjoy turning wrenches and "playing" in my workshop. I have a few bikes (2020 Honda Monkey Z125, 2020 Moto Guzzi V85TT) and enjoy riding whenever the wife lets me. I also enjoy building and riding mini bikes and go karts; recently bought a Rogue Fab tube bender with the goal of making a crosskart one day, and I'm an okay-ish welder (trusty Hobart Handler 140).
I've been following the DF community for a few years now, but just recently was able to order my kit. I previously had a 2006 SS/SC that I become real familiar with, learned a lot, got my first hands on experience with HPTuners, but decided to sell the car as I had no ability to order my kit any time soon. Fast forward 18 months, and here we are!
My Goblin will formally be known as the "Deviant Goblin". Why? "Deviant Engineer" is an online name I coined nearly 10 years ago now. I have a tech blog (albeit, not updated frequently at all) with the same name, and I often use "DeviantEng" or "DevEng" as short hand. It would feel wrong to NOT use "Deviant Goblin" for my build.
Donor car:
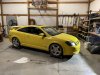
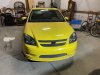
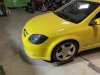
For this build, I have picked up a 2007 Cobalt SS/SC to use as my donor. As far as I can tell, the powertrain is stock and never modded. The car has the factory exhaust with cat intact, factory pulley on the supercharger, no dual pass endplate, and the factory intake.
The odometer reads just over 171k miles, but the engine was reportedly rebuilt by a local speed shop earlier this year. From what I was told, that includes new rod bearings, new main bearings, new piston rings, cometic head gasket, ARP studs, valve job, new timing chain kit, and new sensors. I was told that the reason for the rebuild is the car had sodium-filled valves installed at one time, and late last year one of those valves burned and was no longer sealing. I didn't find a cometic sticker and an ARP document in the car so I have no reason to believe the previous owner lied to me.
After this supposed work, the clutch slave cylinder died and the previous owner parked the car and never drove it any longer. The clutch has very little resistance so something definitely is wrong there, but I'm not sure if I will troubleshoot or attempt to fix, or just start doing the tear down. To start, I am going to spend time cleaning out the car (trash, etc) and removing the Viper alarm/remote start system.
Immediate build plans:
I placed my kit order on November 15, 2021. My order was pretty simple; frame is extended length, with full cage and full door bars. I selected no optional items at time of ordering, and paid my deposit for the full kit. As far as options, I may later add a few such as the the button panels (or maybe 3d print or custom make something), coilover adapters, and 5x114.3 bearing hubs (TBD -- haven't decided on wheels yet). Seats, steering wheel, wheels/tires, mirrors, turn signals, headlights, taillights, etc are all TBD and I will do research into what's on the market and what's available from DF directly. I likely won't be ordering the DF body panels and instead doing my own thing.
With the current estimated ready date of 12-13 weeks, plus another 2 weeks for shipping, I'm realistically expecting to take delivery of my kit around the middle of March 2022. This gives me plenty of time to do my tear down, clean up the engine, do some mods, and get things ready. From experience with my previous 2006 SS/SC, I want to clean the intake manifold and inspect the laminova cores, and replace those o-rings. I will also install a dual pass end plate, new intercooler and water pumps, and likely a clutch upgrade, but still undecided. And of course, replace any parts that look worn or damaged. Basically do all the supporting mods now, keep the M62 blower stock setup and go crazy with v2.
Goblin will be used for a mostly for street cruising, but future state is so I can get into drag racing with it.
Future build plans (1+ year post build):
This is still pretty much TBD, but expectation is to go LSJ-t, with the S257 or Z57. Head work (port and polish, oversized valves, stage cams, etc), maybe a ZZP short block, with diamond pistons, etc. Goal would be 450whp, but suspect I'd be getting suspension, tires, and aero dialed before this happens.
BUILD LOG:
*I will include updates as edits to this original post. I will also reserve the next 3 comments for future build log entries. When I post a new entry, I will also add that as a new comment at the end of the thread. Why? This way it will be easier to see all information without having to read the entire thread.
November 15, 2021
THE BIG DAY! Placed my order for my kit. Extended length chassis, full cage, full door bars. Did not specify any optional addons at the time of my order but this may change in the coming weeks. Goblin #373!
November 16, 2021
Went to look at a local Cobalt, and bought it. I now had my donor! 2007 Chevy Cobalt SS Supercharged, G85 package. Car has body damage, mostly on the rear. Battery was dead but with some jumper cables it started right up and the engine idled well. The clutch pedal had no resistance, and the previous owner tells me he has bled the slave cylinder but that didn't help. He suspects the slave cylinder needs to be replaced, which is why he hasn't been driving it.
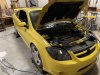
Inspected for as well as I could for the items I cared about, and was satisfied. $1800 cash, a bill of sale, and then I had the title in hand. Got the car on the trailer and headed home. Immediately unloaded into my shop and got the car on my trusty Harbor Freight wheel dollies, and snapped a few photos. She's dirty inside and out, so a good cleanup will be the next task I do. Undecided if I want to investigate the slave cylinder prior to disassembly (if I can fix it, I can at least run it down the road and back for a little shakedown test), or just dive into the disassembly.
November 17, 2021
Nothing too exciting, just cleaned out the car. Made about $18.50 in loose change, found a FireStick, a good pair of black/blue Nikes (in my size), several USB cables, and otherwise cleaned out the trash and vacuumed out the car. I did find some standing water in the trunk, due to the damaged rear but nothing that would effect my Goblin build.
November 21, 2021
Today was my first real day working on the disassembly. I basically made it through the first 2 videos which took me about 75-90 minutes to do. I'm basically committed at this point to leaving the donor where it's at in my shop, up on the QuickJacks, until she's completely tore down. Will use the tractor to get the shell out, but that's probably after the new year.
Before tearing into it, I did (with some help) bleed the clutch slave cylinder, which definitely had air in it. Got it flowing fluid, but the pedal still isn't grabbing. Oh well, not going to let that slow down progress and I'll go over everything once the engine is out (new slave and master cylinders, since I'll already be there; upgraded clutch, hopefully find a LSD to add in, etc).
Already have the hood and front bumper sold for $400, so now I'm only in the donor for $1400. Hoping to see $100 for the fenders, $250 for the doors, and $100 for the spoiler pretty quick. I will probably sell the stock wheels and tires, and maybe the sunroof if I can find a buyer first. Hoping to pay off my donor and have extra cash to put toward new wheels/tires, seats, and steering wheel. Oh, and I'm probably going to make a recining shop couch out of the factory front seats (unless I can sell the seats for decent money). They need to be reupholstered, but I think it would look awesome!
Anyway, pictures aren't anything too exciting, but it feels great to finally get started!
[CLICK HERE FOR PHOTOS]
November 26, 2021
Black Friday got me. I ordered the ZZP Entry Level K04 Turbo Kit, along with their S3 Heat Exchanger and Dual Pass Endplate. This wasn't in the plans, but plans are made to change; right? Looks like my "version 1" build will now be a LSJt K04 setup with 80# injectors and tuned on 93 Octane. Hopefully this can get me 300whp and 350 ft-lb torque!
I fully expect to also buy neutral balance shafts and a new intercooler pump before the kit is built. Otherwise I'm going to try and stay off ZZP/OTTP for the time being.
[CLICK HERE FOR PHOTOS]
November 28, 2021
Made it through videos 3 and 4, removing the powertrain. Really wasn't too bad, just time consuming making sure I label everything. Definitely was a little messy but manageable.
Next up is getting the interior stripped and dash out, which I don't think will be too daunting. Thinking ahead, I'm hoping to have the donor completely stripped and the shell out of my shop by the end of the year. Should be doable as long as I can find the time to get out to the shop!
[CLICK HERE FOR PHOTOS]
December 01, 2021
Made it through the first half of video 5, in about a hours worth of work pretty much stripping the interior minus the dash. Only 1 of the seatbelt T50 bolts gave me trouble, otherwise my ICON brand T50 held up great. Also got my first touch of old sticky harness. I'm actually looking forward to reworking the harness, but do dread the stripping and cleanup of old tape/loom. Part of the fun though.
Hoping to get 2 hours in tomorrow and get the dash and harnesses out of the car.
[CLICK HERE FOR PHOTOS]
December 07, 2021
Finished video 5, and got the dash out. Progress has been slow due to life and kids, but I think we all have run into that during a project like this. Not to mention the below freezing temps, but my torpedo heater has been doing a great job keeping the shop comfortable.
Previous Cobalt owner had a Viper alarm/remote start installed, so it took me a good 20 minutes to unwire and remove that. I also didn't have an extra set of hands so I had to get creative to get the dash out, but I did it without damage. With any luck, the donor shell will be out of my shop by the end of the weekend so I can setup spots to tear down the dash and start the wire harness work.
Oh, I've also canceled my K04 kit order. After thinking about it for a few days, it just didn't make sense. Instead of the Siemens 80# injectors, I want to run the FIC 870cc split spray injectors. The kit came with a downpipe that I don't need, so it's just a waste of money. The K04 turbo wasn't an endgame turbo fro me (I want a z54 or z57, probably), I'll eventually have to replace the stock LSJ intake manifold and I want to go with the OTTP turbo intake manifold, I want to go with an external wastegate setup, I'll probably end up air-to-air instead of air-to-water, etc. Just did not make sense to buy that K04 kit for $1600 and the S3 heat exchanger for another $200 knowing that a lot of it would be replaced within a year. So to keep things moving forward with this build, I will be building the Goblin with the stock LSJ setup. I may do a few things like neutral balance shafts, 82# valve springs with titanium retainers...standard supporting mods that don't require returning at this stage. Then once the car is built, I can enjoy it for the rest of the 2022 season and next winter can do all the go fast stuff.
[CLICK HERE FOR PHOTOS]
December 08, 2021
Video 6 complete. Harness has been removed, and all that's left is parking brake, shifter linkage, and fuel pump assembly. Really debating not dealing with dropping the fuel tank and instead buying a new pump and filter. I guess I'd probably still have to get the fuel filler neck out, and not sure about any wire harness down there. I'm sure I'm not the first to avoid dropping the fuel tank so I'll search the forums and see what I can find.
On track to have the donor out of my shop by Saturday, and get to stripping the dash. Might even have the harness all ready to go by end of the year.
[CLICK HERE FOR PHOTOS]
December 11, 2021
Completed video 8, and got the shell ready to leave the shop. Threw all the things inside the car I don't care about or need, and someone is coming to pick up the shell to get it out of my way. Picked up a sheet of MDF to make a 4x8 table to get ready for wire harness work, but next up will be stripping the dash and taking inventory of all my donor parts (fingers crossed I have everything, or most everything).
Car is off the lift and sitting on a pair of wheel dollies, ready to be pushed to the edge of the shop and winched onto a trailer. Good riddance!
[CLICK HERE FOR PHOTOS]
December 12, 2021
No big updates, but the shell is gone and I made a table from MDF and 2x4s. Table will sit on sawhorses for now, but will eventually make legs. Will seal it with some kind of urethane before using it for harness work, and hope to keep it around for a long time. Hope to get the dash disassembled and donor parts inventoried in the next week.
[CLICK HERE FOR PHOTOS]
January 17, 2022
Happy New Year! I call this the "year of the Goblin".
I took a long break from dealing with my donor (got cold, holidays, laziness...typical excuses) but finally finished the dash disassembly, which means I am done with disassembly. I got my donor shell out of the shop mid December, so it's been gone a while now. I made a table (2x4 frame, 3/4" MDF top) for my wiring work, which I'm actually looking forward to. Been thinking about any extras I want to add into the harness (wide band, additional accessories, etc), and plan to take my time. Solder/de-solder, de-pin connectors instead of cut, wire loom tape, etc. Afterwards I will be taking inventory of my donor parts, ordering replacements for anything that needs to be replaced (likely to replace any consumable parts which makes the most sense to me) and doing cleanup/prep/paint.
Side note, new heater is working great in my shop (30x40x16, insulated). Less than 30 minutes and it went from 30 to 68 degrees in there, burning diesel. Held the heat well and made it comfortable enough for t-shirt and no jacket. Really need to invest in a new audio setup for the shop, though.
[CLICK HERE FOR PHOTOS]
January 23, 2022
Found a little time to get started on the main harness thinning. Completed video 2 (thinning the harness 1) and 2/3 of the way through video 3 (thinning the harness 2). I found 1 broken wire that I need to trace and determine where it goes, but a wire diagram should make that easy but waiting until I finish thinning the harness because that may be a wire I don't even need. Pictures below show a before and after of the work I did yesterday, which was about a hour. I did realize that I traced and removed grounds from the lugs, that it seems I shouldn't have done but not a big deal as I can make a new lugs as needed for grounds.
[CLICK HERE FOR PHOTOS]
February 17, 2022
No updates on the harness or donor part prep. Really waiting for the cold weather to break before I refocus back on that stuff. But, on Feb 07 my frame went on the jig, and only 2 days later on Feb 09 passed inspection! This morning I got my invoice and got that paid for stage 1. Shipping quote is $700, and estimated "ready date" for carrier pick up is Mar 07.
[CLICK HERE FOR PHOTOS]
March 15, 2022
Happy Thursday morning. Stewart Transportation showed up, as expected, at 7:20 this morning to drop off my frame and stage 1 kit. It is now safely in my shop!
I had originally hoped to have the wire harness done by now, but that definitely hasn't happened. However, I figure this let's me test fit the harness before final tape up so not a big deal. I've got a few frame mods planned, then off to powder coating. Going to add a few top bars, a higher harness bar, and tabs to the side to mount in aluminum panels (very similar to what @DCMoney has done).
Color...still undecided. Likely doing a blue/orange theme, but not sure which color the frame will become.
It's a shame that I'll be working all day today and can't even unpack the frame yet to really get a look at it. Maybe this evening?
[CLICK HERE FOR PHOTOS]
March 20, 2022
Been a productive weekend with nice-ish weather! Unpacked the frame and inventoried all frame 1 piece, and all was there. My oldest was eager to get in so he had me put a seat in for him to try things out.
Picking up some tubing this week to made roof bars, but I'm still undecided which I like best. Would love to hear opinions of others, but I'm leaning more toward the third photo (open V in the front, with the bars meeting in the middle of the rear).
And fortunately, I was re-motivated to continue with my wiring so I finished up video 4 and am about half way through video 5 (up to the point of introducing the headlight harness). Harness is taking shape and things have been pretty smooth and uneventful so far, which is good!
[CLICK HERE FOR PHOTOS]
March 28, 2022
Another productive weekend on the wire harness. Earlier this week I finished video 5, and between Saturday and Sunday I completed videos 6, 7, and 8. Watching ahead a little, I'm expecting the next 3 videos to be a little more time consuming and with upcoming plans for this coming weekend, I suspect it will be 2 weeks before I finish the wiring harness.
I've spent a lot of time thinking about roof bars, and I believe I'm just going to keep it simple and do the double roof bars down the middle (picture 2 in my previous post). One of my personality traits is to do things different than everyone else, and that's the primary reason I was considering alternatives to picture 2. But, there's a reason that style is the most popular amongst other builders and I need to stick to that. Hope to pick up a tubing soon and get those cut to length, notched, and welded up around the same time I finish the harness. I also need to pick up some sheet steel (currently thinking thickness around 14 to 16 gauge) to cut and weld some tabs in for side panel plates. The last thing I need to figure before is I need to weld in a new harness bar, but I haven't fully decided my seats yet (thinking Kirkey 65's, 18.5" wide). So decide seats, order a seat, test fit, determine if a new harness bar is needed, the cut/weld one in. Maybe I can get the frame ready for powder coat before the end of April.
[CLICK HERE FOR PHOTOS]
April 09, 2022
Quite a bit done between yesterday and day. Wire harness video 10 completed, leaving only video 11 left which is basically tying grounds together, testing, and final harness wrap. Getting close to a big mile stone!
Also spent some time on my donor engine (stock LSJ). When I bought the donor, it had "no clutch" and was told by the previous owner that it had a new clutch installed but he could get the slave to bleed properly (I suspect he installed it himself). I had planned to swap a new stage clutch either way, so this wasn't a deal breaker with the car and the engine itself ran well. Today I separated the trans from the engine and immediately saw issues with the clutch. The clutch looked new, but the fingers were stuck in it seemed, which was very odd.
Started to take the clutch off and clutch plate just started falling apart. My guess, it was installed incorrectly and blew apart on first start. Throw out bearing looks good, but it's VERY greasy and nasty in here.
Got the engine on the stand, so I can start cleaning it up and giving everything a once over. Got absolutely robbed by Ace hardware for a few bolts to mount the engine to the engine stand...$28 for 4 bolts, 8 washers, 2 lock washers, and 2 nuts. Will order and install a dual pass endplate, but not sure that I really plan to do anything else. Long term plan is turbo swap, so no sense buying a smaller pulley, phenolic spacer, or anything else that would require retuning. But, I want to go through the intake and inspect the laminova cores, replace o-rings, etc.
[CLICK HERE FOR PHOTOS]
April 10, 2022
Finished the wire harness (well, basically)! Still need to tape up the headlight wires and other things on that end, but otherwise I have completed everything with the harness (including testing of the grounds). Feels like a huge milestone!
I have a question though and hope to get a quick answer. The 2 purple wires that I zipped tied to the harness (one near the EPS connector, and the other back near the fuse block), these are power-on-key wires, right? What about the red with white wire that I also zipped tied to the harness near the EPS connector, is this always-hot or another power-on-key wire?
Aside from the harness, I also got the transmission cleaned up decently well, and visually inspected what I could.
And lastly, stripped the engine down to just the long block. Definitely need to clean the engine up, clean and tape up the engine harness, and find missing bolts. Exhaust manifold was missing 2 nuts. The big bolt on the bottom/rear of the intake manifold was also missing. Transmission bolt was missing, and so were a few other miscellaneous things were missing, or just "finger tight". Definitely worth taking the time to go through everything.
Good news is the top end looks great, as it should since it was professionally gone through a few months prior to me buying the donor. Valvetrain looks fantastic and confirmed things like new gaskets (valve cover and head gasket), ARP studs were used, new style timing chain tensioner, timing chain good and tight, etc. I can also tell the oil pan has been off somewhat recently, and I was told the previous owner put in new rod bearings so this makes sense. All in all, should have a good, healthy stock-spec engine (which was running fine before teardown).
Next up, start making a list of engine/trans parts I want to replace or add. No mods that would require a retune at this point though, as I will save that after I am on the street. But I know I need a new clutch, throwout bearing, flywheel, for example. Just need to get all these things listed out. I am also considering replacing the OEM water-cooled oil cooler, and going with a remote mount air-cooled oil cooler (using ZZP or OTTL Oil Cooler Adapter). Lastly, I'm starting to think about seats and wheels. For seats, I'm thinking the Kirkey 65 Series 18.5", if they'll fit (would like to order one, test fit, and if it's a go order the Kirkey floor mount and get that welded in before powder coating). For wheels, I am thinking I should get the redrilled hubs from DF (5x114.3) but I'd like to get feedback on that. Wheel size, I'm thinking 17x7.5? No clue on the offset...picking out wheels is something I've always struggled with. Any feedback would be awesome!
[CLICK HERE FOR PHOTOS]
April 11, 2022
Wire harness is officially finished. Sharing photos for later reference, or for others.
Next up, cleaning up the engine harness.
[CLICK HERE FOR PHOTOS]
April 14, 2022
Engine harness, including injector and coil harnesses, have been cleaned up.
Time to turn my focus to my frame and get roof bars and trick tabs welded in, then prep all parts for powder coating. Has anyone made a list of all the small parts I should get coated/painted? Would be quicker than figuring out my own list.
[CLICK HERE FOR PHOTOS]
April 24, 2022
Unfortunately not much progress lately, other than welding in some roof bars. Was hoping to get my trick tabs welded on by now but didn't get the chance. (photo is just bars tacked in -- I'm not sharing photos of my welds, haha)
On another note, I finally got the chance to meet up with @MR.812 and go for my first Goblin ride! Unfortunately I didn't fit great in his standard frame, and my knee broke a tab of his gauge cluster that he has mounted below the dash cluster. (again, sorry!)
My immediate feedback about the Goblin platform is that 200hp in a 3200lb car is way different than 200hp in a sub 2000lb car. I definitely plan to still turbo swap mine once it's on the road, but even with the stock LSJ it's got more than enough power to walk just about anything on the street. Riding in his also confirmed that I want to do a square tire setup, oh and that I really liked his seats which fit me pretty good (I'm 6'2" and 280lb, so a big boy).
I've got some out of town travel coming up this weekend and next week, but once I'm back my focus will be getting this frame coated. Also hoping to meetup with a few other Goblin owners this weekend (@jaredthenav and/or @r3drckt) if their schedules allow. I promise not to break anything else!
[CLICK HERE FOR PHOTOS]
August 01, 2022
Last update was April, and here it is already August!
Been busy with non-Goblin things, unfortunately. Moved into a new house, made updates to our previous house and got it on the market, spent a bit of time getting the new shop organized (still not done; but is it ever done?), and trying to get my 78 Vette back on the road (new radiator, fans and thermostat; minor refreshes like new intake, exhaust, and valve cover gaskets, reseal oil pan, new fluids, etc). Anywho, about a week ago I dropped my frame off for powder and was able to pick it up this past Saturday. I think it turned out great!
I decided to go with Blue Diamond from Columbia Coatings, and for accents I will be using an orange (debating between Illusion Mandarin and Dormant Orange currently). Valve cover, wheels, wing uprights, and a few other things will be in this orange. I've decided that my floor pans/firewall will be done in a black truck bed liner, and smaller things like battery hold down bracket, brake booster, etc will be done in a rattle can black of some kind.
Powder work was done by Rainy Day Coatings out of Willisburg, KY. First time using them but very happy with the work so far (I'll be picking up A arms, tunnel cap, trans bracket, and sub-frame this coming weekend).
Hopefully I can get the 78 Vette back together this week and out of my working bay by this weekend, so I can start working toward my first startup!
[CLICK HERE FOR PHOTOS]
Oct 02, 2022
I see that I haven't posted an update in a while.
September was a busy month for me (new routines with kid starting school late Aug, birthdays, selling a house, family trip, etc) but I managed to get 7 hours of build time for the month...it's something. Mounted floor pans, steering rack, brake lines, clutch line, pedal box, clutch pedal, brake booster/master cylinder, front brake lines, ignition switch, radiator...good progress. Floor pans, pedal box, and some other pieces were all painted with rattle can truck bed liner, and it turned out great I think!
Seems I've misplaced the upper radiator house, so I have a new one ordered. Hoping by end of next weekend to be ready to install the engine...but I still have my engine to clean up, paint, install a new flywheel/clutch, dual pass endplate, laminova o-rings, etc. Unless something major happens, I expect to have my first start before the end of the month!
Oh, still waiting on my stage 2 kit quote from DF...so that's not ordered yet.
[CLICK HERE FOR PHOTOS]
Oct 12, 2022
Some progress. Bought a new fuel pump (Delphi FG2064-11B1) and got that installed, misplaced my upper radiator hose and had to order a new one (Dayco 71796).
Focus has been on engine prep. I previously stripped everything off the engine, basically to a complete long block and it's sat on the engine stand for ~6 months. Got it out, and spent a good bit of time with degreaser and the pressure sprayer to clean it up. Taped it off, and sprayed it with a couple cans of Flat Black DupliColor Engine Enamel. I've also taken the intake manifold apart, cleaned it up real well, soaked the laminova cores and installed new o-rings, and put on my new dual pass endplate. Taped it all up, painted, and put it on the engine to see how it looks. Needed a new intake gasket so instead ordered a ZZP phenolic spacer, so currently waiting on that. Also cleaned and painted the lower bracket for the intake manifold, and the intercooler pump bracket. Ordered a new ZZP upgrade intercooler pump, as well as an oil cooler bracket so I can ditch the water-cooled oil cooler, and go with a remote mount air cooled oil cooler.
Next up is to clean/paint the alternator bracket, clean the alternator, gut and clean the A/C compressor (not deleting the compressor, but gutting everything from inside to decrease weight and pulley resistance). After that, to finish the engine I need to clean and paint the thermostat housing (new thermostat ordered), mount the supercharger, new flywheel and clutch, paint the trans, mate the trans to the engine. That should only leave plumbing and top end things like fuel rail, injector rail, etc...which I can do after the engine is in the Goblin.
I left the valve cover unpainted with the intent to powder coat that, and the supercharger housing at a later date.
[CLICK HERE FOR PHOTOS]
Oct 17, 2022
Small update. Alt bracket painted, AC compressor painted, alternator cleaned up. Phenolic spacer installed, ZZP intercooler pump mounted, and ZZP oil cooler adapter installed. Thermostat housing cleaned up and ready to go on with new thermostat.
Got some Duplicolor Chevy Orange Engine Enamel on order, planning to paint the m62 supercharger and valve cover; was planning powder, but I eventually plan to swap the m62 for something else (TVS1320? Turbo? Undecided), and want the valve cover to match.
I think the next thing to do though is clean/paint the intermediate axle bracket, then get the engine back on the hoist. Then trans goes on the engine stand to get it painted up and then mate to the engine.
[CLICK HERE FOR PHOTOS]
Oct 23, 2022
Got a lot done this week! Supercharger painted and installed, ZZP aluminum flywheel and GMPP clutch installed, new throwout bearing and clutch pipe/slave cylinder installed, trans painted and mated to engine, new thermostat and painted thermostat housing installed, transaxle bracket painted and installed, and probably other little things I'm forgetting.
I seemed to have lost my belt and starter, so got some on order. Also ordered a pair of -10AN caps for the oil cooler plate, so I can do my first start without the oil cooler. My injector insulators are also toast, so new ones on ordered. Injector rail is painted and ready to go, so once the insulators, belt, and starter show up I should have the engine complete and ready to mount into the frame. Was hoping to have my first start by end of Oct, but I don't think that will happen...but I'm getting close! Really need to get my stage 2 ordered, but DF isn't replying to my emails...I need to remember to call them this week.
[CLICK HERE FOR PHOTOS]
Oct 31, 2022
Another productive week. Got the following installed; new starter, belt, oil cooler plate caps, injector/fuel rail (new insulators and o-rings), fuel regulator, coolant overflow tube, throttle body, header, o2 sensor, and engine harness. Then I got the engine mounted in the frame, which to me is a big milestone. I haven't done my battery positive cable yet, so we'll see how easy that is to get to with the engine already in the car.
I was hoping to have my first start by end of Oct, but that didn't happen...but I'm close. Lots of little things to do first though! To-do before first start:
1) Fuel filter/lines - Need to order a new fuel filter, also some 3/8" fuel line. I want to replaced the factory lines on the fuel pump and run new lines for a cleaner look.
2) Coolant lines - Need to plumb frame tubes to the engine, loop the oil cooler fittings on the thermostat (similar to what's done with the heater core fittings), and figure something out for my overflow tank thermostat fitting.
3) Overflow tank - I have my factory overflow tank, but I think it looks ugly on the Goblin. Looking at a few aftermarket options (Mishimoto has one I really like), but not sure what will happen if I eliminate the overflow tank sensor from the engine harness. Suppressing the CEL in HPT is easy, but I'm not sure if there are any other side effects.
4) Battery cables - Need to shorter the positive cable, and get it connected; Also need to connect the battery ground.
5) Fuse panel - Pretty straightforward, need to mount the box and get all the plugs hooked up
6) Engine harness cleanup - Earlier this year I decided to re-tape the engine harness (it was looking rough from the donor) and I didn't account for eliminating anything. So I'll probably pull the engine harness and spent a little time on that; To get rid of are the radiator fan connectors, waster fluid level sensor, and the AC compressor connector; maybe coolant overflow sensor??
7) Oil temp sensor - At least I think that's the sensor mounted on the oil cooler. Need to decide if I want to plumb that in to an oil cooler (along with a thermostat); I suspect it's entirely possible I won't need an oil cooler at all on this build given that the engine is so exposed. Target oil temp is what, 230-250F in these cars?
8) Fluids - Lastly, but most importantly, need to fill the engine with oil and coolant. Let's hope I don't get in a rush and forget!
[CLICK HERE FOR PHOTOS]
November 08, 2022
Big progress has been made, and I've successfully cranked over the engine! Fuel system connected (made some fuel lines using 3/8" ID 300 psi rubber fuel line), all coolant plumbing finished up (driver side I ended up using two pipes for a perfect fit; Dayco 70789 and a Dayco E7188 -- passenger side I used the included Dayco 72049) coolant tank mouted. Fuse box mounted and all connected up, battery cables put in. Fresh fluids (Valvoline VR1 20W-50 oil, coolant).
At this point I was ready for my first start and it went something like this:
key in, turn key, dash lights up, turn key to crank...nothing. Double checked all my grounds, and a few other things then I found a bent pin on the bottom of my fuse box, and after correcting that was ready to crank again. Crank, started, runs for about a second, then dies. After reading a little, I believe this is because I do not have my MAF sensor connected (my donor's was trashed, and I have a new one on order which should be here later today).
Overall I consider this a win, and fingers crossed connecting a MAF sensor later will let it run and idle as expected.
[CICK HERE FOR PHOTOS]
February 13, 2023
Not much of an update other than to share since I've done nothing with the Goblin since Nov. Sold my house though, and moved. Expecting kiddo #3 any day now, so needless to say I've been busy.
But! Stage 2 kit has officially been ordered. Also got the DF Shifter (orange), redrilled hubs, DFKC steering wheel, and rear coilovers. From what I can tell they gave me the 2021 pricing (to be fair, I first started asking for my stage 2 invoice back in like October), but came out to $6,370. Also ordered 2 things I've needed since Nov; Intake Air Pressure/Temp sensor (ACDelco 213-3907) and a ZZP rear trans mount (lost/trashed my donors. So that was another ~$180.
Also got my wheels ordered. Went with the Konig Hexaform, 17x8/+38 for the front and 17x9.5/+20 for the rears. Wheels are matte black, but I plan to get them powder coated with a nice metallic orange (doing a blue/orange theme). Also plan to get my valve cover sprayed at the same time so they'll match the wheels. Tires undecided on brand, but probably do something like a 245 up front and 275 on the rear.
Lastly, I've pretty much talked myself into going with a TVS1320 future build instead of LSJ-t. LSJ-t is easier to do big power, but I realistically don't think I'll do much beyond spirited street driving, or casual straight line stuff. So the TVS is going to be more linear for the street driving, plus the sound. OTTP got a batch of new stock in for $3k, so really trying to decide if this is the way I'm going to go or not (it wouldn't get installed until the car is on the road regardless). Part of the thinking is I already bought a phenolic spacer, dual pass endplate, and ZZP shorty headers. That'd be like $500 wasted if I went LSJ-t, on top of whatever a s252 setup would have costed me. With the TVS I'd go smaller on the pulley, add another heat exchanger in the loop, bigger injectors...and that'd pretty much be it. I think 350-375 at the wheels should be achievable, and be plenty of go.
Here's to getting on the street this summer!
February 21, 2023
Small update, but a big step back working on this thing. Replaced the brake booster, MAP sensor, fixed a coolant leak on the radiator, and new spark plugs. Little things, but important things. Got an email earlier today that my stage 2 will ship out tomorrow, so that's exciting. Also heard that my powder coat guy got the Illusion Blaze in that he ordered for my wheels/valve cover. I suspect it'll be another week or so on those, and when I go to pick them up I plan to drop off the coil cover plate and the coilover shocks. Not sure what colors those will get, but I want to do something.
Feels good to work in the shop again!
March 06, 2023
Another small update; got my wheels and valve cover back from powder coating, Columbia Coatings Illusion Blaze color. Absolutely love how they came out. I also stripped my donor control arms (FE5 suspension, with the aluminum arms) and ordered new bushings and ball joints. Went with the OTTP leading and spherical bushings, and Mevotech TXMS50510 ball joints. Control arms, coilover springs, and coil pack cover plate are all with my powder coat guy and I expect I'll go get them this weekend. Control Arms will be in the same Illusion Blaze color, springs and cover plate will be matte black. No work done to the actual car though, but I expect to get back into it very soon.
First up will be to get the engine harness back installed (took it out to thin it out and fix a connector). After that, I need to get the sub-frame in and ready for control arms to be put in. I THINK after that, I'm officially done with my stage 1 and will be starting on my stage 2 (A-Arms, hubs, suspension, and brake stuff to start). Part-wise, the main things left to order are my tires and seats. So at this point, unless I'm forgetting anything, the only thing not new on my Goblin is the engine, trans, PCM, BCM, dash cluster, gas filler neck, pedal box/pedals, steering rack, and wire harness. The cluster will one day be replaced with a AEM display, but that's an enhancement project for another day.
My goal is to be able to move her under her own power before the end of April, and start my registration paperwork sometime in April as well!
[CLICK HERE FOR PHOTOS]
March 13, 2023
DFKC Quick Attach Steering wheel installed, picked up LCAs, coilover springs, and valve cover coil plate from powder coating. Started work on front control arm install, but one of the front upper control arms had messed up threads and I destroyed one of the small rod ends. Got a new rod end on order, and a helicoil kit to attempt replacing the threads in the control arm (1/2-20 threads). Pressed in the OTTP spherical trailing bushing into the LCAs, and got the OTTP leading bushings installed as well. Discovered I trashed my steering knuckles, so I can't assemble the front or the rear wheel/brake/suspension yet. Found a pair of knuckles on Facebook, should be able to get for under $100 shipped...just hope they are in good condition. Also, updated my costs table (second post in this thread) and officially hit the $20k mark. Pretty close to having all my parts though, just missing seats, harnesses, mirrors, and lights, I think!
March 14, 2023
Got ball joints mounted on the LCAs, and got the LCAs on the Goblin. Seem to have lost one of the leading bushing bolts, so will have to find a replacement. Nothing else really done, but got a couple pictures to share.
[CLICK HERE FOR PHOTOS]
March 26, 2023
This update covers the past week or so, about 8 hours of work. Got my rear end together (knuckles, hubs, suspension, tie rods, rotors, calipers, brake lines, etc), and had a bit of fighting with the rear brake setup but finally got it figured out. The caliper guide pin bracket would not fit on the DF provided aluminum spacer, and I ended up having to shave a little off of that guide pin bracket, and on the passenger side add a washer to space the rotor evenly in that bracket. Still need to hook up the parking brake cables, but waiting on a new parking brake lever assembly to show up.
Also got my front end together (uprights, hubs, suspension, steering tie rods, rotors, calipers, brake lines, etc). All went smooth on the front.
More exciting, I got my wheels/tires mounted and balanced, and mounted on the car. Lowered the car on the ground for the first time ever and she rolls smoothly. She'll be back in the air on the QuickJacks soon enough, but it was exciting to see the car on the ground.
What's next? A lot. Heat exchanger cooling loop, fuel tank vent tee, brake proportioning kit, fill/bleed brakes, rear firewall, tunnel cap, shifter and cables, parking brake and cables, button panel, order and mount seats, footwell/hood/windscreen (once they arrive), order and mount head/tail lights and turn signal mirrors...so much to do, but it's starting to look like a drivable vehicle!
[CLICK HERE FOR PHOTOS]
April 05, 2023
Progress is slow, but it's moving forward. Got my brake proportioning kit in and installed, installed the brake reservoir relocation kit (new reservoir, -4AN fittings and braided lines). Sent off my BCM to Odo-Pro.com to have it reprogrammed to 0 miles, ordered and received my parking brake lever assembly (old one was rough) and got it painted black. New parking brake cables should be here later this week. Ordered some M3 aluminum rivnuts and started drilling the tunnel to take M3 screws to mount the cap. Shifter installed on the tunnel cap. Decided to give the Kirkey Series 55 20" seat a try, so ordered one of those and the driver side Planted seat bracket. Still waiting on the bracket, but got the seat and it at least fits between the tunnel and the sides. Seat bracket should raise it up some and give a slightly better fit, but need to wait on the seat bracket to fully understand fitment.
Hoping later this week to add brake fluid (DOT4) and bleed the brakes, get the shifter cables installed and hoses in for the heat exchanger and close up the tunnel. By that point I should be able to move the car under it's own power. Still have a list of stuff to do, but I feel like I'm getting real close to calling this an actual car and starting the registration process!Cost wise, I'm about $650 under $25k, and I expect I'll go passed that after buying my other seat, covers, and harnesses. My goal was $25k for a "most everything new" setup, and I've really spared no expense so far, so I'm happy with where my budget it. Once I mod for performance, my goal was under $30k so I'll have around $5k for either TVS swap, or s252/s257 setup.
[CLICK HERE FOR PHOTOS]
April 10, 2023
As they say, the last 10% of anything takes 90% of the time.
Received only one parking brake cable, instead of two. The second one will be here soon, then I can get the cables run and connected. Parking brake lever trimmed, cleaned up, painted, and installed. Filled and bleed brakes and clutch line, all feels good there. Swapped over to M5 rivnuts for the tunnel, and got those drilled out and set. Connected shift cables to shifter and trans, and set in h/e coolant lines in tunnel. Installed all 3 tunnel cap pieces with M5x12mm torx bolts. Painted one side of firewall panel (truck bed liner), and will paint the other side soon, then rivet on. Started making bracket for my h/e loop coolant tank. Planted seat bracket will be here this week, so can do proper test fitment for my seat and either order a second Kirkey 55, or switch to the 18.5" Kirkey 65.
If all goes well, and my BCM returns from Odo-Pro by Friday of this week, I may get to do my first "drive" this coming weekend. Still waiting for my hood/windscreen to ship from DF, which is required in order to pass inspection in KY. Hoping to start my registration with the state of KY by the start of May and be street legal in June.
[CLICK HERE FOR PHOTOS]
April 14, 2023
Parking brake cables installed, and verified working. Reassembled the brake reservoir system to fix a slight leak I had, and that seems resolved. Rear firewall painted and riveted on. Passenger footwell plate painted and ready for install. BCM returned from Odo-Pro and validated milage reset correctly to 0. Also went and picked up my crate from DF yesterday, from a local-ish YRC hub -- I now have my hood, windshield, footwell cover, and a few little things missing from my stage 2.
I received a package from Planted earlier this week, but they sent the wrong bracket (what I got was for a Miata). Emailed same day and got a response, next morning the correct bracket was shipped out and received yesterday. Also ordered a single harness set to test fit with seat and bracket, so fingers crossed all lines up well.
Hope to get a lot done this weekend, and maybe move the car under it's own power for the first time!
April 24, 2023
I'm behind on sharing updates, but I've been trying to finish up a lot of little things. Modified the Planted seat bracket and got it mounted; stacked 2 1/4" aluminum bars as spacers, drilled holes in the bracket and rivnuts in the frame. Also cut off the seatbelt hole on the Planted bracket, as I don't need it and it got in the way of the Kirkey seat.
Also painted up some remaining brackets (boost gauge, heat exchanger brackets, and battery hold down). More importantly, the car moved under it's own power for the first time ever. Found some little issues, like loose toe links (didn't tighten all the way), leaking brake fluid from the DF reservoir adapter, etc. I've "fixed" and bled the brakes 3 times now, and it seems I'm leaking between the o-ring on the reservoir and the DF bracket; new o-rings, reseating...nothing works. So I'm giving up, and I ordered a Tilton 72-578 -- this was a long term plan of mine (separate reservoirs for brakes and clutch) but I'm doing it now because I'm tired of fighting the issue I currently have.
Kirkey 55 series 20" seats fit great with the Planted brackets. I have 2.5" square aluminum (.120 thick) between the bracket and the seat which gives me the perfect ride height. I still need to mount the square bars to the bracket, and seat to the bars, but that should happen soon. After which my driver seat is done (other than buying a Kirkey cover). To-do list is shrinking, and my goal is to do my roadworthy inspection in the next couple of weeks, with the aim to be street legal by end of May.
[CLICK HERE FOR PHOTOS]
May 01, 2023
As they say, the last 10% take 90% of the time. Lot getting done though. Used 2.5" x .120 thick aluminum square tube as seat spacers between seat bracket and seat, which raised it exactly where I needed. 4 Lag bolts through the seat base to the square tube, but I still need to make 2 small angle brackets to support the rear of the seat, but should be good to go afterwards. Seat is solid.
Made a basic bracket for a 1L reservoir tank, mounted behind passenger seat and will be used as an expansion/fill tank for the h/e loop. H/e has been mounted, but still need to plumb it all.
After fighting brake fluid leaks, I've decided to replace the factory reservoir and DF relocation bracket. My donor's reservoir was toast, so I bought a new one. Accidentally ordered one for an automatic, so it didn't have the barb fitting for the clutch, so I drilled and tapped the plug and put a fitting in there. No leaks there, but I don't trust it long term. However I'm having leaks from the o-ring and coming up and over the DF relocation bracket. Disassembled the system twice, and decided if I had to do it a third time it was getting replaced. Went with the 3 chamber Tilton 72-578, which I really like. It has -AN4 fittings for each chamber, so I have new pre-made braided lines on order and should be here today. Will remove the factory reservoir today as well.
Went with the DF offered mirrors and taillights, which have been mounted and tested but I need to solder the wires and tape up/zip tie to frame. Headlights ordered from Amazon -- Audexen 7 inch round high/low light with DRL, DOT and SAE rated. About half the price as the Dominator, and I like the look. I don't expect to drive much at night, so spending a lot on lights were not a priority. Still waiting on more button panels to be made and sent to me, so I will likely have to temp wire a horn button so I can do my roadworthy inspection next week (KY cares about headlights with high/low, tail light/brake lights, turn signals, mirrors, horn, and windshield). I will start a separate thread for the KY registration process, but I don't expect it to be anything too difficult. By design, KY would want to register a "partial kit car" (meaning with parts from a donor) with a rebuild title, and that's a no go with me. I had a great conversation with my county clerk and he was explaining that there is a process for a clean title if it's a "full kit car". He alluded that if I show receipts for the kit, I can call it a full kit and not have to call out specifically the engine/trans or other donor parts (minimal for my build -- engine, trans, subframe, bcm/ecm, dash cluster, parking brake tubes...that's it). My to-do list below is basically everything left to do to be on the road, but I'm focused on the items needed for my county sheriff roadworthy inspection first. I'm off work next week, so big plans.
[CLICK HERE FOR PHOTOS]
May 05, 2023
Received my headlights, got them mounted and wired. Bleed brakes and clutch, so hopefully I'm all good there now. Mounted up hood and windscreen, and I'm pretty well ready to go for my roadworthy inspection now. I'm expecting to get that done early next week, and my paperwork off to Frankfort to get a title and get on the road!
I am having an issue with my back up lights, they just aren't coming on. I tried jumping across the connector for the back up lamp switch, but still get nothing so I think I have a wire issue which is odd since that'd be on my engine harness, which was minimally touched. I found a wiring diagram, so just need to trace through things and possibly replace a wire, but I'll get it fixed eventually. I don't think they'll specifically ask to see that for my roadworthy inspection, so fingers crossed. Finally did my fuel tank vent as well, so that's done. List is getting small, but the big thing is the heat exchanger loop, which will be my next priority (hopefully tomorrow)!
[CLICK HERE FOR PHOTOS]
May 09, 2023
All roadworthy items completed, and successfully passed my inspection yesterday (performed by local sheriff's department). I've had some great conversations with my local county clerk (who handles DMV-type functions), and he's supportive of me getting this registered. Figuring the process out has been a little tricky, mainly because it's an uncommon thing for him, but I think we got it. Thursday I go back to sign some papers, submit the MCO, and with any luck, on the same day I'll pay taxes (based on the kit amount; ~$13,500) and get a plate. Not celebrating yet, though.
For insurance I've shopped local for a few quotes, and most think Hagerty. One did call Hagerty who said, "oh it's like an Aerial Atom? We don't insure tube frame cars." Per suggestions on the form, I spoke with Kelsey Bell from Rally Insurance out of IL, and she got me a quote in less than a hour. I'm happy with the rate, which was just under $1k/year. $27k agreed value policy, $500 comp/collision deductible, and $100k/$300k liability coverage. 3,000 miles per year, which I suspect will be sufficient.
I still have my reverse light issue to sort, but it's low priority right now. Also, it seems that with my front heat exchange fan connected, the engine will continue to run for ~3 seconds after the key has been removed. If I disconnect the fan, start the car, turn it off with the key, the engine stops immediately as expected. Not sure what that's about, but I think I'll just wire up a relay to an accessory wire and power it that way.
Another interesting call out, my stage 2 came with a set of inner tie rods and tie rod ends. I assumed these were both for the rear, but turns out the stage 2 included rod ends are meant to go on the steering rack up front. In short, all 4 tie rods are Cobalt standard, rear tie rod ends are Cobalt standard, but the front tie rod ends are NOT Cobalt spec. Kit came with Quick Steer ES2382, for future reference. Oh, and my stage 2 came with the wrong brake pads up front (thanks to @snirtman for posting about this!); bought Power Stop Z23-956 pads that should fit correctly.
All that aside, I still need to plumb up the heat exchange in the rear of the car. That's probably the big thing left to do, but I keep getting caught up in the little stuff (like adding in a battery disconnect switch, somewhat hidden behind the dash cluster). I put 4 miles on the car on Sunday, and overall it ran good. The alignment definately needs work, and I'll probably let a local-ish speed shop take care of that for me.
[CLICK HERE FOR PHOTOS]
Attachments
-
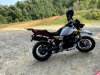 751.1 KB Views: 317
 -
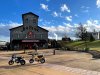 363.8 KB Views: 302
Last edited:
