DIY Front End Alignment

ncgoblin

Goblin Guru
Hey all,

I am adjusting caster and need assistance to get 8.5-9.0 degrees. The tools I am using are Longacre 52-78290 and toe plates. The steps I follow are:

1. 0 Gauge out on level surface.
2. Moved tire out to 15 degrees, set caster mode, leveled gauge and set to 0.
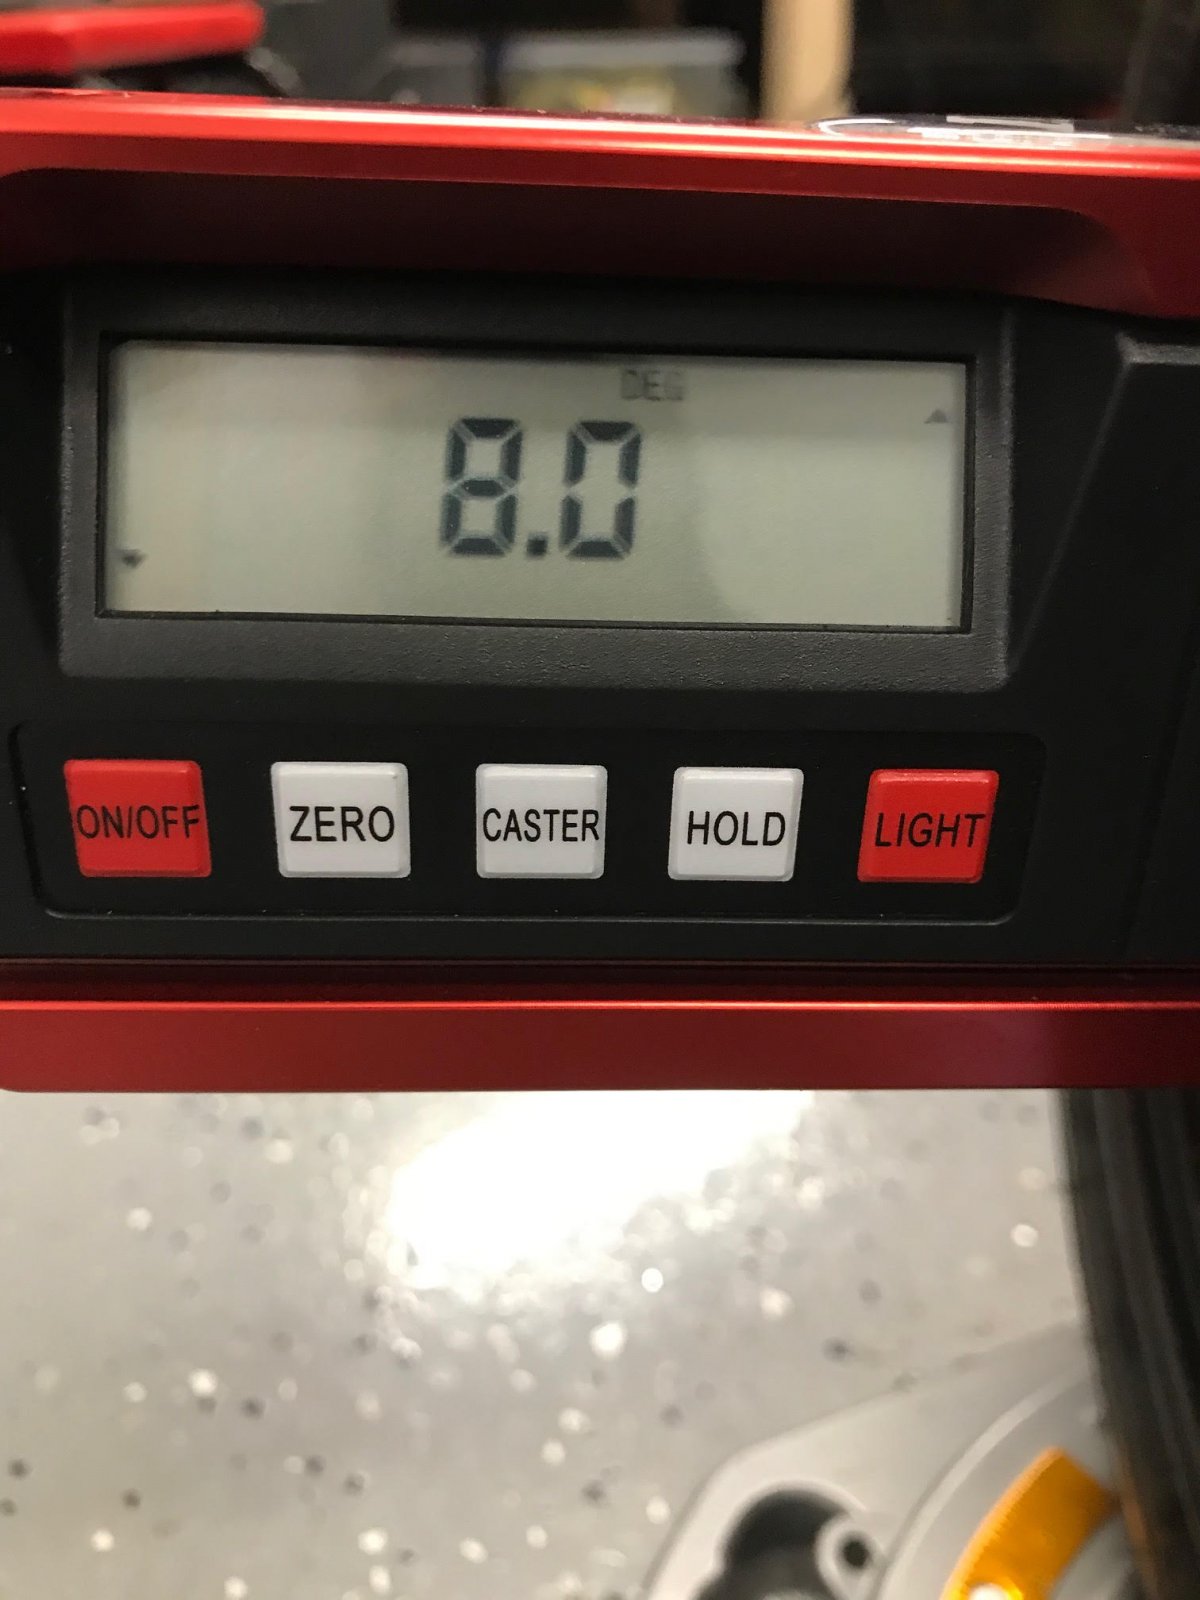
3. Moved tire in to 15 degrees, leveled gauge and read 8.0 degrees. As shown in the pic the gauge states negative this may not be a concern but I do know there is negative and postive caster so maybe someone can clear this up for me.
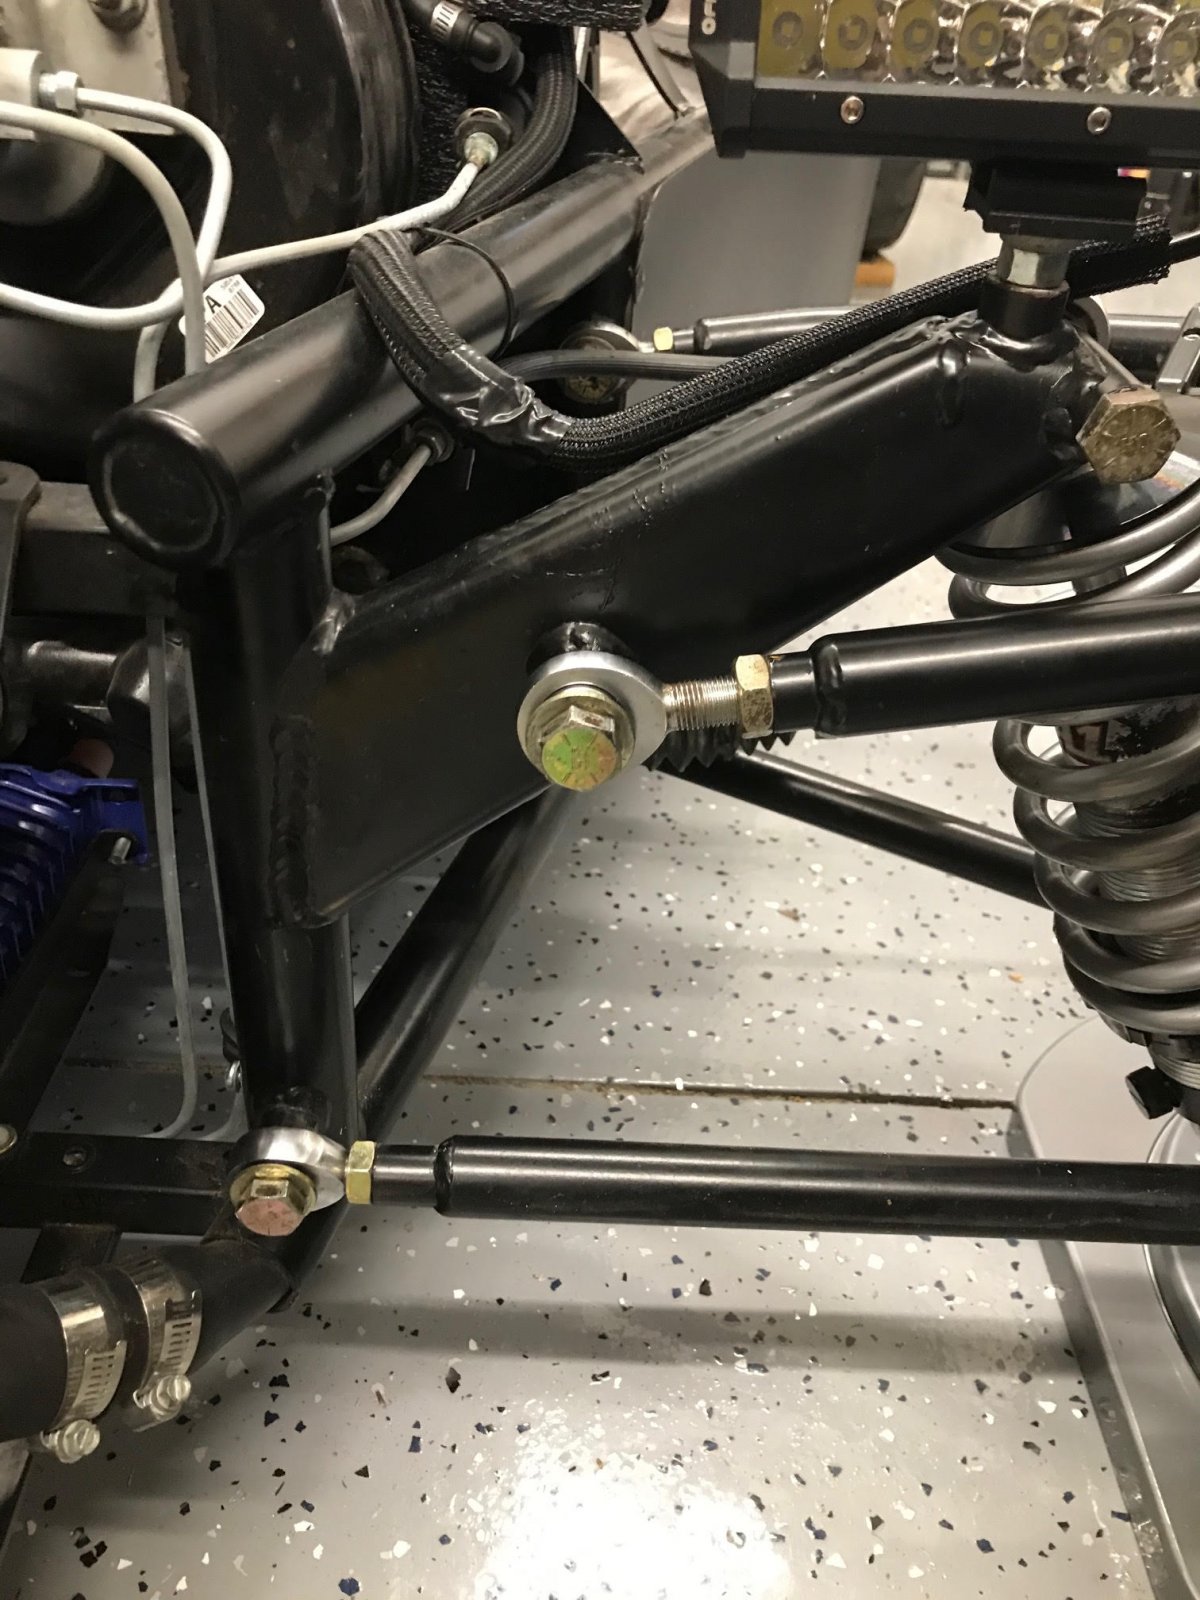
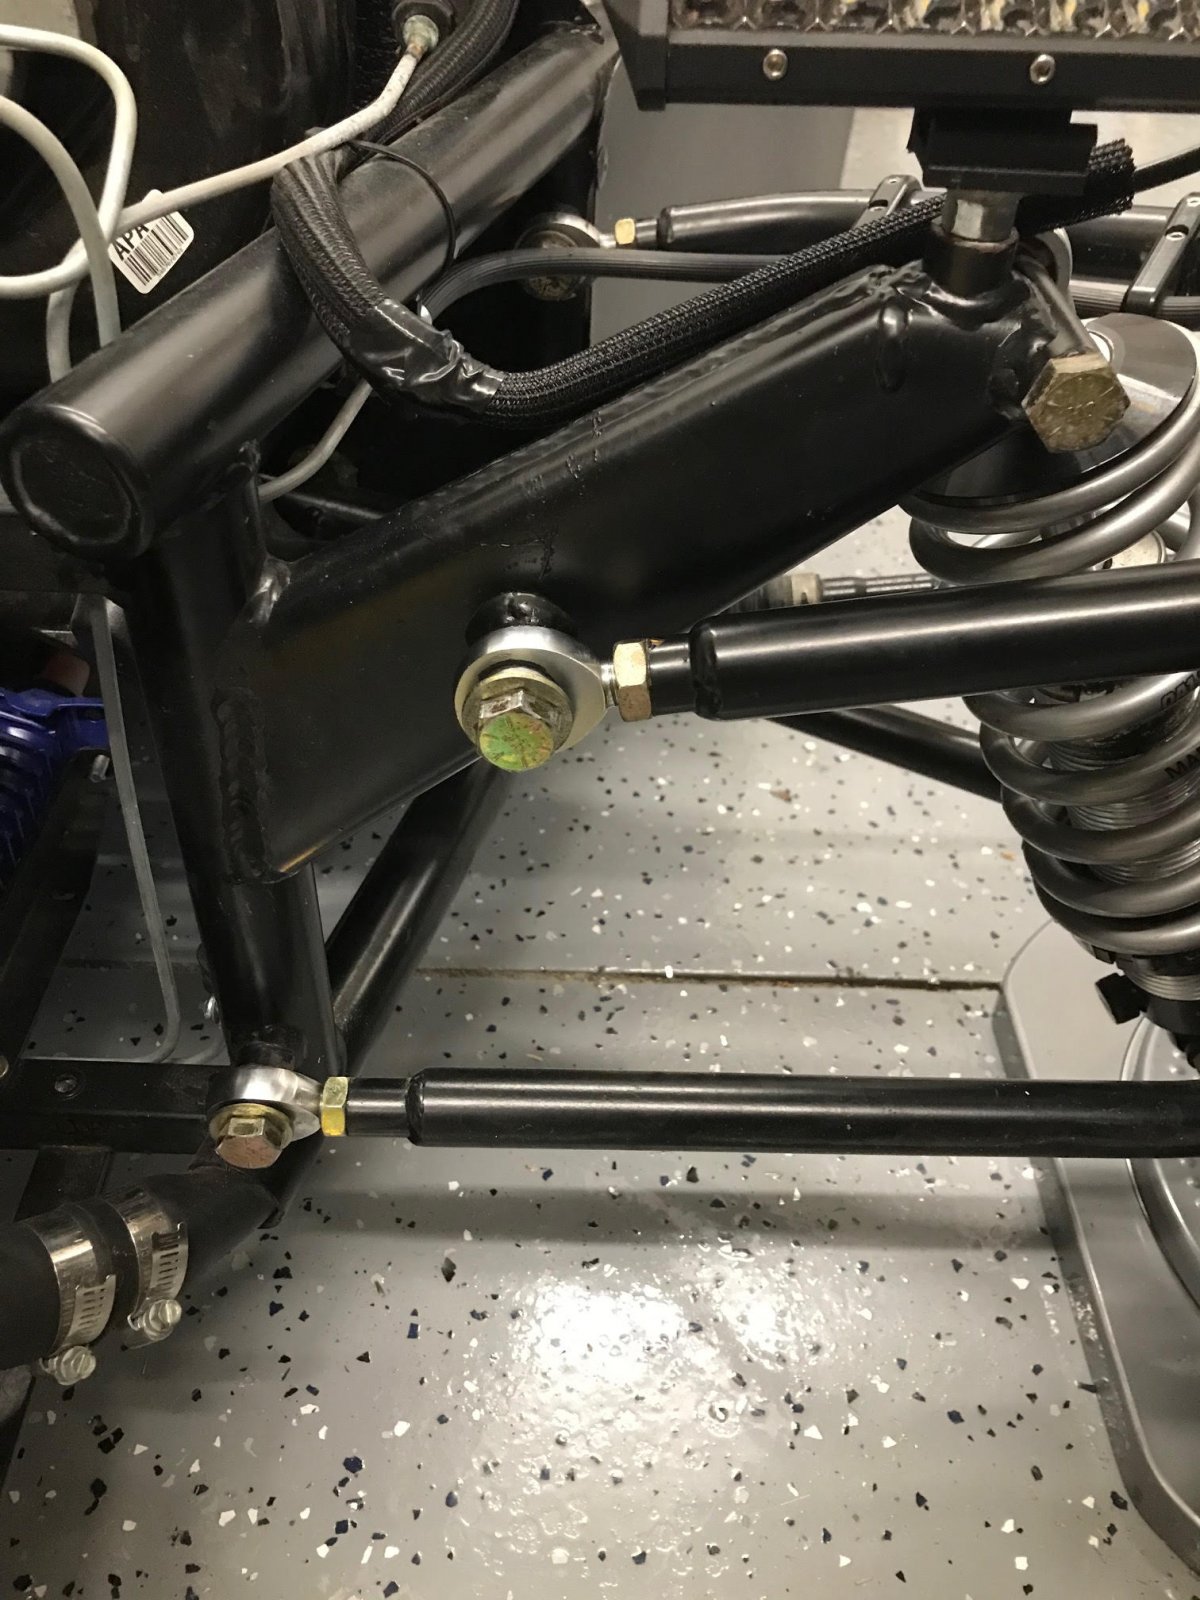
4. To get 8.0 degrees the upper ball joint has to be turned out more then seems right. The photo with the upper ball joint turned out just 2 turns is 4.4 degrees degrees.
5. The lower ball joint I turned all the way in if it was 4 turns out and the upper ball joint was in the current position it would only be 7 degrees.

All build logs I have scanned through show very slight adjustment to the default -4 turns out.
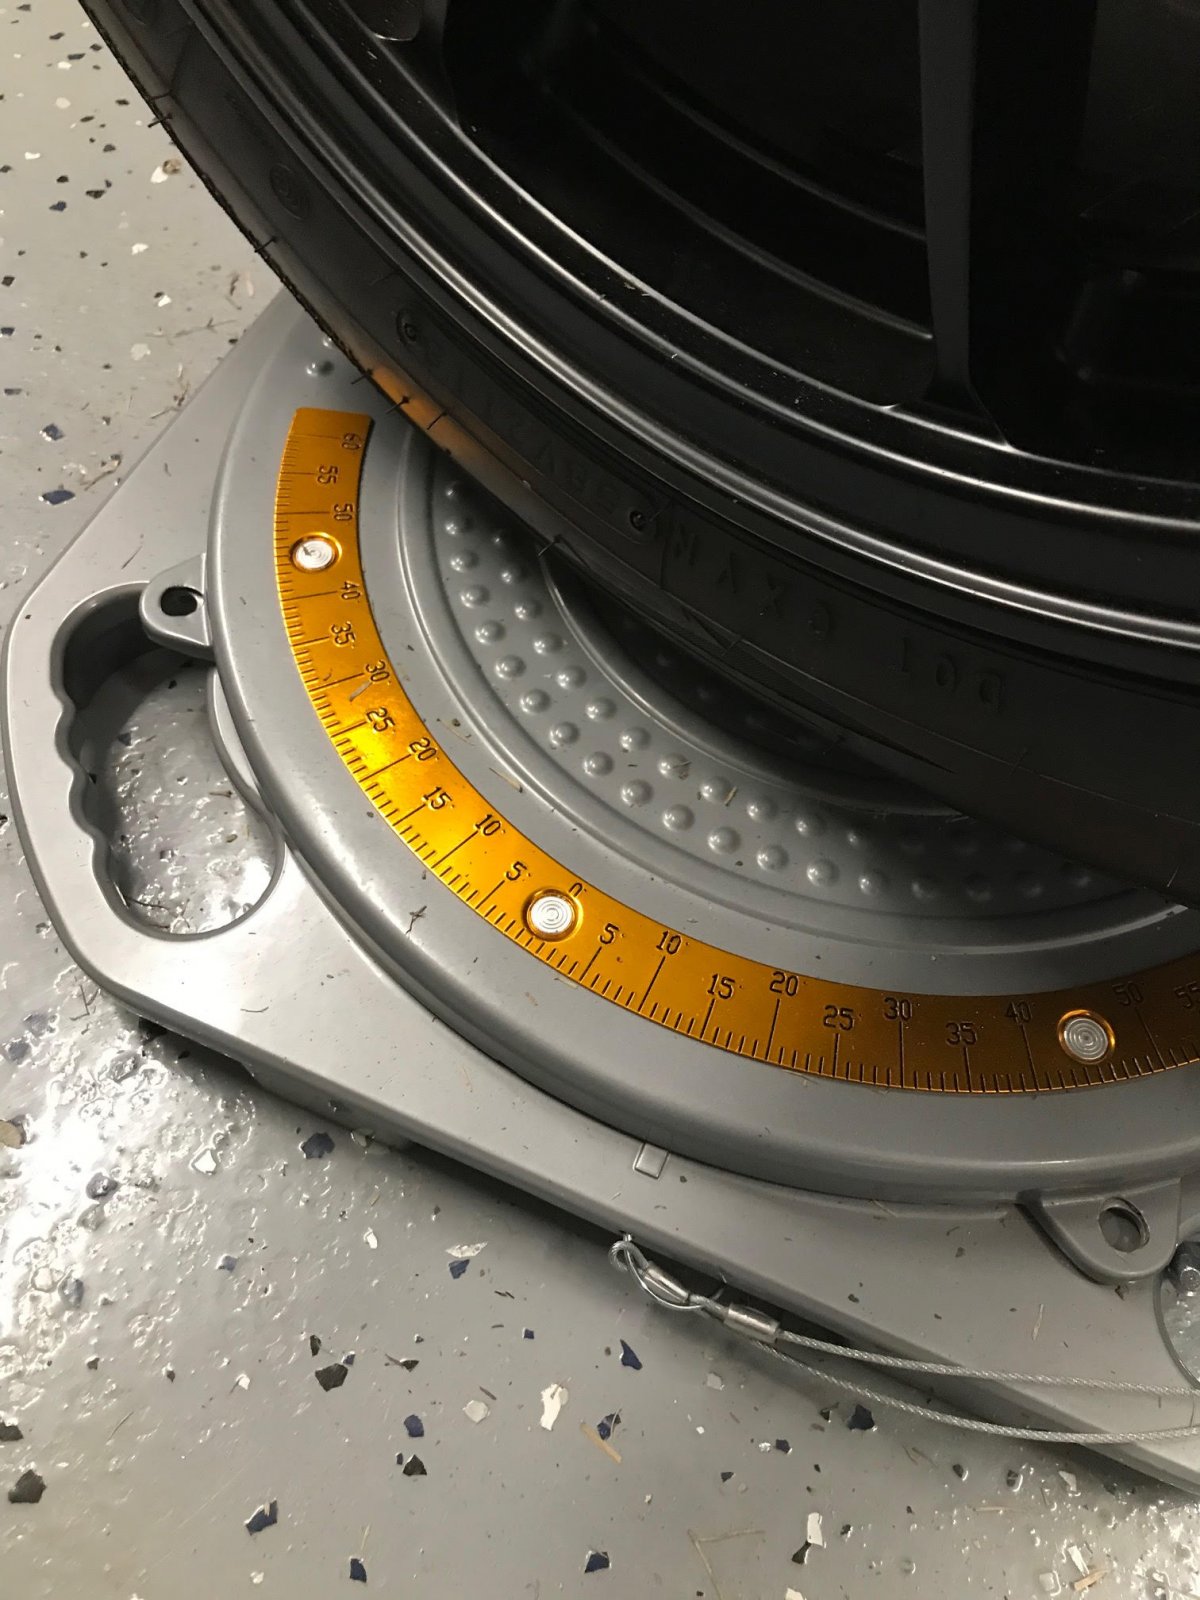
8.jpg

6.jpg

5.jpg

7.jpg
 

Ross

Goblin Guru
My lower A arms have the heim joints threaded almost all the way in. My upper A arms have about 4 threads on all the 3 heim joints.
We want about 1.5 degrees negative camber as shown below. (I used 0.7 degrees after studying my tread wear)
20024

The 8 or 9 degrees is the positive caster angle.
20025

The caster can be adjusted using the upper or lower A arms, as it is a measure of the difference between the upper and lower A arms.
 

Towerdog

Goblin Guru
The first step is to adjust the ride height using the locking nuts on the bottom of the coilovers. Adjust the height until the lower control arm is level with the ground when viewed from the front.

Is this done empty or driver passenger weight added? Just noticing on my short test drives that the front seems light and bouncy.
 

baustin

Well-Known Member
The first step is to adjust the ride height using the locking nuts on the bottom of the coilovers. Adjust the height until the lower control arm is level with the ground when viewed from the front.

Is this done empty or driver passenger weight added? Just noticing on my short test drives that the front seems light and bouncy.
Either but preferably with weight in the seats for your normal drive weight.

If I'm thinking of it correctly:
Are you maxing out the shock travel with where you set your springs even when sitting on the wheels? You can check this by jacking up the front of the car, does the front suspension have any droop? It shouldn't droop much on these, there's not much weight per front wheel anyways and I think it's preferred to have a slight preload on the spring so it doesn't rattle at full droop. If it doesn't extend any when jacking up the front of the frame then you have preload+ force on the springs which will ride very rough since it won't compress till you get a high enough force to overcome the preload, this would essentially lock the shock into max length unless you went through a roller coaster dip in the road and just be a rigid suspension.
 

Lndshrk Steve

Well-Known Member
The beginning of this thread for front end alignment it states "these instructions assume that you adjusted your control arm rod ends the way we showed in the instructional video." Is the video still available anywhere? I've been looking and sometimes you can find the on YouTube but I can't seem to locate it. Or can you tell me simply, these rod ends out 4 turns these rod end in all the way etc.?
 

k.rollin

Goblin Guru
The beginning of this thread for front end alignment it states "these instructions assume that you adjusted your control arm rod ends the way we showed in the instructional video." Is the video still available anywhere? I've been looking and sometimes you can find the on YouTube but I can't seem to locate it. Or can you tell me simply, these rod ends out 4 turns these rod end in all the way etc.?
Initial assembly said to run them all the way in, then back then out 4 full turns.
 

Lndshrk Steve

Well-Known Member
Thanks! That what I thought I read somewhere, but I was thinking the larger outer rod ends started full in. This should get me started.
 

chief404

Active Member
Next, the camber needs to be set. Zero the digital angle finder to the main hoop and then check the camber at each of the front rotors. Same as the rear, we shoot for 1.5 degrees of negative camber (top of the tire leans in toward the car).
What exactly does main hoop mean? Where is the best spot for the angle finder?
 

mike_sno

Goblin Guru
Remove bolt 2, loosen nut 1, spin the ball joint out a few revolutions, reassemble, and you have increased caster.
Remove bolt 4, loosen nut 3, spin the ball joint out a few revolutions, reassemble, and you have decreased caster.

View attachment 9305
Couple of questions:
What is the reason that only the front screws of the control arms are used for the caster adjustment?
How much degree of caster will you get per revolution of the ball joint?
Is there a torque value for the not and the screw?
 

mike_sno

Goblin Guru
I always worked that toe was the last thing to set. Caster, camber and then toe is the method I follow.
Yeah, should have know that before :D

I took some measurements. Despite the display, I have positive Caster on both sides and Negative Camber on both sides.

Is that the correct way of measuring it?

46524
 
Last edited:

Desert Sasqwatch

Goblin Guru
The ideal caster - according to Lonny - is -7 to -8 degrees. Assuming the negative number -7.8 is the driver's side, it is spot on: the 6.1 on the passenger's side is not far off (I would tweak it in some more if I were doing this) closer to the 7-8 degrees.

Can't tell exactly what the camber numbers are - assuming-2.7 and -1.6 - are in a little far too negative based on the camber numbers that most builders are using at -1.0 to -0.5 degrees. Too much camber will cause uneven tire wear and can be adverse to good front end traction, maybe exacerbate understeer. This should be readjusted. Then reset the front toe-in, as it will have changed.
 

mike_sno

Goblin Guru
The ideal caster - according to Lonny - is -7 to -8 degrees. Assuming the negative number -7.8 is the driver's side, it is spot on: the 6.1 on the passenger's side is not far off (I would tweak it in some more if I were doing this) closer to the 7-8 degrees.

Can't tell exactly what the camber numbers are - assuming-2.7 and -1.6 - are in a little far too negative based on the camber numbers that most builders are using at -1.0 to -0.5 degrees. Too much camber will cause uneven tire wear and can be adverse to good front end traction, maybe exacerbate understeer. This should be readjusted. Then reset the front toe-in, as it will have changed.
Left side pictures are passenger side.
Passenger Positive Caster = 7.8deg
Passenger Negative Camber = 2.6deg
Driver Positive Caster = 6.1deg
Driver Negative Camber = 1.8deg

Alright, will adjust the caster on the driver side, as well as camber on both sides. Plus toe.

I wonder with this caster, why my steering wheel is not coming back. If I left go of the steering wheel in a curve, the steering is staying exactly in the same spot...
 
Last edited:

Desert Sasqwatch

Goblin Guru
Maybe I'm reading this wrong, but you want negative caster with hub carrier uprights tilted backwards - for negative caster. Positive caster would make the front end almost undrivable at higher speeds and the tires would at best want to wander side to side. This could be why your steering feels off.
 

mike_sno

Goblin Guru
Maybe I'm reading this wrong, but you want negative caster with hub carrier uprights tilted backwards - for negative caster. Positive caster would make the front end almost undrivable at higher speeds and the tires would at best want to wander side to side. This could be why your steering feels off.
Post 22 in this thread describes positive caster as tilted backwards. Like in a go cart.
 
Top