New Dzus, No More Loose:
I replaced my Dzus fasteners tonight with allen head Dzus.
For reference, I ordered some suggested in another thread:
https://www.ebay.com/itm/332408339388
For the life of me, I couldn't get the old fasteners to fully hook into the frame, and the slots on the fasteners were getting all gummed up.
I just used locking pliers to grab the old ones pull them out. Then I took a couple of the new ones, stuck them in a vise and did the same thing.
These Dzus are also a hair longer than the ones I took out.
To install the new ones, I made a "ball joint press" kind of apparatus with a C-clamp and a socket.
And I placed a piece of vinyl tape over the head to keep it from getting scuffed.
Here is an example of the layout used when putting in the new ones:
Maiden Voyage:
After that, I reattached the front cowl and I couldn't help myself. I took it out for the first time since I've had it out for inspections.
I just ran it a couple miles down the street. It was dark and 45 degrees out. I put on some ear warmers, but my hands were freezing by the time I made it down there.
AFR Issue:
It also caused me to notice something else. After warming it up, every minute or so, when I was near idle, the AFRs would start to bounce up really lean and then back down. It would start to idle rough and oscillate back and forth from stoichiometric to really lean (18:1+), actually maxing out the gauge sometimes. But other times at idle, it would sit right at 14.7:1.
This oscillation would also sometimes continue to happen when starting from a stop in first gear. It would cause the goblin to buck around a little during takeoff. It does have a sensitive throttle, but it was more than that. I also still notice a throttle delay of between half a second and a second.
All that said, when driving and actually moving more than a few mph, the AFRs looked good.
So now I'm going to start to look for vacuum leaks, and maybe exhaust leaks.
 404.2 KB Views: 115
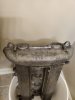 202 KB Views: 115