Kingchuck's (and friends) Street Goblin #435 - 06 LT Manual (Aftermarket Supercharger)

KingChuck24

Well-Known Member
Hello everyone,

Today marks the start of the work on the goblin that me and two friends have decided would be a fun and challenging summer project to embark on. For a little background, we are three seventeen year old's with some mechanical and car experience but still are new to cars in general. We wanted to learn more about cars and wanted to know the ins and outs of one and the experience gained from building a goblin seemed like a great way to get that as well as get an awesome car out of it in the end. We have two very talented mechanic friends that have offered there help whenever needed as well as the forum which I'm sure both will be of great use to us.

Info about the donor:
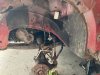
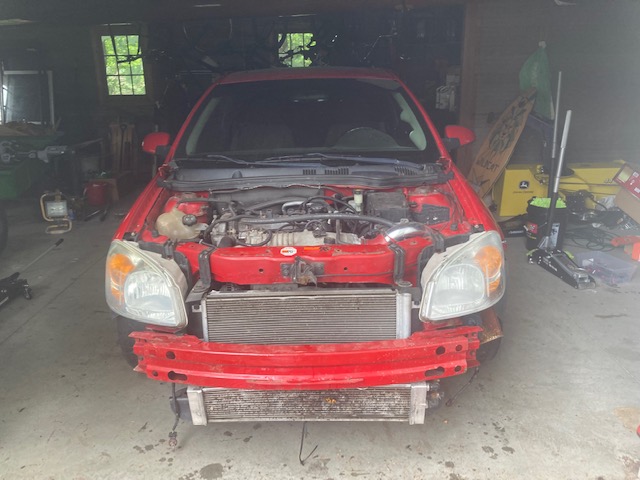
2006 LT Manual 2.4L that has been modified with a tune, supercharger, rims (that look terrible and will be changing), intercooler, and I'm sure many other things that we will run into while stripping the donor. We are hoping that the supercharger will work with the goblin and the first question I suppose would be will it? If not I suppose we will end up taking it off. Otherwise the picture below is the very minimal amounts of progress we have made! (Don't mind the messy garage it is still being cleaned)
34086


Other than that we were thinking of setting of a time-lapse camera or making a couple of videos about the build process.
 
Last edited:

Desert Sasqwatch

Goblin Guru
Welcome. Sounds like you and your friends have a challenging project ahead of you, and yes do the video.

Did the donor run/drive when you bought it? I'm curious about the 'tune' it supposedly has, as the 2005 ECMs are reported to not readily accept tuning changes. I'm also wondering about the 2.4 liter in the LT model. Factory the LT was a 2.2 liter. The SS came with a 2.0 liter SC and the 2.4 was not an option in 2005 and never came with a Factory supercharger. Sounds like there's been some parts swapping going on if it truly is a 2.4 liter SC and if the ECM is from a later model year.
 

KingChuck24

Well-Known Member
To update this thread I accidently misread the vin of the donor car and it is most definitely a 2006 LT. Also we will be continuing work today with the tear down!
 

Chris_WNC

Well-Known Member
Be sure to keep a list of cool stuff you find under the seats and carpet. :D

Have fun. The tear down of my donor and the first start were my favorite parts of my build.
 

KingChuck24

Well-Known Member
Got video number 2 done on stripping the donor and got the brakes bled. We will be starting on the suspension and coolant things tomorrow and hopefully are able to finish video 3!
 

KingChuck24

Well-Known Member
Got the front suspension off today with some persuasion with the angle grinder! We weren't able to remove the nut on top of the strut but we figured out that you don't have to do that to remove it from the donor so instead we just kept it on both of them. The sway bar end link nuts were also not coming off and we got annoyed and decided to cut. The final thing we ran into (and where we stopped) was that the axle nut kept spinning while we were trying to get it off (more detailed thread here: https://dfkitcar.com/forum/index.php?threads/axle-nut-spinning-with-axle-and-cant-get-off.3730/).
 

Attachments

Desert Sasqwatch

Goblin Guru
Your pics show the metal mites are definitely inhibiting the disassembly process. It's so bad the aluminum LCA looks rusty! o_O Lots of PB Blaster is needed with lots of soaking time. ;)
 

KingChuck24

Well-Known Member
Today was a good day as the axle nut came off using a technique from rttoys. We also were able to remove the surrounding bolts but not able to slip the bearing hub off of the axle and will leave that for tomorrow. We drained the coolant and some of the transmission fluid from the donor and were able to completely take off the front radiator and intercooler which leaves the front of the car looking very bare!
34236
34237
 

Desert Sasqwatch

Goblin Guru
Break out the Sawzall and remove the front radiator support across the front of the engine bay. Makes for better access to everything and easier to remove the drivetrain. Unless you plan to sell the Cobalt body?
 

KingChuck24

Well-Known Member
Yesterday went fairly well and we were able to finish up the 3rd video which has so far taken us the longest. The subframe came out but only after cutting one of the front bolts due to the fact that the square piece of metal that acts as a nut for it was rusted and spun with the bolt. We will hopefully be dropping the engine this week sometime but were waiting for a friend that is much more knowable than us has time because we would rather not get hurt or drop the engine doing something stupid. If anyone knows the exact bolt that is used for the mounting of the subframe in the front that would be appreciated as we will have to order one. We also ended up deciding that the front suspension was to rusted and was not worth keeping so we added the coil overs to our order.

34262
34263
34265
Does anyone know how to push this bolt out? It is stuck on both sides.
34266
Same thing with this one.

34267
Is this rust of any hazard to the integrity of the subframe? If so what should we do?

34270
 

Sluggonaut

Goblin Guru
For the rear subframe bolts, I only had 1 of the 2 needed and ordered this from Bolt Depot:


17785Metric flange bolts, Partial thread, Class 10.9 steel plain finish, 14mm x 2.0mm x 100mm
 

Rauq

Goblin Guru
The radiator/core support tab on the front of the subframe comes off, and the tabs that remain on the subframe aren't needed except possibly to secure the parking brake cable guide tubes. There's other places to attach them if you need.

The hardware for the front of the subframe is new and comes with the kit. It's a carriage bolt that goes in from the bottom.

The rear bolts can get bound up by the rear control arm bushings. See if manipulating the control arm helps you get them loose. They're pretty beefy so I wouldn't mind banging them a bit. You will almost certainly need new rear control arm bushings, the MOOG K201285 is highly recommended.

I don't have a lot of experience with rust so I really can't speculate there. If you need to pick up a replacement, as far as I know, every Cobalt subframe is the same.

To get the tie rod end out of the knuckle, try heating the knuckle, penetrating oil, and/or a tie rod separator like pictured below. That tool can typically be picked up from a parts store as a loaner. You can also use a pickle fork if you're willing to replace the tie rod end (and why not, they're cheap).

34271
 

KingChuck24

Well-Known Member
Today we started working on video 4 which is removing everything off of the engine and dropping it. We got through the entire video besides removing the transmission cable housing and the exhaust. Starting off with the transmission cable housing we could not find the exact thing as in the video (maybe because it is a manual transmission?) so we just decided to leave it until we got some guidance from the forum.

Here is a photo of what we think is the cable housing:
34283


We tried pulling them out but didn't use that much force or try very long because we weren't sure if those are the right ones.

In terms of the exhaust it is extremely rusted and the nuts and bolts are stripped so we are going to probably have to use to angle grinder to cut it off.

Here is a picture of what the wire harness looks like still in the engine bay. We are pretty confident we got everything but we will triple check before we drop the engine:
34284


We also got word today that our kit will likely be ready around mid August which is somewhat disappointing because we are trying to finish the goblin before we go back to school at the start of September and with that time frame it does not seem very feasible but we will do our best. We know that the team at DF is working very hard to get the kit ready and they have some of the best customer support I have ever experienced.

We will hopefully end up dropping the engine this coming Friday as that is when our friend has time.

Fingers crossed we will have the donor stripped out by next week and we can clean everything up and have lots of time before the kit arrives to prepare for the long days of building!
 

Rauq

Goblin Guru
The shifter cables do just pop out of the bracket. You're right, I think in their video series for disassembly they were working with an auto trans donor, so that's why you don't see that there.

The only reason I can remember to treat the cables gingerly is that they have decent resale. I sold mine for $60 in just a couple days. I think the new kits come with all new hardware for shifter cables other than the base of that bracket and perhaps the shifter side cable ends. I know DF sells new cable ends but I'm not sure they're included in the new kits as standard. I also know the stock ones aren't reused if you get the upgraded DF shifter (which I recommend).
 
Top