Step one
Install your tunnel cover.
Step two
Install your shifter cable bracket
Step three
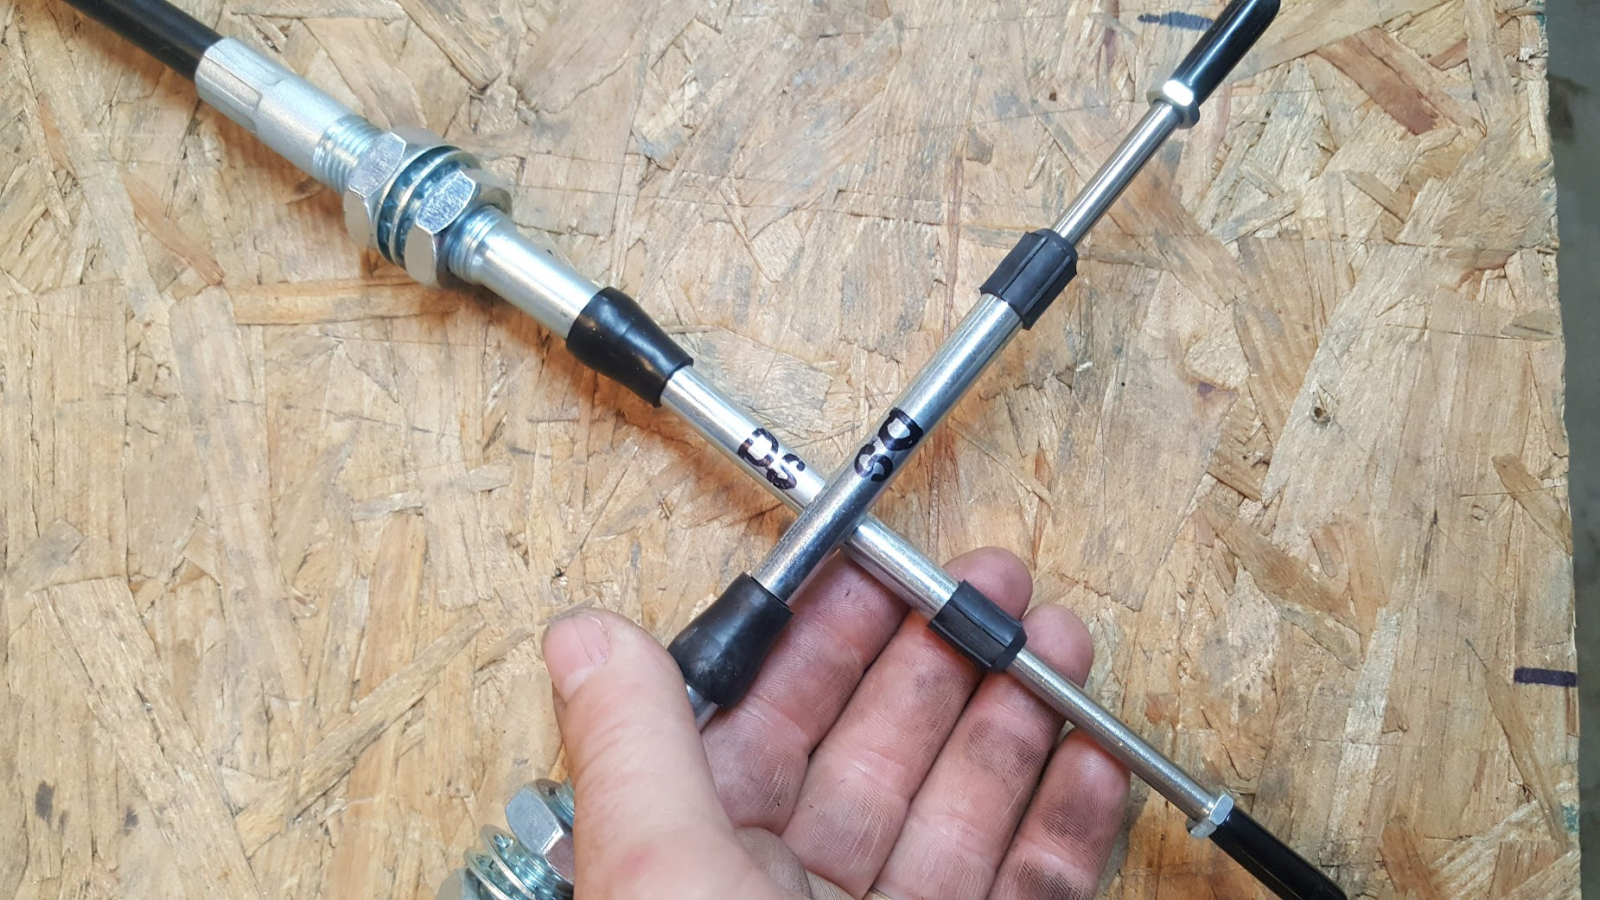
Identify one of the cables on both ends with a sharpie mark or piece of tape.
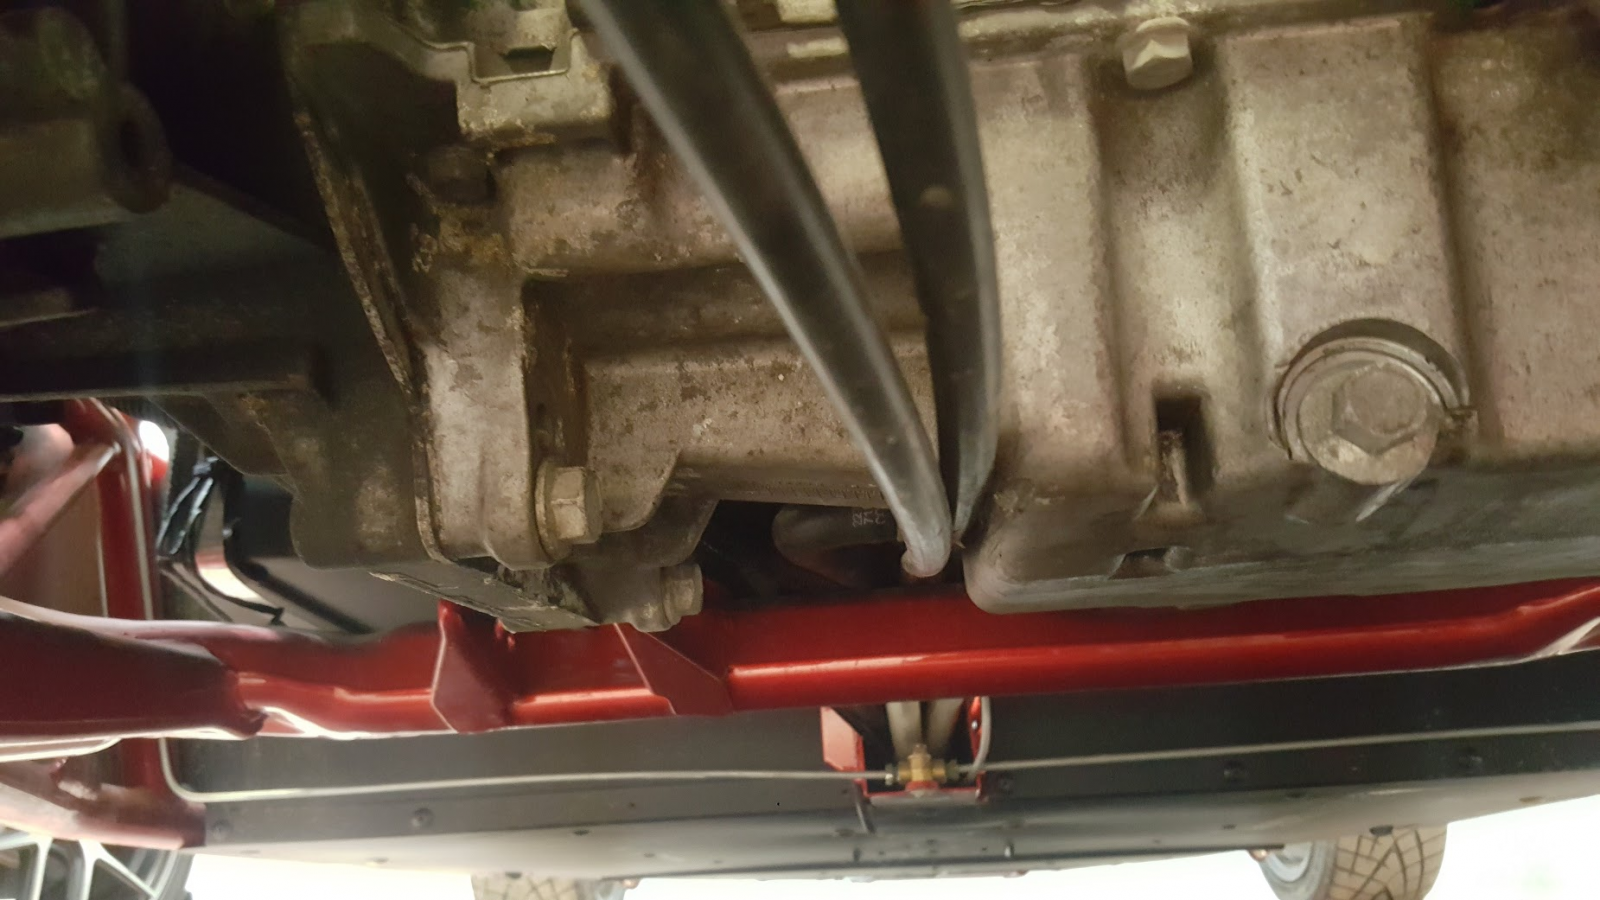
Route your two shifter cables along the tunnel and through the opening in the firewall.
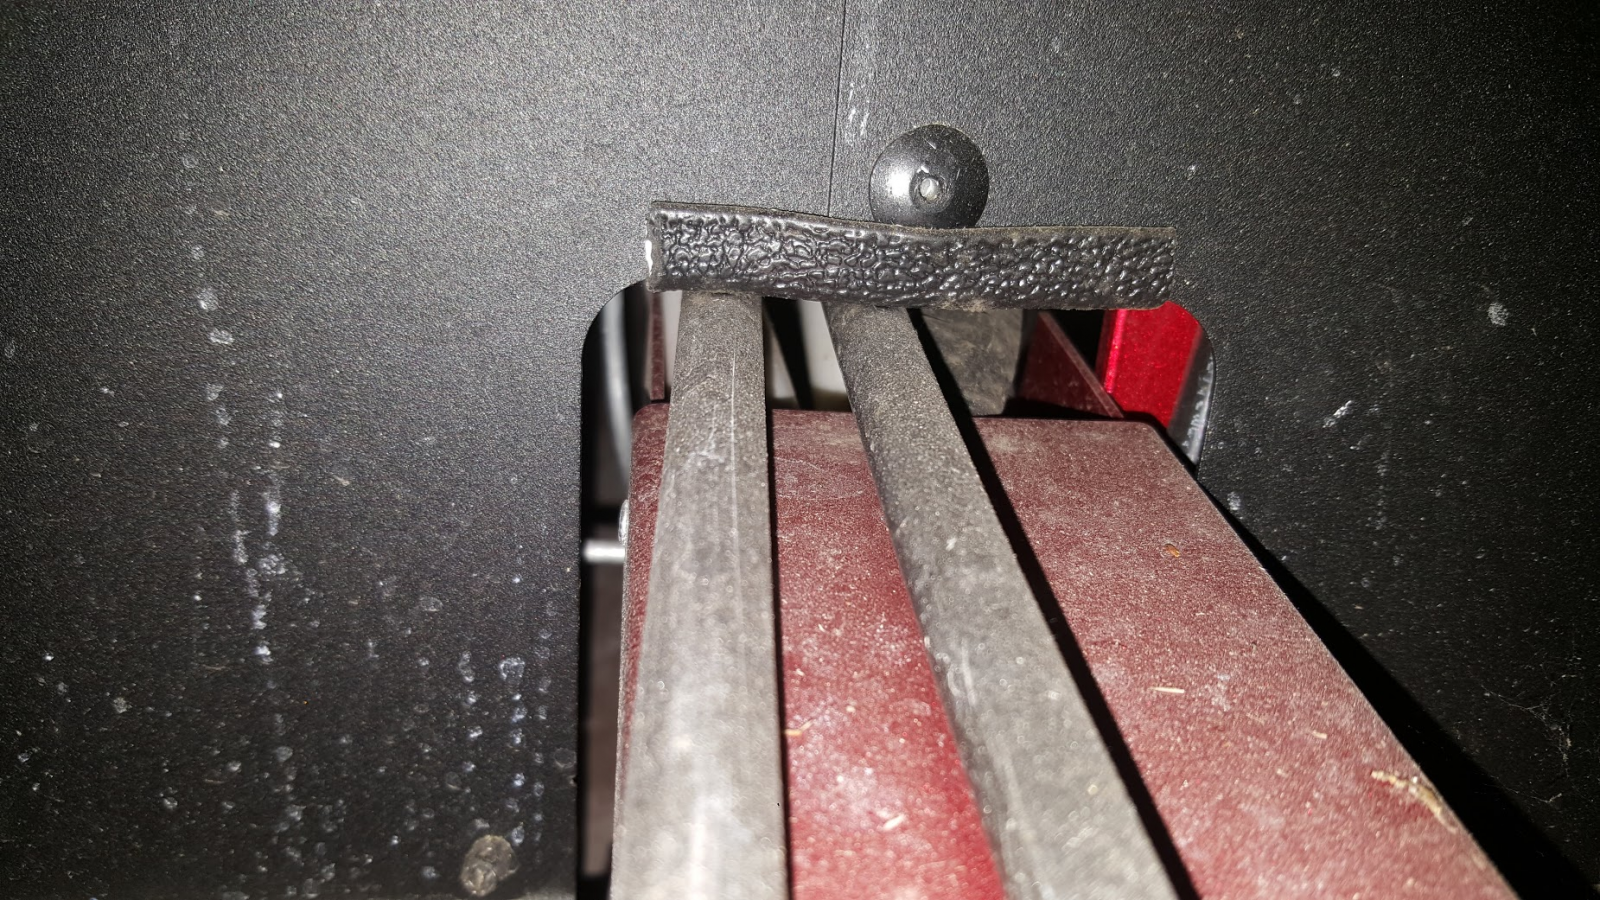
The cables need to be positioned above the subframe and below the fuel tank.
Step four
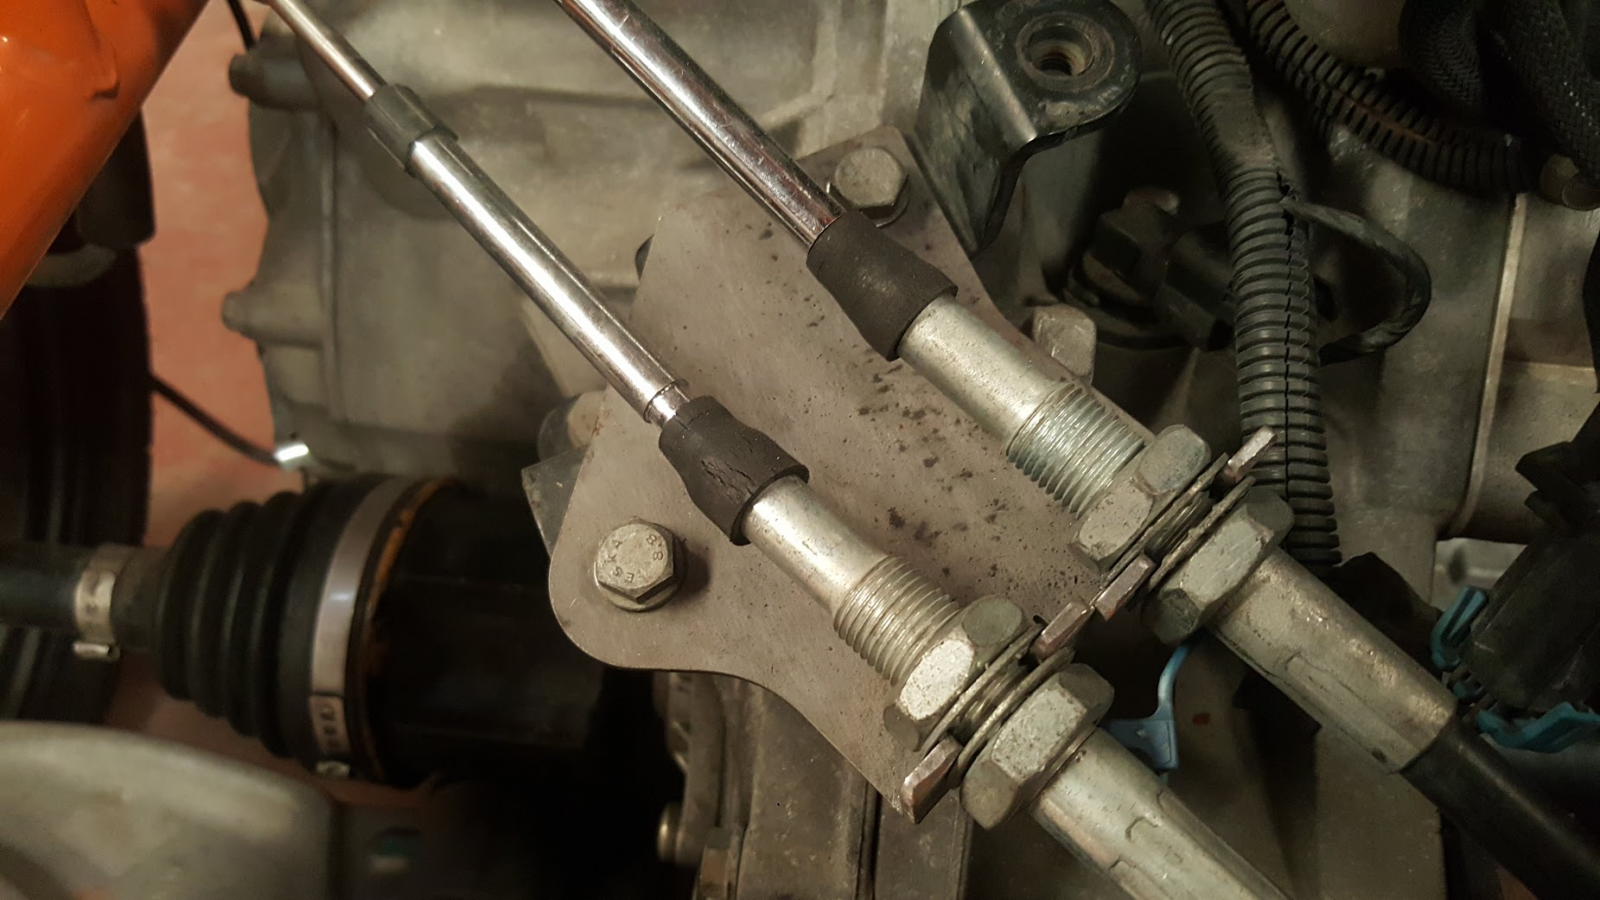
Place the cable with the sharpie mark or tape in the "U" shaped slot on the driver's side tunnel mount.
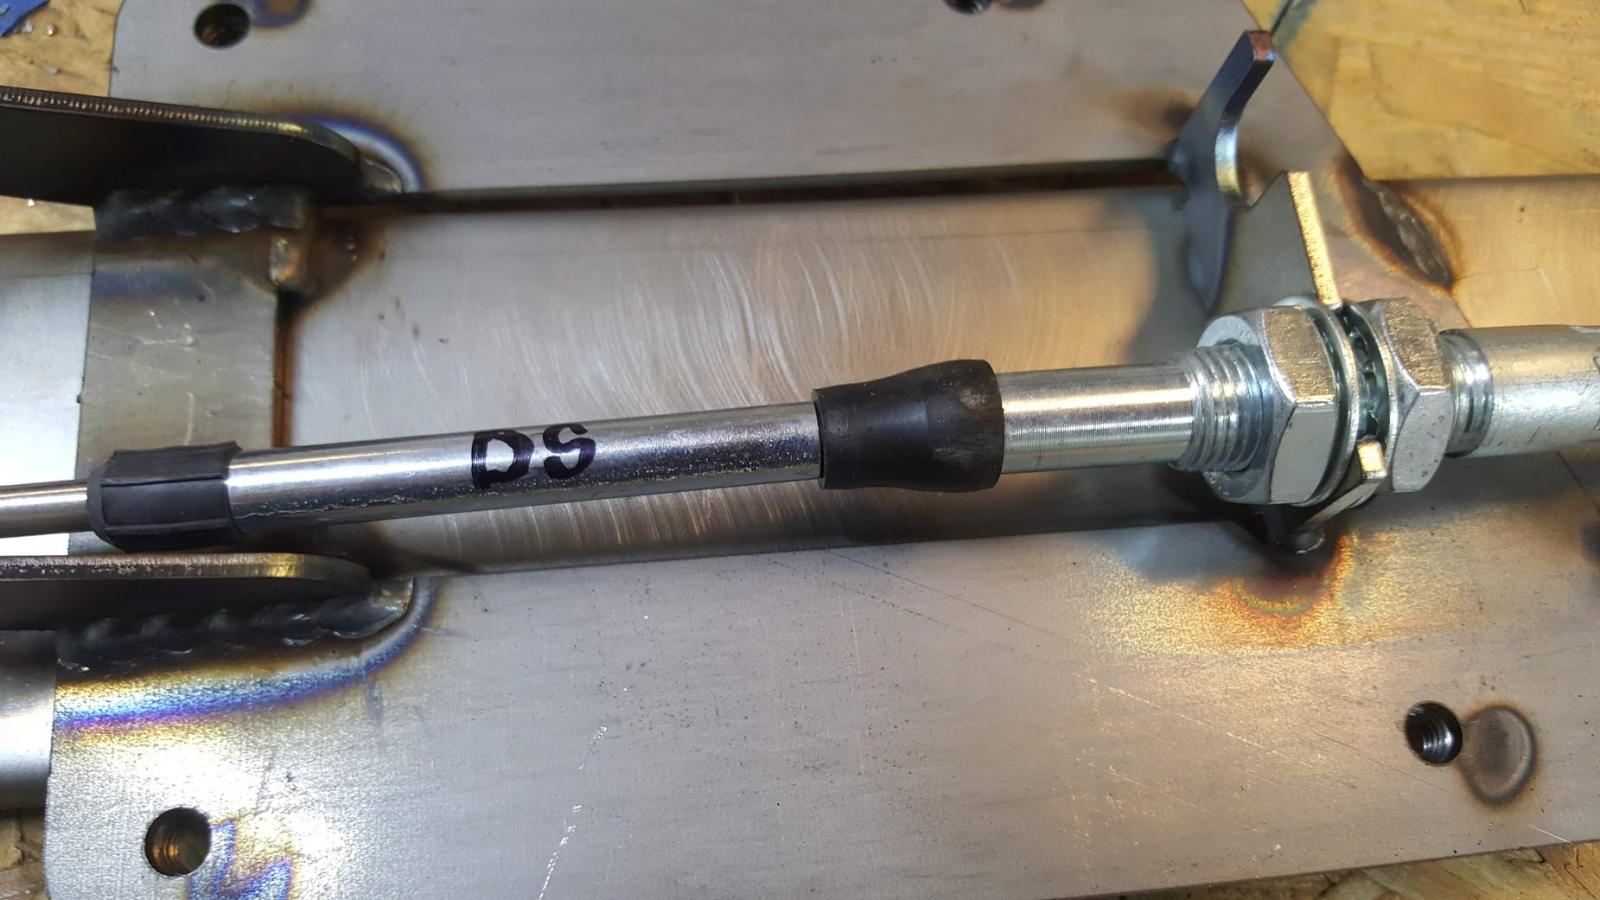
Adjust the lock nuts so there is about the same amount of threads showing on each side of the nuts.
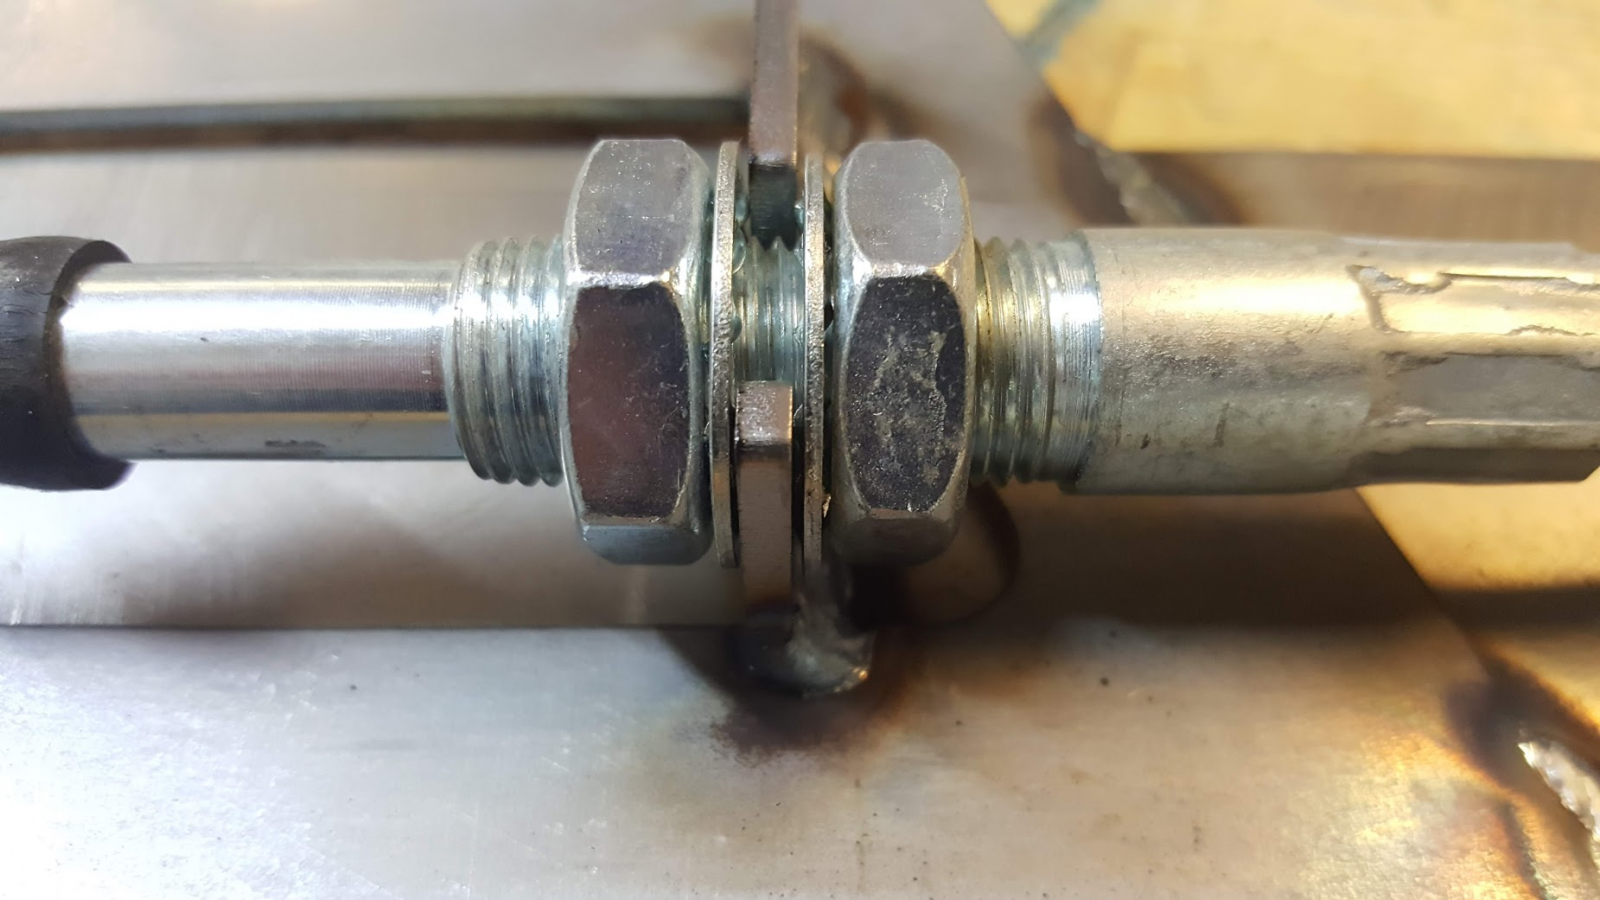
Snug the two nuts to hold it in place. These will need to be adjusted later.
Now do this again with the unmarked cable on the passenger side.
Step five
Attach the shifter cable that you identified earlier to the shifter cable mount bracket near the transmission on the driver's side.
As you do this, route the cables so they make as smooth a radius as possible.
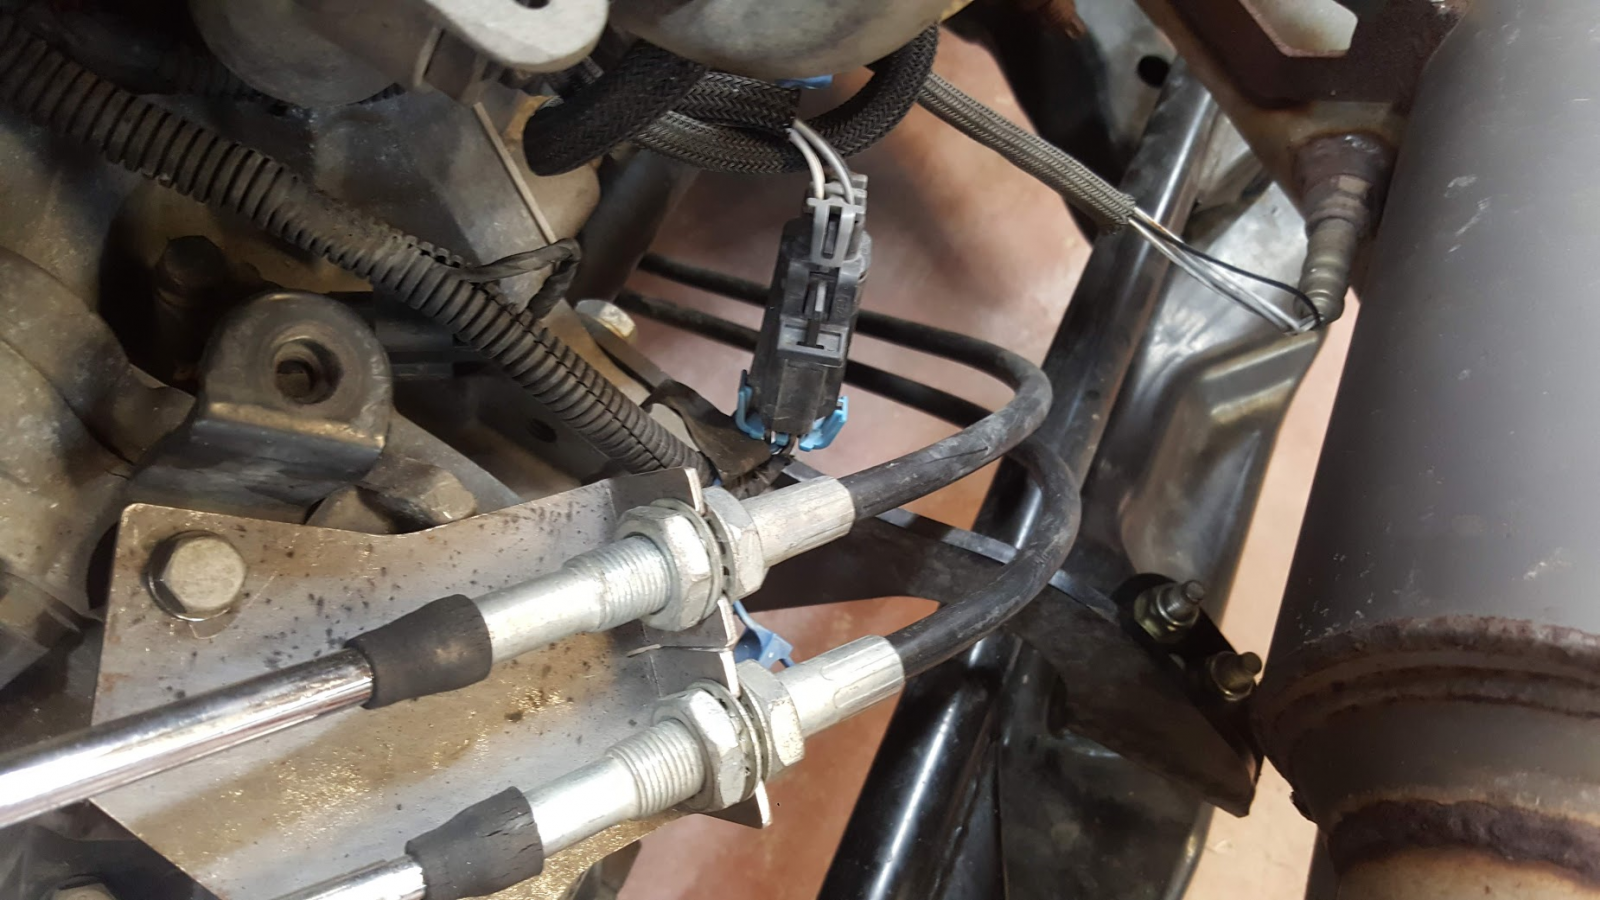
Make sure it doesn't get too close to the exhaust system.
Adjust the lock nuts so there is about the same amount of threads showing on each side of the two nuts.
Snug the two nuts to hold it in place. These will need to be adjusted later.
Now do this again with the unmarked cable on the passenger side.
Step six
Locate your shifter hardware baggie.
L23I for base manuals
L23J for SS manuals
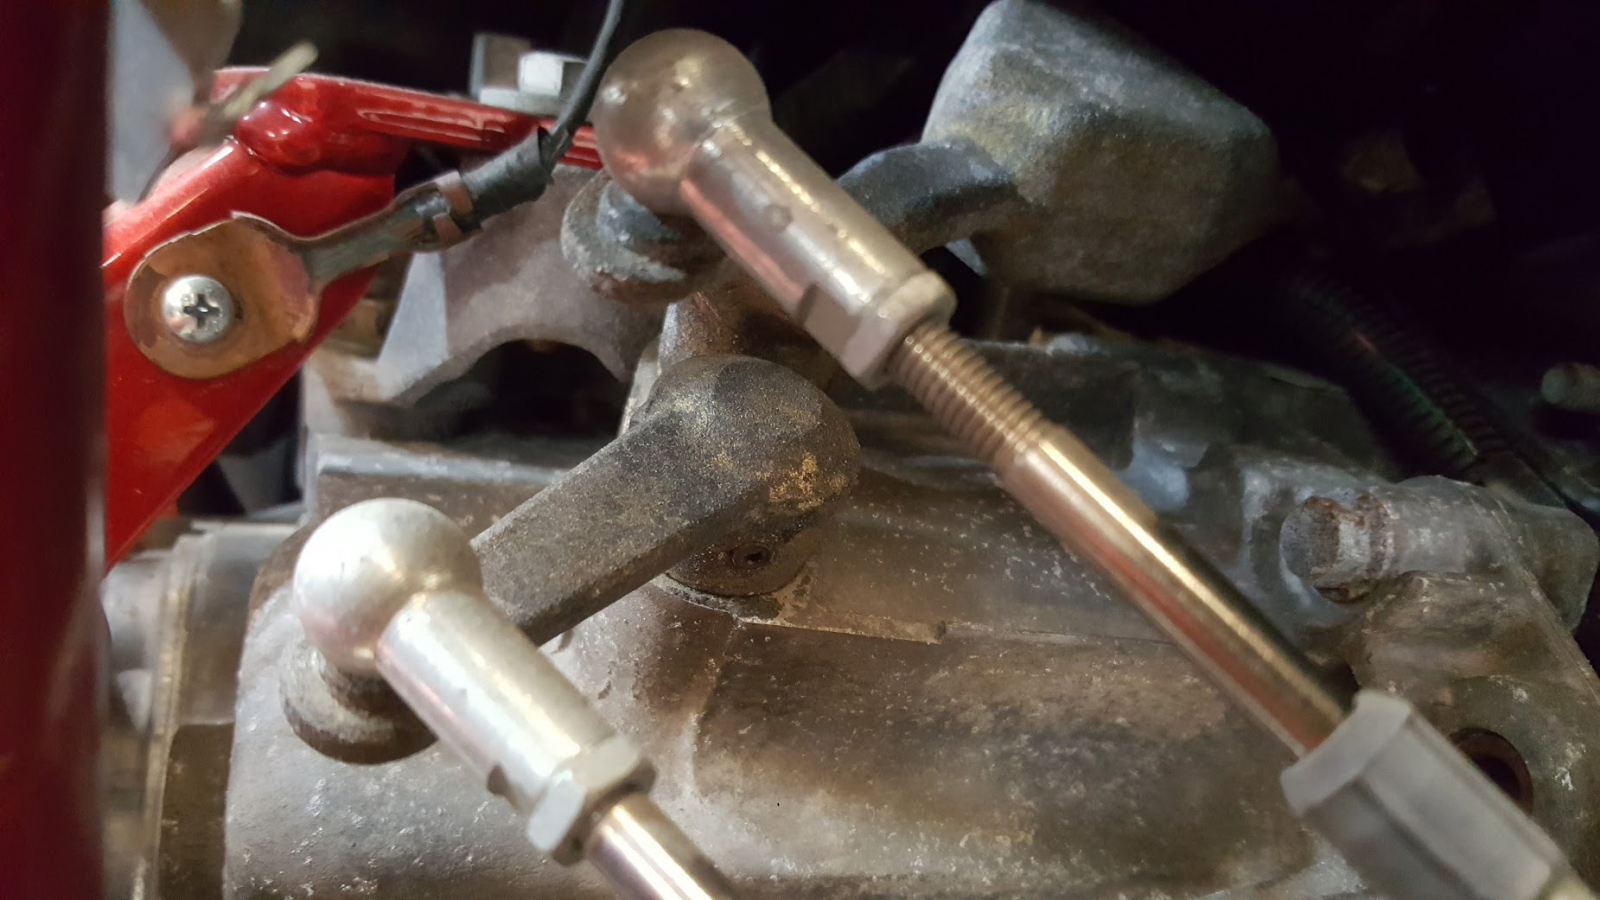
Attach the rear cable ends to the transmission shifter arms using the supplied rod ends.
Step seven
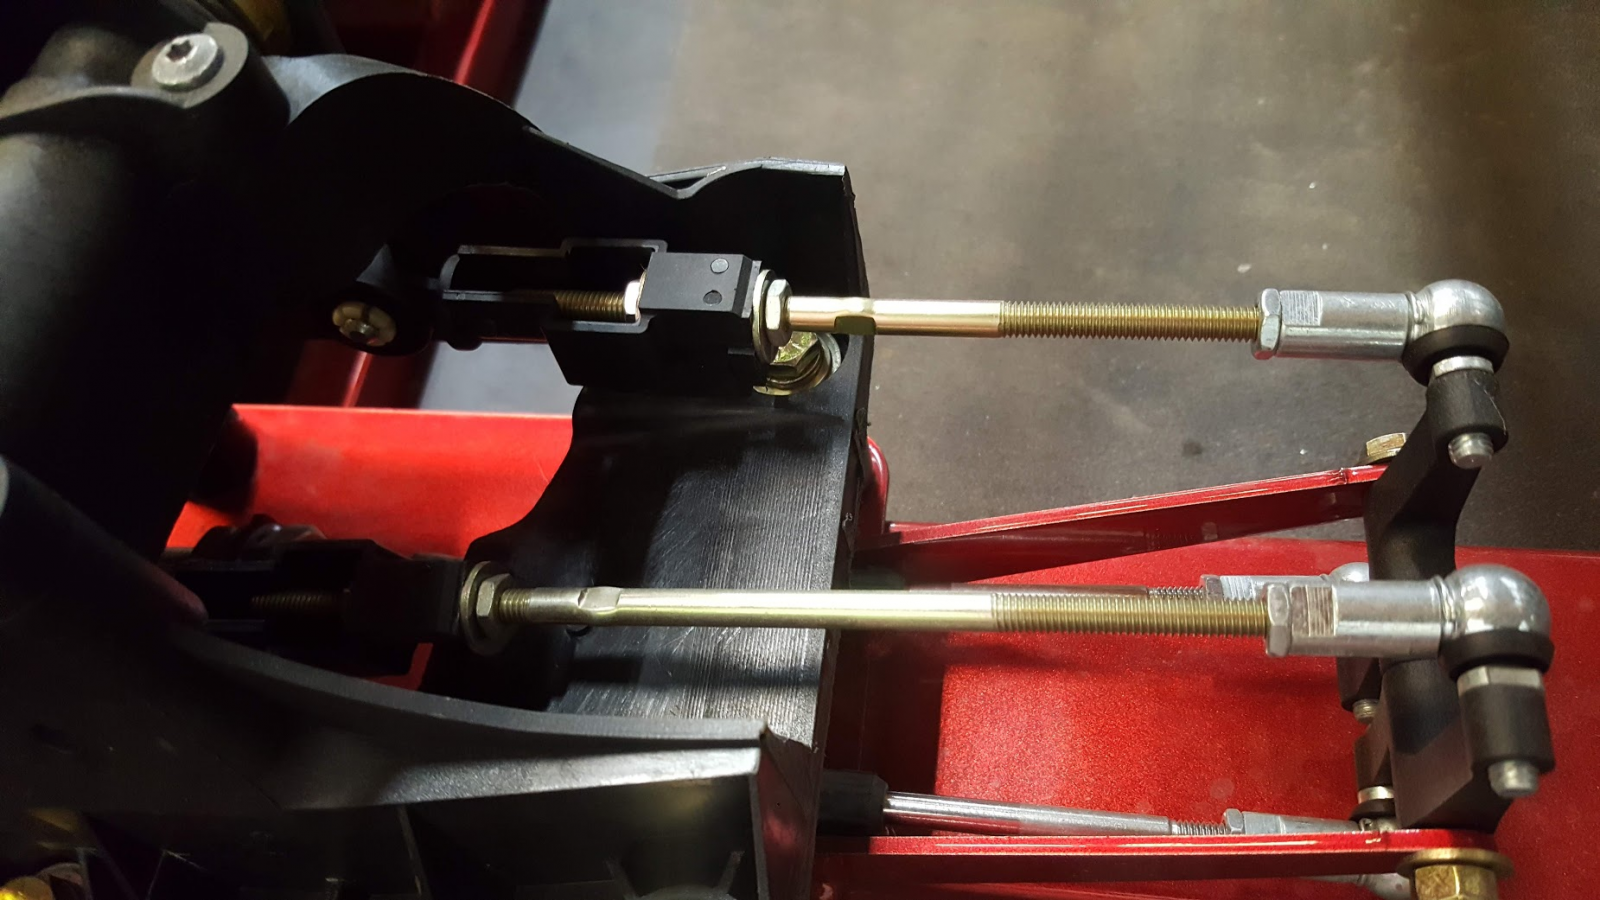
Assemble the bellcranks to the tunnel.
Leave the nut for the long cross shaft bolt loose enough that is doesn't cause the bellcranks to bind.
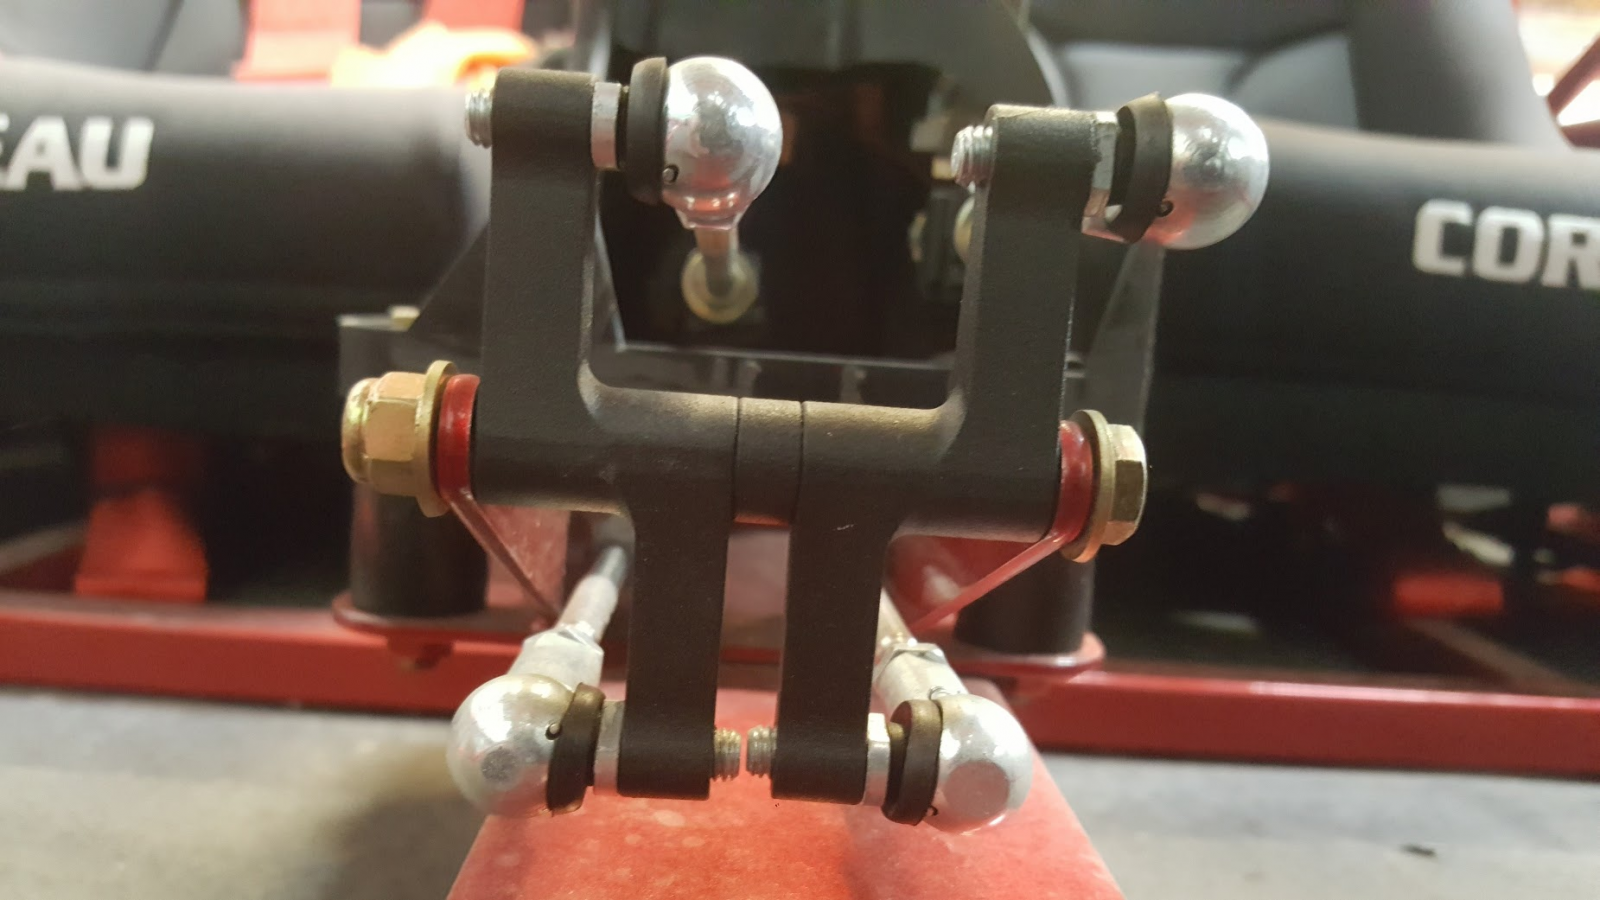
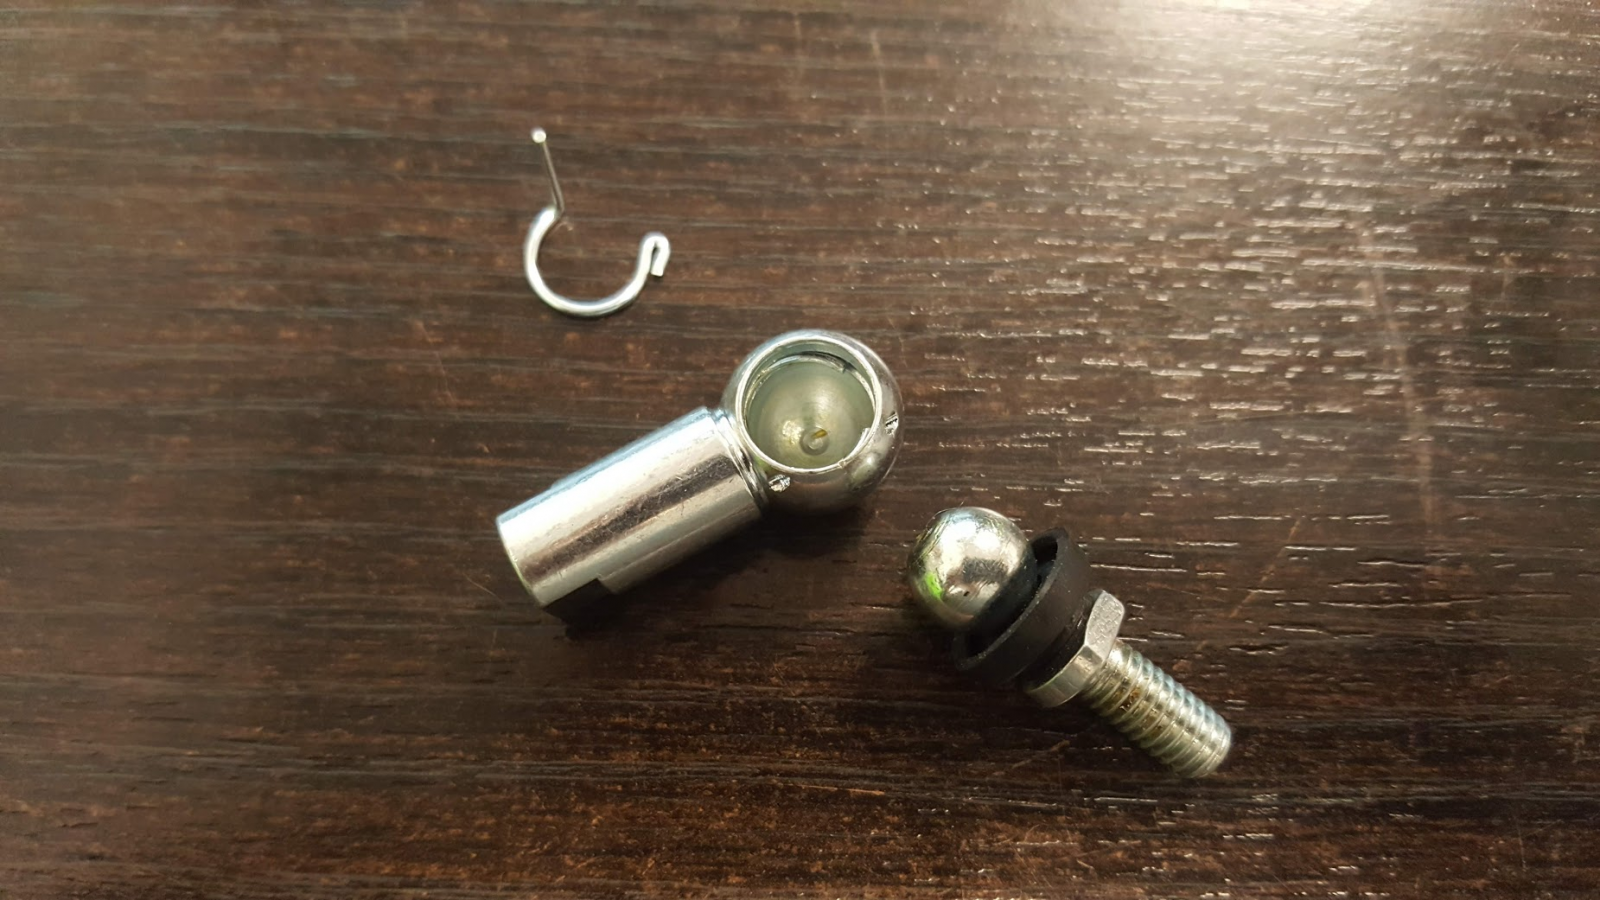
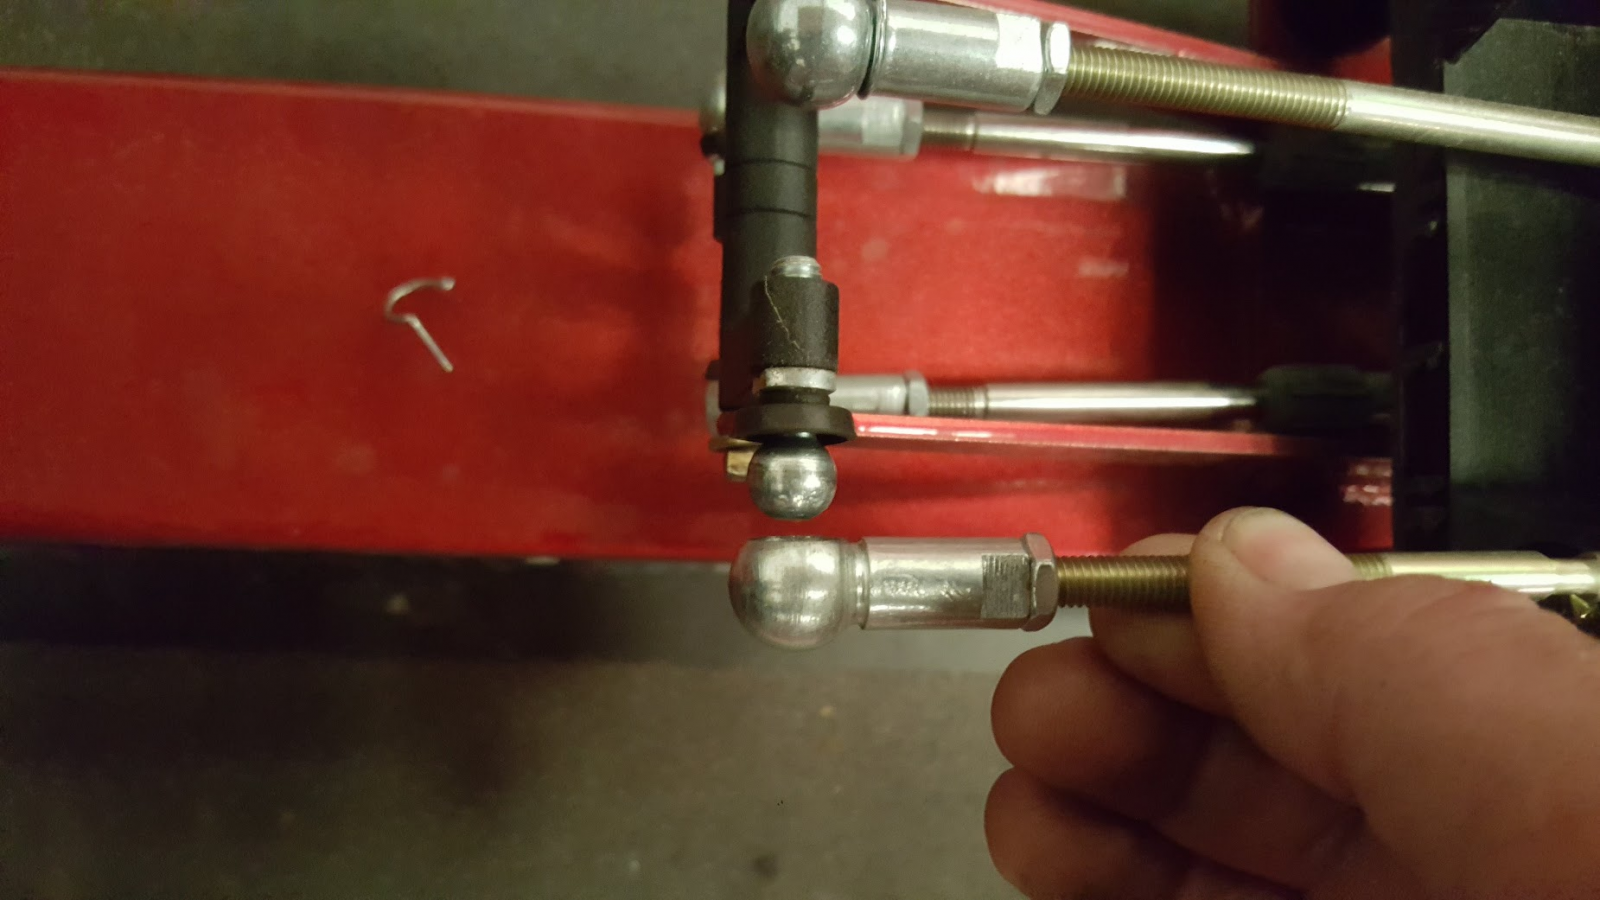
Remove the rod end retaining clips.
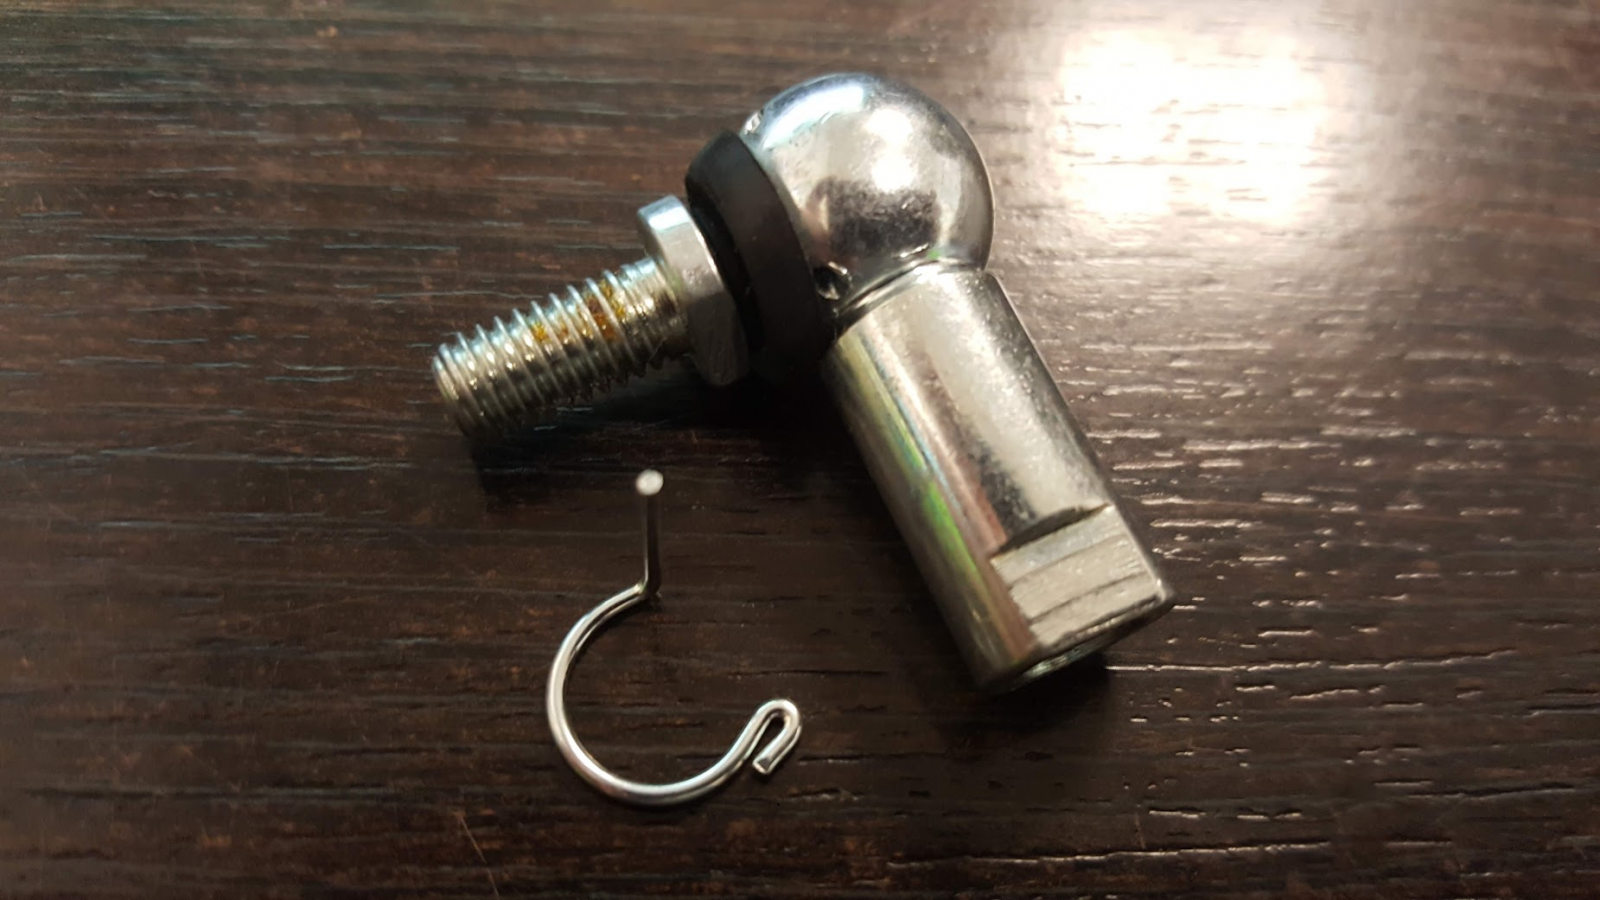
Pull the ball studs from the rod ends.
Attach the rod ends to the cables.
Attach the rod end ball studs to the bellcranks.
Do not reattach the ball studs to the rod ends at this time.
Step eight
Rotate the shifter lever on the transmission that has the counterweight back and forth.
You should feel three distinct positions.
The center position is neutral. Place it in the center position.
The other (smaller) shifter arm will automatically find it's neutral position while moving the larger counterweighted one.
It is imperative that the following adjustments are made with the transmission in neutral.
Step nine
Adjust the cables by repositioning the locking nuts closer to one end of its threads or the other.
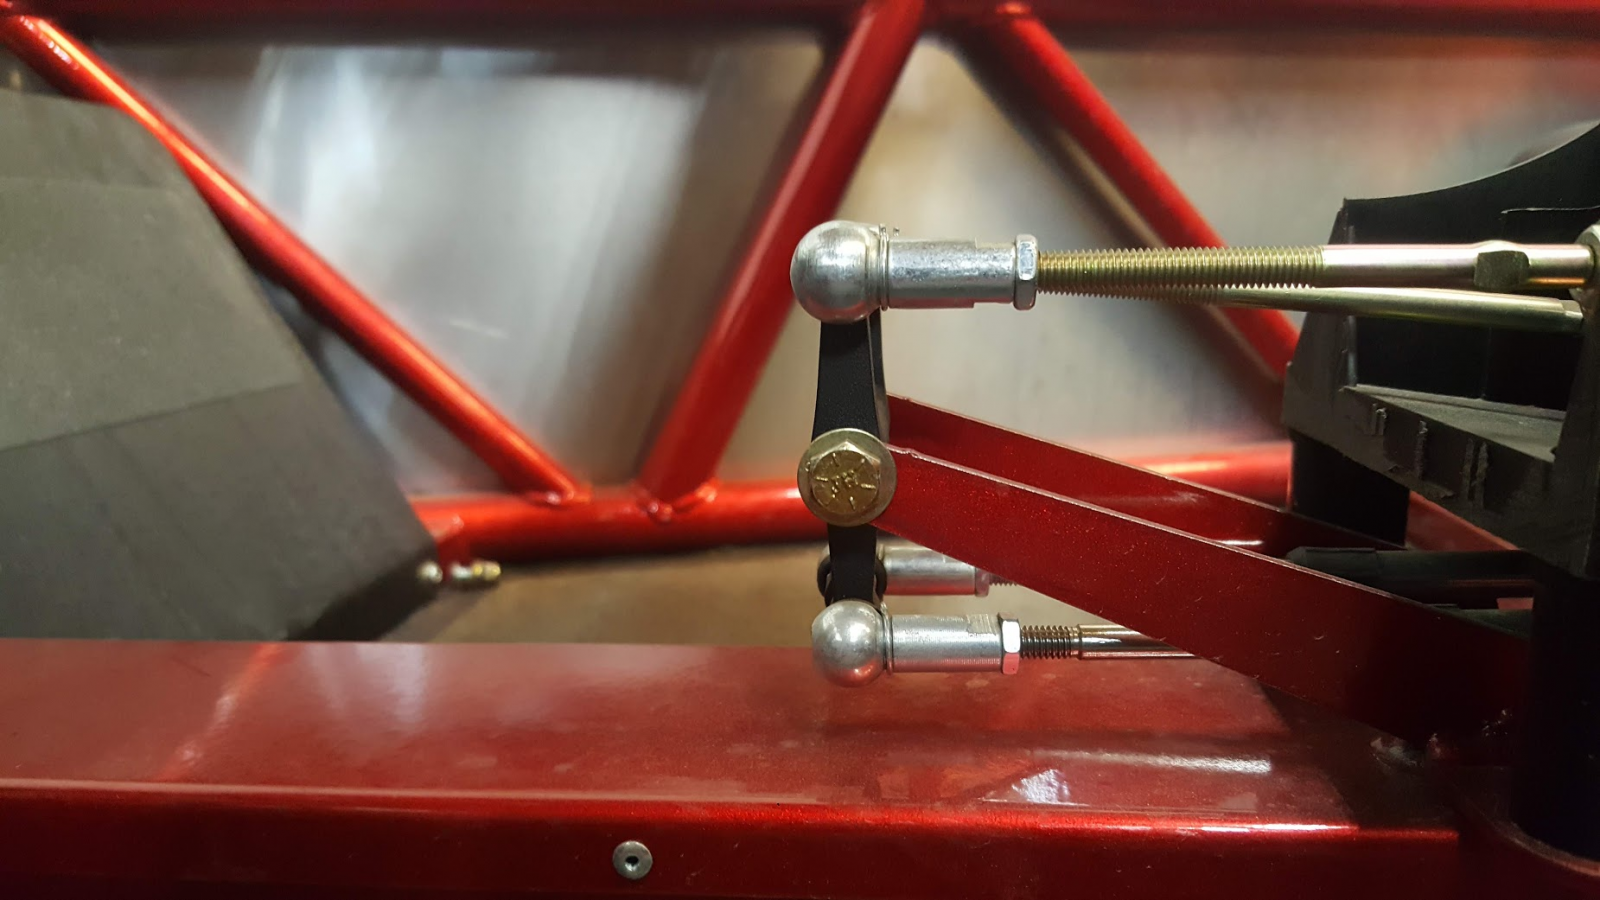
The cables need to be adjusted until the bellcranks are straight up and down. Perpendicular to the tunnel.
You will likely need to adjust both ends of each cable to achieve this.
DO NOT PROCEED TO THE NEXT STEP UNTIL THEY ARE ADJUSTED PROPERLY.
Firmly tighten all eight of the locknuts and all of the rod end jam nuts.
Go to the transmission and rotate the big shifter arm and then place it back in the center (neutral) position.
This should be moving the passenger side bell crank.
Reinspect the bellcranks.
If they are not perpendicular to the tunnel cap DO NOT PROCEED TO THE NEXT STEP.
After step nine the big cable locknuts and the cable rod end jam nuts should not be moved, they are set.
Step ten
Cut off the front section of your shifter housing.
Assemble the pushrods to the shifter.
The longer of the two goes on the passenger side.
Attach your shifter to the tunnel using the supplied hardware.
The bellcranks should be straight up and down, perpendicular to the tunnel and the transmission should be in neutral.
If they are not, go back to step nine.
After step nine the big cable locknuts and the cable rod end jam nuts should not be moved, they are set.
Step eleven
Remove the rod end retaining clips.
Pull the ball studs from the rod ends.
Insert the ball studs in the upper holes of the bellcranks.
Install the rod ends on the pushrods.
After step nine the big cable locknuts and the cable rod end jam nuts should not be moved, they are set.
Step twelve
Now its time to hook the shifter pushrods to the top of the bell cranks.
Start with the driver's side.
The left to right movement of the shifter will naturally spring to a center position.
Don't worry about the front to back movement right now.
Allow the shifter to find the left to right center position.
With the bellcrank perpendicular to the tunnel and the shifter in a relaxed center position, adjust the pushrod length until it will slip back on the ball without moving the Shifter or bellcrank.
Push the rod end back on the ball and reinsert the retaining wire.
The transmission should still be in neutral and the bellcranks should still be perpendicular to the tunnel cap.
Step thirteen
The forward to back adjustment is more forgiving.
Hold the shifter handle in approximately the center of its travel.
Adjust the length of the pushrod until the rod end will slip over the ball.
Reinsert the retaining clip.
The bellcranks should still be perpendicular to the tunnel.
Tighten everything.
Install your tunnel cover.
Step two
Install your shifter cable bracket
Step three
Identify one of the cables on both ends with a sharpie mark or piece of tape.
Route your two shifter cables along the tunnel and through the opening in the firewall.
The cables need to be positioned above the subframe and below the fuel tank.
Step four
Place the cable with the sharpie mark or tape in the "U" shaped slot on the driver's side tunnel mount.
Adjust the lock nuts so there is about the same amount of threads showing on each side of the nuts.
Snug the two nuts to hold it in place. These will need to be adjusted later.
Now do this again with the unmarked cable on the passenger side.
Step five
Attach the shifter cable that you identified earlier to the shifter cable mount bracket near the transmission on the driver's side.
As you do this, route the cables so they make as smooth a radius as possible.
Make sure it doesn't get too close to the exhaust system.
Adjust the lock nuts so there is about the same amount of threads showing on each side of the two nuts.
Snug the two nuts to hold it in place. These will need to be adjusted later.
Now do this again with the unmarked cable on the passenger side.
Step six
Locate your shifter hardware baggie.
L23I for base manuals
L23J for SS manuals
Attach the rear cable ends to the transmission shifter arms using the supplied rod ends.
Step seven
Assemble the bellcranks to the tunnel.
Leave the nut for the long cross shaft bolt loose enough that is doesn't cause the bellcranks to bind.
Remove the rod end retaining clips.
Pull the ball studs from the rod ends.
Attach the rod ends to the cables.
Attach the rod end ball studs to the bellcranks.
Do not reattach the ball studs to the rod ends at this time.
Step eight
Rotate the shifter lever on the transmission that has the counterweight back and forth.
You should feel three distinct positions.
The center position is neutral. Place it in the center position.
The other (smaller) shifter arm will automatically find it's neutral position while moving the larger counterweighted one.
It is imperative that the following adjustments are made with the transmission in neutral.
Step nine
Adjust the cables by repositioning the locking nuts closer to one end of its threads or the other.
The cables need to be adjusted until the bellcranks are straight up and down. Perpendicular to the tunnel.
You will likely need to adjust both ends of each cable to achieve this.
DO NOT PROCEED TO THE NEXT STEP UNTIL THEY ARE ADJUSTED PROPERLY.
Firmly tighten all eight of the locknuts and all of the rod end jam nuts.
Go to the transmission and rotate the big shifter arm and then place it back in the center (neutral) position.
This should be moving the passenger side bell crank.
Reinspect the bellcranks.
If they are not perpendicular to the tunnel cap DO NOT PROCEED TO THE NEXT STEP.
After step nine the big cable locknuts and the cable rod end jam nuts should not be moved, they are set.
Step ten
Cut off the front section of your shifter housing.
Assemble the pushrods to the shifter.
The longer of the two goes on the passenger side.
Attach your shifter to the tunnel using the supplied hardware.
The bellcranks should be straight up and down, perpendicular to the tunnel and the transmission should be in neutral.
If they are not, go back to step nine.
After step nine the big cable locknuts and the cable rod end jam nuts should not be moved, they are set.
Step eleven
Remove the rod end retaining clips.
Pull the ball studs from the rod ends.
Insert the ball studs in the upper holes of the bellcranks.
Install the rod ends on the pushrods.
After step nine the big cable locknuts and the cable rod end jam nuts should not be moved, they are set.
Step twelve
Now its time to hook the shifter pushrods to the top of the bell cranks.
Start with the driver's side.
The left to right movement of the shifter will naturally spring to a center position.
Don't worry about the front to back movement right now.
Allow the shifter to find the left to right center position.
With the bellcrank perpendicular to the tunnel and the shifter in a relaxed center position, adjust the pushrod length until it will slip back on the ball without moving the Shifter or bellcrank.
Push the rod end back on the ball and reinsert the retaining wire.
The transmission should still be in neutral and the bellcranks should still be perpendicular to the tunnel cap.
Step thirteen
The forward to back adjustment is more forgiving.
Hold the shifter handle in approximately the center of its travel.
Adjust the length of the pushrod until the rod end will slip over the ball.
Reinsert the retaining clip.
The bellcranks should still be perpendicular to the tunnel.
Tighten everything.
Attachments
-
 1.4 MB Views: 419