Murcielago311's City/standard build - 06 SS/SC - Chassis #177 *REGISTERED*

Murcielago311

Well-Known Member
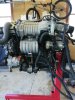
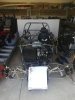
About to start engine cleanup and tear-down. Anyone else have a really oily grimy engine before cleaning? It never dripped or used oil, so I'm not super concerned for engine health, but I'd like to address whatever parts are weeping if I can easily do so.

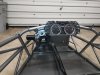
I think this one can be addressed with a new timing cover and water pump cover (?) gasket.
11181


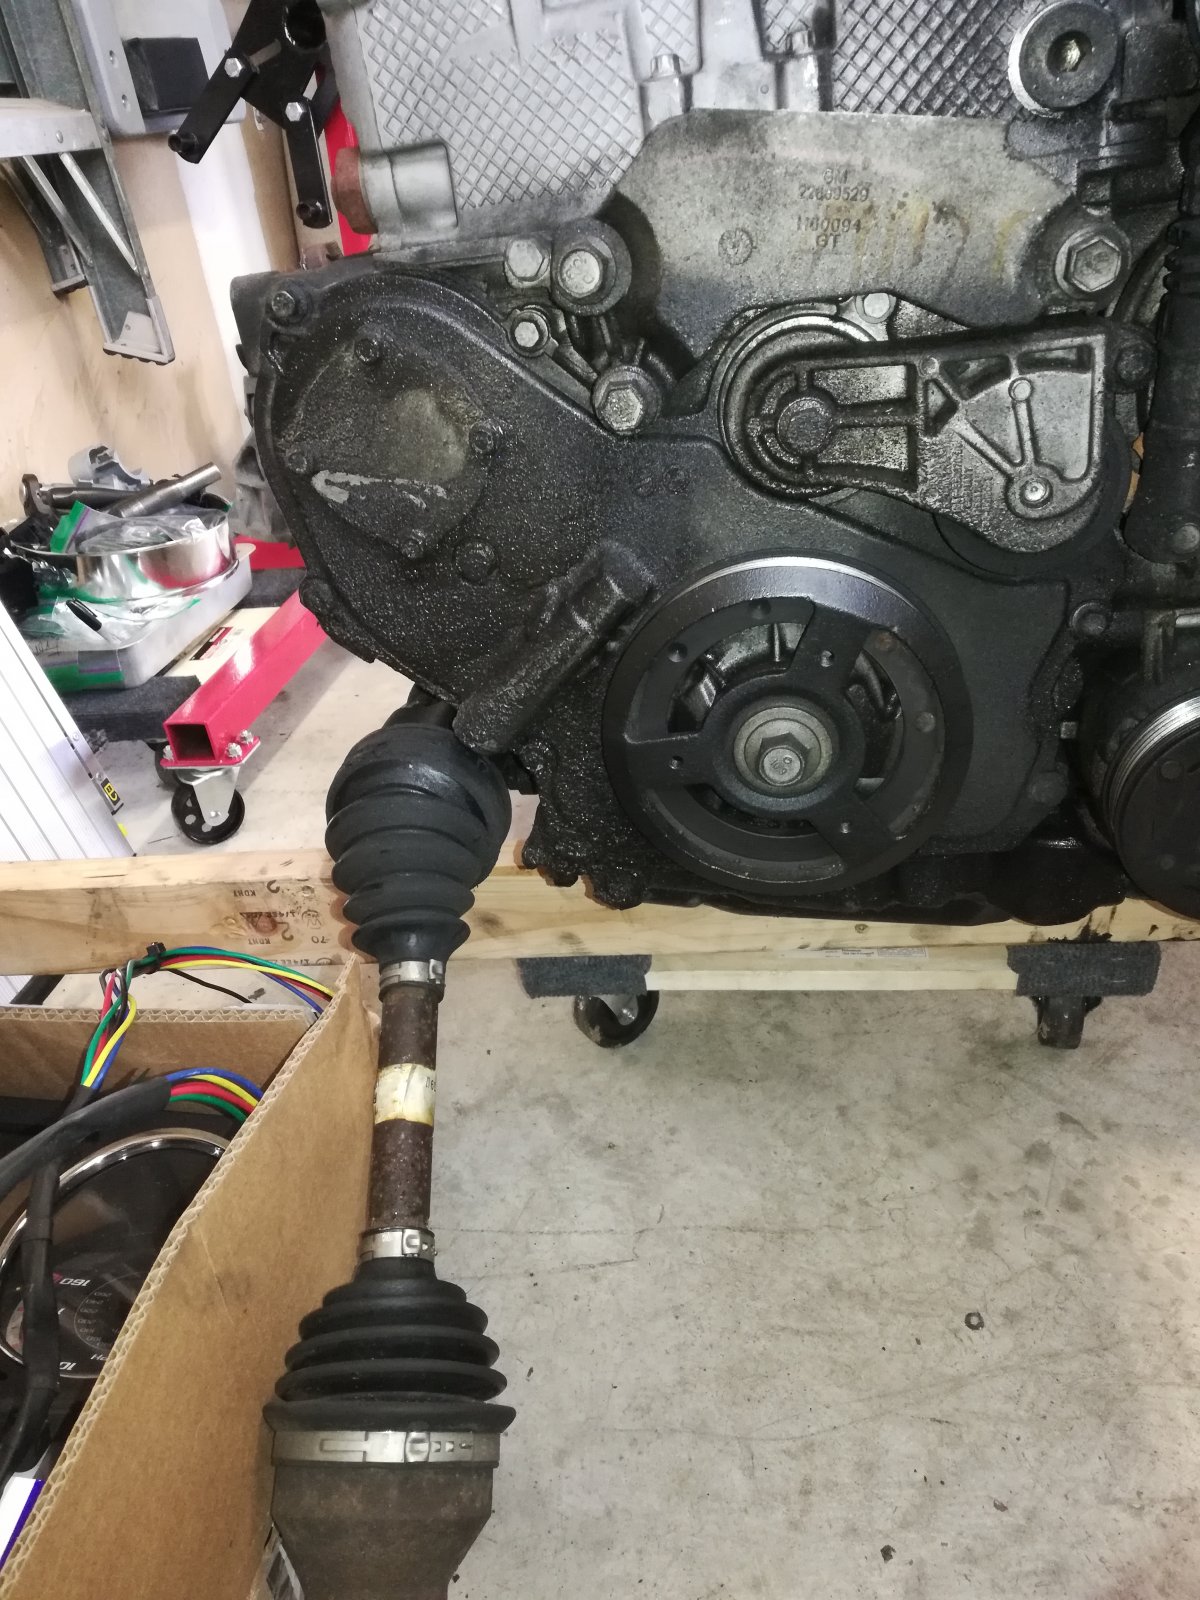
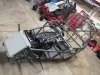
I'll be pulling the SC so hopefully this one becomes clear at that point. Whole front is just covered.
11182


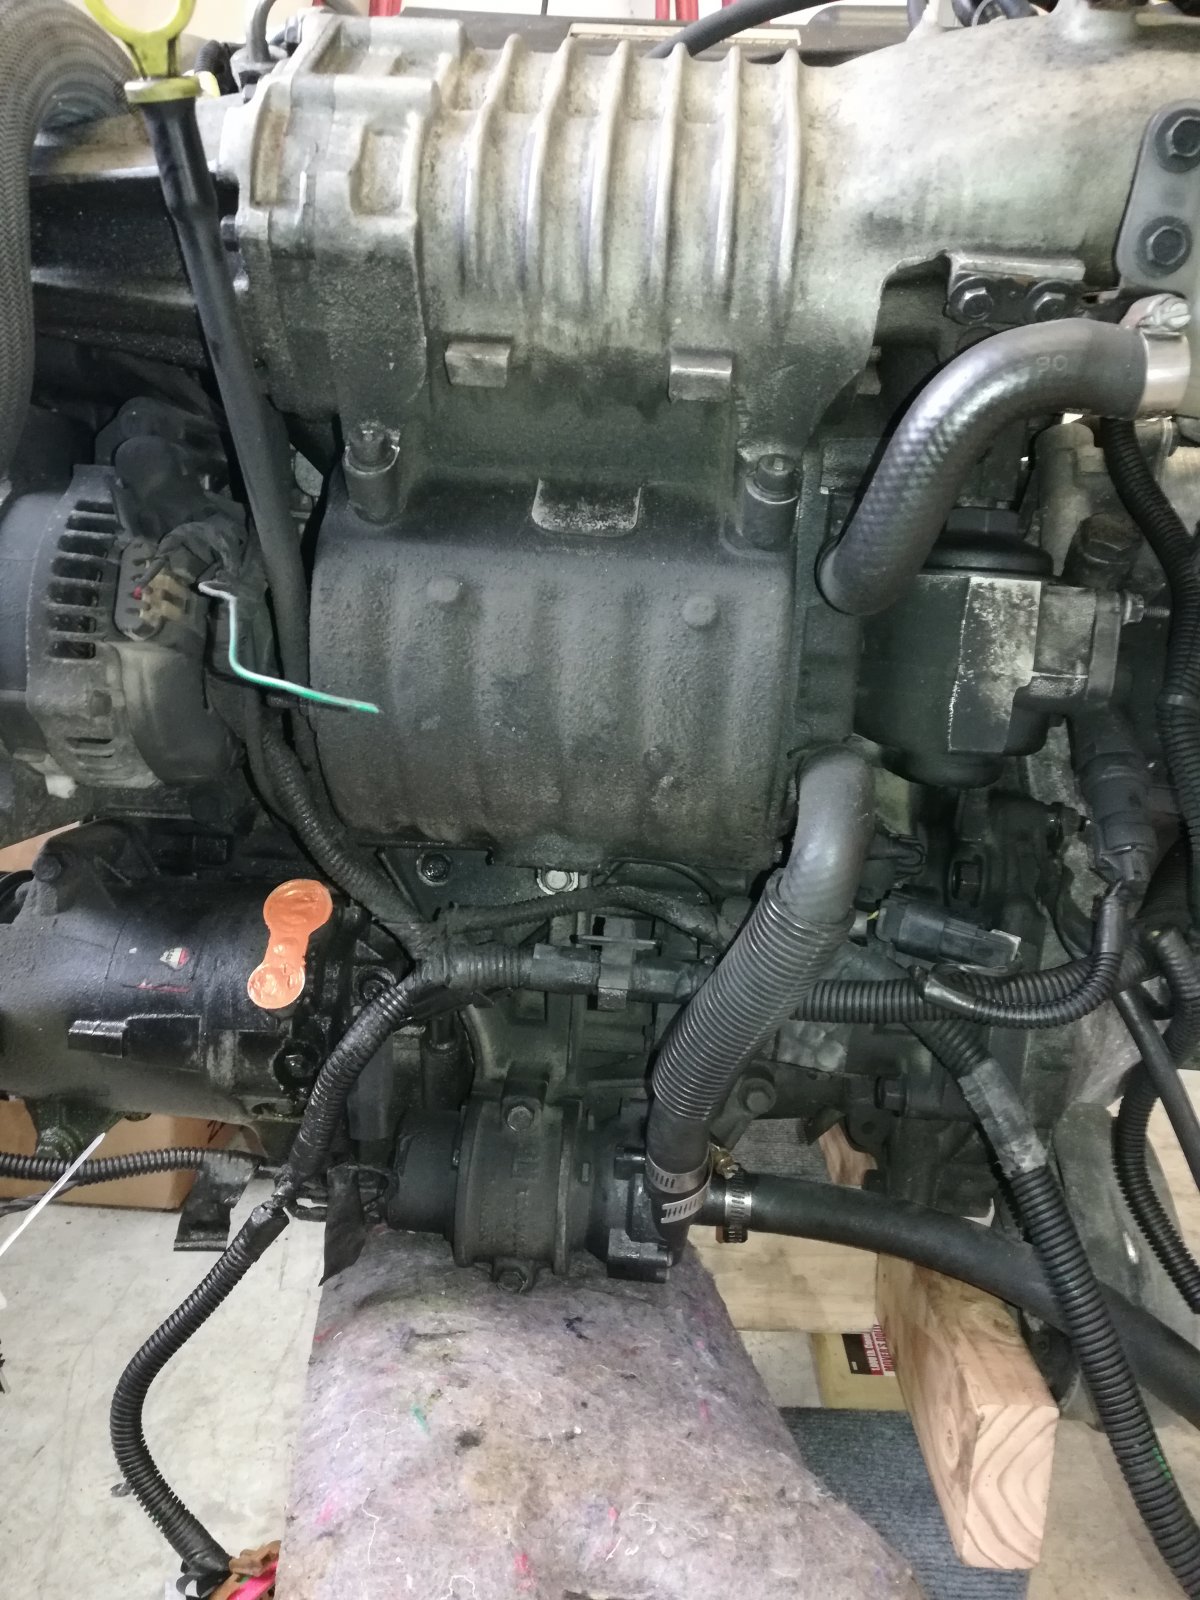
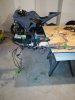
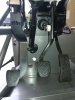
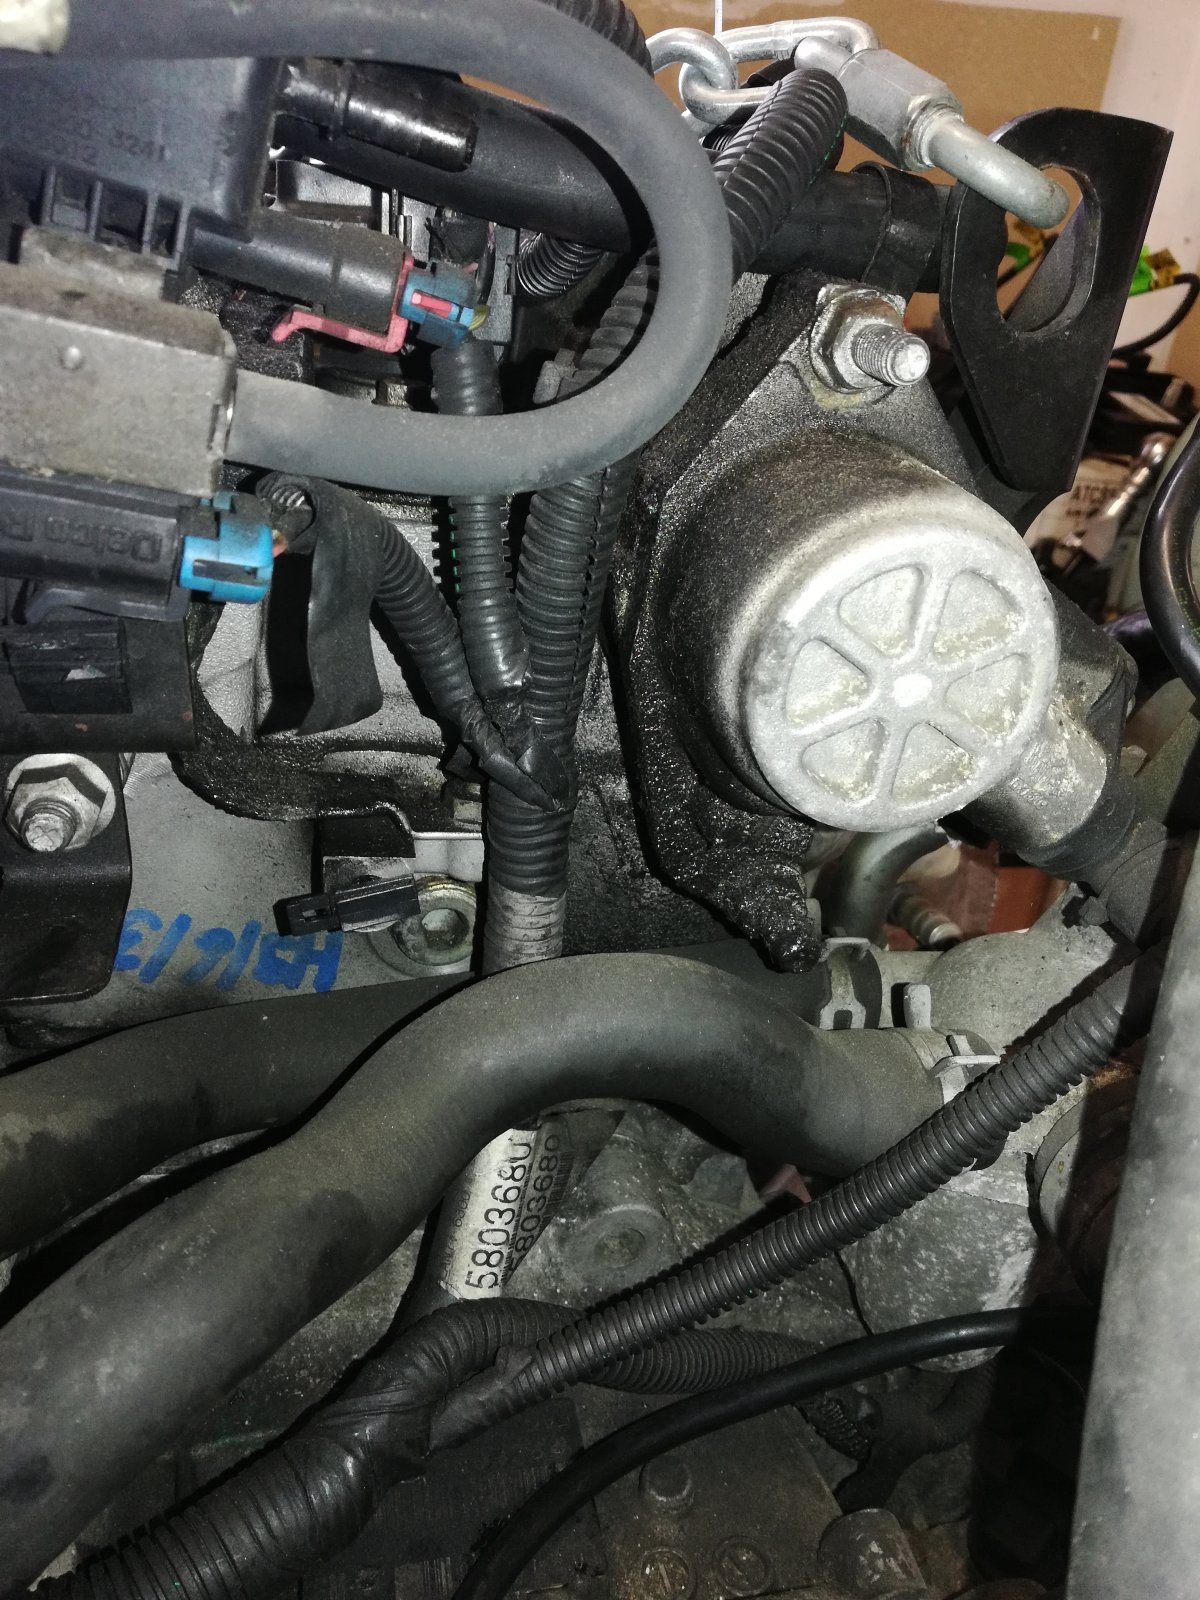
This one on the driver's side top I have no idea. What's the little circular part in the top right that's oil-covered?
11183


Thanks
 

Karter2026

Goblin Guru
Crank seal and the water pump cover seal. When you do the timing cover seal. It doesn't look like a cv boot they look clean from the picture. How many miles?
 

Murcielago311

Well-Known Member
160K :eek:
Edit: I ordered timing cover gasket, front main crank seal, and cam position sensor gasket.
 
Last edited:

Murcielago311

Well-Known Member
I know I should just order the kit but I'm hoping it's been addressed already since the tensioner was updated (and the cover is leaking). Not sure if I'll be able to tell when I get the cover off besides looking for chain slack. It had no rattles before disassembly. Ancillary costs are piling up.
 

Murcielago311

Well-Known Member
Just checking in. Engine washed and on the stand, have the SC and header pulled. A lot more cleaning and engine maintenance left.

I'm caught up to the newest wiring harness video. I await warmer weather for more parts prep. And the dash harness videos.

Sold some cobalt parts, exhaust and intake, DVD head unit, hood and front bumper, coilovers. Closing in on a grand in sales and still have nice trunk with high spoiler, doors, side skirts, interior, radiator, etc.
 

Attachments

Desert Sasqwatch

Goblin Guru
The engine looks a lot cleaner than before, know how tedious that can be to get enough of the dirt and crud off to work on it. ;) Looks like you have already made good progress on the engine harness, which can definitely be one of the hardest parts of the build. Warmer weather is coming soon and the parts prep will be back on track. How soon until you get your kit?
 

Murcielago311

Well-Known Member
Today was my day. Big thanks to the Doyles who went really above and beyond to get me my kit.

It can be done with a mid size truck with back seats but it's tight. The floor pan just barely fit through the back doors.

Haven't opened any boxes yet but I'm amazed by the fabricated stuff.

Besides threading in bolts and nuts, any other tips before powder coating? I won't be welding anything.
IMG_20200215_091822.jpg
MmsCamera_2020-02-15-17-27-08.jpg
 

Murcielago311

Well-Known Member
Got to start on assembly today. I'd really recommend a pneumatic rivet gun.

On the main hoses, heat em up, cut slits in the end you tie the rope to so it can collapse easier, I tied a washer to the rope and cinched that inside the hose so it couldn't pull out, and use a crank or rig up something awesome like this for leverage.
 

Attachments

Desert Sasqwatch

Goblin Guru
Great progress! I see you have a garage helper - always a good thing to start them young. :);) Are those the new or the old steering rods on the rack up front? Sometimes these get mixed up in the large number of things that need to be remembered.
 

Murcielago311

Well-Known Member
Just the naked steering rack right now. If I remember correctly I have DF replacements that go up front and I need to buy some new ones for the goblin rear because the old cobalt fronts the boots were cracked up.
 

Desert Sasqwatch

Goblin Guru
New parts are good. One of my arms was bent on the donor so new (now) rear arms were a must!
I see you have plenty of clearance between the steering shaft the clutch pedal arm, did you have to do any trimming or part re-adjustment (bending)?
 

Murcielago311

Well-Known Member
No bending. I was able to cut enough of the little switch leg off to clear the shaft and still grab almost all of the switch. Good eye.

The smile on his face
He loves 'HIS' new racecar. Gonna be a hard wait until he's big enough to leave the neighborhood in it. I'm imagining we'll have to rack up some serious neighborhood miles.
 

JBINTX

Goblin Guru
No bending. I was able to cut enough of the little switch leg off to clear the shaft and still grab almost all of the switch. Good eye.

He loves 'HIS' new racecar. Gonna be a hard wait until he's big enough to leave the neighborhood in it. I'm imagining we'll have to rack up some serious neighborhood miles.
Riding that lawn mower will never be the same after he gets to ride in the goblin!
Booster seat in a racing seat with a 5-point harness and a cool full helmet? I am sure you will make it work........ ;)
 

Murcielago311

Well-Known Member
Can I hear some opinions on whether or not I should do as many here have done and add my large donor ZZP heat exchanger up top on the roll bars or just stick with the DF HE up front that I already have mounted?

My LSJ has 60lb injectors and 2.8 SC pulley. Was pushing about 15 psi on the donor. Will only see street duty.


As an update, I completed my harness and it's in the car. Need to do some final taping and securing but all the connectors plugged in. Thanks to the new videos and Adam's 'Rock On' lighter and Lonny's calming 'you can do this' VO work.
I was able to add in the necessary wiring for my AEM wideband, Aeroforce Interceptor, and WOT box that came on my donor. Also several extra positives front and rear for my street glow and 15" woofers (JK).

I have the driver controls mounted, driver's seat, because I just HAD TO sit in this thing to see what it would feel like. Front suspension is done. Rear coilovers on, fuel tank, brake/clutch reservoir, radiator, and HE on and plumbed.

Next is my engine work and painting, need to figure out how to get these *****ing control arm rear bearings out. Now that all my moto track days are being canceled I'll have more time for the car.
 

Attachments

Last edited:
Top