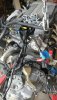
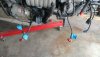
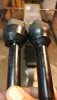
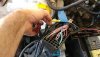
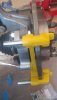
Been a while since an update. Since the last one I started on prepping the donor parts. Polished and sealed the LCAs. Split the engine/tranny and was individually cleaning and painting everything. The goal was to do all of the internals so that when I was ready for silly power there wouldn't be any need to drop the drivetrain...
But my company has decided to relocate my job to Houston...
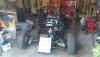
So a huge change of plans. Slap it together and get it running now then after the move get a second block to build for late 2020 or 2021. Not painting the body. Not working on front aero. No sound system or integrated tablet. No tow bar. I will do the Dorman, and timing tensioner, along with the tilt steering column mod.
Since I'm putting the engine/tranny back together. Does anyone have a good source for the torque specs for all of the external engine parts? Engine mounts, intercooler pump...
Engine 2.0l LSJ Torque Specs copied from this site (use at your own risk, but I had no issues)
https://www.cobaltss.net/forums/2-0l-lsj-performance-tech-47/various-ss-sc-torque-specs-ratings-193753/
A/C Compressor to Block Bolt
20 N·m
15 lb ft
Accessory Drive Belt Tensioner Bolt
32 N·m
24 lb ft
Balance Shaft Adjustable Chain Guide Bolt
15 N·m
11 lb ft
Balance Shaft Bearing Carrier to Block Bolt
10 N·m
89 lb in
Balance Shaft Fixed Chain Guide Bolt
15 N·m
11 lb ft
Balance Shaft Sprocket Bolt
50 N·m
37 lb ft
Baro Sensor and Coolant Return Line Assembly
8 N·m
71 lb in
Boost Solenoid Bracket Nut
10 N·m
89 lb in
Cam Cover to Cylinder Head Bolt
8 N·m
71 lb in
Cam Cover to Ground Cable Bolt
10 N·m
89 lb in
Cam Cover to Ground Cable Stud
10 N·m
89 lb in
Cam Sensor Bolt
8 N·m
71 lb in
Camshaft Position Sensor Housing Stud
22 N·m
16 lb ft
Camshaft Bearing Cap Bolt
10 N·m
89 lb in
Camshaft Sprocket Bolt
•First Pass
85 N·m
63 lb ft
•Final Pass
30 degrees
Camshaft Timing Chain Tensioner
75 N·m
55 lb ft
Chain Guide Access Hole Plug
90 N·m
59 lb ft
Connecting Rod Bolts
•First Pass
25 N·m
18 lb ft
•Final Pass
100 degrees
Crankshaft Bearing Lower Crankcase to Block Bolts
•First Pass
20 N·m
15 lb ft
•Final Pass
70 degrees
Crankshaft Position Sensor Bolt
8 N·m
71 lb in
Crankshaft Position Sensor Housing Studs
22 N·m
16 lb ft
Crankshaft Pulley Bolt
•First Pass
100 N·m
74 lb ft
•Final Pass
75 degrees
Cylinder Head Bolt
•First Pass
30 N·m
22 lb ft
•Final Pass
155 degrees
Cylinder Head Front Chaincase Bolt
35 N·m
26 lb ft
Cylinder Head Oil Gallery Plug
35 N·m
26 lb ft
Dipstick Guide to Intake Manifold Bolt
10 N·m
89 lb in
Elek. ICM Cover Bolt
8 N·m
71 lb in
Engine Coolant Temperature Sensor
22 N·m
16 lb ft
Engine Lift Bracket Front Bolt
25 N·m
18 lb ft
Engine Lift Bracket Rear Bolt
25 N·m
18 lb ft
Engine Mount Intermediate Bracket Bolts
100 N·m
74 lb ft
Engine Mount to Intermediate Bracket Bolts
50 N·m
37 lb ft
Engine Mount to Mid-Rail Nuts
100 N·m
74 lb ft
Exhaust Manifold to Cylinder Head Nut
12 N·m
106 lb in
Exhaust Manifold to Cylinder Head Stud
10 N·m
89 lb in
Exhaust Manifold Pipe Flange Stud
16 N·m
12 lb ft
Exhaust Takedown Pipe Nuts
30 N·m
22 lb ft
Flywheel (SMT) Bolt
•First Pass
53 N·m
39 lb ft
•Final Pass
25 degrees
Frame Bolts
•First Pass
100 N·m
74 lb ft
•Second Pass
180 degrees
Front Cover to Block Bolt
25 N·m
18 lb ft
Front Lift Bracket Bolt
25 N·m
18 lb ft
Fuel Feed Line
14 N·m
124 lb in
Fuel Feed Line and Injector Harness Bracket
10 N·m
89 lb in
Fuel Line Bracket Bolt
10 N·m
89 lb in
Fuel Pipe Bracket Bolt
10 N·m
89 lb in
Fuel Rail Bracket Stud
10 N·m
89 lb in
Generator Bracket Bolt
42 N·m
31 lb ft
Generator Connector Nut
20 N·m
15 lb ft
Generator to Block Bolt
20 N·m
15 lb ft
Heat Shield to Exhaust Manifold Bolt
23 N·m
17 lb ft
Idler Pulley
22 N·m
16 lb ft
Ignition Coil Bolt
8 N·m
71 lb in
Intake Camshaft Rear Cap Bolt
25 N·m
18 lb ft
Intake Manifold to Cylinder Head Bolt
25 N·m
18 lb ft
Intake Manifold to Cylinder Head Nut
25 N·m
18 lb ft
Intake Manifold to Cylinder Head Stud
6 N·m
53 lb in
Knock Sensor Bolt
25 N·m
18 lb ft
Lower Crankcase to Block Peripheral Bolts
25 N·m
18 lb ft
Oil Bypass Tube
22 N·m
16 lb ft
Oil Cooler
22 N·m
16 lb ft
Oil Filter Housing Cover
25 N·m
18 lb ft
Oil Gallery Plug
35 N·m
26 lb ft
Oil Gallery Plug – Rear
60 N·m
44 lb ft
Oil Level Indicator Tube Bolt
10 N·m
89 lb in
Oil Pan Drain Plug
25 N·m
18 lb ft
Oil Pan to Block Bolts
25 N·m
18 lb ft
Oil Pressure Sensor
18 N·m
13 lb ft
Oil Pump Gerotor Cover Bolt
6 N·m
53 lb in
Oil Pump Pressure Relief Valve Plug
40 N·m
30 lb ft
Oxygen Sensor
42 N·m
31 lb ft
Power Steering Pump Blockout Plate Bolts
25 N·m
18 lb ft
Rear Lift Bracket Bolt
22 N·m
16 lb ft
Spark Plug
20 N·m
15 lb ft
Starter Motor to Block Bolt
40 N·m
30 lb ft
Starter Terminal Nut
17 N·m
13 lb ft
Supercharger Bolts
25 N·m
18 lb ft
Thermostat Housing to Block Bolts
10 N·m
89 lb in
Throttle Body Bolt
10 N·m
89 lb in
Timing Chain Adjustable Guide Bolt
10 N·m
89 lb in
Timing Chain Fixed Guide Bolt
15 N·m
11 lb ft
Timing Chain Oil Nozzle Bolt
10 N·m
89 lb in
Timing Chain Upper Guide Bolt
10 N·m
89 lb in
Torque Converter Bolts
62 N·m
46 lb ft
Transmission to Engine Bolts
75 N·m
55 lb ft
Vent Tube to Cylinder Head
15 N·m
11 lb ft
Water Pipe Support Bracket Bolt
10 N·m
89 lb in
Water Pump Access Cover Bolt
7 N·m
62 lb in
Water Pump/Balance Shaft Chain Tensioner Bolt
10 N·m
89 lb in
Water Pump Bolts
25 N·m
18 lb ft
Water Pump Drain Plug
20 N·m
15 lb ft
Water Pump Sprocket Bolt
10 N·m
89 lb in
") Good luck with the move and hope the Goblin goes together smoothly and you get the chance, not too far in the future, to work on the go fast aspects of your build.
Good luck with the move and hope the Goblin goes together smoothly and you get the chance, not too far in the future, to work on the go fast aspects of your build.