RichN City Goblin - 2007 LT donor
- Thread starter RichN
- Start date
RichN
Well-Known Member
I have a Chilton's manual; not as detailed as they were before Hayes bought them.
There is nothing in there to help with the automatic shifter wiring.
The solenoid is not activating to allow me to take it out of park when I hit the brake pedal.
The ignition switch solenoid clicks to hold the key when I depress the shifter button and the light works.
Have a second shifter; same thing.
Any help would be greatly appreciated.
JSATX
Goblin Guru
Congrats!!Fuel pump came today.
Success!!!
It's quick.
After this run, only a small drip at the water neck, tightened it 3/4 turn; no more drip.
Check engine light went off while going around the block.
And sorry I don't have any experience with the Auto can't help there.
RichN
Well-Known Member
Having fun driving it around the neighborhood.
Don't want to go too far since there's no plates.
Well, the shifter seems to be working now, I can take it out of park when I press the brake pedal.
Temperature runs about 183-187.
A few things:
My brake light is on, it goes off when all the other idiot lights go off when you turn the key, then comes back on after 3 seconds and stays on.
I checked the plug going to the reservoir; good battery and ground. I swapped the black "insert" that goes through the reservoir with my spare.
I looked at the light blue parking brake wire. Heat shrinked for now. That should only light if the brake handle is pulled and gets a ground.
What else could cause that to light up?
Can someone post a picture or two on how the automatic tranny cable is hooked up to the shifter?
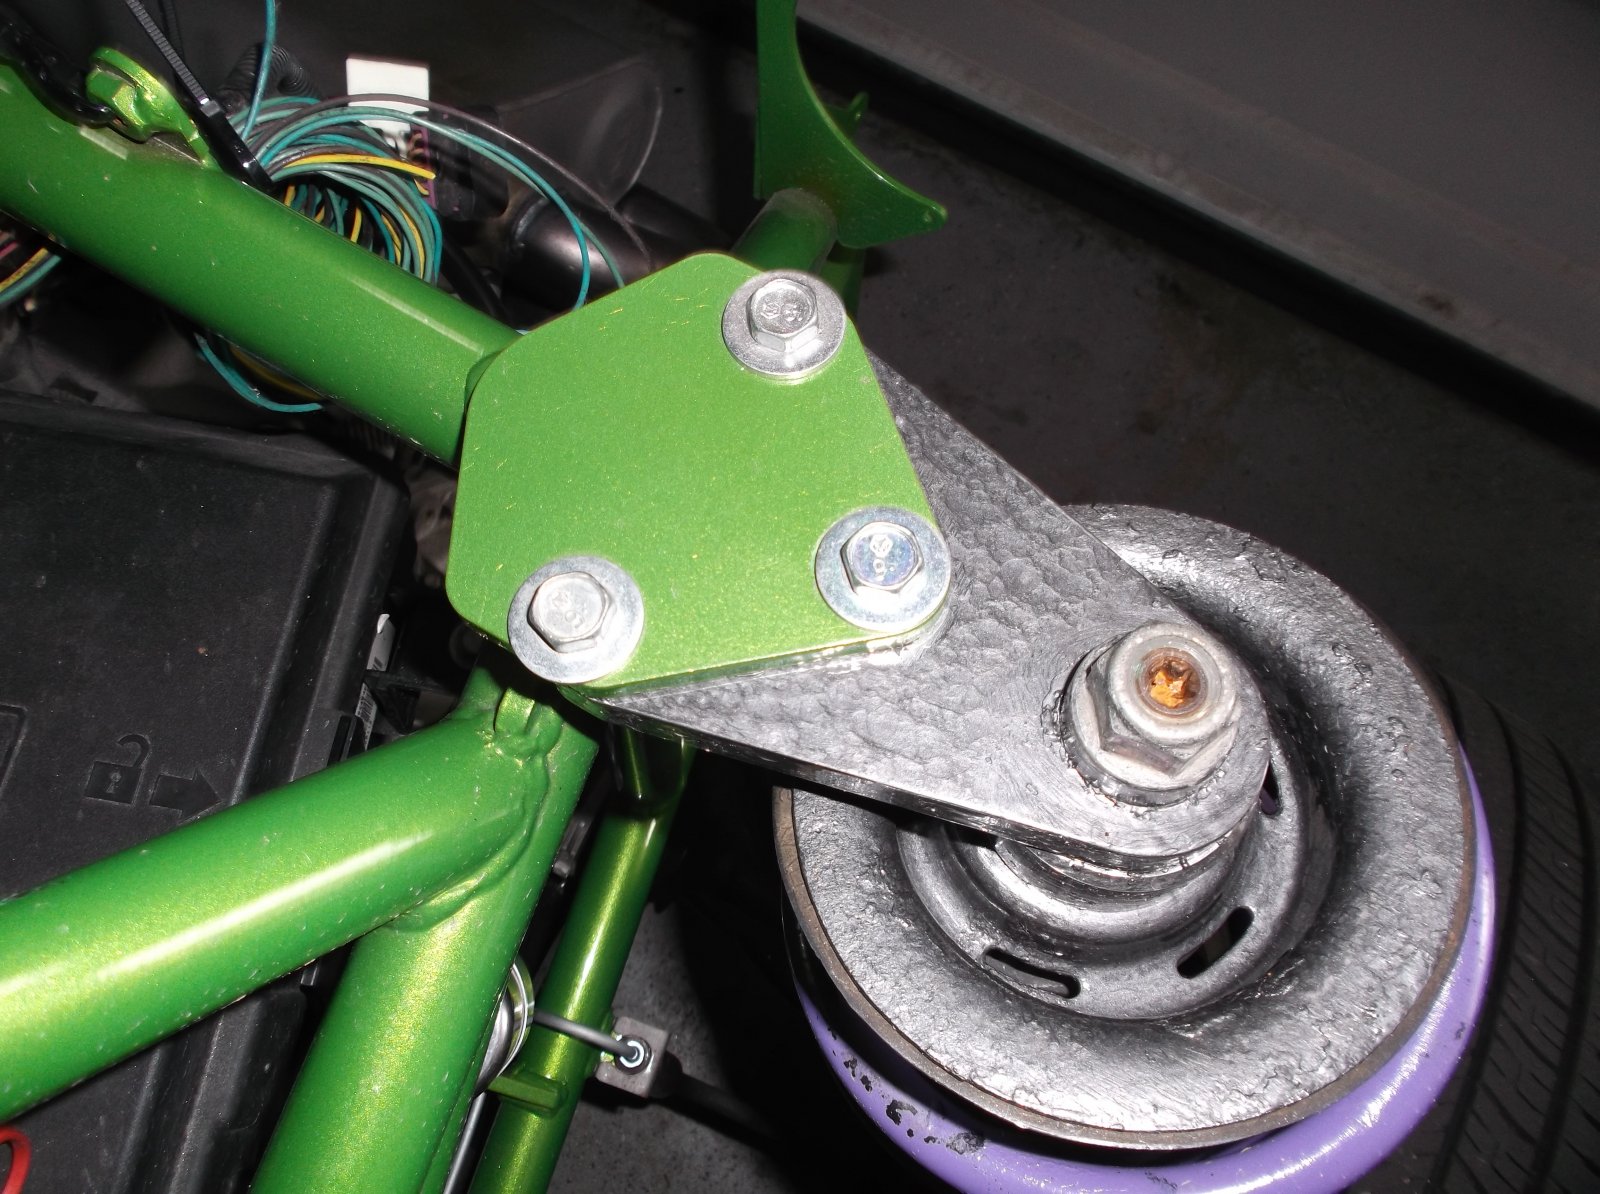
What bolts should we be using on the strut adapter to frame? I'm using some donor bolts, not sure what grade? I'm using what looks like a M inside a hexagon above a 9 and a dot after.
Don't want to go too far since there's no plates.
Well, the shifter seems to be working now, I can take it out of park when I press the brake pedal.
Temperature runs about 183-187.
A few things:
My brake light is on, it goes off when all the other idiot lights go off when you turn the key, then comes back on after 3 seconds and stays on.
I checked the plug going to the reservoir; good battery and ground. I swapped the black "insert" that goes through the reservoir with my spare.
I looked at the light blue parking brake wire. Heat shrinked for now. That should only light if the brake handle is pulled and gets a ground.
What else could cause that to light up?
Can someone post a picture or two on how the automatic tranny cable is hooked up to the shifter?
What bolts should we be using on the strut adapter to frame? I'm using some donor bolts, not sure what grade? I'm using what looks like a M inside a hexagon above a 9 and a dot after.
Automatic Shifter Arm Installation
(We just started recording Stage 2 videos over the weekend so we should have video instructions for the automatic shifter very soon)
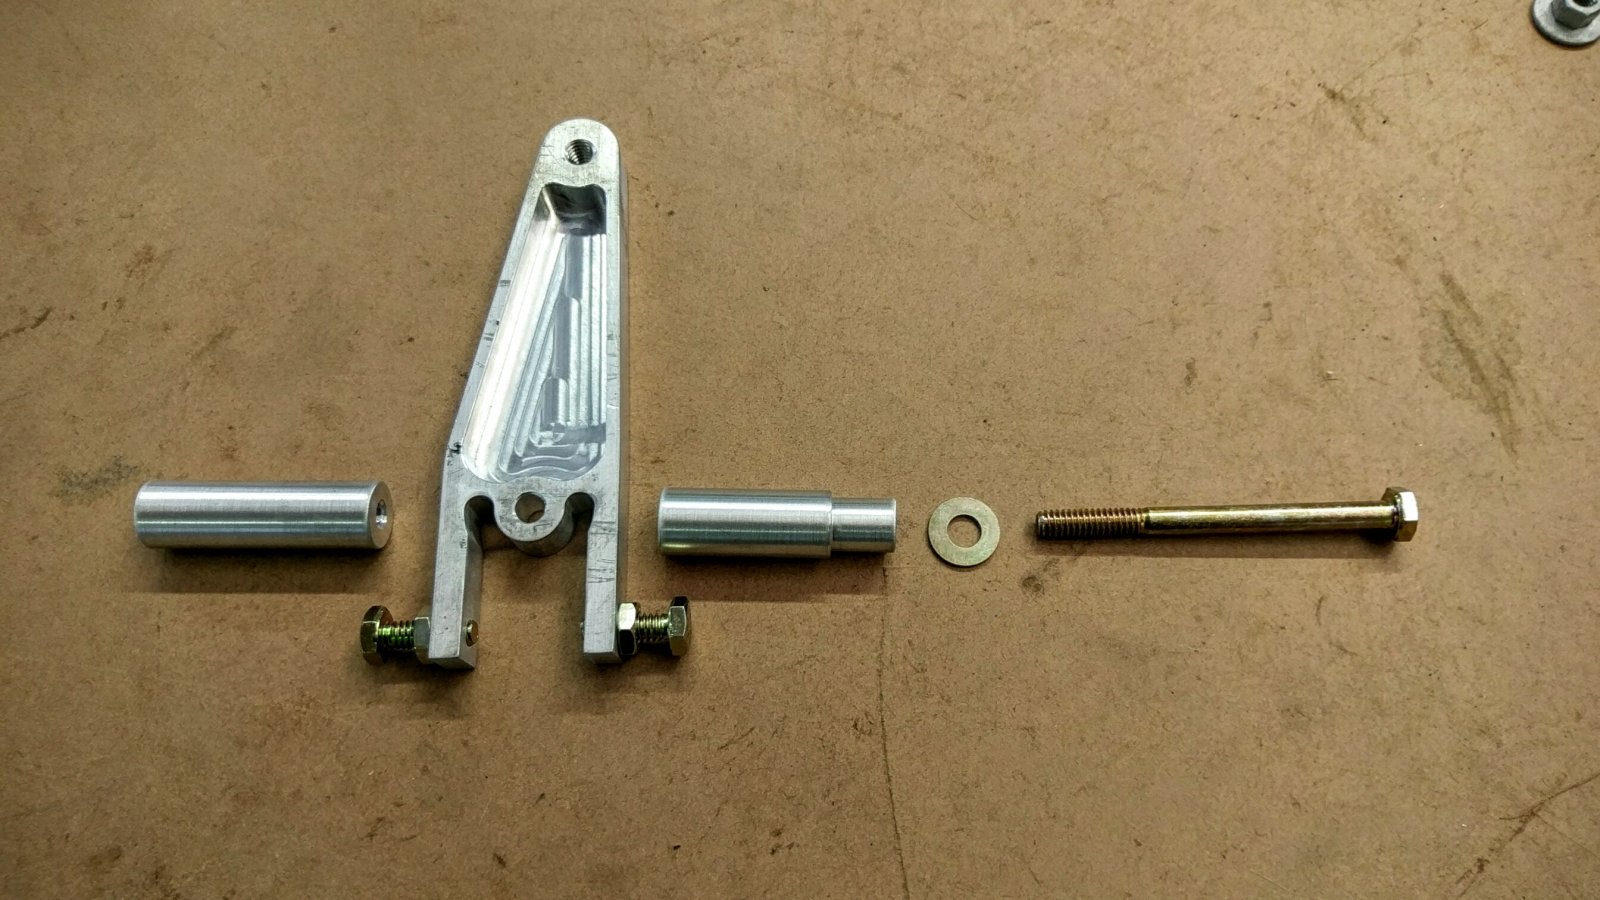
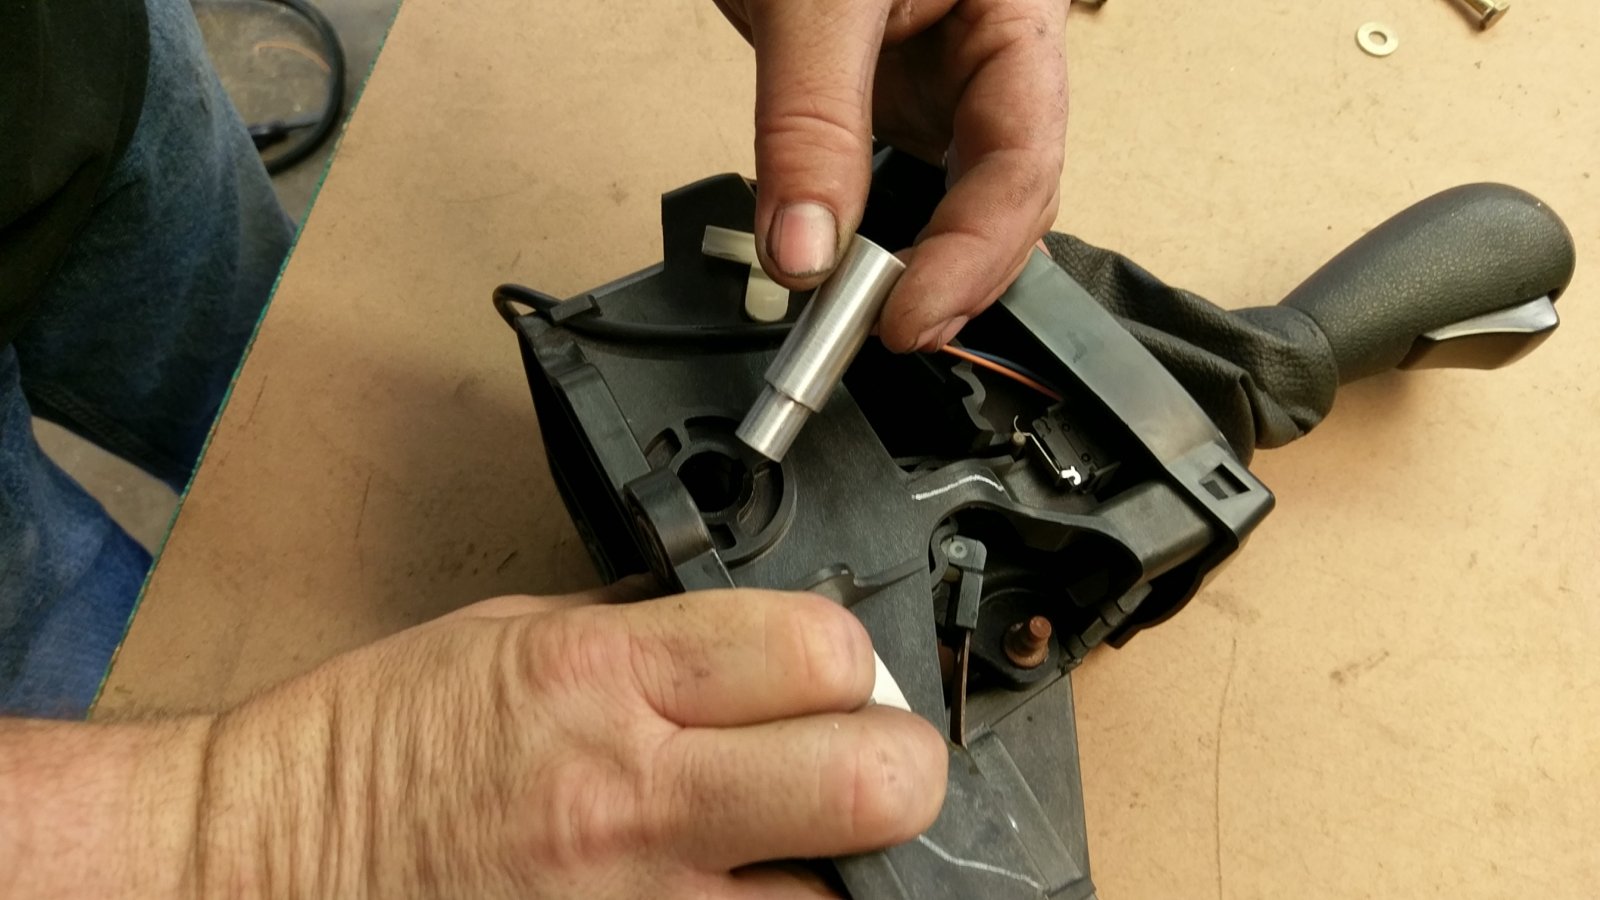
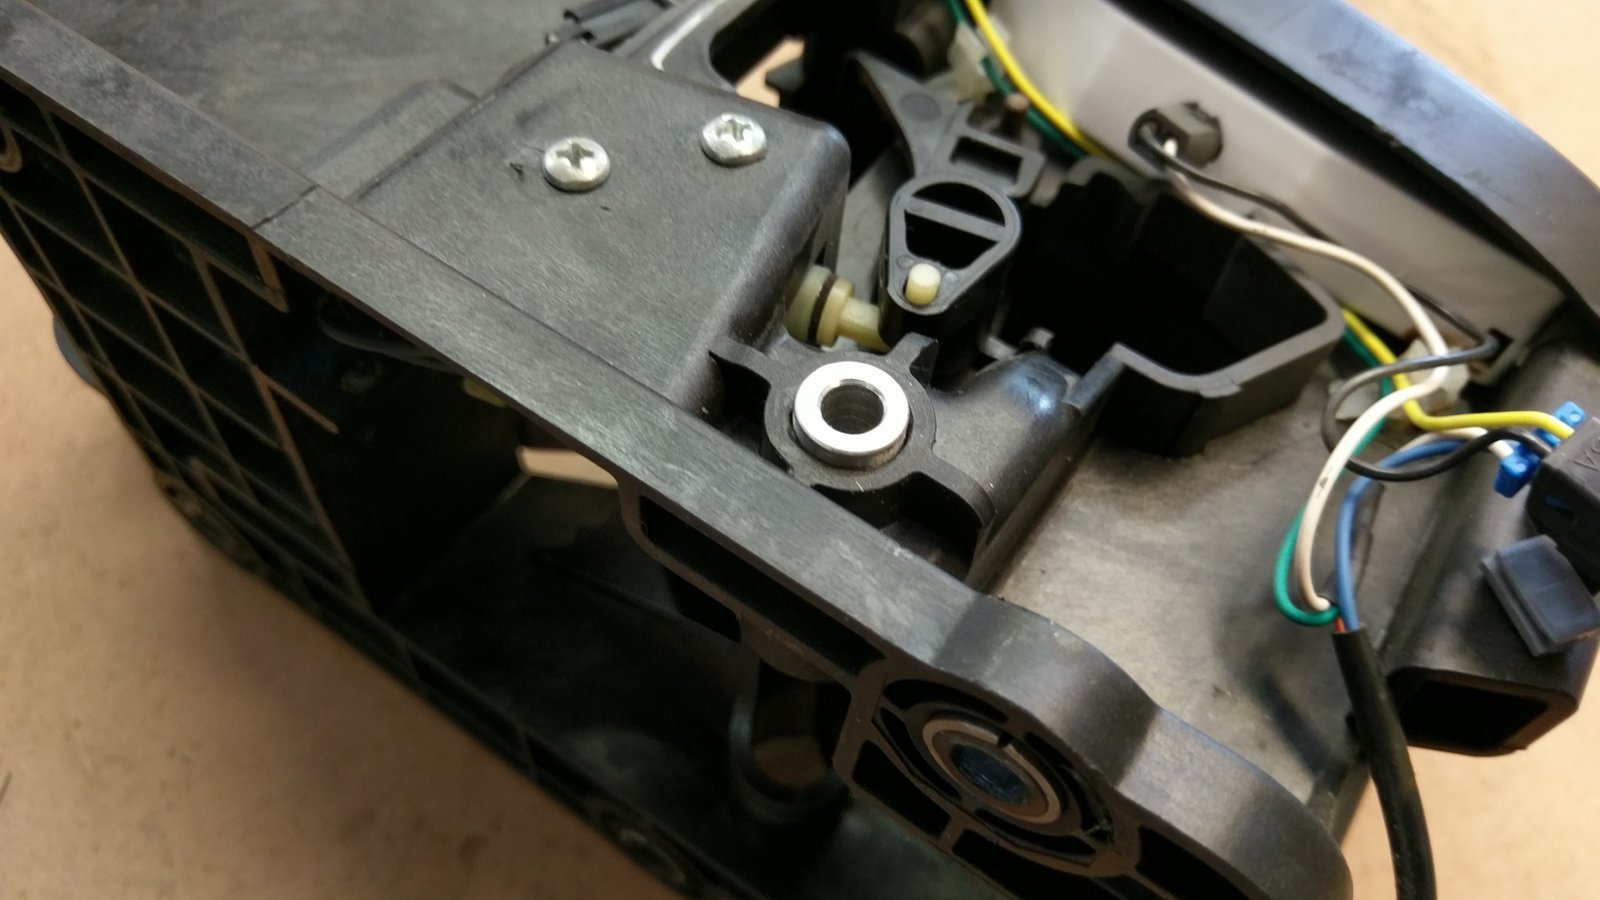
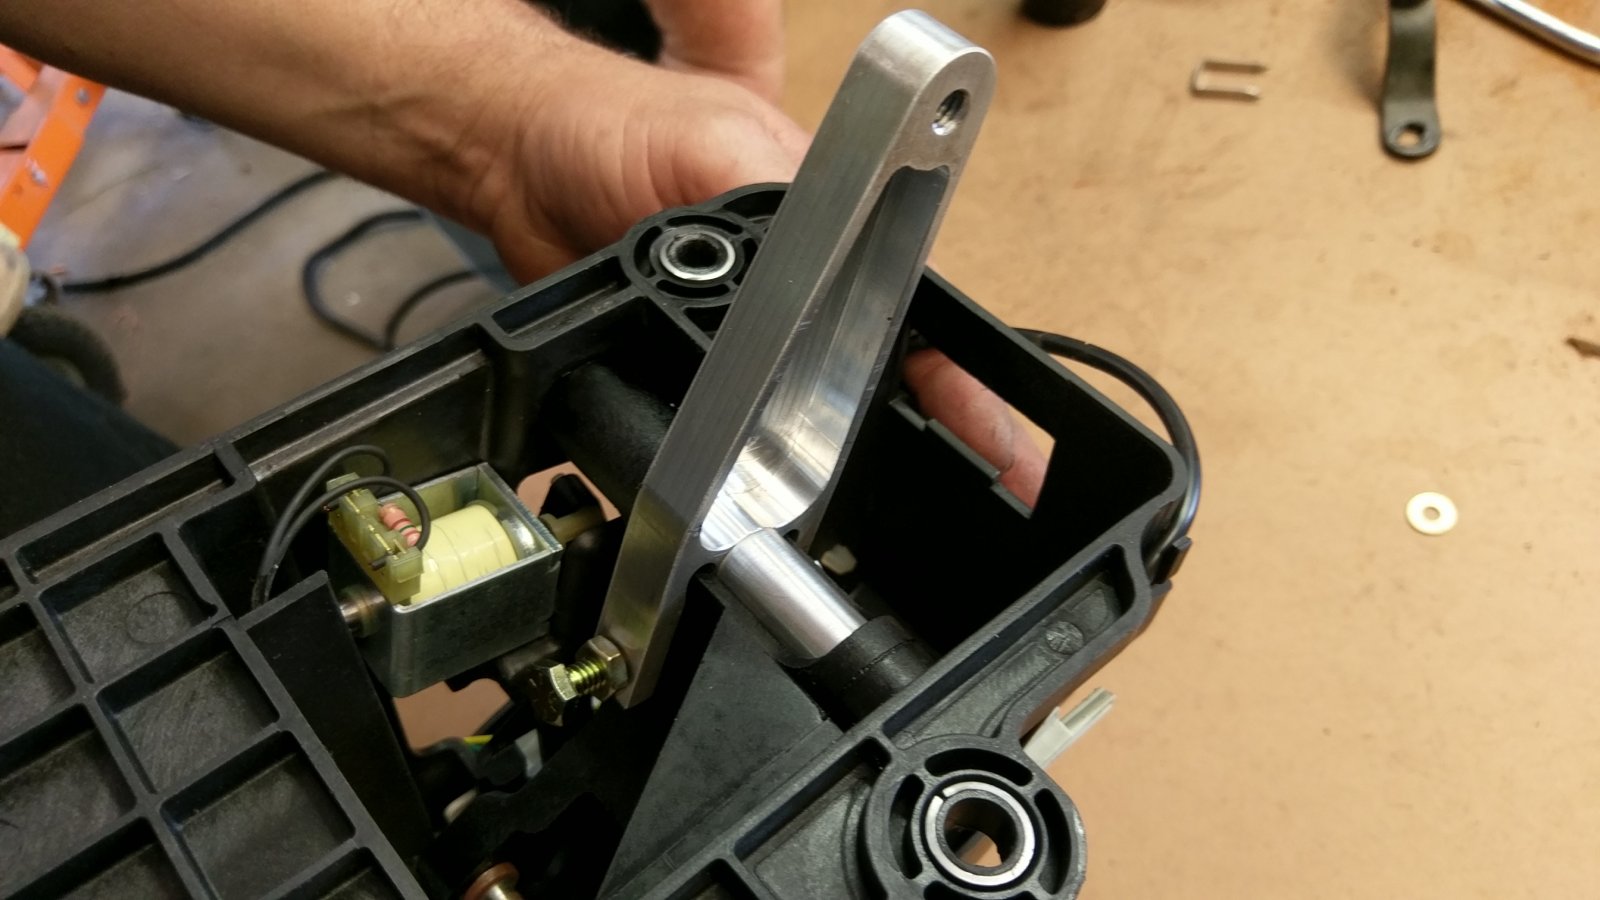
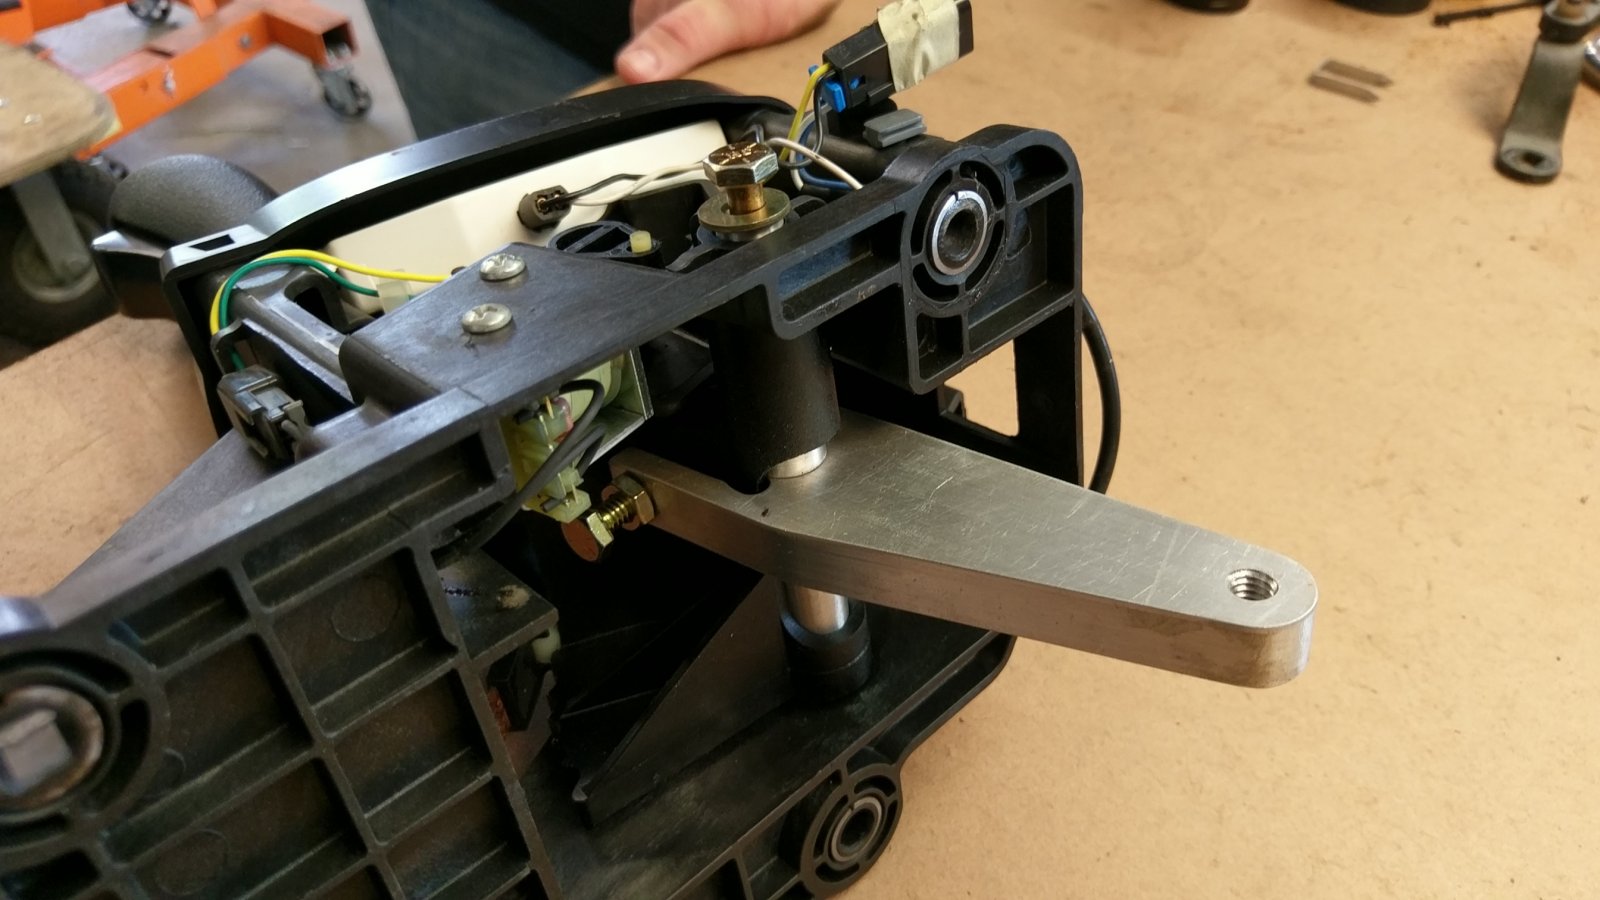
You'll need to put your transmission in park (pivot the arm on the transmission all the way toward the back of the car). Install the arm on the shifter as shown. Make sure the shifter itself is in park. Bolt the shifter to the tunnel cap. Click the cable housing into the metal loop on the underside of the tunnel cap and bolt the cable to the shifter arm.
If you can't get the cable end lined up with the arm, you can adjust it in a couple of ways. If it is way off, you can flip the shifter arm over. You can adjust the bolts at the top of the shifter arm to reposition the arm. Or you can use the original adjustment clamp back near the transmission. Once you get the cable hooked up, keep adjusting until you can move the shifter all the way through its travel and hit all positions.
(We just started recording Stage 2 videos over the weekend so we should have video instructions for the automatic shifter very soon)
You'll need to put your transmission in park (pivot the arm on the transmission all the way toward the back of the car). Install the arm on the shifter as shown. Make sure the shifter itself is in park. Bolt the shifter to the tunnel cap. Click the cable housing into the metal loop on the underside of the tunnel cap and bolt the cable to the shifter arm.
If you can't get the cable end lined up with the arm, you can adjust it in a couple of ways. If it is way off, you can flip the shifter arm over. You can adjust the bolts at the top of the shifter arm to reposition the arm. Or you can use the original adjustment clamp back near the transmission. Once you get the cable hooked up, keep adjusting until you can move the shifter all the way through its travel and hit all positions.
You should have 6 3/8-16 x 1.5 zinc plated hex head bolts, 12 3/8 flat washers and 6 3/8-16 nylok nuts.What bolts should we be using on the strut adapter to frame? I'm using some donor bolts, not sure what grade? I'm using what looks like a M inside a hexagon above a 9 and a dot after.
View attachment 936
RichN
Well-Known Member
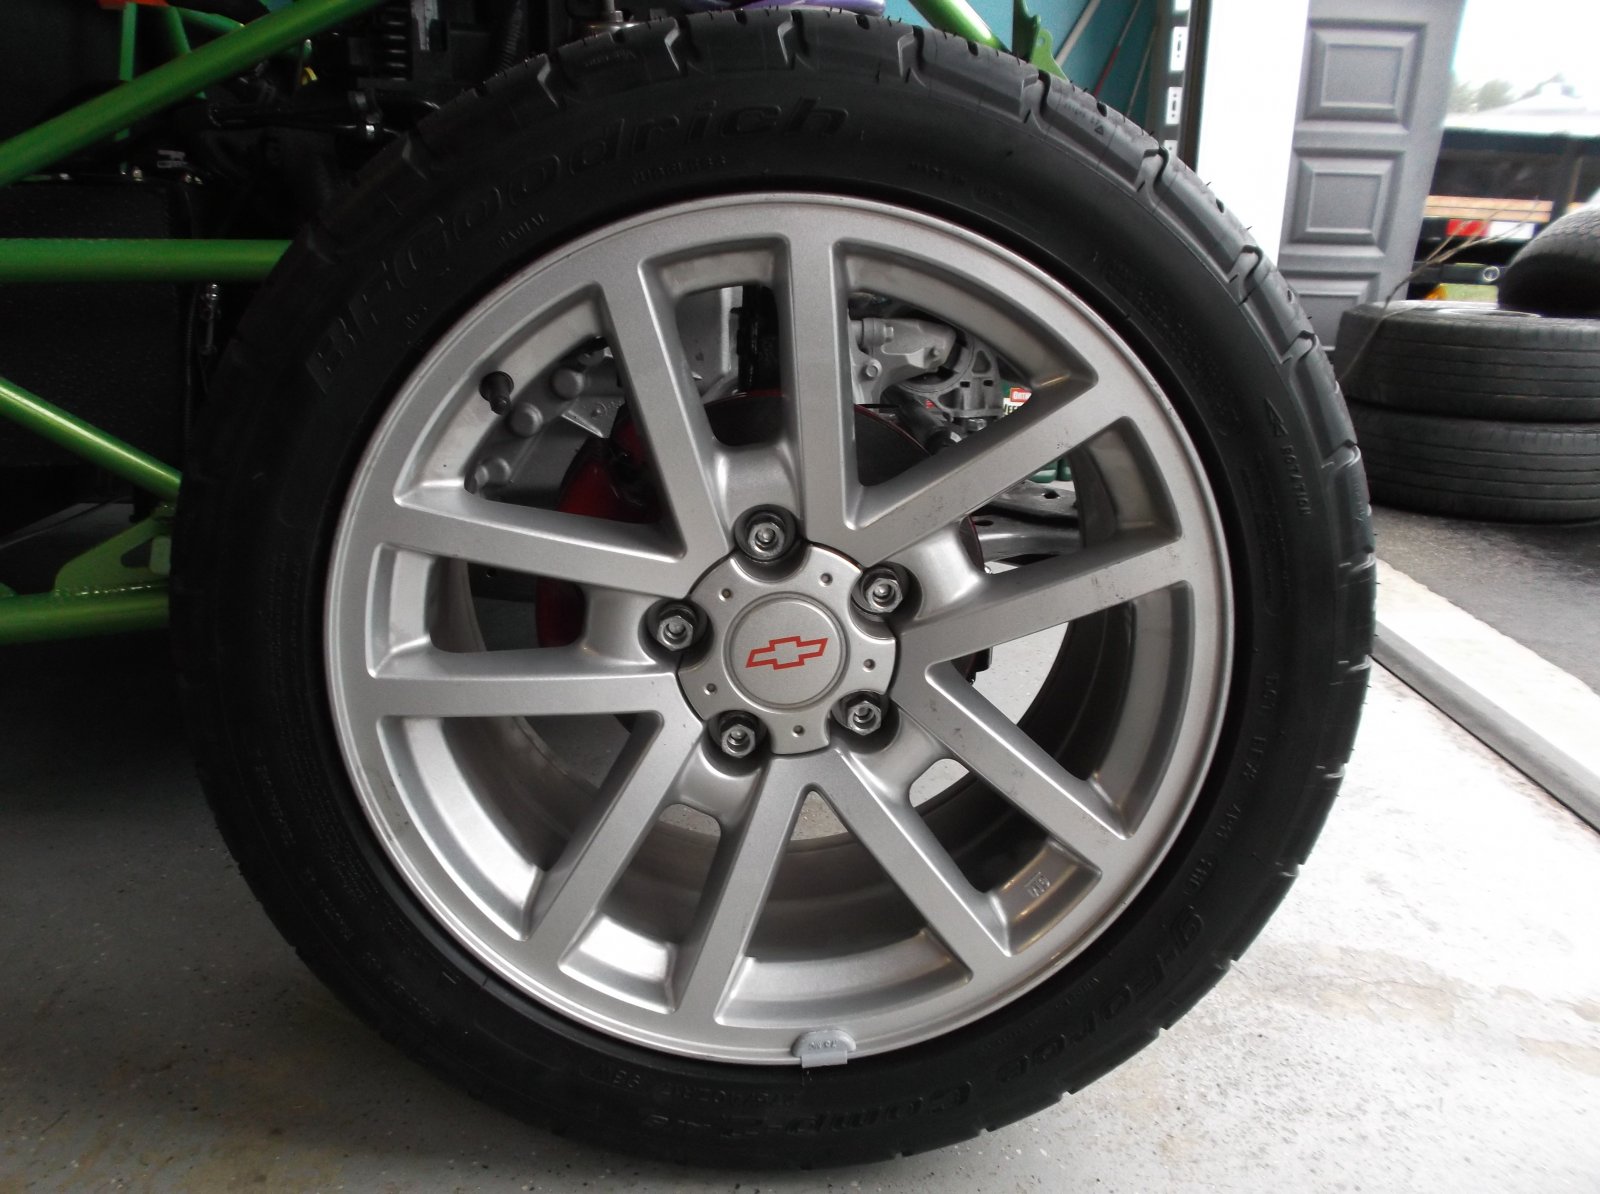
Mounted the 275/40/17
They look nice from the side.
I searched everywhere for the same design in a 6" wide rim for the front with no luck.

They fit nice and no clearance issues; the wheel is turned all the way.
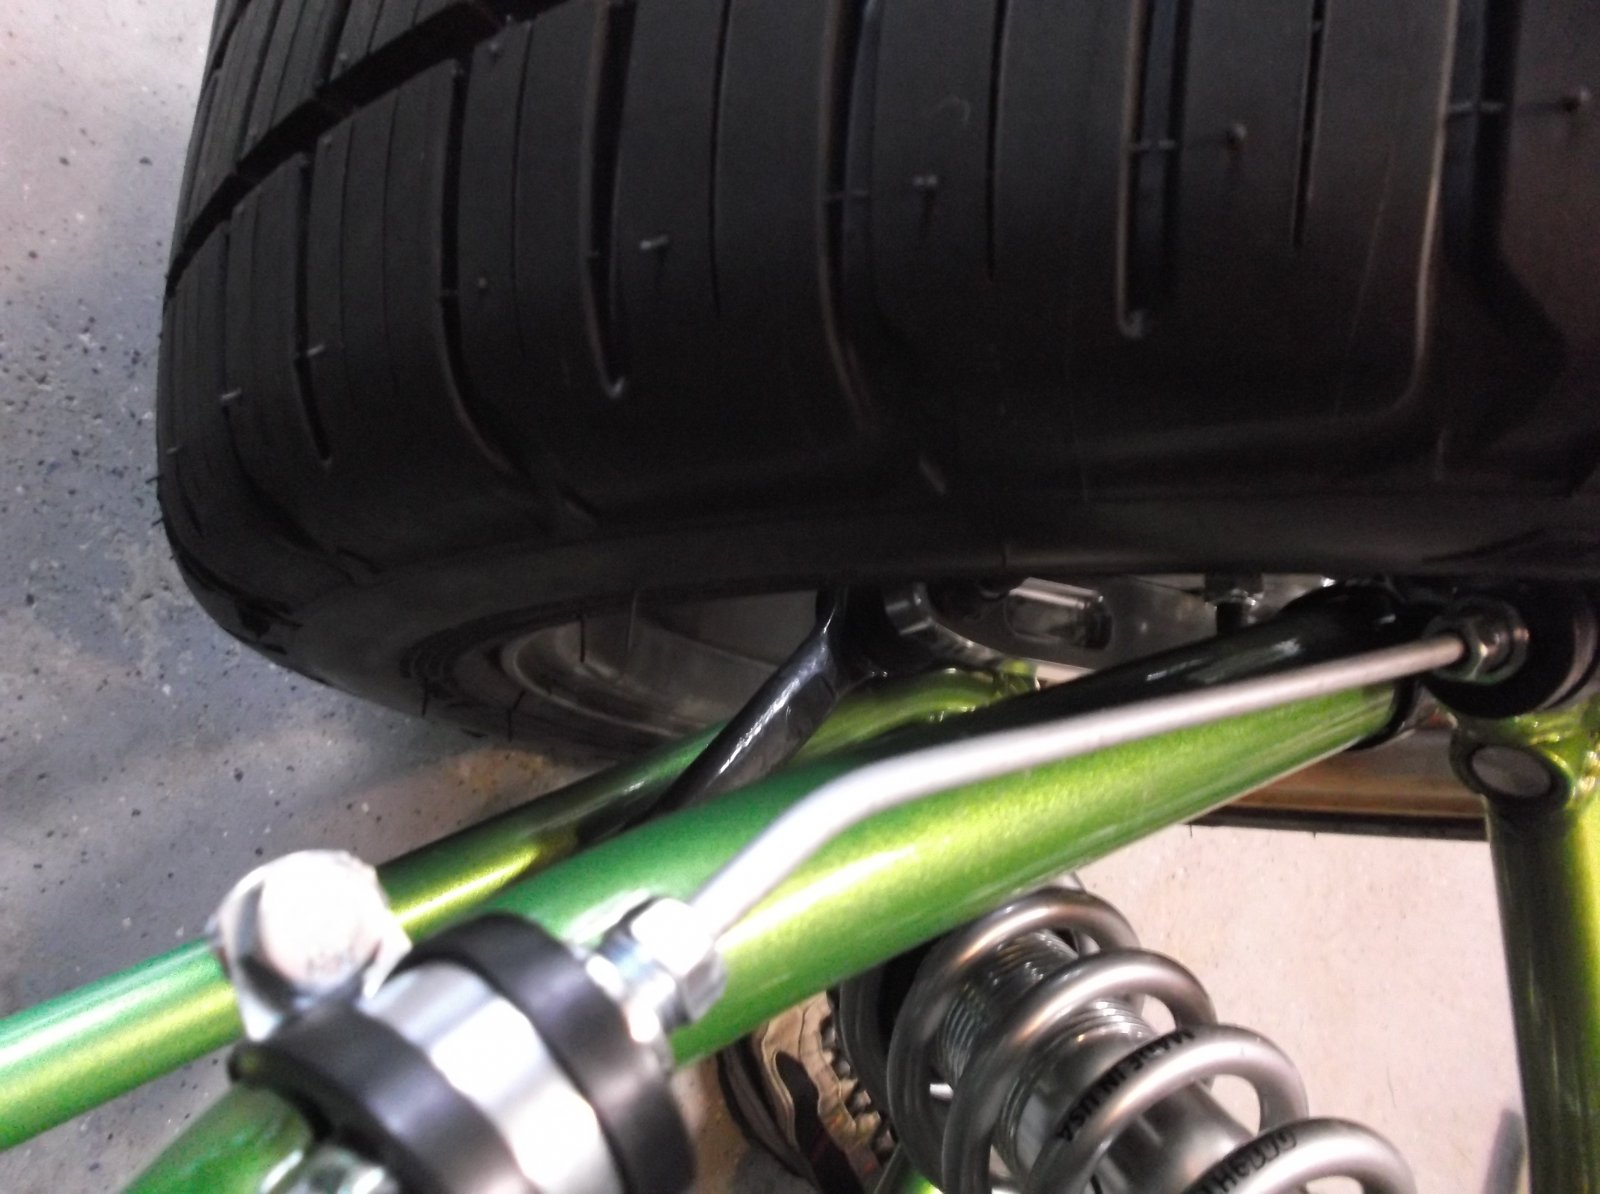
They look a little too big for the front;
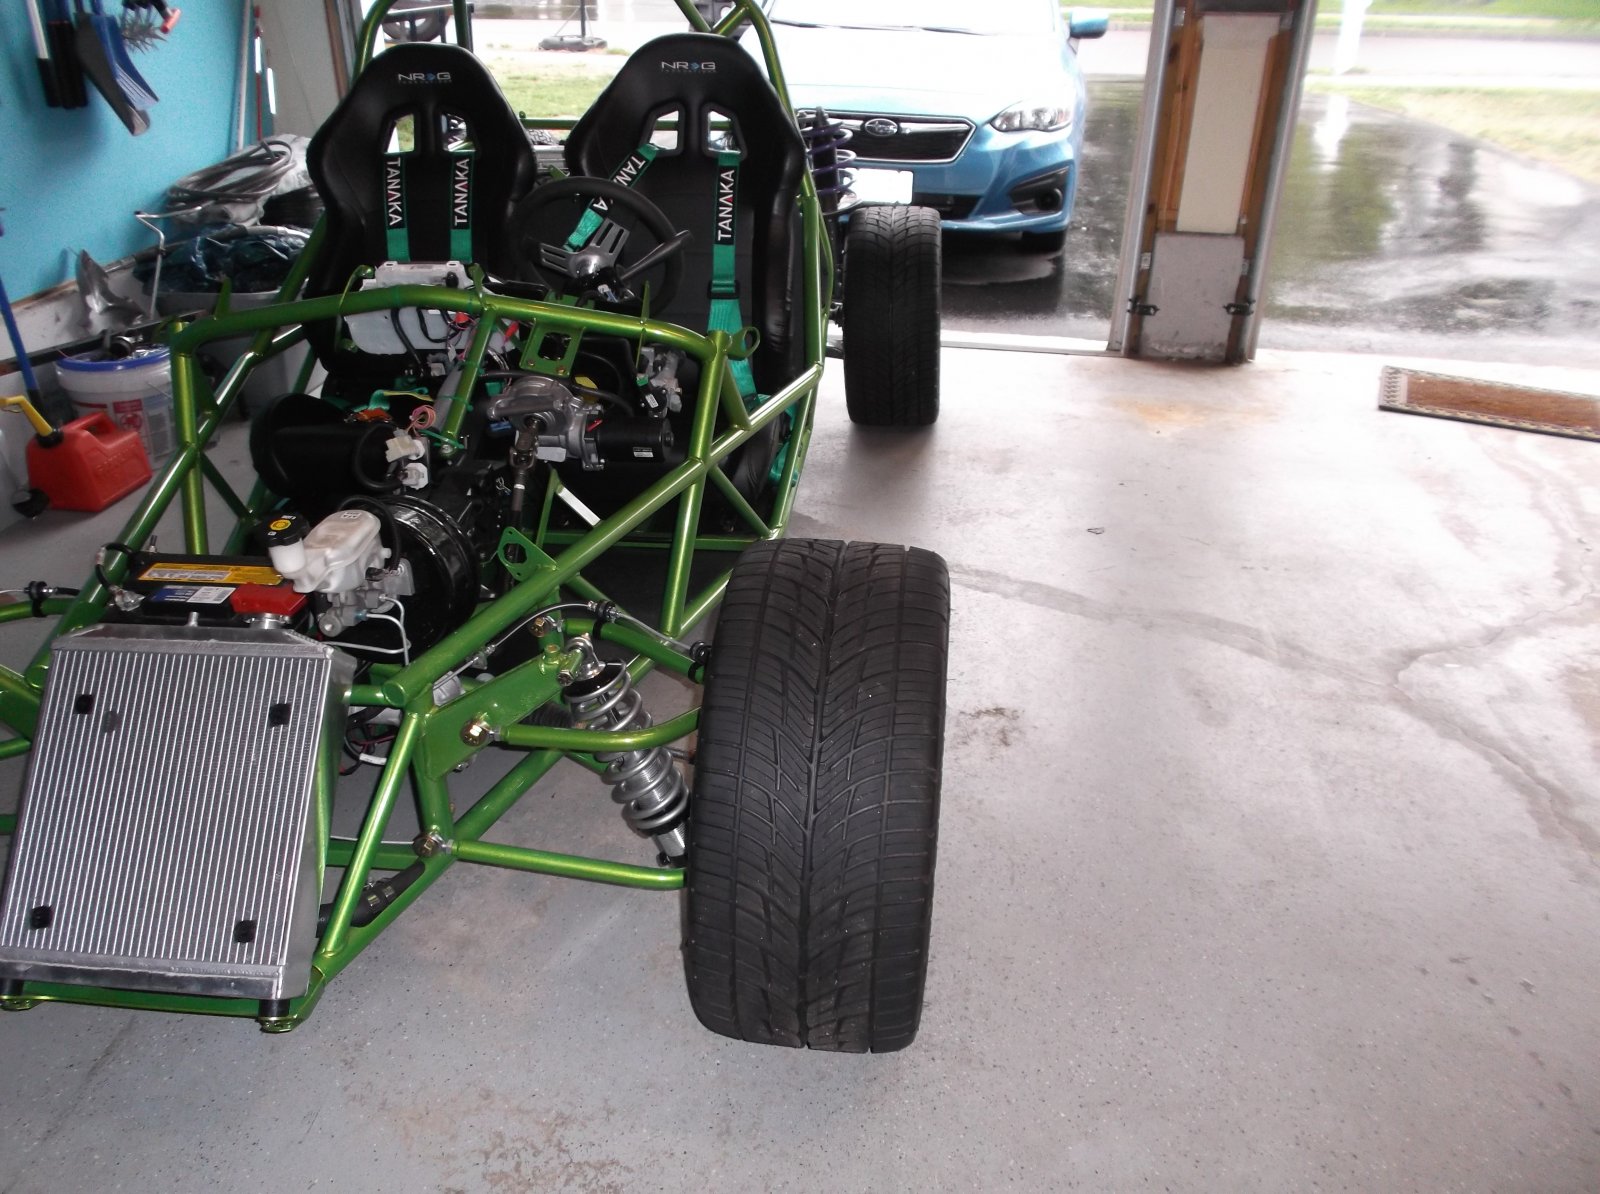
The 10" rotors look tiny.
I'll probably change back and forth depending on whether we're going to a show, for a cruise or just goofing around.
They look nice from the side.
I searched everywhere for the same design in a 6" wide rim for the front with no luck.
They fit nice and no clearance issues; the wheel is turned all the way.
They look a little too big for the front;
The 10" rotors look tiny.
I'll probably change back and forth depending on whether we're going to a show, for a cruise or just goofing around.
RichN
Well-Known Member
These are the alignment values from Justin's post:
Front total toe .30
Front camber: -.5°
Front caster: +8.5°
Kingpin: 6.5°
Incl angle: 6.2°
Rear toe: 0"
Rear camber: -.5°
I'm bringing mine to the shop this week; would these be good ones to use?
I too value tread life over lap times.
Front total toe .30
Front camber: -.5°
Front caster: +8.5°
Kingpin: 6.5°
Incl angle: 6.2°
Rear toe: 0"
Rear camber: -.5°
I'm bringing mine to the shop this week; would these be good ones to use?
I too value tread life over lap times.
PG5
Well-Known Member
I actually think the 275/40/17s look good on all 4 corners.
I agree, the 10" rotors do look tiny. You should swap them out for the 12.25" rotor with the BrembosThe 10" rotors look tiny.
RichN
Well-Known Member
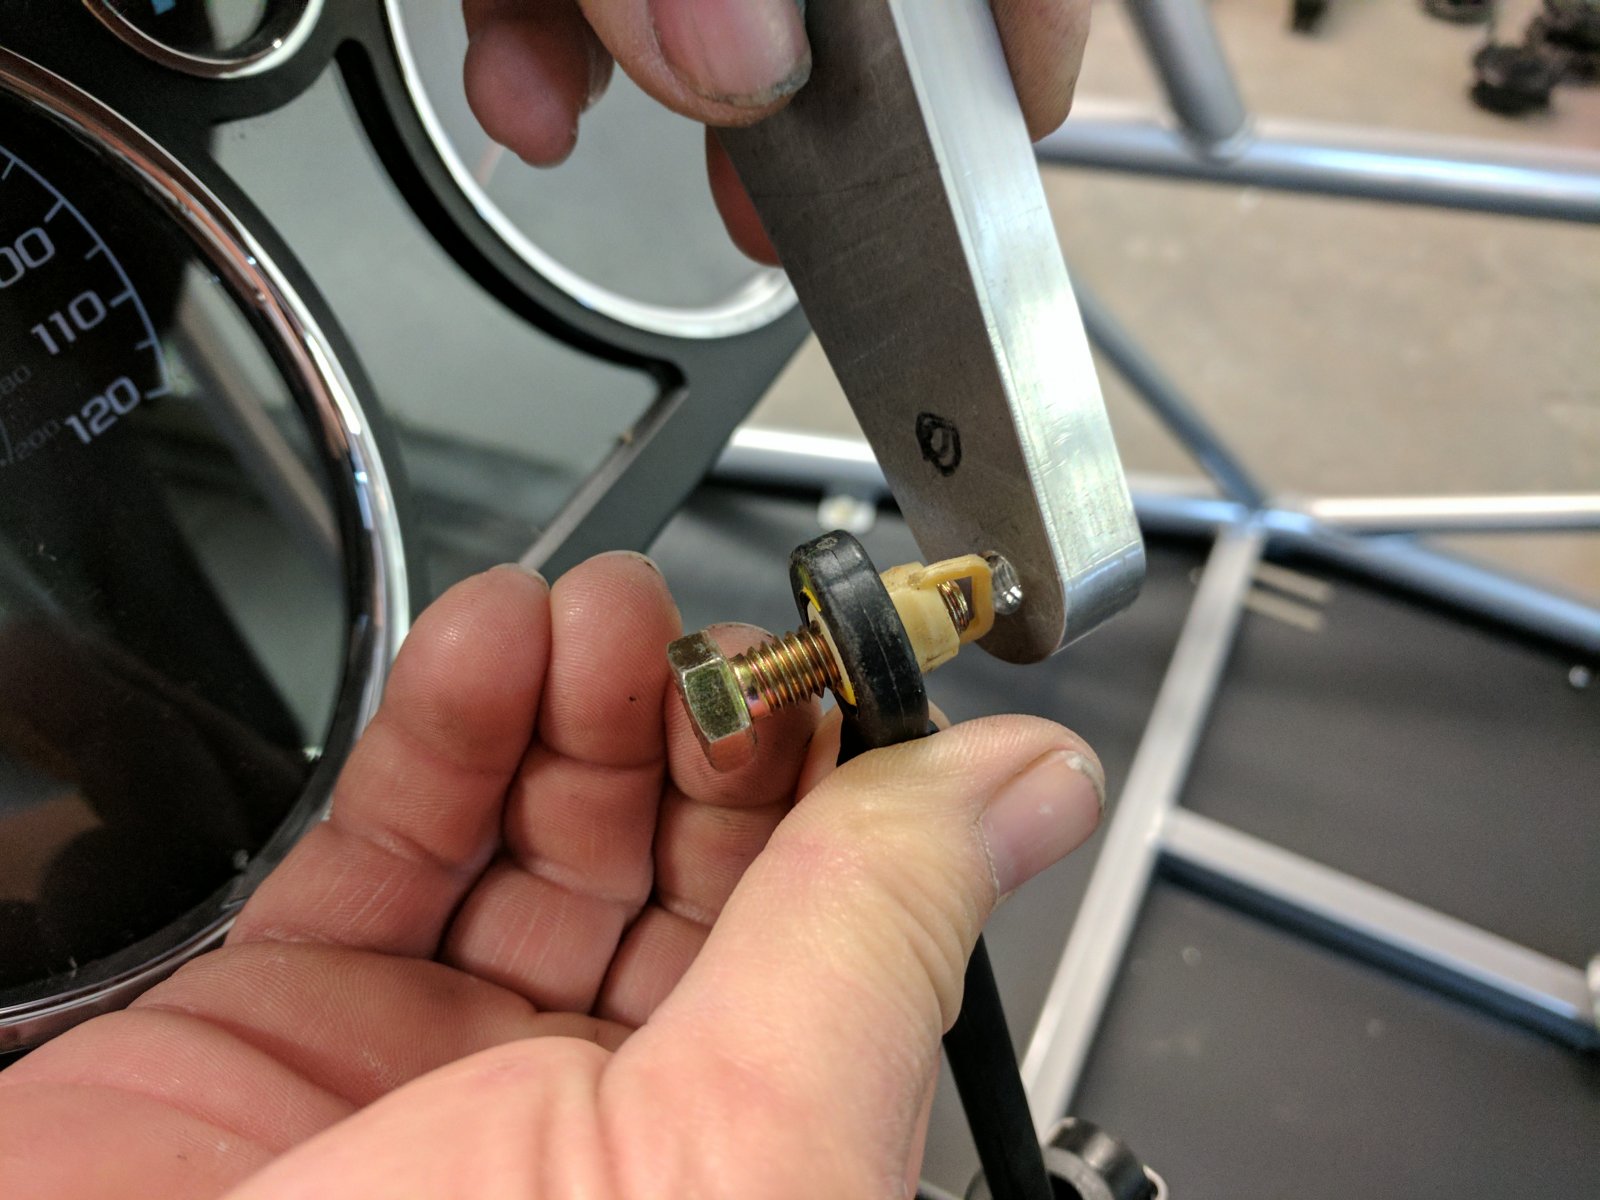
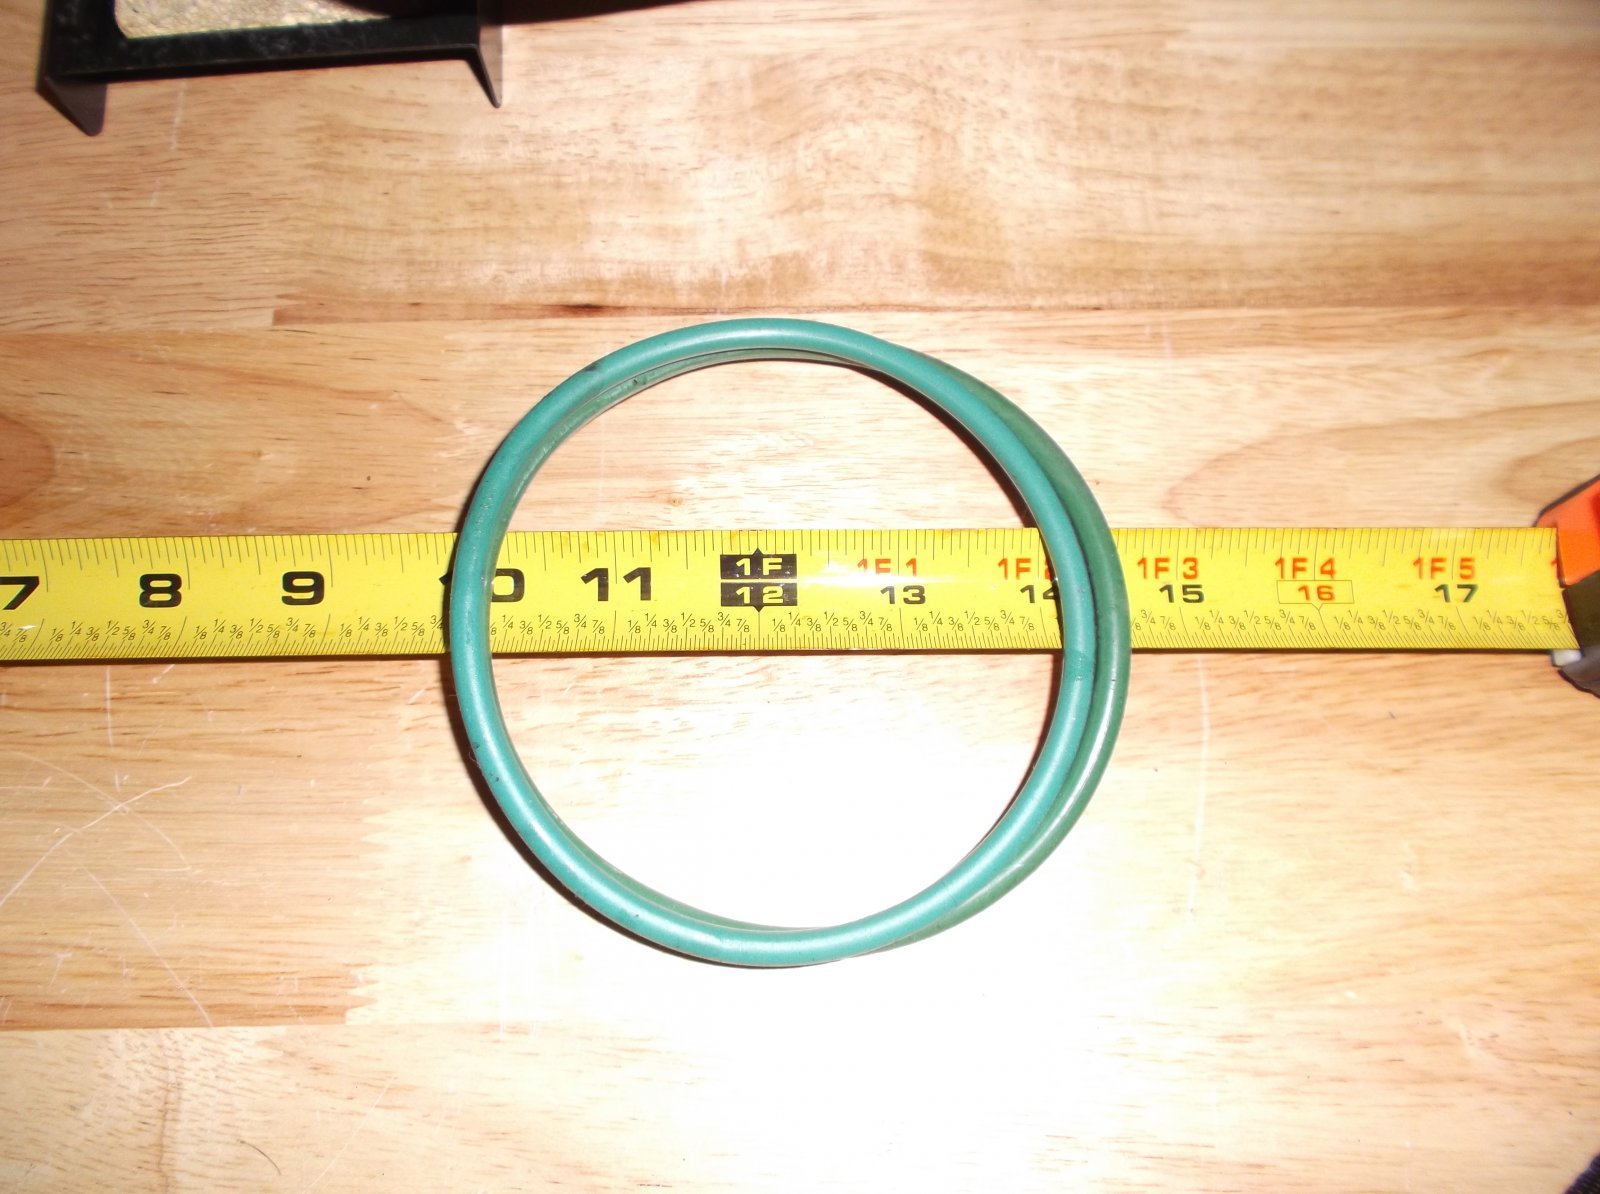
Here is a photo of 2 o-rings for the fuel pump.
The lighter one on top is from my 2005 donor or 2005 junk yard one.
The darker one on the bottom came with the brand new pump I bought online.
I spent 5+ hours yesterday trying to get the new o-ring to not leak when turning corners.
I had pulled the pump out 4 or 5 times trying.
Even doing the 1/4" allen key and drill bit, the gasket was still bulging in spots.
FINALLY I removed the pump from fuel filter to see what was going on.
I grabbed one of the older o-ring to compare sizes and saw the difference.
I put the smaller one in and it wasn't almost up against the studs like the darker one on the fuel tank.
You can install it without removing the pump from the tank; just slip it over the lip and work it around.
Then I tightened it in a "wheel lug" pattern by sight to watch the gasket just start to compress.
NO MORE LEAKS!!!
Hopefully this post will eliminate someone else's frustration, just measure the green o-ring before installing.
RichN
Well-Known Member
I have already created and posted on the NH registration thread my experience at DMV yesterday.
Today, I would like to give a HUGE shout out and thank you to Lonnie for always answering the phone when I call.
I truly appreciate the time he spent listening to my frustrations with the inspector.
I know everyone down there at the shop love what they are doing and sometimes we forget to say thanks for making a great product and always trying to find ways to make it better.
My family and I have had a lot of fun building this and I'm sure will be even more excited when everything is completed and we are driving down the road (legally) with the body wrapped with the Green Goblin from the Spiderman comics.
Thanks again to everyone at Doyle Fabrication,
Rich
RichN
Well-Known Member
I've been searching through the Cobalt forums with little success.
Here's what I'm looking for:
Apparently the thing I removed from my stock exhaust manifold is a "secondary air injection check valve" the other end of the pipe was the air pump, also removed.
I left the plugs alone in the hope of jumping pins to turn of the CEL.
Anyone here know what I need to do?
OR is that something that can be done if I need to get a tune because I removed the catalytic converter?
If I can jump pins, I don't mind buying a 8" cat from Summit Racing for $69
Different subject=
Thinking about options for getting a title.
Option B= Another NH inspection station after the body parts, fenders, windshield, parking brakes and bumpers are installed.
Option C= Have my in-laws title and register it in Massachusetts (supposedly easier process ) then "sell" it to me.
Option D=Best option but I'll have to take another road trip. Title and register it in Florida with the title in my mom's name and mine. Should pass as is now without needing to add anything else to the car, such as bumpers, windshield, fenders, body, parking brake, etc. That state just wants to see the vehicle, MCO, donor title and receipts. Then with the title in both our names, have her register it with her address. Every year she can mail me the registration. Florida doesn't have annual inspections or emissions. Since it is in both our names, I can insure it under mine and give the insurance company my zip code as the garaging location. Seems 100% legal. "Snowbirds" have a lot of FL registered cars up here.