Robinjo
Goblin Guru
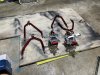
I knew the cables did come with the kit, wasn’t sure about the bracket. Thanks for the info.No. Df provides the bracket and cables.
I knew the cables did come with the kit, wasn’t sure about the bracket. Thanks for the info.No. Df provides the bracket and cables.
Are you sure about that? I thought that DF plate attached to the bottom half of the factory cable bracket (the red piece from the photo).No. Df provides the bracket and cables.
I'm considering all the nick-knack items. Boost gauge mount, windshield bar, rear subframe, rear tie rod set, etc. Possibly even the side panels....Might sound odd, but I would take as many as possible to the powder coater, that won’t cost extra money. I know my guy has a minimum price, so 10 little items would be the same price and 20. Anything you forget, can easily be rattle canned. Satin black is a great mix between gloss and flat.
powder coat everything, I wouldn't have wasted my time painting thing if I had known how cheap the powder coating was going to be.I'm considering all the nick-knack items. Boost gauge mount, windshield bar, rear subframe, rear tie rod set, etc. Possibly even the side panels....

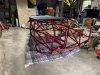
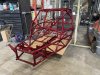
vroom! vroom!6/24/2022 - Powder Coating Adventure. My son picked a pretty rad color, Lollipop Red (UPS-1506) over Crushed Silver (PMB-1544), if anyone has seen the Soul Red Metallic from Mazda, it looks a lot like that. I personally love that color, so it worked out great. I made sure that the clear going on it will also have UV protectant in it, based off others recommendations.
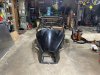
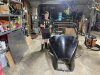
Oh, before it went to the coater we put a seat in the thing just to get a feel for it. It's going to take a little getting used to getting in/out. It's wee bit tight!
Also, stopped by to meet GTStory and picked up a set of seatbelts without seized bolts. Thanks you for those units!
View attachment 33980
")