SACTX - Track - 07 SS/SC - Chassis #201

JBINTX

Goblin Guru
These are helpful:


SACTX

Well-Known Member
It’s amazing what happens when you build things correctly…
This change will probably also fix the problem with the shorter rod end links.

@ToxicBill make sure you set the angle brackets up correctly and I might have a new set of rear replacement end links if you need them. Learn from my mistakes :)

Thanks for the help guys! I’m sure y’all get sick of telling us new guys everything.
 

Attachments

ToxicBill

Well-Known Member
@ToxicBill make sure you set the angle brackets up correctly and I might have a new set of rear replacement end links if you need them. Learn from my mistakes :)
Maybe I haven't gotten that far yet but what angle brackets are you taking about? I need to know what to look it for. ;)
 

SACTX

Well-Known Member
Maybe I haven't gotten that far yet but what angle brackets are you taking about? I need to know what to look it for
They are the brackets (rod end mounts on the video) that hold the front uprights to the control arms. They are different than the brackets in the videos. The top one attaches to the outside of the upright and the bottom goes on the inside. If you put them on the same side your front wheels will have a lot of negative camber.

https://photos.google.com/share/AF1QipM8QCUB_bOOWgYpdIR0bWV4-TU4k0ZNN6XPpm_n6p8FqtjFeh2m-h4Fs7fBilmY1A?key=Y19FbDQ5dE5uVlNrV3dwVFgyVkxJM3h5WHZwSHZ3

The stock rod ends go on the rear and I will probably have an extra set. The DF supplied ends are shorter and are too short if you set up the uprights wrong. I ordered another set before I was told that I had them on wrong.

You look like you'll be there pretty soon!
 

SACTX

Well-Known Member
Those are correct. The steering arm needs to be attached to both bottom holes though. At least that's what I was told...
 

SACTX

Well-Known Member
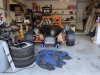
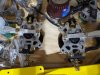
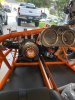
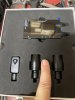
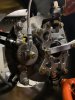
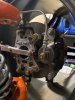
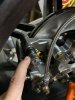
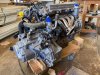
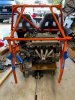
No major updates here. I messed up and ordered the wrong flywheel bolts, twice.... I think I have the correct ones now and will be mounting the flywheel/clutch assembly tomorrow to make sure I don't need a shim. It's a ZZP lightweight flywheel with a Southbend Stage 3 clutch. I'm thinking I'm going to need a shim but I haven't ordered it. If we're not needing one, the motor will be installed this weekend.

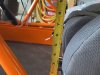
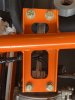
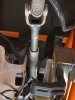
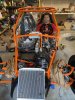
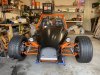
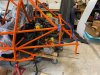
The front end is complete with the exception of some very minor things. The driver's seat, seat belts, and steering column is all assembled and done. The passenger side is ready but waiting for the shifter and hand brake install. The pictures from the shimmed steering column are from the other thread but I wanted them here also.

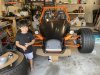
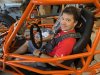
Also for posterity, the Corbeau A4 seats can be installed using 1" square tube shims on the front being bolted straight to the seat mounts on frame. It does push the seat further forward a it's pretty low.

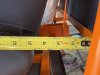
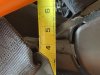
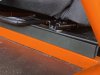
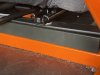
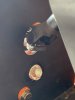
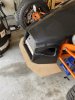
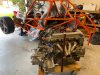
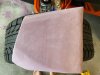
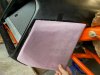
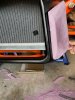
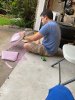
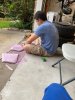
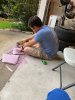
I'm working on a full front bottom plate with some winglets. It's still in the works and I've cut 3 templates. These are pictures of the second and don't have the end plates or sloped ends done yet. Alan likes it!

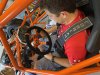
I'm working on mounts for a double gauge mount for a Aeroforce dual gauge set up. That'll be done this weekend for sure.

Next will be wiring in a front/back motorcycle dashcam set up with the monitor mounted below the button panel (I think). I also have a dual dashmount USB power port that'll be mounted next to the dashcam monitor.

A bunch of little things going on waiting on the motor and the backordered button panel.
 

Attachments

Last edited:

Desert Sasqwatch

Goblin Guru
Looks great. See the shop boss approves of the front wing. ;). Your getting close now and will be exciting to get that first drive under your belt. :)
 

SACTX

Well-Known Member
Yes the wing is an acquired taste and he’s already acquired it :).. it looks better in person... thank you!

He is ridiculously excited about the car. Every day when I get home from work he asks me if we can go out and work on the car
 
Last edited:

Classy

Well-Known Member
I really like that splitter! I love it when my kids want to participate in my projects, but it seems to be fewer and far between as they get older...
 

SACTX

Well-Known Member
I really like that splitter! I love it when my kids want to participate in my projects, but it seems to be fewer and far between as they get older...
Thank you Classy! I'll have another one this weekend that'll be the final design. I'll be doing this type of stuff (paint prep and extras) after getting the clutch assembly together with the flywheel and finding that I need a spacer. No motor this weekend.

For everyone's information a ZZP Lightweight Flywheel + SouthBend Stage 3 clutch gives about a 1/2" air gap. Tooooo big in mine. I saw that some people on the Cobalt forums had my same set up and didn't use one. I figured I was going to need one but didn't want to get the spacer unless I was sure. Had I ordered it, I'd be installing a motor this weekend.

One question for everyone. I put my front pads in last night, just doing some little things, and I found out that one of my calipers (driver's side) has 12mm head bolts on both ends of the caliper and one (passenger side) had a 14mm on the top by the bleeder valve and a 13mm on the bottom. The one that had different sized heads was very tight with the pads in. It was like the sliding rod was bottoming out in the caliper. I thought I did something wrong, but they are the same number and they have the same pads in them. You can tell in the pictures that the heads are different. Anyone ever seen anything like this?
 

Attachments

Last edited:

Rttoys

Goblin Guru
Something looks off, like they are not the same caliper. They should match, with the only difference being reversed for each side.

the bolt head being difference is not the end of the world, but the threads and shaft sizes should be the same on all 4.
 

SACTX

Well-Known Member
@Lonny Those are old pictures.

These are new pictures. I’ve already flipped them. The guys caught my mistake a while ago.

The part that I’m pointing at is where it would not push all the way in to allow the caliper to go all the way back into position. I had to push VERY hard to get it on with the pads in place. They are both stamped similarly but not identically. They are both stamped 5420 behind the main piston but one is marked 1688 on the side and the other is marked 2178.

I did them one at a time so I did not compare the rods.
 

Attachments

SACTX

Well-Known Member
2 week update..

We got the transmission installed to the motor last week. Yesterday evening Alan and I got the motor in the back. I was able to set the motor in the car pretty much by myself with Alan running on both sides to pull and place jackstands. A low profile floor jack, good dolly, an able helper, and a good plan....

We're on to running hoses and hooking up the fusebox. I have a few little things that I'm wanting to clean up on the front (correct toe ends, wiring to clean up, etc) and I need to modify the clutch tower because it's hitting the hood. We're waiting on a few things from DF and hopefully we'll be moving on those things quickly.

I've been working on some other misc items and changes.
- I have the final design for the front splitter and side skirts and they are cutout and ready for install. I have to get the car off the jackstands to install them.
- I'm working on a rear pan under the motor with a built in diffuser but I need the subframe installed to finalize it. More to come on this...
- I also have some scoops that I'm going to form in fiberglass to cover the intercooler duct cutouts. These pictures are of the foam plugs for the forms that are out of Pink Panther hard insulation. Plaster molds are next and then I'll lay fiberglass....
-I've worked on some side scoops and a scoop for the remote oil cooler that'll be going in the back. More pics for these things are coming soon.
-PCI Rear wing is here and I'm going to be fabbing some small mounting brackets for it once I get the upper wing mounting brackets from DF. I got the Black 60" version and it's pretty nice. It took a while to get but it's a quality piece.

A bunch of little things waiting on a few big things and a few big things waiting on even fewer little things but it's coming along.

Thanks!
 

Attachments

Desert Sasqwatch

Goblin Guru
Great work on fabbing up the scoops for the nose, those will look nice and (should be) exceptionally functional. Your son looks like he is full of enthusiasm to help Dad, great you are spending quality time with him - kids grow up far too quickly!
 
Top