Scotts extended low entry track #321 09 SS/TC

Scott #321

Well-Known Member
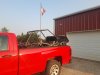
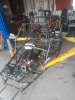
30 hr weekend road trip to pick up donor... So it begins. Cleaning the garage now to begin tear down this weekend. Saw my first Goblin (Tim Molands) about a month ago and was inspired as I have always wanted to build something like this. Budget is not starting out well as I overpaid for donor, not good to invest $600 in a road trip to find out donor vehicle is not in the condition you had been led to believe. Well its mainly interior and wheels that are in need of love and I planned on upgrading them anyway so just a added initial expense. Planning on a trip to Texas to see the factory soon and finalize additions and deletions to the kit based on how I proceed. I was delighted to find out my frame number was going to be #321 so I better do something special for that honor. Hope I will be able to recover some expenses with the part out.
20210513_193344[1].jpg
 

JBINTX

Goblin Guru
Welcome!
And another turbo.
Dont let the Cobalt crowd know you are removing a sedan from their world. They will shriek. :)
 

KSLunsfo

Well-Known Member
With some patience, you'll probably be surprised what you can recoup. Particularly the front bumper if it's in decent shape and the cats are selling for ridiculous prices these days.
 

Scott #321

Well-Known Member
Almost done stripping donor, recouped $4.93 and two fishing lures which exceeded what I thought the interior was worth by almost five dollars. I now believe the previous owner never had a beverage or bag of chips in the vehicle that didn't spill. Happy to be getting the carpet and interior panels out of the garage to help with room and the smell, smoker and rotting food particles, yuck. Made contact with local goblin owner Tim Moland, very nice guy, and am planning to take another look at his goblin in the near future before taking a trip to DF in TX to finalize how I want my kit. On a positive note no suspension damage or wiring damage found to date.
 

Scott #321

Well-Known Member
Stressed out today due to family health issues. My wonderful wife decided to come out to the garage and get her hands dirty with me. Low and behold she had never seen an airbag go off. What a great stress reliever let's blow something up.lol I've set off a lot of airbags for demonstrations but this side curtain was a first for me to see go off outside a vehicle. Sorry I can't get the video to post.
20210518_200717.jpg
 

Scott #321

Well-Known Member
Finished with teardown to the point that's its time to get her out of the garage. Leaving the rear hubs and tires for now will make moving it out and around a lot easier.
20210520_102740.jpg
 
Last edited:

Scott #321

Well-Known Member
Just a few bolts and some duck tape and the donor makes excellent storage for items yet to be parted out. I live rural so car will remain until goblin is finished without any issues. Its wonderful having fields and livestock for neighbors as they never complain about anything.
20210520_105515.jpg
 

Scott #321

Well-Known Member
Had some time today so I jumped right into the wiring. Build videos are awesome to the point that is difficult to make a mistake. I did put several 3" deck screws in the table to keep the harness separated and allow it to be opened and spread a little easier. Worked great to allow pulling wires through the harness without it moving around or crossing into other parts I was trying to keep separate to make following the video easier. Whoever posted about using silicone line or wd40 to clean off the too needs a trophie. Finished 2nd video before calling it a night. I did keep power wire for ABS pump out for future factory fused acc. Amazing how relaxing the wiring actually is.
20210522_001820.jpg
 

Joebob

Goblin Guru
Very nice work sir, how long did to take you and what kind of polishing Eq did you use?
Oh about 1 hour for each one. A little secret is I only did the tops and sides. I started with fine brass wire brushes in the Dremel. Then moved on to a mx of 3" random orbital polisher or a Power cone polisher in a cordless drill, each with aluminum metal polish.

Joe
 

Scott #321

Well-Known Member
Laptop has been updating for over 4hours now, I guess you should connect them to the internet more than once every year or two. Too the time to see what I could do with the lower a-arms. Polished very easy just like joebob said but I didn't like the casting line in the side. I removed and polished the edges as shown, with the other a-arm for reference. Its amazing how many small dents and Knicks these pick up in 100,000 miles. I think I'll try sanding the rough casting out of the knuckles as well. This will go a lot faster after I replace the motor on polishing wheel which decided tonight upon initial startup that its time in this world had come to an end.
20210524_214150.jpg
 

Scott #321

Well-Known Member
Ok, I had about six hours today and decided to temporarily install engine and required elect components tty o make sure I did the harness correctly and it will start. Everything except the engine is bend by one bolt or zip ties as it will all come back out for some welding modifications.
 

Attachments

Scott #321

Well-Known Member
Installed battery cables today and some engine oil to attempt 1st start. Prior to shooting video I did verify throttle movement, pump operation, fuel gauge operation, and that the turn signals at least tried to work without the lighting fixtures.


Top