TravMac's Extended Track Goblin (#253) - 2007 SS/SC Doner

TravMac

Well-Known Member
Well I've got some good news and some bad news:

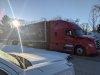
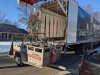
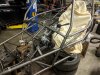
The good news is the kit is getting closer and closer to being completed! The bad news is, my idea of going to pick it up from Texas fell through with upcoming schedules at work. Oh well, just not in the cards for me this time.

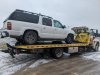
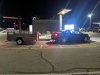
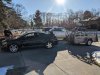
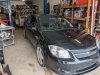
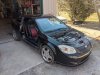
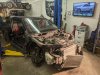
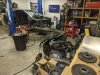
The even more good news is that my doner gets to play backup car for a few days! I'm currently on the roadside in my truck... With more trans issues... So this will be a fun afternoon haha.
 

TravMac

Well-Known Member
Alright! Truck is sitting nicely in a driveway... and will now live there for a while. Now, time to focus on the Goblin.

I needed to pick up an office chair today, so i took out my cobalt passenger seat for the storage space. Does that count as starting to tear down? I'm counting down the days until the kit is shipped, and enjoying the cruises around town in the SS while it's still a cobalt. This little car still puts a smile on my face, I can't wait for it to shed 1000lbs and be open wheel.

My friends and I are already planning a week off work to dive headfirst into the project. Between now and then will be ordering a lot of parts. Paint in the cold of Michigan may not go so well either, but there is plenty of prep work to be done. Has anyone else used steel-it before? I've seen/read/heard a lot of good things, and excited to get my frame covered in it. Now grey or black...

Just because, here's the truck on a flat bed getting hauled away. I'm sure a few of you will appreciate it!
PXL_20210117_143332245.jpg
 

TravMac

Well-Known Member
IT'S HERE! This is an exciting weekend after getting the chassis 253 to it's new home over the next few months of building. A buddy and I did (at least part of) what we wanted to do: bring home the kit using the doner car. And what a great ride it was!

With the way my schedule at work lined up, I wasn't able to make the trip to Texas as I had hoped. That being said, SmsDetroit was shipping his chassis nearby to my home address. So rather than ship all the way to where I will be working on the build (Midland MI), it saved a few bucks to ship along with the other kit (near Detroit). As a side note, the U-Haul 5x9 motorcycle trailer with e-z load ramp fits the extended track frame perfectly!

I also got my drivers seat - a 65 series Kirkey. Now that I have hands on all the parts, time to do a bit of fab work before paint. I need to go through all my boxes and make sure I get an idea for all that was included and what still needs to be addressed. Might do a parts order later tonight!

PXL_20210225_105832599.jpgPXL_20210225_130348573.jpgPXL_20210225_134200721.jpgPXL_20210225_140254272.jpgPXL_20210225_163133655.jpgPXL_20210226_013137257.jpg
 
Last edited:

Desert Sasqwatch

Goblin Guru
That's amazing and ironic all at the same time. The Cobalt that will be 'dying' towing the Goblin it is destined to become. There may a DF Goblin song in this if someone has that kind of talent - could become the DF website theme song. :D
 

Towerdog

Goblin Guru
Alright! Truck is sitting nicely in a driveway... and will now live there for a while. Now, time to focus on the Goblin.

I needed to pick up an office chair today, so i took out my cobalt passenger seat for the storage space. Does that count as starting to tear down? I'm counting down the days until the kit is shipped, and enjoying the cruises around town in the SS while it's still a cobalt. This little car still puts a smile on my face, I can't wait for it to shed 1000lbs and be open wheel.

My friends and I are already planning a week off work to dive headfirst into the project. Between now and then will be ordering a lot of parts. Paint in the cold of Michigan may not go so well either, but there is plenty of prep work to be done. Has anyone else used steel-it before? I've seen/read/heard a lot of good things, and excited to get my frame covered in it. Now grey or black...

Just because, here's the truck on a flat bed getting hauled away. I'm sure a few of you will appreciate it!
View attachment 20157
Ok so my sample of Steel-It showed up. I tested it on a piece of pipe, It flows out really well and looks good, The grey looks like gunmetal grey. It will be a few more days of curing before I can give it the hammer test.
 

Attachments

TravMac

Well-Known Member
Ok so my sample of Steel-It showed up. I tested it on a piece of pipe, It flows out really well and looks good, The grey looks like gunmetal grey. It will be a few more days of curing before I can give it the hammer test.
Yea, I like that flat grey look a lot. Supposedly its quite strong as long as the surface is prepped with something like a sandblast. I've got a blaster, but the Michigan weather may delay the painting plans for a few weeks. Lots to do in the meantime though!
 

TravMac

Well-Known Member
This weekend was the official start and end of the teardown for the doner car. Lots to update on here, and lots of pictures! But before pictures start... 2 videos need to be shared. The first is the baseline pulls of the cobalt on the mustang dyno (aka the heartbreaker). The second, a final send-off for the tires with my buddy behind the wheel. Hope you enjoy as much as I did :)


The car made around 205 horsepower and 200 ft lbs at the wheels. For having 193000 miles, this little thing still goes! The smokeshow was more of a one wheel peel, but well worth the 10 seconds of freedom. After that, it was time for the teardown. Here are the few highlights:

1) New parts showed up! I now have both seats, new wheel bearings, and a new timing kit. I also have my steel-it paint for the chassis and some mounting hardware showing up today.

2) Rust, rust, and more rust. This poor Michigan car was on it's last leg from a chassis perspective... perfect for this project. Torches were brought out a few times, but all in all, things fell apart pretty nicely.

3) Transmission refuses to let go of it's axles. We hit, pried, prayed, and nothin. So more to think about for that.

4) Brake booster was filled with brake fluid from a leaking master cylinder. That's a problem I didn't know about, but now is making me wonder about the manual brake conversions.

5) Engine is mounted on a stand ready for a new timing kit. Accidently broke the starter solenoid, so new parts on the way for that too.

Today after work will be packing up the doner shell with all the stuff I don't need and wheeling it outside. Then back to the city for me till next time!

PXL_20210313_172753427.jpgPXL_20210313_180728444.jpgPXL_20210313_222824648.jpgPXL_20210314_012435417.jpgPXL_20210314_012450418.jpgPXL_20210314_023210858.jpgPXL_20210314_200459857.jpgPXL_20210314_204042166.jpgPXL_20210315_024818829.jpg
 

Desert Sasqwatch

Goblin Guru
Great progress! Have to ask what is on top of the lift/scaffold (hard to tell) in the back corner that has the 3 bolt wheels? There were not to many vehicles that came with 3 bolts - many were French. :eek::oops:
 

TravMac

Well-Known Member
It is a formula SAE car! Well, 2 of them actually hanging out up there. They are currently more decoration than function, but have good bones if/when there is enough money to throw at them.
 

TravMac

Well-Known Member
These cars actually belong to my buddy who was on an FSAE team. Although, I did Baja SAE at University of Michigan from 2012 - 2016. I don't have one of those cars, but sure would like one. I was lucky enough to be the chassis guy, so this goblin is already bringing up all those great memories. I'm really looking forward to the little bit of fab work I have planned, but it's still a few days out with my upcoming work schedule. It can't come soon enough!
 

TravMac

Well-Known Member
Well, this has been a fairly productive day. Getting seat mounting figured out relative to pedals and steering. Going to figure out some sort of dead pedal or footrest spot next. Got some "trick tabs" from TMR customs with a 3/8 threaded insert to mount the seats down onto. They are really slick little tabs that should work great! Now just need some more tube and let the welding begin.

Wiring has also been stripped clean of tape and wrap. Going to be doing a bit of that tonight and thinking of what small stuff powdercoat on the car. I also got the steel-it chassis paint through TMR, although not warm enough to start that yet.

Last but not least... axles. My buddy and I slide-hammered quite excessively to no avail. Short of cracking the case on accident, we decided to leave it for now. Seems like a few others are in the same boat too.

PXL_20210320_204149819.jpgPXL_20210320_202749504.jpgPXL_20210320_200758334.jpg
 

TravMac

Well-Known Member
Getting pretty deep into the wiring harness with a little work here and there as I can. just about finished with video part 4 of the new videos, organizing the main harness. About halfway through is when the final 2 ground lugs are pulled out. The video shows a few grounds that are cut and marked to be extended later (I think there were 3? 2 towards the BCM and 1 towards the ECM?). I only had to cut one... and wondering if I went wrong somewhere along the way. The only one I had to cut goes to the grey BCM connector. Anyone else come across this? Maybe its something with having a different vehicle.

I also figure it's worth asking while I am still in the early stages. Being an extended goblin, is there anything that needs consideration while making most of the wire extensions? I think the only mention during the videos so far has been for the battery fuse connector that was a few inches longer when cut out of the harness.

I appreciate the help all! Next update, I sure hope to have my seats mounted in and some of my welding projects complete :)
 

Towerdog

Goblin Guru
No your good. It fits the extended version fine.
Trust me I had a panic attack the first time someone asked that after I was done with mine.
 

TravMac

Well-Known Member
I appreciate it! I noticed almost nobody had a complaint or question about it here, so figured either everyone cut their extra 4 inches from the start, or I was way over thinking it. Glad to be the latter haha. Now hopefully someone ran into only cutting one ground free as well... I keep staring at all my connectors and can't even think where it would go considering what's left.
 

Ross

Goblin Guru
Well, this has been a fairly productive day. Getting seat mounting figured out relative to pedals and steering. Going to figure out some sort of dead pedal or footrest spot next. Got some "trick tabs" from TMR customs with a 3/8 threaded insert to mount the seats down onto. They are really slick little tabs that should work great! Now just need some more tube and let the welding begin.

Wiring has also been stripped clean of tape and wrap. Going to be doing a bit of that tonight and thinking of what small stuff powdercoat on the car. I also got the steel-it chassis paint through TMR, although not warm enough to start that yet.

Last but not least... axles. My buddy and I slide-hammered quite excessively to no avail. Short of cracking the case on accident, we decided to leave it for now. Seems like a few others are in the same boat too.

View attachment 21864View attachment 21863View attachment 21862
I can relate on the stuck axles.
 

ATMironov

Well-Known Member
Getting pretty deep into the wiring harness with a little work here and there as I can. just about finished with video part 4 of the new videos, organizing the main harness. About halfway through is when the final 2 ground lugs are pulled out. The video shows a few grounds that are cut and marked to be extended later (I think there were 3? 2 towards the BCM and 1 towards the ECM?). I only had to cut one... and wondering if I went wrong somewhere along the way. The only one I had to cut goes to the grey BCM connector. Anyone else come across this? Maybe its something with having a different vehicle.

I also figure it's worth asking while I am still in the early stages. Being an extended goblin, is there anything that needs consideration while making most of the wire extensions? I think the only mention during the videos so far has been for the battery fuse connector that was a few inches longer when cut out of the harness.

I appreciate the help all! Next update, I sure hope to have my seats mounted in and some of my welding projects complete :)
I just finished my wiring harness and I too just had one ground wire to cut that went to the BCM. Strangely enough there is no reference to reconnecting this wire when you solder back in all the ground lugs. I just brought it towards the BCM and soldered to into the lugs. When testing all the grounds, everything worked per video..
I won’t know for awhile still if the harness actually works
 

TravMac

Well-Known Member
I just finished my wiring harness and I too just had one ground wire to cut that went to the BCM. Strangely enough there is no reference to reconnecting this wire when you solder back in all the ground lugs. I just brought it towards the BCM and soldered to into the lugs. When testing all the grounds, everything worked per video..
I won’t know for awhile still if the harness actually works
That's good to know I'm not alone. I figured I would be doing the same thing, but still have a ways to go.

I can relate on the stuck axles.
I've been watching your log at the issue too... haha. That's wild. Since my axles are still fine, I figure I'll bolt it up and run it till it breaks. Then find new parts :)
 
Top