BAustin's Extended Track - 06 SS/SC Donor - #157 Registered

baustin

Well-Known Member
I'm working on the front suspension and I'm running into issues getting the larger rod ends into the control arms. No issues threading in the 1/2" and 3/4" rod ends for the upper control arms. Are the lower control arm 3/4" holes supposed to be left hand threaded? It's hard to capture the thread direction on pictures but each time I hand start the rod ends, they start to walk off straight and don't even make it 1.5 turns before full stop. I'm hesitant to put a wrench since the upper control arms assembled easily. I have 4 right hand threaded 3/4" rod ends.

10309


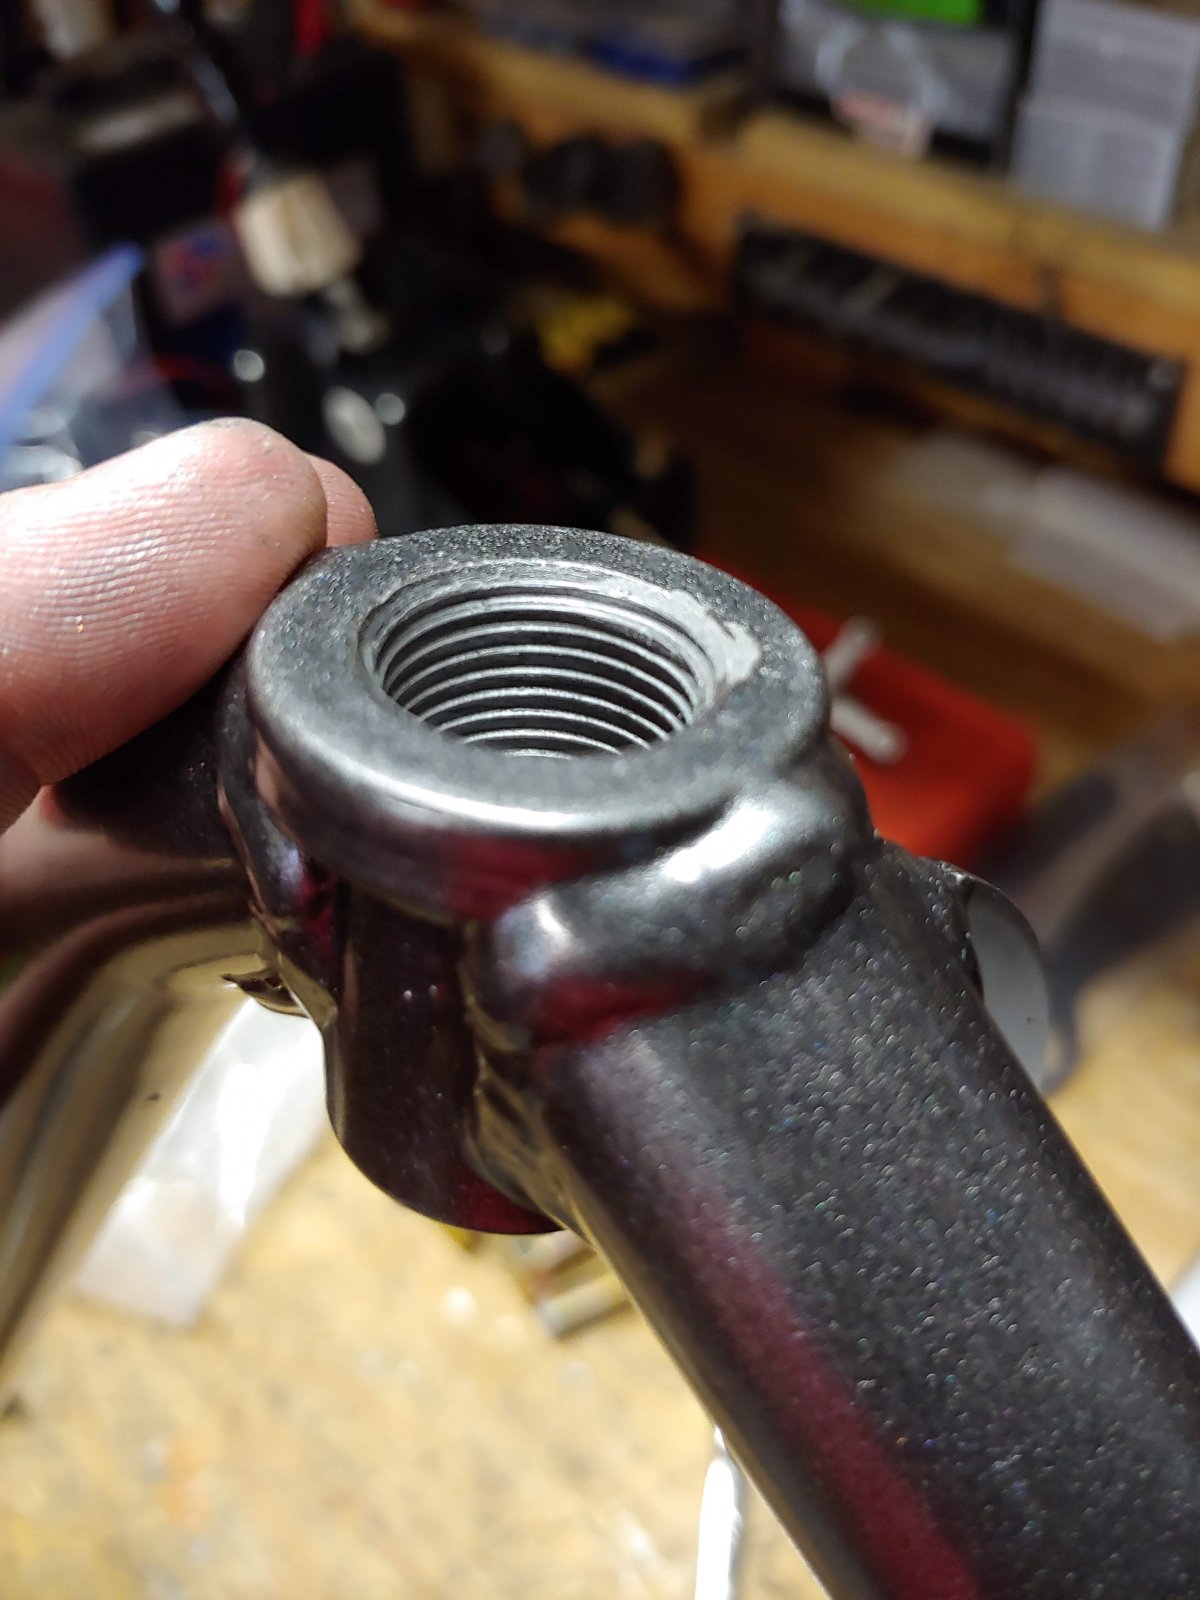
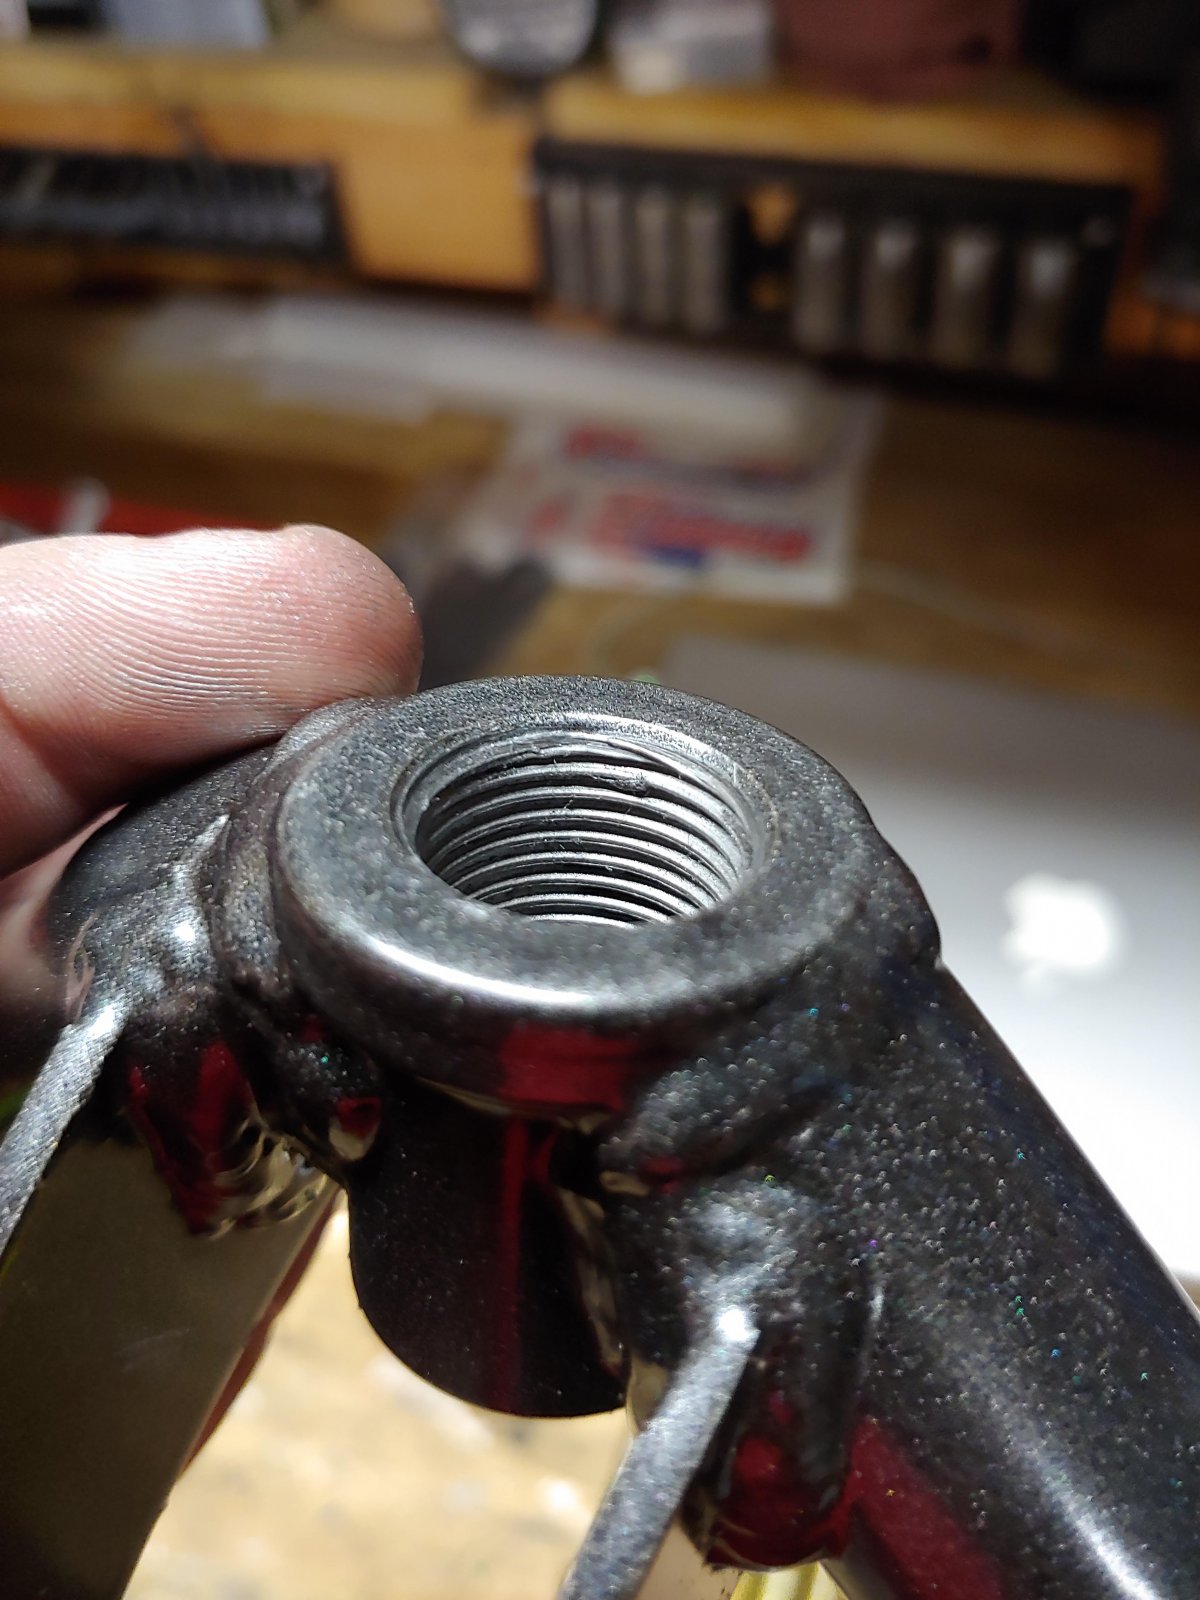
This image shows where the right hand thread of the rod end was trying to cut threads in.
10310


If I hold the control arm up and visually follow the thread pattern, I have to turn the piece clockwise in my hands to go inward (same things as saying I'd have to walk around it counterclockwise if it was held still on the floor. I don't have any left hand thread rod ends in my kit, and don't have any random bolts in my garage to test my theory.
 

Ross

Goblin Guru
Those are all right hand threads. Your last picture shows a bit of cross threading on the first thread. Can you run a bolt thru from the backside, to help align the threads?
 

Lonny

Administrator
Staff member
We were sent a batch of left hand threaded bungs and decided to order left handed rod ends and jam nuts and just use them for our in-house builds.

We thought we had caught all of them before they got out but obviously we did not.

We can either send you a different lower control arm set or send you left hand hardware. It's totally up to you. Functionally the control arms are the same just let us know.
 

baustin

Well-Known Member
We were sent a batch of left hand threaded bungs and decided to order left handed rod ends and jam nuts and just use them for our in-house builds.

We thought we had caught all of them before they got out but obviously we did not.

We can either send you a different lower control arm set or send you left hand hardware. It's totally up to you. Functionally the control arms are the same just let us know.
Since my control arms are powder coated already, the left hand hardware would be perfect. I only caused 1 level of cross threading since I tried it gently to see if it was a paint buildup. Pretty sure the left hand hardware would still thread nicely.
 

baustin

Well-Known Member
One day my wheels/tires will arrive. Good thing I've got plenty of other work to get done before then.

Wheels weren't in stock when I ordered. When they finally shipped to my house they had my name but were actually black steel rims with winter tires (different order got my name in packaging). They since have reordered wheels/tires and will ship again but just got a call that one of the wheels was actually bent. So now another wheel will be ordered. I'm probably the most laid back customer for Discount Tire Direct with these mishaps, I had honestly expected a couple week lead time anyways so I ordered a couple weeks ahead of when I thought I might be ready for them.

I've got a bunch of electrical connectors coming to use for wiring in my lights that should arrive tomorrow (head lights, turn signals on mirrors, tail lights, 3rd brake light, license plate light) and the 12V outlets I'm adding up front so I can disconnect without cutting wires later on if needed. Hopefully I can make some good progress by the end of this weekend. I went with this type from McMaster https://www.mcmaster.com/1470n16. 'Ready to Use DC Connectors' https://www.mcmaster.com/dc-connector, basically the same type GM used all over the Cobalt anyways. Not the smallest but easily handle the 12V outlet current and I don't think they'll be too exposed when I'm finished.

Also will be going with the parking brake setup (thanks Lonny for getting that shipped out) and the left hand hardware that should arrive tomorrow. I've got a lot of things I can get done this weekend, the question will be how much time do I put towards the car vs other things?
 

baustin

Well-Known Member
Wheels are in and I've soldered in all of my rear light wiring/connectors.

I'll probably add some electrical tape on the license plate bracket so it doesn't shine up/back so much.
10448


Didn't expect the 3rd brake light to be the only brake light that shines when pedal is pressed and the key is out or off but it looks like this is normal for cobalts. All of the rear lighting works as expected though I'll have to figure out which wires at the bcm side are the rear lights to add in my tow bar kit harness.

My 3rd brake light has the wiring to have running out brake light function, increased visibility is good so I connected it off the brown (marker/running) light circuit too.

10449


10450
 
Last edited:

baustin

Well-Known Member
Had the time last night I could solder in the driver side headlight and turn signals. I'm thinking that tonight I can do the passenger side headlight and turn signal. Then I'll just need to tape up the wiring to the lights and secure it along the frame.

I know the kit rear lights are LEDs, but seems like I get a fast signal speed. Either side is the same speed right now with no passenger front lights wired in at all. I assume this is normal but couldn't find others mention it on the forum with my quick search.

Also got the replacement solstice driver side parking brake caliper. The first one I got from DF had the brake hose banjo bolt completely strip the caliper of threads (at least 6-8 thread engagement) once I got to 10 lb-ft torque. I currently have 1 brake caliper with hose installed, hopefully when I install the other 3 this weekend they won't strip out.
 

Ross

Goblin Guru
LED lights can cause a fast blinker... you can add additional resistance if you want it to slow down, but it ends up using as much energy as a filament bulb, which negates some of the benefits of LED lights.
 

JSATX

Goblin Guru
Like Ross said they are going to be faster anyway, but should slow down a lot once the other lights are connected. Additional wires and additional lights will add enough resistance to bring the speed down to a pretty normal level at least that was my experience.
 

baustin

Well-Known Member
Then I see no problem with the signal speed. It was fast enough I noticed, slow enough it doesn't bother me for now. Just fast enough I figured I'd check to see if I was getting the same thing as other builds.
 

baustin

Well-Known Member
I might end up going with wheel adapters anyways, just as push the wheels slightly further out. My rear wheels/tires clear without issue but the front bump the upper control arm slightly. Because of my tires not bulging out on the sidewall but being fairly square, the wheel or tire could both rub.

If the outer rod ends are all the way shortened, both wheels would touch on the rear surface of the upper control arm (driver side wheel when turning left, passenger wheel when turning right). I have all the large rod ends turned out to 8 turns from minimum length. The tires don't contact the control arm by themselves at that rod end length (I'm still up on jack stands under the frame) but if I push lightly on the tire while it's turned it'll touch the control arm. At 4 turns the wheels touched pretty hard. 8 turns out seems like it's still halfway or just over halfway inserted for the large rod ends, knowing how much force goes through that rod end, even in a parking lot, I don't really want to go to the range of 4-7 threads engaged. I know moving the upright further out would help decrease the rub chance to the upper control arm but I think I'd feel better by bolting on hub adapters (same bolt pattern, I like the wheels).

Last night I circled back and read Ross was using 39mm adapters but didn't include the rotor thickness in that calc. The wheels I've got do have slight cavity back setup where the original studs can go without interference. I hope to measure things tonight to figure out what my minimum will be. I do have the solstice rear rotors so I'll have to measure both the front and rear for adapter thickness. I think I prefer the full adapter setup (bolts to existing studs and then has 5 new studs offset for the wheel to bolt to) instead of the basic spacer disc.

For clarity, my tires are 225/45r17 on 17x7.5 wheels with 45mm offset (6.02" backspace). When I compared against stock SS/SC wheels (I don't have a set since my donor had cheap lug-centric aftermarket wheels with plastic hub rings), my tires should be ~8mm further in than the stock wheels. Even if I used a 1/4" spacer disc, I think my suspension adjustment could still allow for rub; I'd have to go >8mm to prevent rub risk.
 

askiles

Goblin Guru
I might end up going with wheel adapters anyways, just as push the wheels slightly further out. My rear wheels/tires clear without issue but the front bump the upper control arm slightly. Because of my tires not bulging out on the sidewall but being fairly square, the wheel or tire could both rub.

If the outer rod ends are all the way shortened, both wheels would touch on the rear surface of the upper control arm (driver side wheel when turning left, passenger wheel when turning right). I have all the large rod ends turned out to 8 turns from minimum length. The tires don't contact the control arm by themselves at that rod end length (I'm still up on jack stands under the frame) but if I push lightly on the tire while it's turned it'll touch the control arm. At 4 turns the wheels touched pretty hard. 8 turns out seems like it's still halfway or just over halfway inserted for the large rod ends, knowing how much force goes through that rod end, even in a parking lot, I don't really want to go to the range of 4-7 threads engaged. I know moving the upright further out would help decrease the rub chance to the upper control arm but I think I'd feel better by bolting on hub adapters (same bolt pattern, I like the wheels).

Last night I circled back and read Ross was using 39mm adapters but didn't include the rotor thickness in that calc. The wheels I've got do have slight cavity back setup where the original studs can go without interference. I hope to measure things tonight to figure out what my minimum will be. I do have the solstice rear rotors so I'll have to measure both the front and rear for adapter thickness. I think I prefer the full adapter setup (bolts to existing studs and then has 5 new studs offset for the wheel to bolt to) instead of the basic spacer disc.

For clarity, my tires are 225/45r17 on 17x7.5 wheels with 45mm offset (6.02" backspace). When I compared against stock SS/SC wheels (I don't have a set since my donor had cheap lug-centric aftermarket wheels with plastic hub rings), my tires should be ~8mm further in than the stock wheels. Even if I used a 1/4" spacer disc, I think my suspension adjustment could still allow for rub; I'd have to go >8mm to prevent rub risk.
The stock wheel is 7" wide with an offset of 42. So going with a wider wheel and a bigger offset would be why it is hitting. When I got my American Racing Torq Thrusts, that was one of the reasons I went with the 16" x 7". I could get a smaller offset of 35, pushing them out just a bit more than the stock ones. I think they fit awesome. The only thing that I would change with mine, is a wider wheel in the rear. Maybe some day I will find that. So in your case, you will just need to add a spacer in the front to clear. Maybe like a 10mm. Or get some adapters, which is never my favorite thing to do.
 

G Atsma

Goblin Guru
Don't worry about offset so much as backspace measurement. As long as the backspace number doesn't grow, the wheels will fit.
 

askiles

Goblin Guru
Don't worry about offset so much as backspace measurement. As long as the backspace number doesn't grow, the wheels will fit.
Offset and backspacing are hand in hand. Offset is the measurement from center line of wheel to mounting surface, backspace is the back wheel lip to mounting surface. So if one changes the other changes by exactly the same amount.
 

G Atsma

Goblin Guru
The width of the wheel affects backspace measurement. With the offset constant, a wider wheel increases the backspace measurement. Offset relates strictly to the centerline of the wheel. The wider the wheel, the more offset needed to keep backspace constant.
 

JeffsGoblin

Goblin Guru
The width of the wheel affects backspace measurement. With the offset constant, a wider wheel increases the backspace measurement. Offset relates strictly to the centerline of the wheel. The wider the wheel, the more offset needed to keep backspace constant.
G is right. These two wheels have almost the same offset of 17x9, 5x114.3, +24mm, backspacing 5.85" and 17x10.5, 5x114.3+27mm, backspacing 6.84" respectively. They have an inch difference in backspacing. Not sure if they would need spacers for the DFG since I don't have wheels yet. Use this cool tool to play around with options virtually: https://www.rimsntires.com/specspro.jsp Does anybody have backspacing measurements to see how far we can go before they rub? Realizing the tires being used will play a big factor.
10518
10519
 

Desert Sasqwatch

Goblin Guru
G is right. These two wheels have almost the same offset of 17x9, 5x114.3, +24mm, backspacing 5.85" and 17x10.5, 5x114.3+27mm, backspacing 6.84" respectively. They have an inch difference in backspacing. Not sure if they would need spacers for the DFG since I don't have wheels yet. Use this cool tool to play around with options virtually: https://www.rimsntires.com/specspro.jsp Does anybody have backspacing measurements to see how far we can go before they rub? Realizing the tires being used will play a big factor.
View attachment 10518View attachment 10519
Jeff, that is the website I have been using for a few years now to match rims and tires for sizing and clearances on several of my cars. It is a great tool and gives you a very accurate definition of how a wheel and tire combination will fit.
 
Top