Custom STL Files for 3D Printed Goblin Parts

WarmPepsi

Active Member
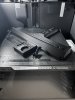
I'm gonna bump this just because I picked up an X1CC a few weeks ago (as an early birthday present to myself) and am starting to get back in the game. My ender was fun but it was so much like watching paint dry. Being able to set something to print and having it done in minutes (or an hour or 2) rather than 2 days is just a complete game changer to me. Peeking in on it while it's doing its thing and i'm at work is pretty sweet as well.

Gonna try a few ideas for some venting thru the side panels as well as some general brackets, cup/water bottle holder and such.

What's the consensus for material choice on on stuff like this, PETG over ABS?
 

Rauq

Goblin Guru
I've not run ABS as I don't have an enclosure for my printer and I don't want to deal with calculating for shrinkage. All the parts on my car are PETG and they've held up great to humidity and a bit of rain, heat, and UV. I ran a solid PETG printed coil pack cover for a time but the edges away from the fasteners warped over the course of about a month, so direct engine contact might be asking a bit much of PETG relying on material strength alone.
 

WarmPepsi

Active Member
Well put. I'm gonna do some experimenting (failing) and will post back if i come up with anything that anyone else might want to print!

I printed one great first print with PETG on my ender... and it WELDED the poor benchy to the bed. So, being a little more cautious about that now. :rolleyes:
 

OptimizePrime

Goblin Guru
Happy to hear you went with the x1c, really jealous I couldn't start this hobby on that machine lol I'm now too invested in my frankenstein printers to justify another printer.

I echo @Rauq with PETG. I have only used PETG and it's held up great for years now. At this point if a part fails I'd just print it in PETG again.

I usually print my exposed car parts with a few extra walls to help mitigate warping from the lava sun we can get. You can also paint / protect over the part to give it a little more protection if you wanted.
 

Rauq

Goblin Guru
I printed one great first print with PETG on my ender... and it WELDED the poor benchy to the bed. So, being a little more cautious about that now. :rolleyes:
I have an Ender 3 V2 with the textured tempered glass bed and PETG WILL NOT come off the bed... unless you let a finished print sit for a few minutes after the bed is completely cooled. Then it just pops right off.
 

WarmPepsi

Active Member
I have an Ender 3 V2 with the textured tempered glass bed and PETG WILL NOT come off the bed... unless you let a finished print sit for a few minutes after the bed is completely cooled. Then it just pops right off.
I let it print and came back to it in the morning.... Not no, but HELL NO. Heated it back up and let it sit there for a while, then let it start to cool and 10 minutes later... same result.

I ended up needing a putty knife and a ball peen.

Again, completely clean bed. No Glue. It seems like glue is a double use item... to keep PETG from welding, but to also keep PLA stuck. I never had any issues with PLA on a normal bed, but I've been cleaning and regluing my X1C bed every few prints after I had one decide not to stick.
 

Rauq

Goblin Guru
That does seem to lend credence to that textured tempered glass bed being one of the biggest reasons I decided to pick up that model printer. The only prints I've ever really had adhesion issues with are low bottom surface area/tall parts which I'd imagine are challenging for anyone, and I've never had significant release issues. The bottom layer surface texture is a little weird but I can live with it.
 

WarmPepsi

Active Member
That does seem to lend credence to that textured tempered glass bed being one of the biggest reasons I decided to pick up that model printer. The only prints I've ever really had adhesion issues with are low bottom surface area/tall parts which I'd imagine are challenging for anyone, and I've never had significant release issues. The bottom layer surface texture is a little weird but I can live with it.
Yeah; this guy has done well even with not a lot of meat against the table. Printed my first items with supports (trees) last night, came out good enough for what they’ll be used for (desiccant holders in the AMS filament holder). I have no idea why bambu would think that plate holder tool needs a raft though...

The bottom of the flare on the Mario pipe didn’t come out great but I’m simply an idiot for not printing it upside down. :cool:
 

Attachments

RITDR

Active Member
I like to use PETG for most car parts. ABS was too finicky, and I had better luck with PETG prints.
 

Brian74

Goblin Guru
I just finished building/programming my first of 3 500x500mm bed CoreXY printers. These are based on Ratrig original VCore design but I redesigned much of it to improve durability and efficiency. I’m getting +/- .05mm tolerance on .6 nozzle ASA parts. It is printing ASA, PETG, Nylon/NylonCF, PC flawlessly. I personally favor ASA for Goblin parts, due to its UV resistance and strength. I’m running a tool changer setup with custom printheads that I designed, each with their own CAN bus circuitboards, which gives me freedom to design further (with more to come). Amazing technology we have these days!

I still have 2 more identical printers to build, which should be pretty easy, since I’ve already designed all of the parts and written the firmware. I should have all three printers built by the end of summer. By fall, when it cools down, I hope to be back in the garage to finish up my build. Having 3 large 3D printers on demand will make it convenient to quickly print up Goblin part designs during the remainder of the build.

41FDFFCA-EDF5-405B-9EC7-12C7C0E31E97.jpeg
92D880DD-B1D6-461B-8F52-DCF7F7E8272B.jpeg
AF1B2B04-D358-490B-BA1D-72263F1427F6.jpeg
51BA1BD4-4011-48FC-A935-0C4543B6F6A8.jpeg
9893E752-95A1-4750-9D04-5544FBAC8EED.jpeg
22CAA471-9C4B-41DE-A640-E1B371CEE680.jpeg
57907E0A-6678-46B4-8568-971AFC51B3FD.jpeg
237239D5-E778-4F76-9112-F76A364FB1B9.jpeg
86131D97-4EFC-4070-871C-F8A94F568B1E.jpeg
 
Last edited:

Rauq

Goblin Guru
I would think an F23 and F35 spline tool would be the same as the clutch discs have the same splines?
 

ctuinstra

Goblin Guru
There are a lot of really good designs for printing in this thread. Here is another.

A version of a center console for mounting on the tunnel. This is made for two phones and a key fob with extra room for other stuff.

42601


Here is flat-bottom version of our original design. This works well forward of the shifter on the tunnel cap.


42607
 

Attachments

Jareth

Goblin Guru
I like your new design. If I were to design one, I might make it to accommodate a USB Power Outlet?

9-7-2023 10-22-35 AM.png
 

ctuinstra

Goblin Guru
I like your new design. If I were to design one, I might make it to accommodate a USB Power Outlet?

View attachment 42619
We used one of those and mounted it in the tunnel cap towards the front. It was easier there because I already had the original wiring to the original outlet in there and that was all the farther the wires would reach without having to extend them. Besides, it wasn't something we needed easy and quick access to all the time as we just leave a charge cable plugged into it all the time.

I HIGHLY recommend installing one no matter how you do it. It helps to keep an eye on the battery voltage all the time while sitting to be driven. At least on the circuit we connected to, it's on all the time and anytime I walk by it, I can see the current battery voltage and know if I need to put a trickle charger on it.
 
Top