• We've upgraded and reskinned the forum. Notice something off? Email us at [email protected] and we'll fix it.

V1 Brian's City Goblin-06/Crate MotorTC #61

Brian74
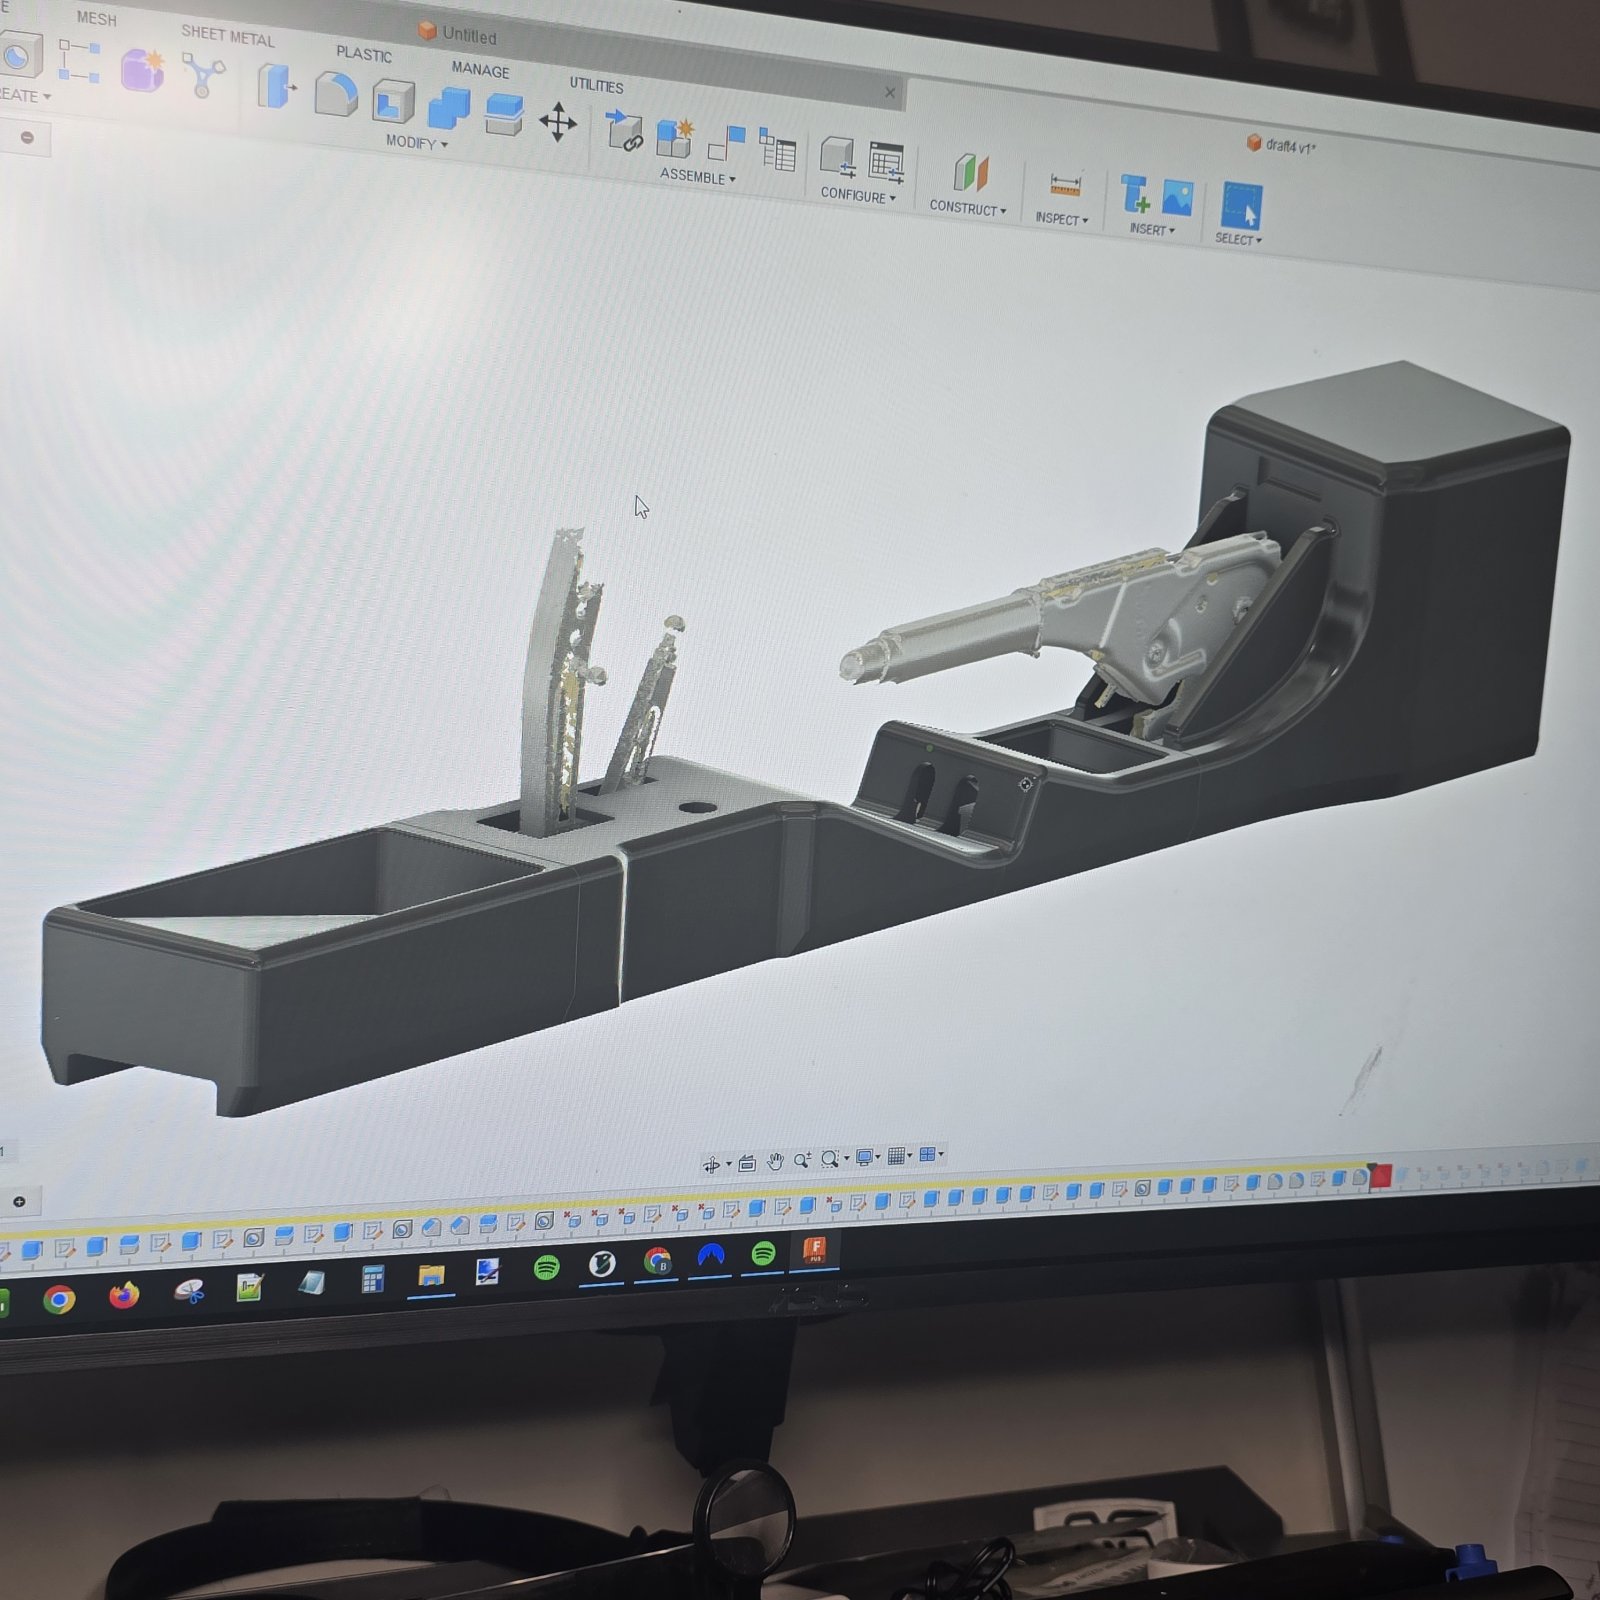
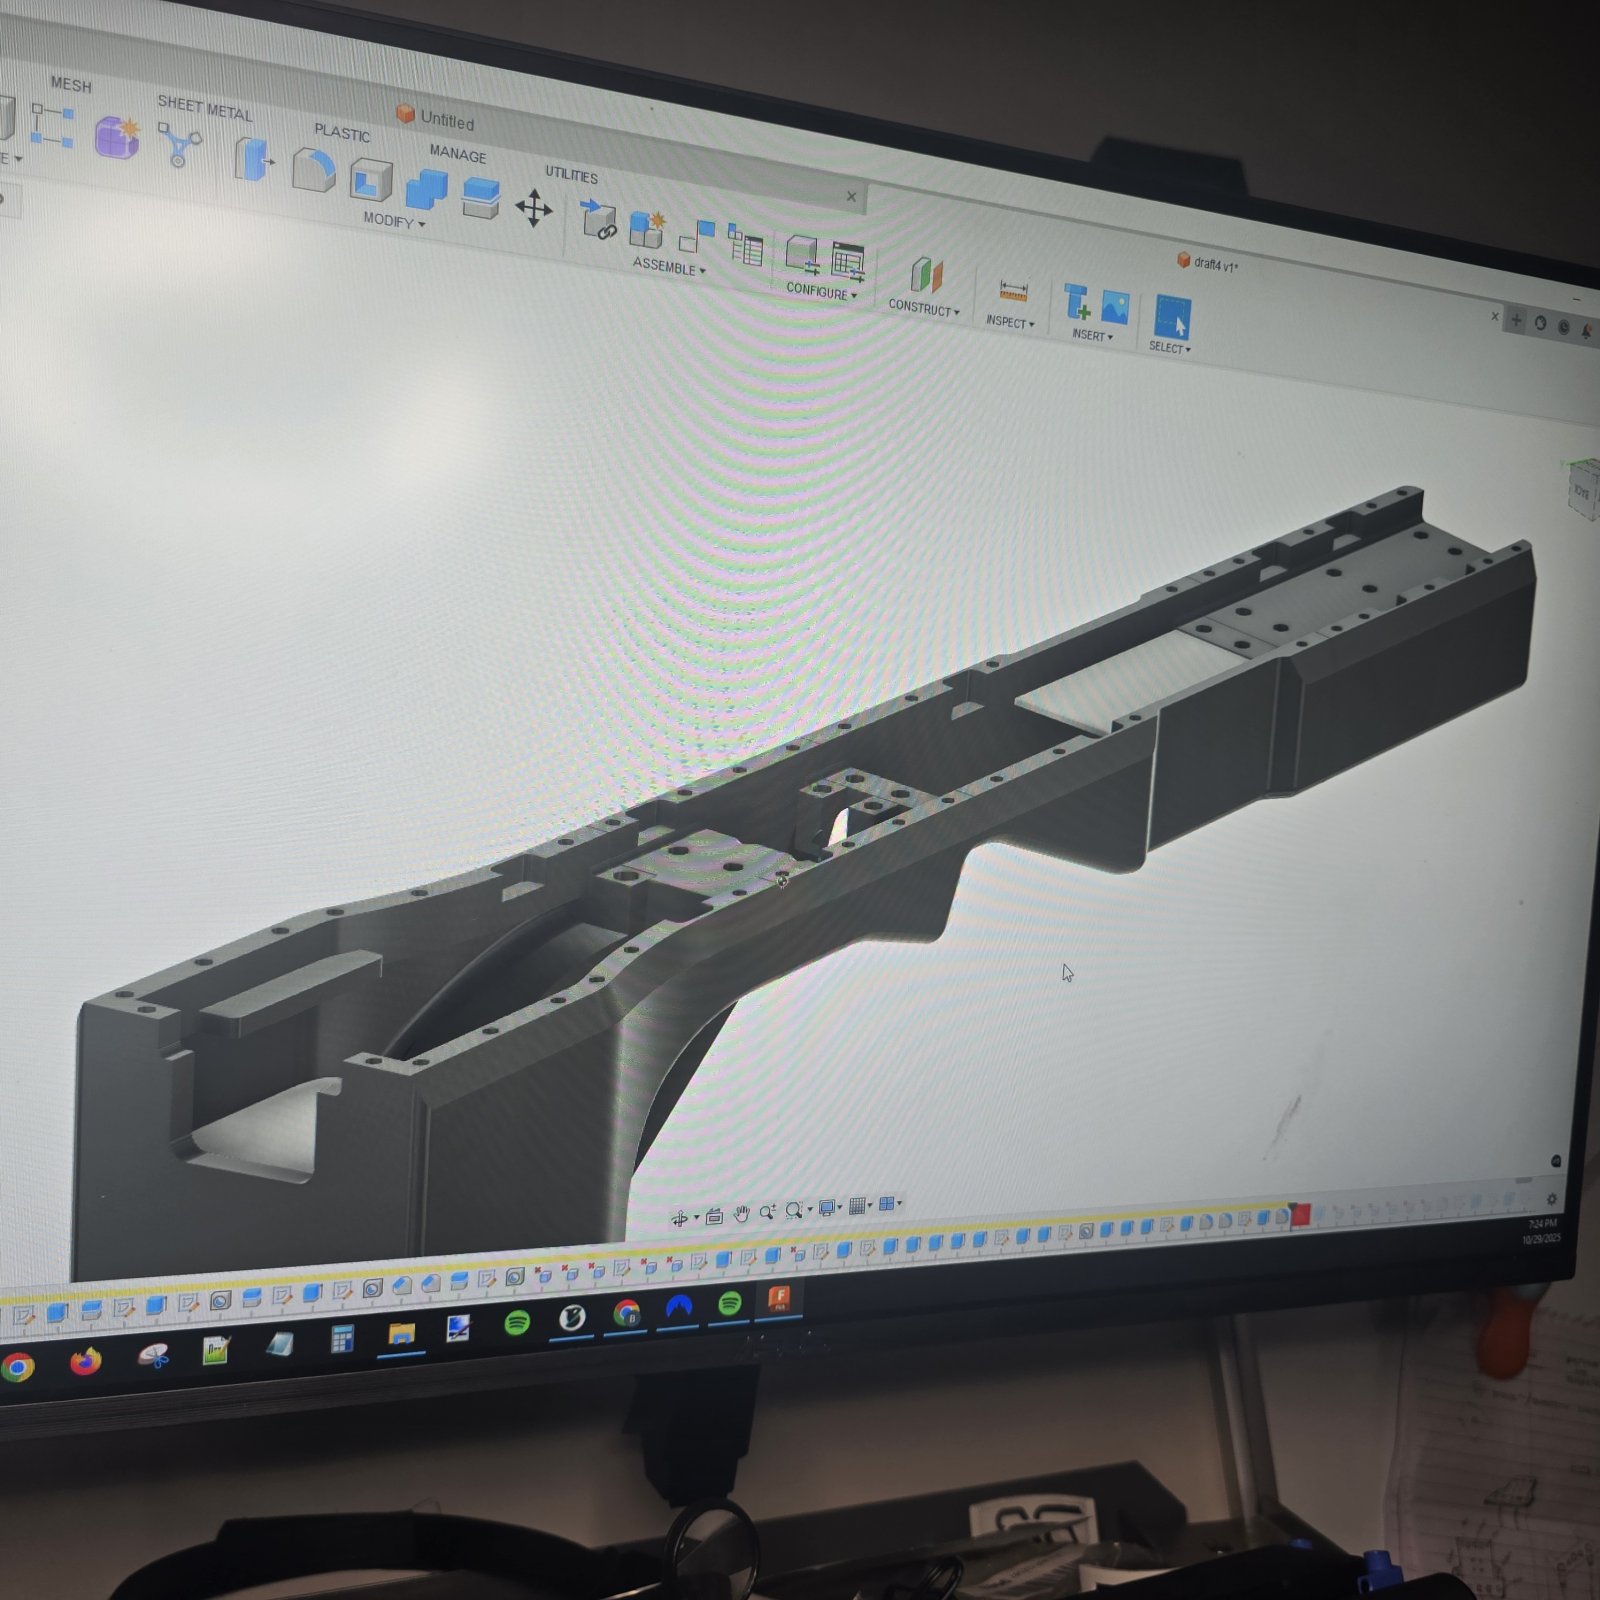
Slow progress. Today I realized that small draw latches would be an absolutely perfect solution for attaching the 3 tunnel covers. Certainly beats spending 6 hours cutting & welding hardware mounts. Updated the CAD design with the proper provisions, as well as a split print design and tapered lower end. Looks much more streamlined now. Did a mockup print of one of the dash sections for a test fit; no issues.

The only thing I am still not happy with is the parking brake shroud. I may simplify it more and just have my wife sew up a leather cover.

All the needed hardware should be here by this weekend.

20251029_213655.jpg
20251029_192441.jpg
20251029_185659.jpg
20251029_192852.jpg
 
Brian74
Gottdamn , my build log is freaking long. I had forgotten a few earlier details that I may need soon, so I was reading back through it. Nothing like an almost 10 year old project!... Once I finish this center console, I see no other major issues with the build that I cannot initiate later. I have no additional design upgrades planned as of yet. Adam has been working with me on getting me all the upgraded parts.
 
Last edited:
Brian74
Parking brake handle... First iteration had some geometry off... I fixed it. 2nd iteration uses the factory plastic release tab, and locks into place perfectly. This includes a recessed portion to zip tie a leather boot cover in place.

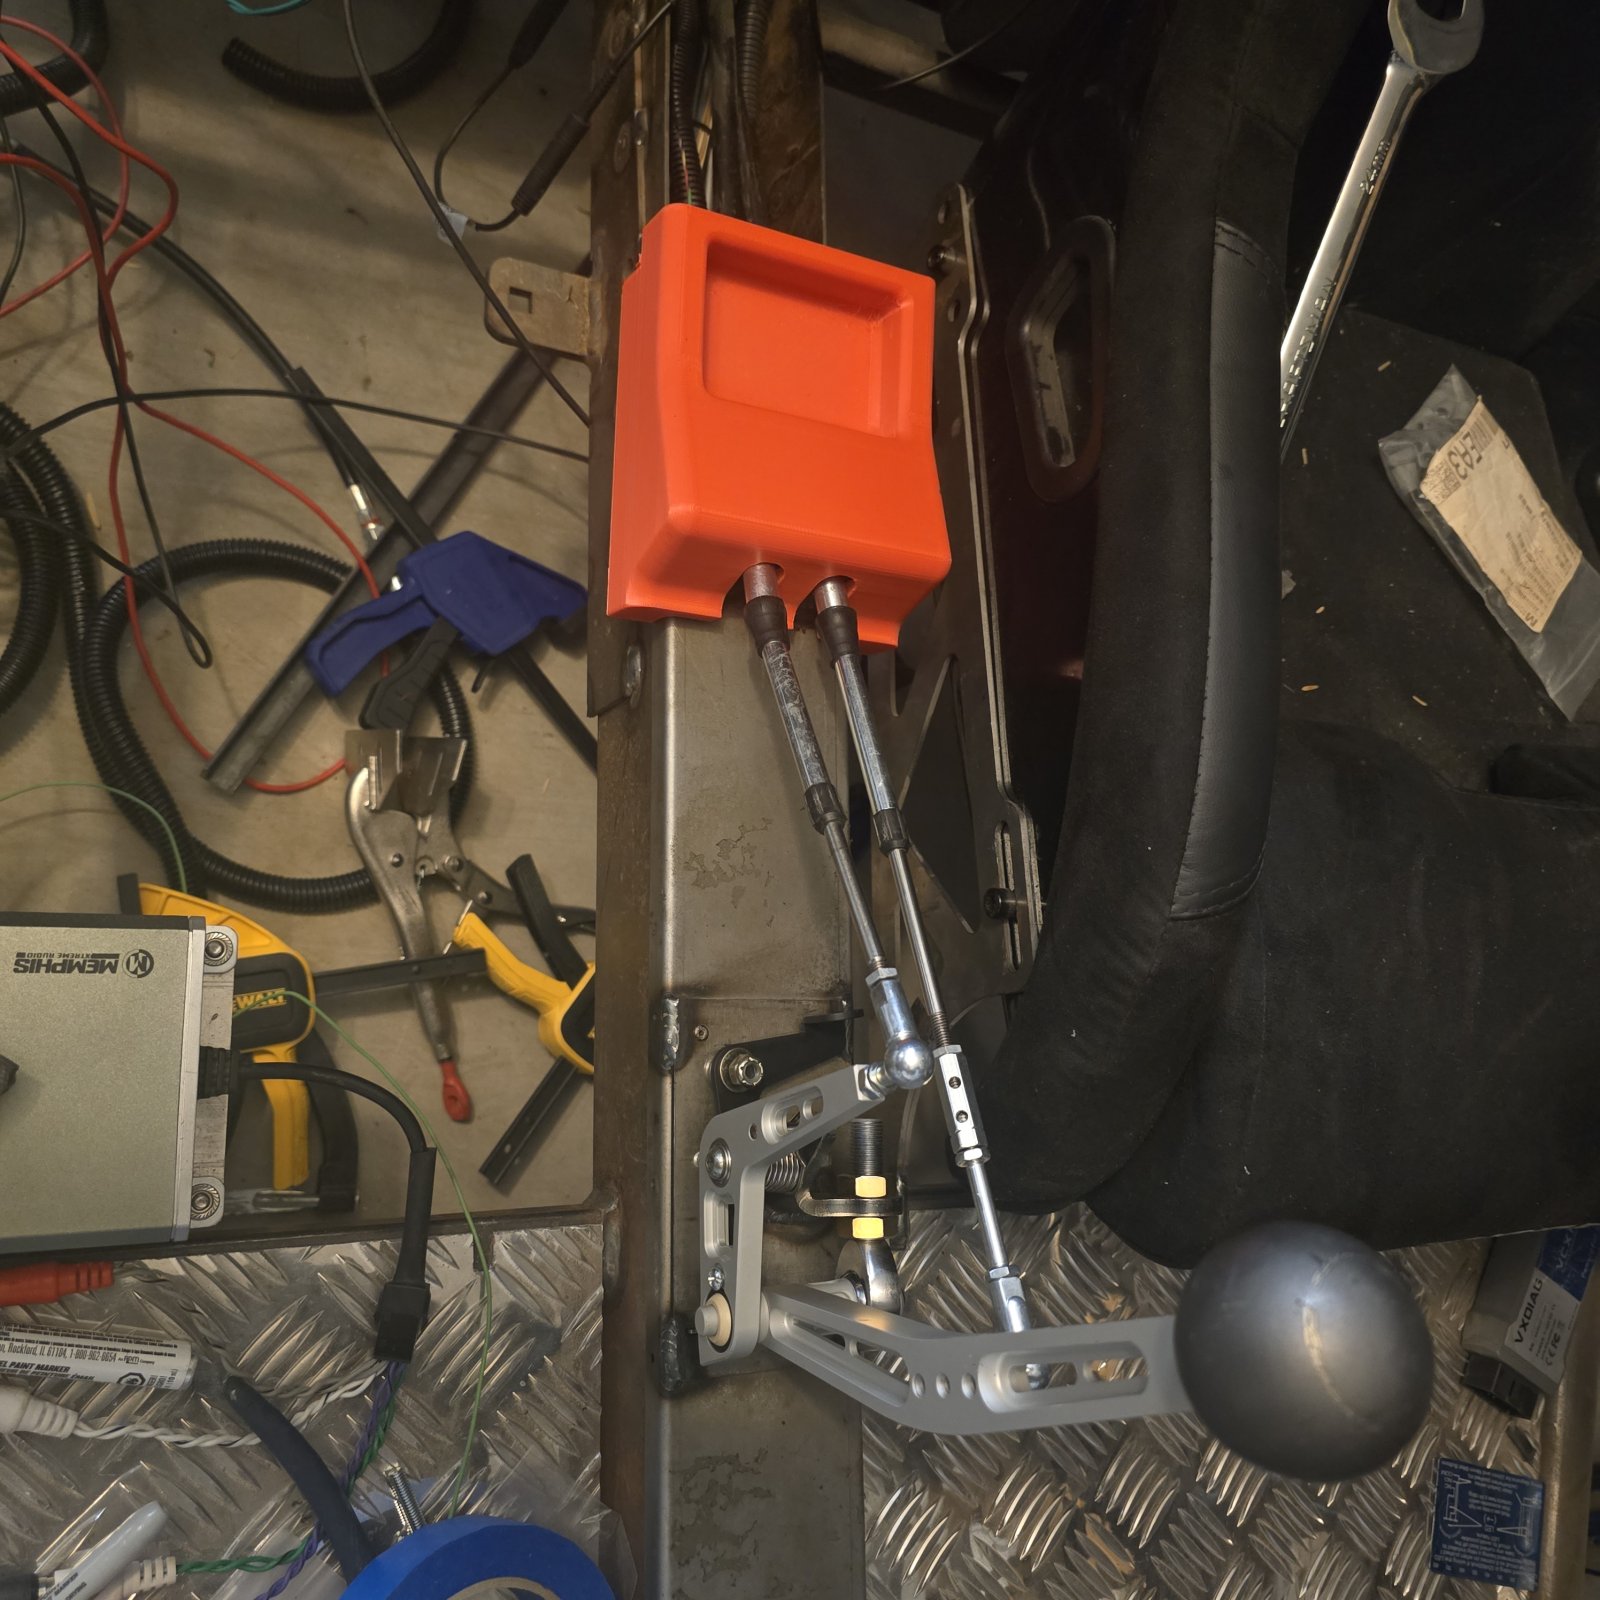
Other than that, waiting on the latch hardware for the storage box, and linkage for the reverse gate. In the meantime I am printing up prototypes of the console to check fit.


Attachments

  • 20251101_195805.jpg
    20251101_195805.jpg
    265 KB · Views: 115
Brian74
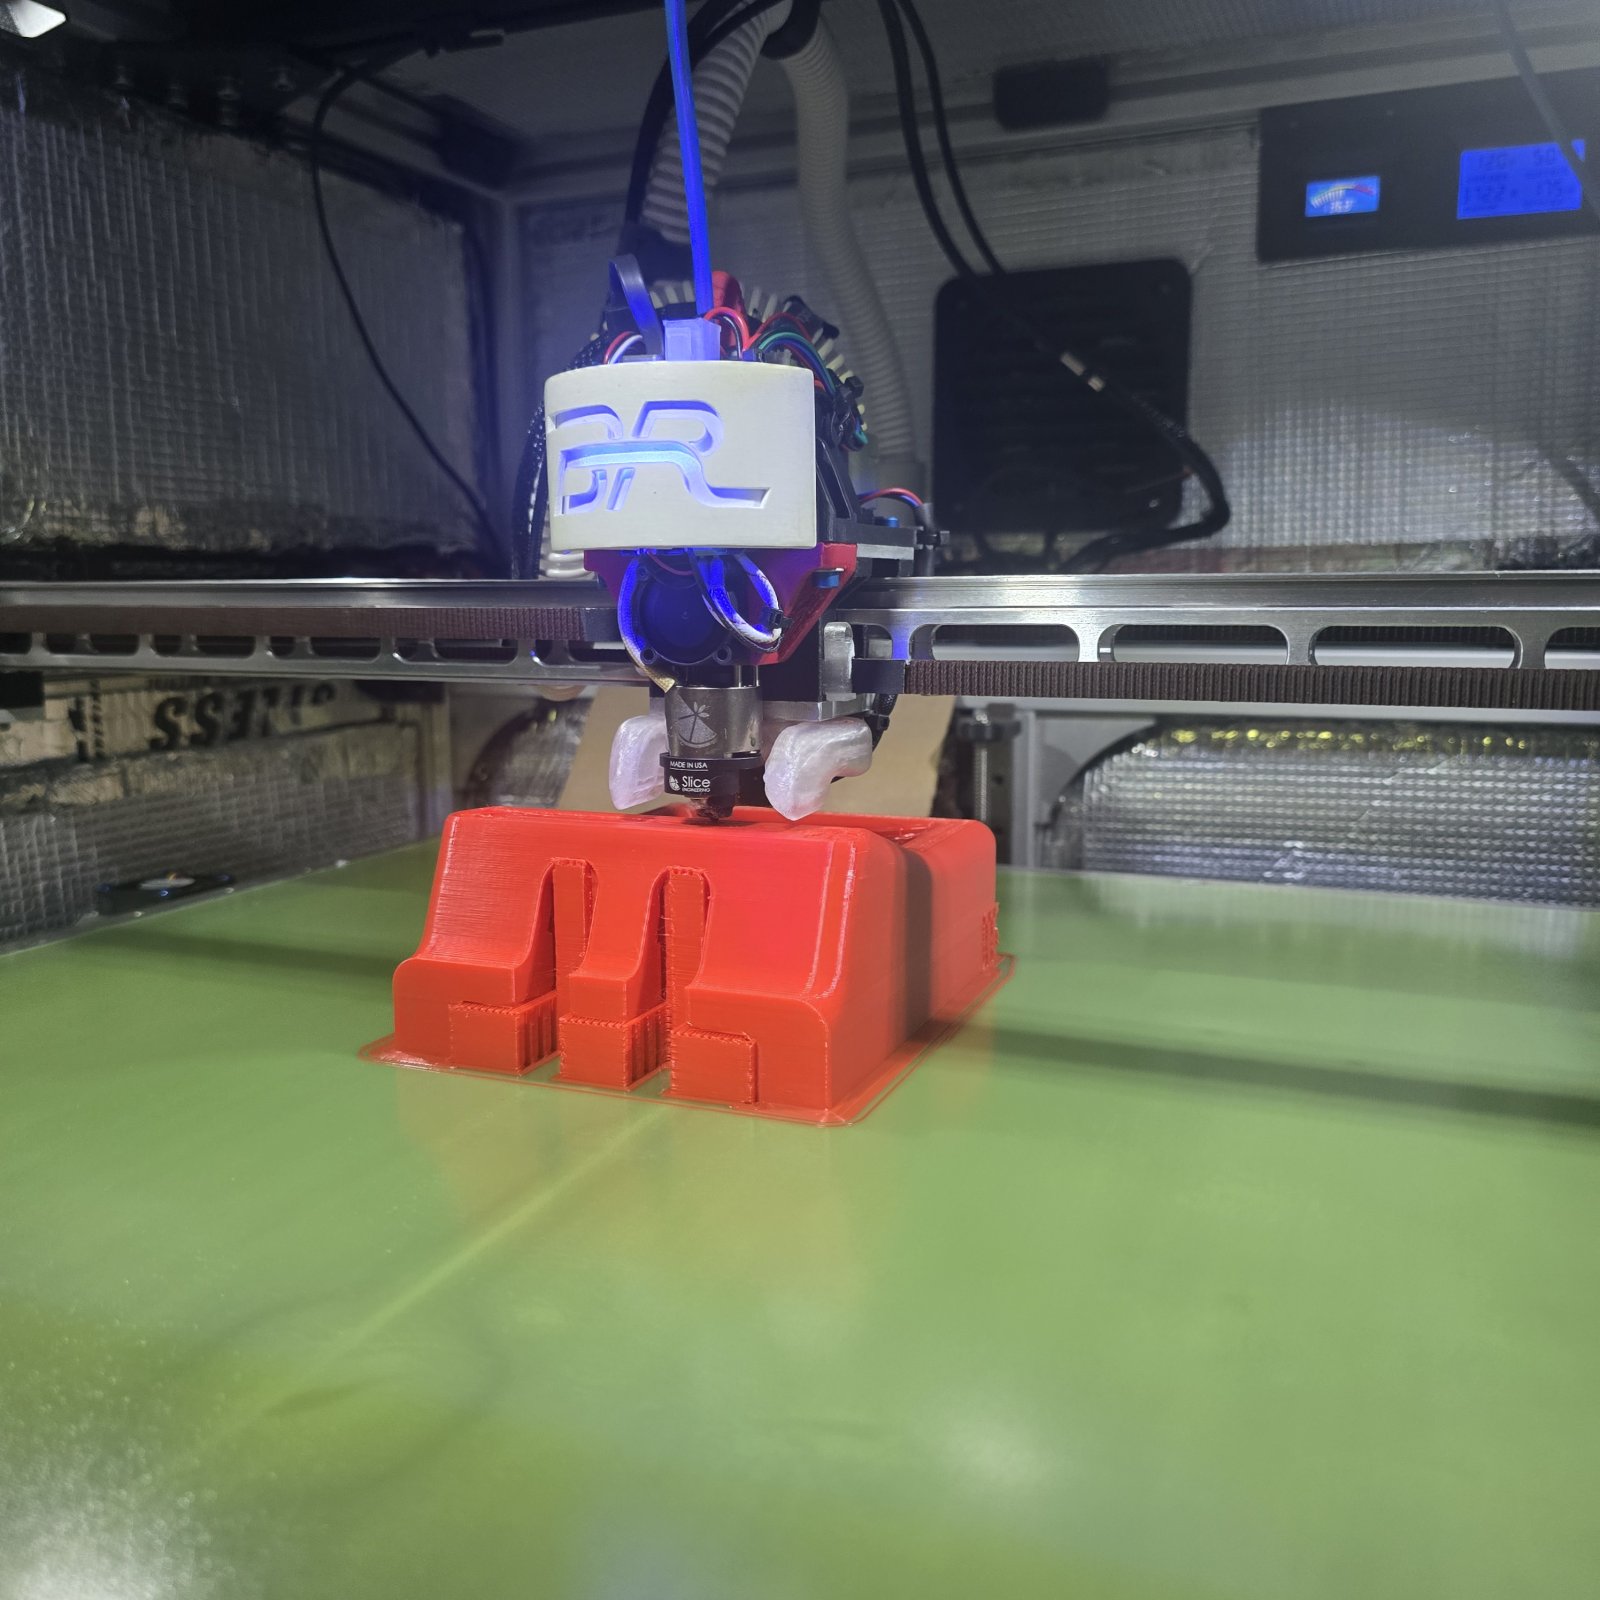
Monumental day today. I finally got my industrial printer heaters up and maintaining chamber temps for printing large ASA parts. It is successfully printing the console pieces as I type.

Ccenter console design is finished in CAD. Took a few PLA test prints and fit checks. It is a 4 piece assembly. It has a hinged, latched storage bin, a custom e-brake handle & boot, button for solenoid controlled reverse shifter gate, USB quick charging, and a canted phone tray that is viewable from the driver's seat (for using GPS maps). The entire fwd assembly is secured by high strength magnets for easy removal.
20251104_235535.jpg
20251106_195900.jpg
20251102_170719.jpg
 
David
Monumental day today. I finally got my industrial printer heaters up and maintaining chamber temps for printing large ASA parts. It is successfully printing the console pieces as I type.

Ccenter console design is finished in CAD. Took a few PLA test prints and fit checks. It is a 4 piece assembly. It has a hinged, latched storage bin, a custom e-brake handle & boot, button for solenoid controlled reverse shifter gate, USB quick charging, and a canted phone tray that is viewable from the driver's seat (for using GPS maps). The entire fwd assembly is secured by high strength magnets for easy removal. View attachment 54450View attachment 54451View attachment 54452

Amazing, If I ever pull the trigger on a goblin I will definitely like want one. Will ask to buy the stl file lol
 
Brian74
My goal from day 1 was to have these big machines, with heated chambers, that could print ASA (Acrylonitrile Styrene Acrylate) issue free. I simply fell in love with ASA at day 1... Why? because ASA prints very fast under the right conditions, has a viscosity that lends well to FDM 3D printing, and when dialed in, it is very repeatable, dimensionally accurate, requires no annealing, and has better UV resistance than any other filament. Under the right conditions, it prints with very similar characteristics as PLA. Its not brittle or overly rigid, which makes it great for roll cage clamps or parts subject to vibration. ASA relieves the need to weld things on to a Goblin frame (clamps/wire ties/fixtures) that can otherwise be 3D printed. Its also reasonably strong, but where it truly shines is automotive interior parts, or anything under frequent UV exposure. Unfortunately, to print large ASA parts requires a very controlled higher temperature environment and proper fume evacuation due to the VOC's that it emits. I redesigned these machines I built from the ground up with the primary end state goal to successfully print large ASA parts. For this we are talking insulation, multiple temperature sensors, and specialized heaters. It has been a 3 year journey of trial and error to get to the point where I figured out what works. It was more of a hope than a plan. Fortunately my armchair engineering experience has resulted in 3 machines that work exactly as planned and advertised.

I have finally gotten through the pain of getting these machines dialed in for ASA's peculiarities, and I am now seeing success. I am 2 hours away from the first attempt at an 8 hour print of the remaining piece of the parking brake / rear storage compartment. The bin and lid are already done. I should have the remaining 3 console sections printed in the next few days.

1000066423.jpg
1000066424.jpg
1000066426.jpg
1000066427.jpg
 
David
My goal from day 1 was to have these big machines, with heated chambers, that could print ASA (Acrylonitrile Styrene Acrylate) issue free. I simply fell in love with ASA at day 1... Why? because ASA prints very fast under the right conditions, has a viscosity that lends well to FDM 3D printing, and when dialed in, it is very repeatable, dimensionally accurate, requires no annealing, and has better UV resistance than any other filament. Under the right conditions, it prints with very similar characteristics as PLA. Its not brittle or overly rigid, which makes it great for roll cage clamps or parts subject to vibration. ASA relieves the need to weld things on to a Goblin frame (clamps/wire ties/fixtures) that can otherwise be 3D printed. Its also reasonably strong, but where it truly shines is automotive interior parts, or anything under frequent UV exposure. Unfortunately, to print large ASA parts requires a very controlled higher temperature environment and proper fume evacuation due to the VOC's that it emits. I redesigned these machines I built from the ground up with the primary end state goal to successfully print large ASA parts. For this we are talking insulation, multiple temperature sensors, and specialized heaters. It has been a 3 year journey of trial and error to get to the point where I figured out what works. It was more of a hope than a plan. Fortunately my armchair engineering experience has resulted in 3 machines that work exactly as planned and advertised.

I have finally gotten through the pain of getting these machines dialed in for ASA's peculiarities, and I am now seeing success. I am 2 hours away from the first attempt at an 8 hour print of the remaining piece of the parking brake / rear storage compartment. The bin and lid are already done. I should have the remaining 3 console sections printed in the next few days.

View attachment 54485View attachment 54486View attachment 54487View attachment 54488

Thats sweet, I use ASA for all parts for exterior use. Are you planning to sell the center console?
 
Brian74
Stripped the interior back out today to start on the tunnel cover. I cut some small slots in the tunnel to provide room for the latch hardware. I got everything cleaned up and prepped to weld the backing plates in for the latches.

Where I used to use cardboard and 2D drawings, I am now using CAD and 3D printing, which is great for mockups, making fitting jigs and drill marking holes. Tomorrow I will weld the backing plates in and drill/fit the latches on the tunnel. I hope these tiny latches hold up well. I think they should; they are actually rated at 200 lbs each and I am using 6 of them on the shifter portion of the tunnel cover.

After a few print iterations and adjustments, I finally got the center console parts printed to my liking. I broke up the 2nd section into a 2 piece assembly where it now has a separate top insert, which could be done in aluminum and would look really sharp. Whenever my laser cutter shows up I will make that my first project.

I got my aluminum floorboards out as well, which will give me the opportunity to sound deaden them and determine how I will mount them. The subwoofer makes them rattle horribly.

I hope to have the center console fully installed and wired in by the end of this weekend.
1000066590.jpg
1000066591.jpg
1000066593.jpg
1000066575.jpg
1000066576.jpg
1000066592.jpg
1000066595.jpg
1000066574.jpg
 
Brian74
I finished installing all 14 latches on the tunnel cover. These things work excellent and allow the tunnel cover to be fully removed in less than a minute. The center console is done, other than one minor design update to add some clearance for the seat belt. I will wire in the parking brake, 12v outlet, and reverse shift gate solenoid next. I am thinking of designing some cupholders that bolt to the side rails. I will have to do some more laser scanning for that project.

1000066613.jpg
1000066615.jpg
1000066617.jpg
1000066620.jpg
 
David
Its a Pioneer 1400 NEX. Great unit; I have one in my daily driver as well.

Nice will probably do something similar. I want to find a headunit or tablet I can connect to OBD to display info. It looks like your using a Haltec or is it something similar?
 
Back
Top