
-
We've upgraded and reskinned the forum. Notice something off? Email us at [email protected] and we'll fix it.
You are using an out of date browser. It may not display this or other websites correctly.
You should upgrade or use an alternative browser.
You should upgrade or use an alternative browser.
V1 Fenix's Goblin #461 - 2010 Base Auto


Fenix Nexen
Well-Known Member

- Fenix Nexen Well-Known Member
almost done with the harness videos, half way through the last one
 www.youtube.com
- YouTube
Enjoy the videos and music you love, upload original content, and share it all with friends, family, and the world on YouTube.
www.youtube.com
Fenix Nexen
Well-Known Member
- Fenix Nexen Well-Known Member
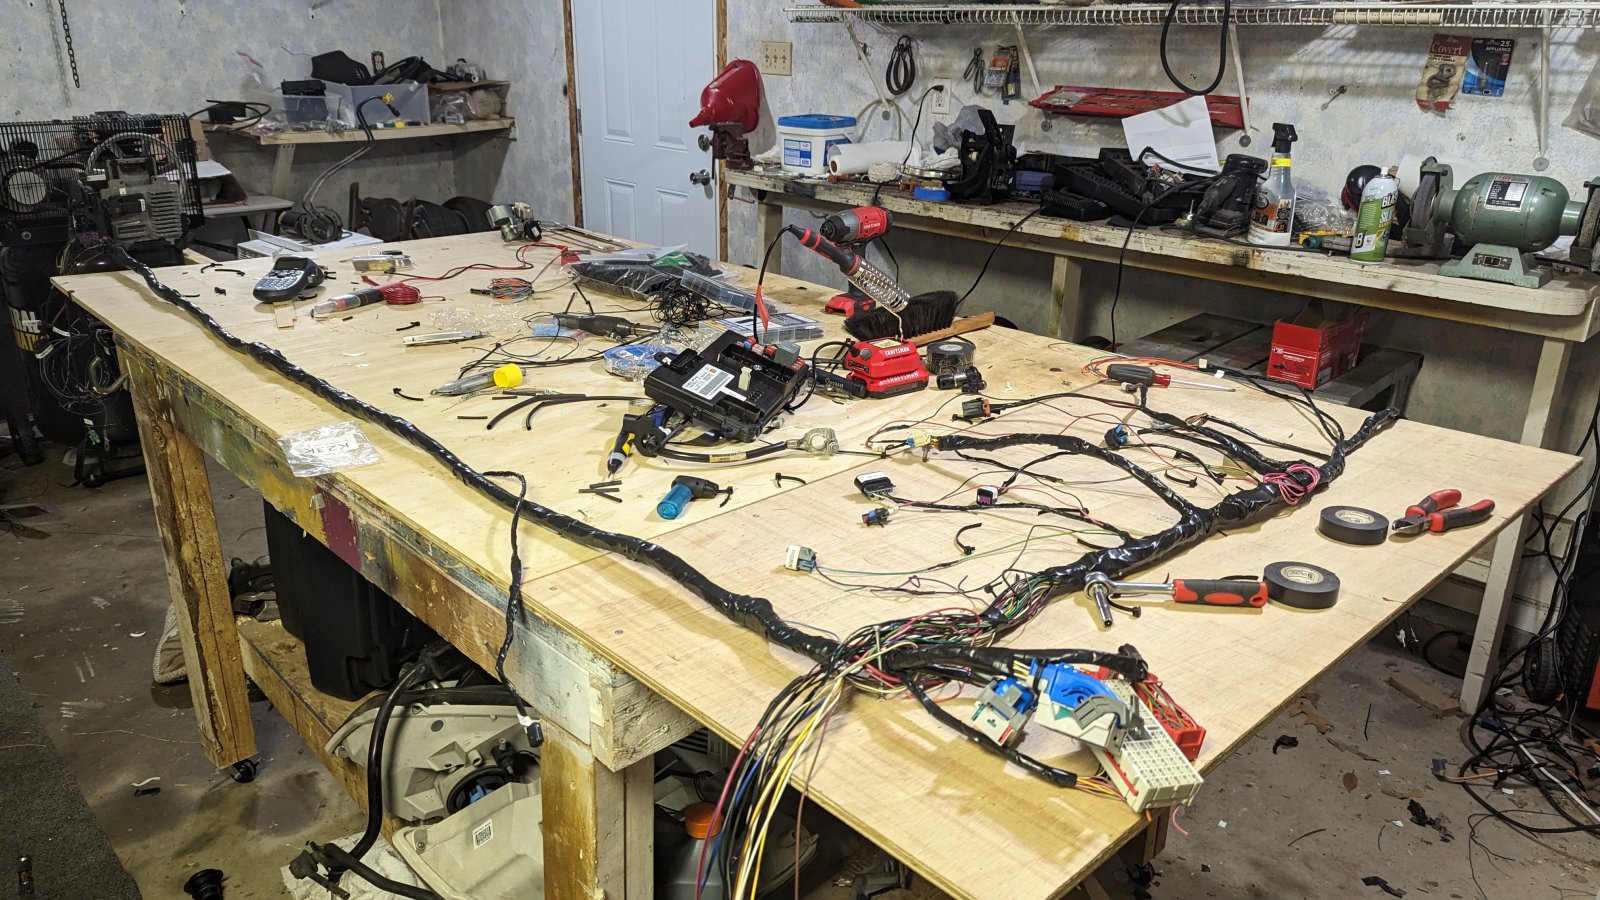
Wrapping up the harness, will probably regret it later. It's very satisfying though. If I did the harness properly then that'd be awesome. I have two purple wires exposed in the back and front, I've been thinking of having underglow. Got the 12v accessory port wires too and the extended shifter wires. I'm off work Friday, looking forward to putting stuff in the frame. Really thinking of detailing the engine since it has aluminum corrosion. White spots.
Fenix Nexen
Well-Known Member
- Fenix Nexen Well-Known Member
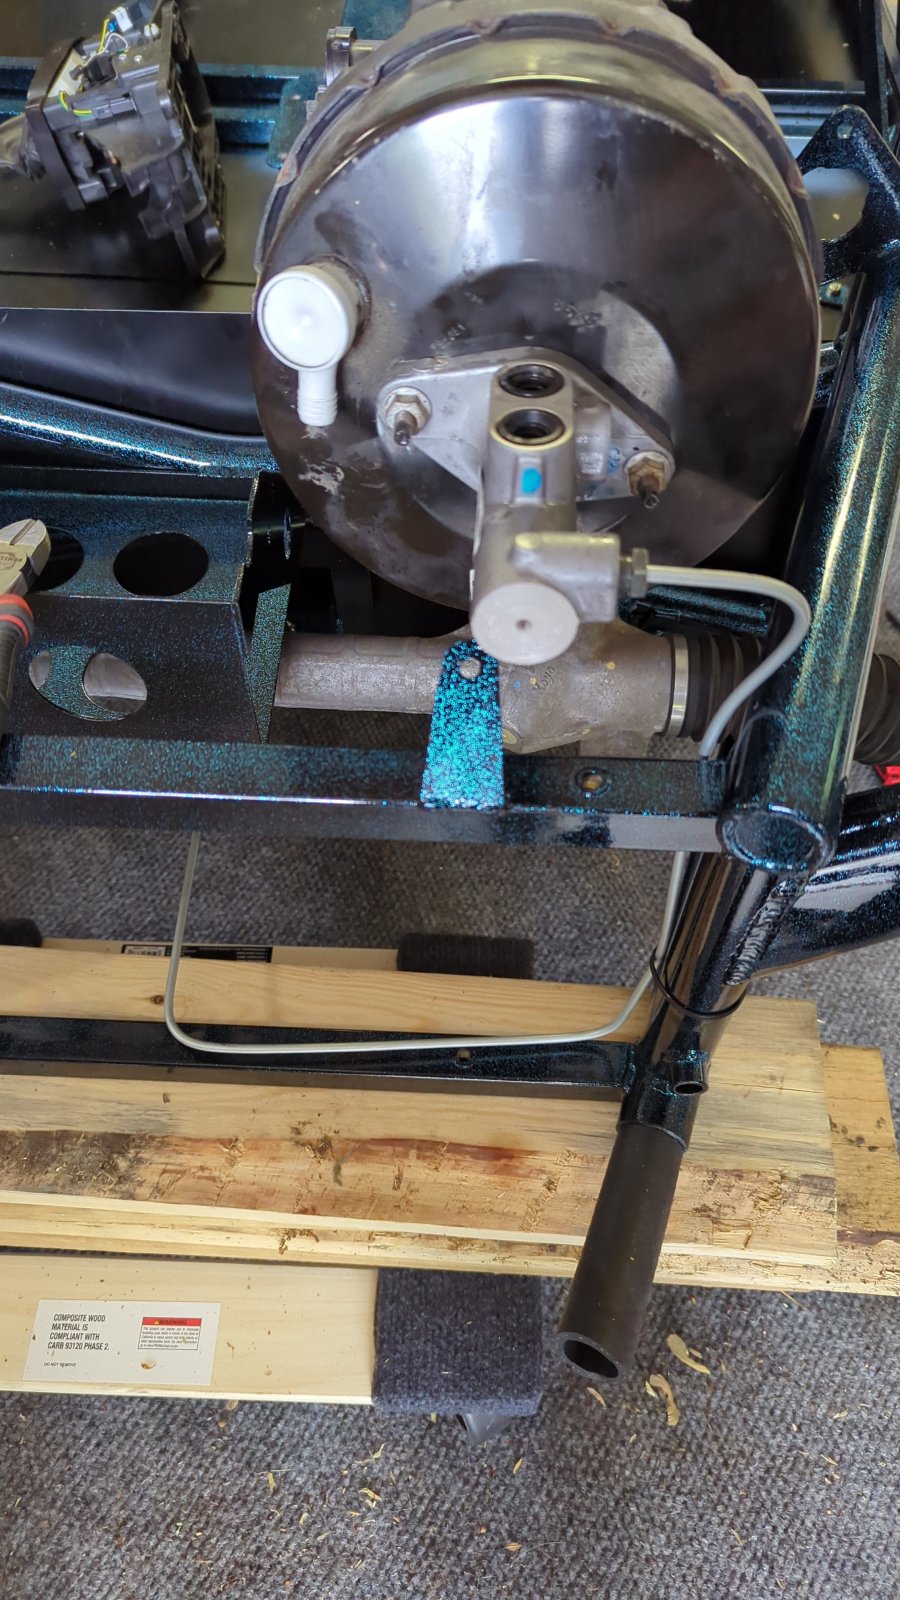
Brake line is too long at this section.. what do I do?
- Gtstorey Goblin Guru
Common issue. It really comes down to make it work. It won't always land exactly where the videos show. You can sometimes make some gradual bends in the tunnel without the tube bender. I think I made mine swap sides several times in the tunnel to take up some of the excess length.


- snirtman Well-Known Member
Dittos here. My brake line was too long fore/aft and too short up/down. I zig-zag'd it 3-4 times in the tunnel to take up the extra length. You can kind of see the start of the zig-zag here:This would probably be my approach as well.
Just bend it by hand. Be gentle, with gradual bends.

SmsDetroit
Goblin Guru

- SmsDetroit Goblin Guru
Just don’t attach it on top of the of the square tube. That’s where the heat exchanger sits
Fenix Nexen
Well-Known Member
- Fenix Nexen Well-Known Member
I went with this. And said **** trying to screw the lines in and used zip ties instead.Common issue. It really comes down to make it work. It won't always land exactly where the videos show. You can sometimes make some gradual bends in the tunnel without the tube bender. I think I made mine swap sides several times in the tunnel to take up some of the excess length.

Goblinfanclub1234
Goblin Guru

- Goblinfanclub1234 Goblin Guru
give one of these spring loaded center punches a try for the self drilling screws 
Fenix Nexen
Well-Known Member
- Fenix Nexen Well-Known Member
tried a center punch and i guess in general using these screws sucks so much
this one wouldnt tap, got hot enough to burn me, i had to get a drill out, which made it easy to get the screw in, but now its loose in the hole, used copper wiring as a spacer, couldnt unthread the screw
it was only after this that i remembered i ran a ground cable for the rad so this little messing up the frame adventure was pretty pointless
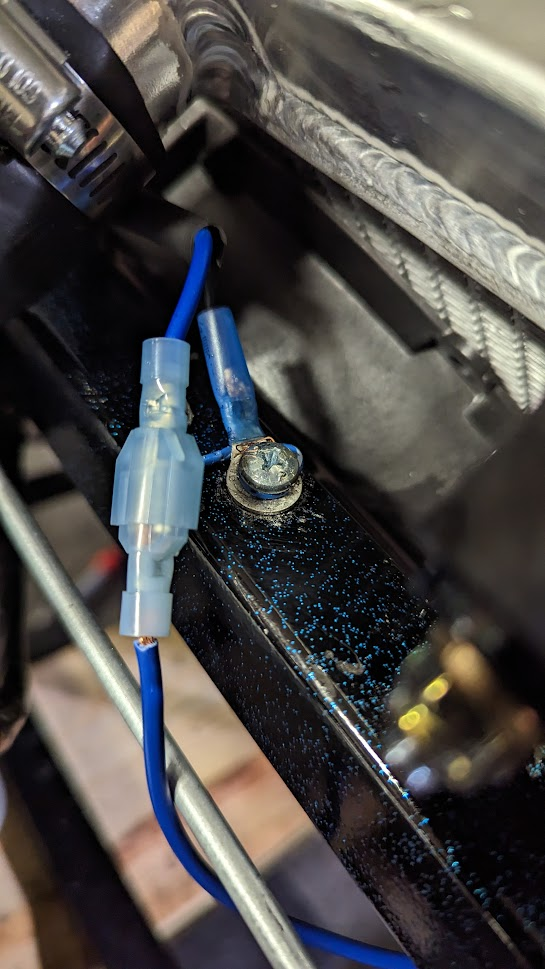
this one wouldnt tap, got hot enough to burn me, i had to get a drill out, which made it easy to get the screw in, but now its loose in the hole, used copper wiring as a spacer, couldnt unthread the screw
it was only after this that i remembered i ran a ground cable for the rad so this little messing up the frame adventure was pretty pointless
Fenix Nexen
Well-Known Member
- Fenix Nexen Well-Known Member
I hope you clean off the paint or powder coating once you get that ground properly secured.
Brushed off the metal shavings and used windo weld on the scratches the drill made from slipping off the screw, this will all be hidden when I get the hood on and the screw is snug and I checked the ground with a tester
Last edited:

Desert Sasqwatch
Bigfoot Goblin

- Desert Sasqwatch Bigfoot Goblin
Oh no it's not, we all know it's there now and will pointing it out to everyone we meet!!! LOL!!! Really, just kidding...every Goblin has goofups and dings and scratches that happen during the build. When well hidden or camouflaged or artfully touched up no one will notice - and that car show trophy will look good on the shelf in your garage! 

Fenix Nexen
Well-Known Member
- Fenix Nexen Well-Known Member
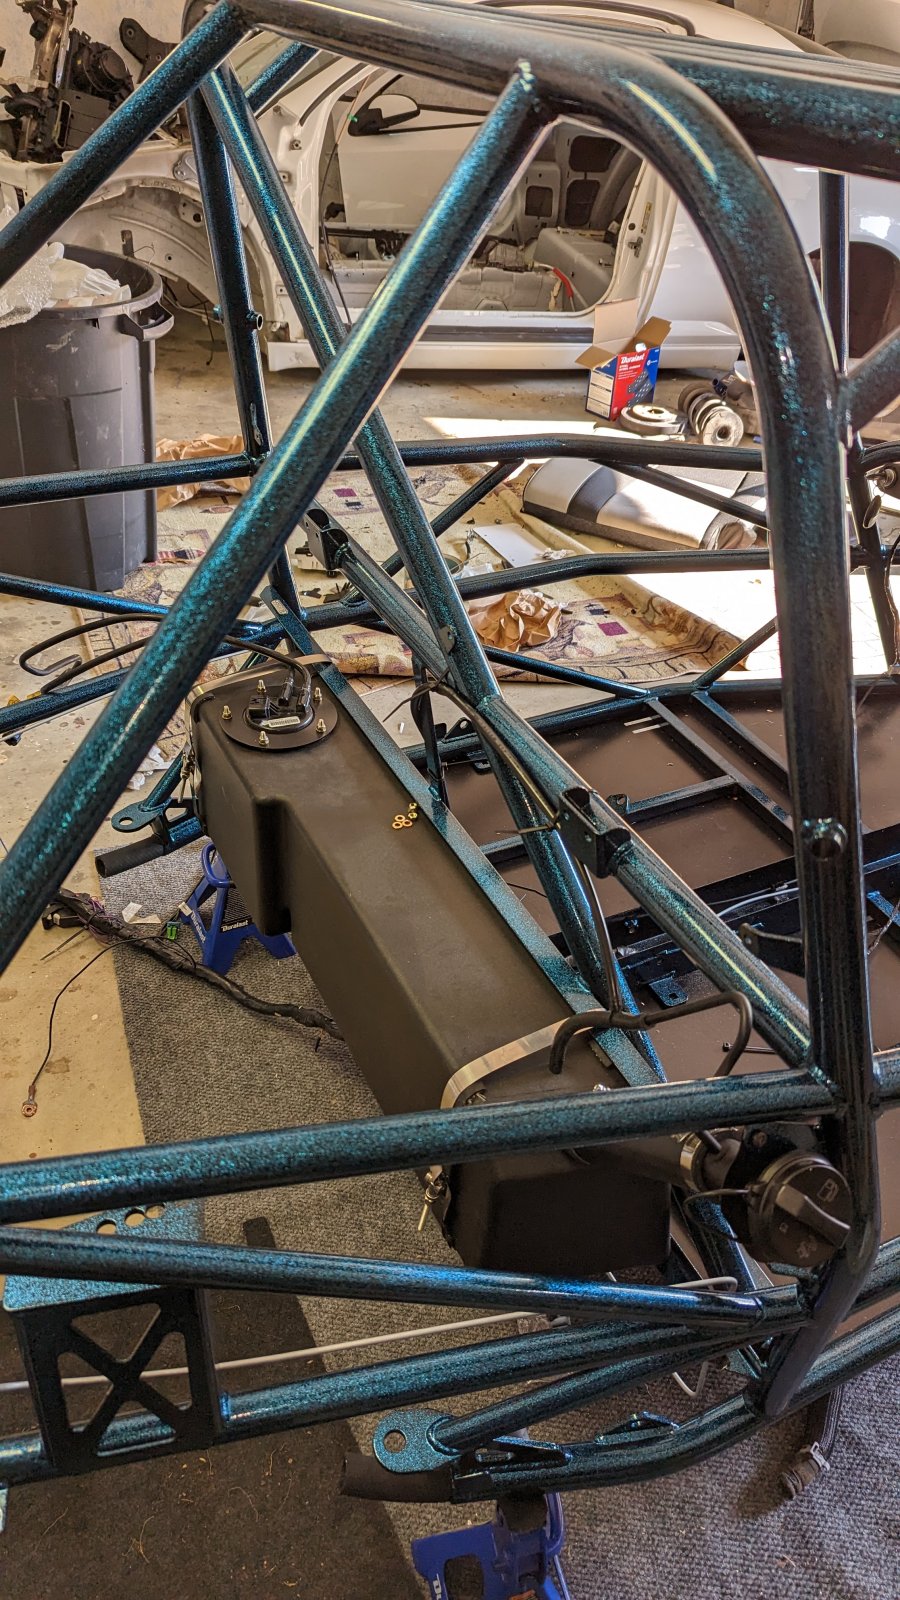
Gas tank is in, as instructed the Allen is snug around the pump ring. Will probably call it for today.
Fenix Nexen
Well-Known Member
- Fenix Nexen Well-Known Member
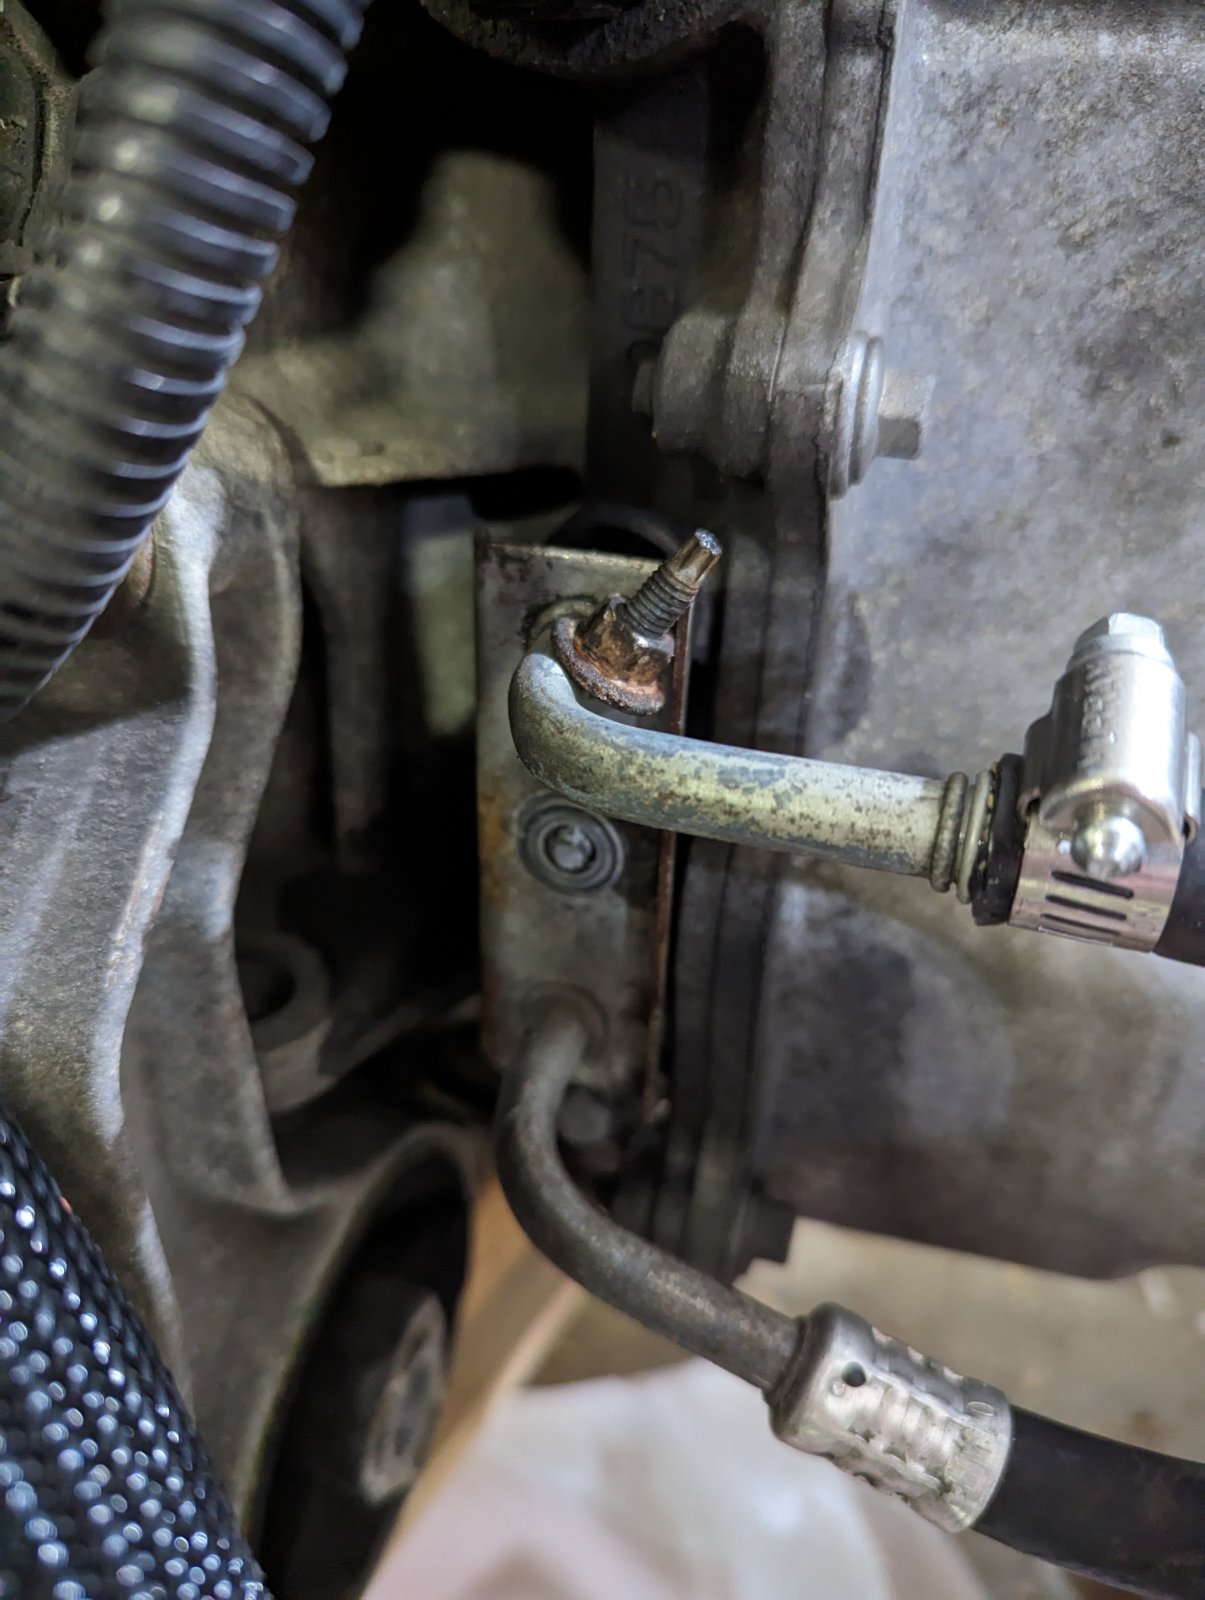
How do I fix this? Broke off the bolt that holds the trans line loop

Joebob
Goblin Guru

- Joebob Goblin Guru
I would jack up that side of the chassis to make sure much fluid doesn't flow out.
Remove the cooler hoses by pulling straight out.
See if you can get a vice grip or stud extractor to remove the stud.
Replace with bolt as you have to have something hold the cooler to the tranny.
Go easy on the Wheaties next time.
Joe