Dan Perry - 4" Extended Street
- Thread starter DanPerryy
- Start date
JSATX
Goblin Guru
Wow! Are you building a goblin or an S Class?? Haha. What's next, a roof??Today - rear view mirror with homelink garage door openers, compass. Ran wire in frame hoop
View attachment 1061
View attachment 1062
DanPerryy
Well-Known Member
Did some cleanup of a lot of loose ends on Saturday. Got the heated seats hooked up to the dash, got the mirror connectors coupled together. I had never covered my tunnel as I was still figuraing out how to get the HVAC lines and the heater lines up to the front of the car. What I did was add 4 pieces of conduit through the tunnel. The conduit is used to run the real pipes - make a passageway from the front to the back of the car. I'm not going to run any liquid through these, just pipes for the liquids, gases. I could run 4 pipes through my tunnel because I don't have a shifter going through the tunnel.
3 of the conduits are electrical thin wall EMT. 2 of these are for the heater, and one for the pressure side of the HVAC (the hot side - no condensation) . The 4th conduit was a piece of thin 3/4" PVC for sprinklers (schedule 20). This is to hopefully let the condensation from the low pressure cold side of the AC not set in the tunnel itself.
Then Saturday evening my wife, my 10 year old 120 lb grandson and I took a real nice long ride. It was quite comfortable.
I enjoyed reading through your build logs. I'm planning on heat/ac for my build as well, and I'm wondering if you can share any further photos of how you installed yours/your installed setup, when you get a chance. It'll help give me some ideas while I pre-plan my build. I'll also likely be going with an extended track frame for comfort sake, so your build was encouraging to see.
DanPerryy
Well-Known Member
On the backside - engine AC compressor, there are two types, one larger in diameter and one smaller (harder to find) - mine is the larger one. The engine in a automatic car is forward of the engine in a manual by 1 1/2 inches. While either compressor fits, the smaller one has a bit more room. With that being said, while the compressor fits, the stock fittings on the top of the compressor don't fit. Right now I am planning on tapping the inlet and outlets from the compressor and using some brass elbows and then using copper piping with flange fittings. I will let you see how this is coming.
Briann1177
Goblin Guru
Dan, what kind of tow bar you using? I really like that setup as a possible option for me.
DanPerryy
Well-Known Member
Lonny bent the tubes for me. I ground and cut the ends so they fit the heim joints I installed on the front end. I made them so that they would allow the tow bar to fold up and stay vertical (bottom out on the heim joint) so I could position the car with the tow bar in place. The tow bar comes off with just two pins. It is really easy to put on and off and nearly all the weight is in the safety chain. Next time I would use smaller chain.
DanPerryy
Well-Known Member
I haven't posted about my own build for quite some time. I have been enjoying driving it - it is a kick in the butt. My grand kids love it as does my wife!
While I have a number of things left to do, none of them are keeping me off the road. I took it to a little car show in the Cabella's parking lot last weekend. Lots of people gathered around with a lot of questions.
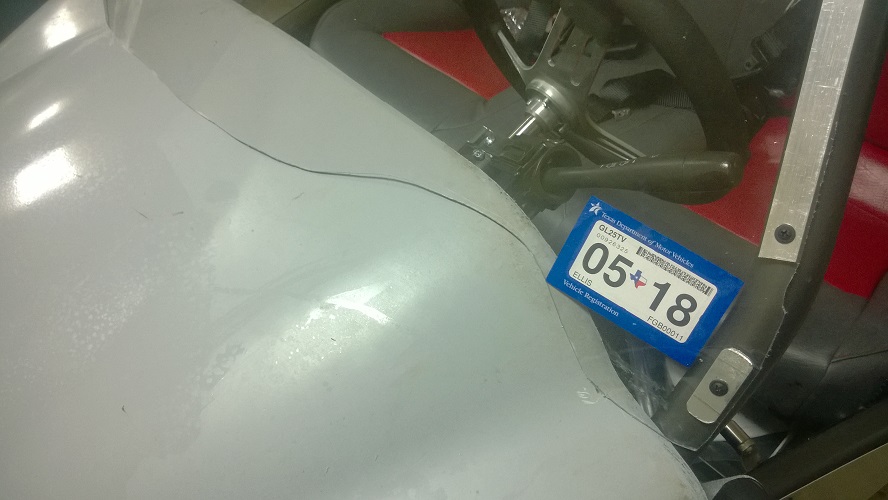
I have yet to paint my body panels. My windshield is attached to the front roll cage hoop and not to the hood. As of now, I plan to cut off a small portion of the hood at the passenger compartment for a cowl. I will attach the cowl piece more permanently to the frame and windshield. Then the balance of the hood will attach to the cowl and the front clips so I can remove it easily. A design in progress.
This entire effort would have not been necessary if I did not have the full roll cage. What I did not like about attaching the windshield to the hood with the roll cage was the angles of the windshield do no match those of the roll cage. Without a roll cage, it is not a problem.
The body painting has to wait for this.
While I have a number of things left to do, none of them are keeping me off the road. I took it to a little car show in the Cabella's parking lot last weekend. Lots of people gathered around with a lot of questions.
I have yet to paint my body panels. My windshield is attached to the front roll cage hoop and not to the hood. As of now, I plan to cut off a small portion of the hood at the passenger compartment for a cowl. I will attach the cowl piece more permanently to the frame and windshield. Then the balance of the hood will attach to the cowl and the front clips so I can remove it easily. A design in progress.
This entire effort would have not been necessary if I did not have the full roll cage. What I did not like about attaching the windshield to the hood with the roll cage was the angles of the windshield do no match those of the roll cage. Without a roll cage, it is not a problem.
The body painting has to wait for this.
DanPerryy
Well-Known Member
I was asked to post some pictures of my windshield. I did not want a flat windshield - the only car I ever seen with a flat windshield that looked good was an Lotus Esprit. I also di not like the multiple angles of the a-pillars and the DF windshield.
Mine windshield is Lexan. the hardest part was getting it to match the hood. I made a cardboard template and then cut the windshield out with a jigsaw. It is not perfect. I mounted it to the A-Pillars and the top of the cage. The hood goes under it - but .... it really scratches the hood in removing it and I plan on cutting 6" off the backside of the hood to make a cowl and (more) permanently attach the windshield to the cowl and to the car. Put clips on the balance of the hood to connect it to the cowl. I then can get the hood off and on easily. If I ever need to get under the cowl, I'll take it off together with the windshield. The windshield does come on and off pretty easily. I am planning on raising the back side of the hood just a bit and makeing a more perfect junction between the windshiled and the hood. If not, I'll get a new piece of Lexan and then I can get it much closer using the existing one as a template.
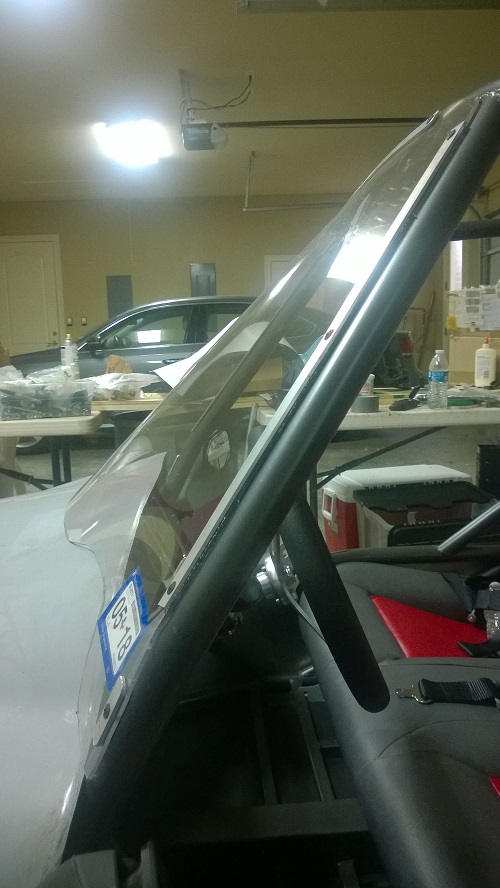
 The flat windshield. You would NEVER never guess that this is a flat piece of glass!!!
Mine windshield is Lexan. the hardest part was getting it to match the hood. I made a cardboard template and then cut the windshield out with a jigsaw. It is not perfect. I mounted it to the A-Pillars and the top of the cage. The hood goes under it - but .... it really scratches the hood in removing it and I plan on cutting 6" off the backside of the hood to make a cowl and (more) permanently attach the windshield to the cowl and to the car. Put clips on the balance of the hood to connect it to the cowl. I then can get the hood off and on easily. If I ever need to get under the cowl, I'll take it off together with the windshield. The windshield does come on and off pretty easily. I am planning on raising the back side of the hood just a bit and makeing a more perfect junction between the windshiled and the hood. If not, I'll get a new piece of Lexan and then I can get it much closer using the existing one as a template.
DanPerryy
Well-Known Member
Haven't worked on the car for a while. Busy summer. Worked on the windshield today, fits a lot better. Getting ready for the hood modification.
I recollected the discussion on alignment and initial setup. Here is how mine wound up for the initial setup. The top king pin heim joint all the way in. This allows setting maximum negative camber. The top A arm rear heim joint all the way in. This allows adjusting the top front heim joint to to give more caster (a recomendation from Lonny). On mine the top front heim joint has 5 threads showing from the lock nut.
Once the top is set like this the rest of the alignment can be done just modifying the bottom A arm settings. The bottom A arm heims front and rear on my car are about 3/8" of an inch of thread (outside the lock nut). By setting these equal (and out a little bit because I could not get enough camber with them all the way in) it makes setting the caster just by modifying the top front A arm heim joint if needed.
That just leaves the bottom king pin heim joint to set the proper camber.
Lastly set the toe in.
It took me a while to figure out how best to do it. I had it together and apart many times but once I figured out to get some base setup to minimize the remaining adjustments points it was real easy,.
DanPerryy
Well-Known Member
Mounting the side skins - This turns out to be one of the more difficult tasks.
It turns out my hood did not need to cut to work with my windshield. I will post a picture later. Still working on it.
I modified my instrument cluster, removing the bottom right mounting point and putting a long spacer in the top right so the cluster points at my face. I could not see the turn signal indicators with it pointing longitudinally.
- I figured that I would self tap screw mine into place (not rivet)
- I wanted to be able to remove them easily
- Getting them aligned properly is a bit difficult
- You can attach to the top rail (mid rail) on the frame anywhere
- No so on the bottom - the coolant hoses
- Attaching in multiple places is NOT a good idea, it deforms the aluminum
- Best to think of the side skins as "hanging" from just a few places - not deforming them
- Using the cross members to attach the bottom is not good, they are recessed from the bottom tube
- Rattling (vibrating) is an issue
- I put insulting (sticky back) weather stripping 3/8" by 3/8" on my panels where they were in contact with the frame
- On some cars Adam and Lonny RTV'ed (I think) to the frame
It turns out my hood did not need to cut to work with my windshield. I will post a picture later. Still working on it.
I modified my instrument cluster, removing the bottom right mounting point and putting a long spacer in the top right so the cluster points at my face. I could not see the turn signal indicators with it pointing longitudinally.
k.rollin
Goblin Guru
There doesn't need to be a hanging D-ring. The dzus fasteners that we used for the panels on our Baja SAE cars just had a coin slot in the heads. This isn't the best picture, but you can kind of get the idea.That's what I used on my track bikes and they work good but I'd you don't mind a little dring hanging


Last edited:
Karter2026
Goblin Guru
If you can find the 3M brand VHB tape you should have no problem with it staying inplace.I wonder if a guy could use the good 3M double-sided tape for much of it and a few screws or rivets where available. I know it sounds junky, but my all aluminum trailer uses nothing but tape for the aluminum panels and I never had a problem with them.
View attachment 1724