Brian's City Goblin-06/Crate MotorTC #61

Brian74

Goblin Guru
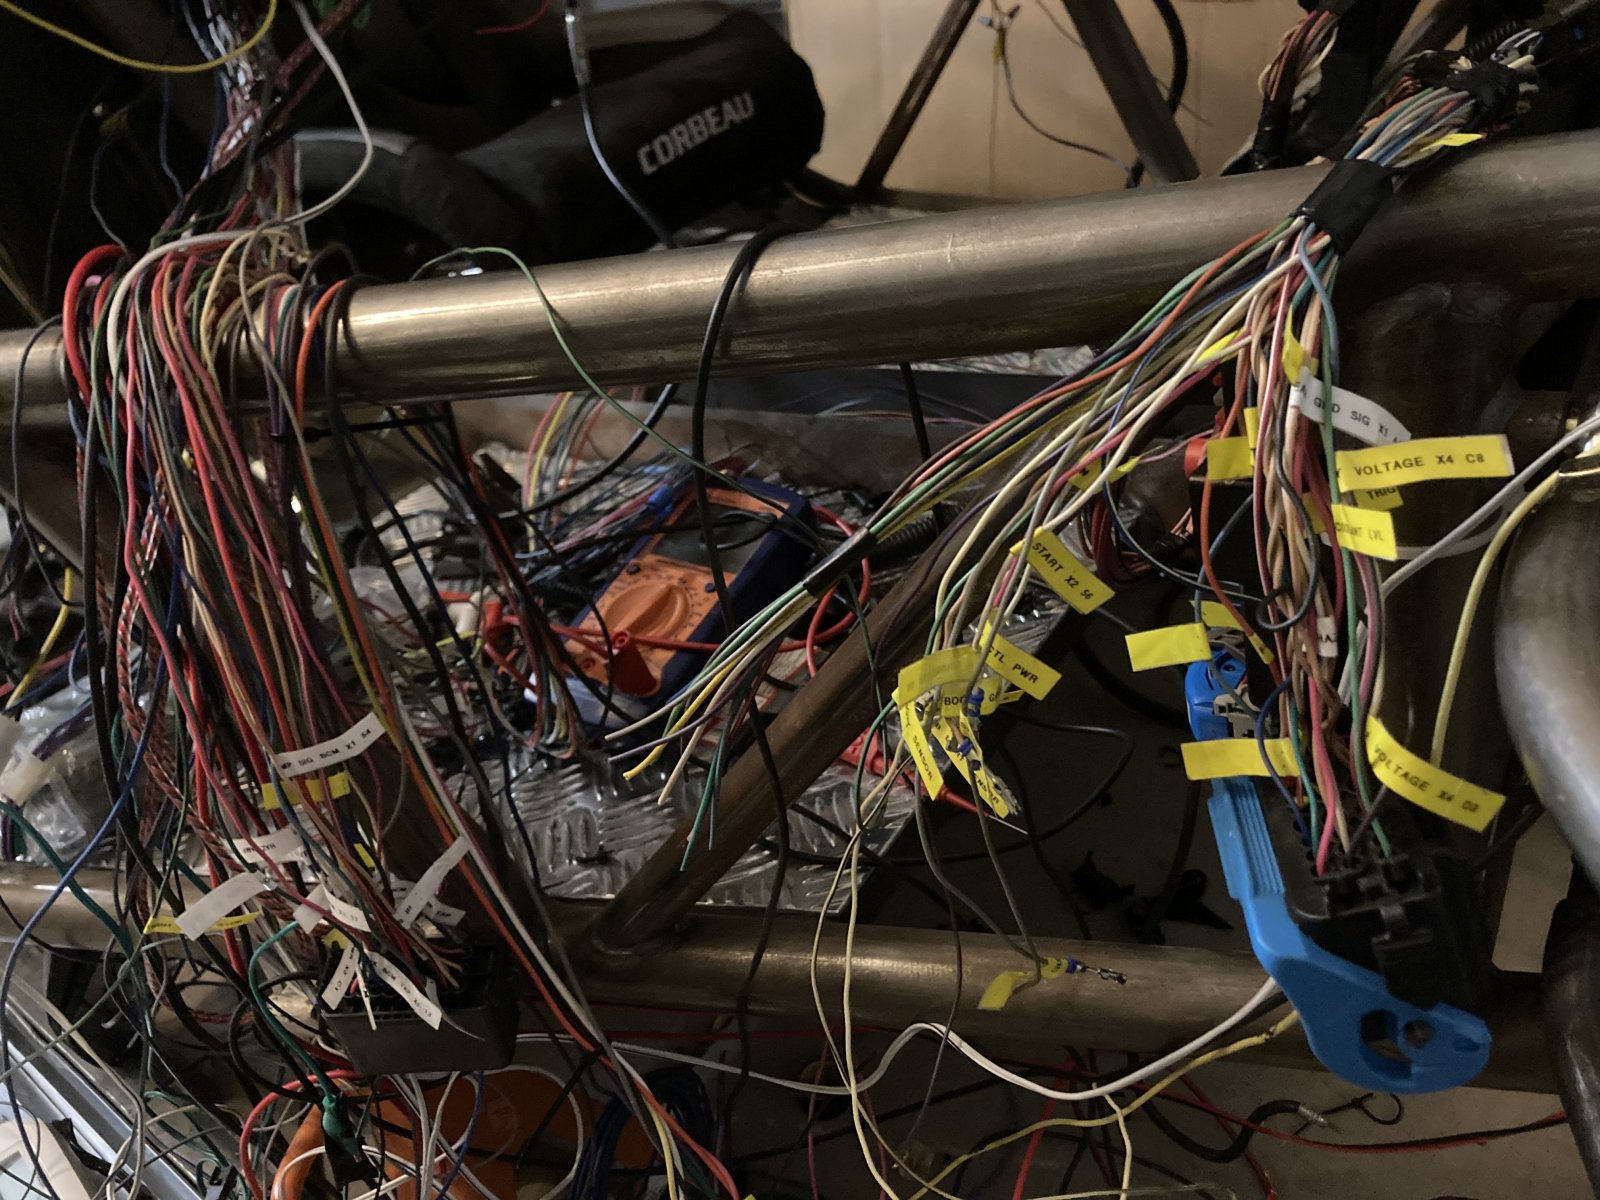
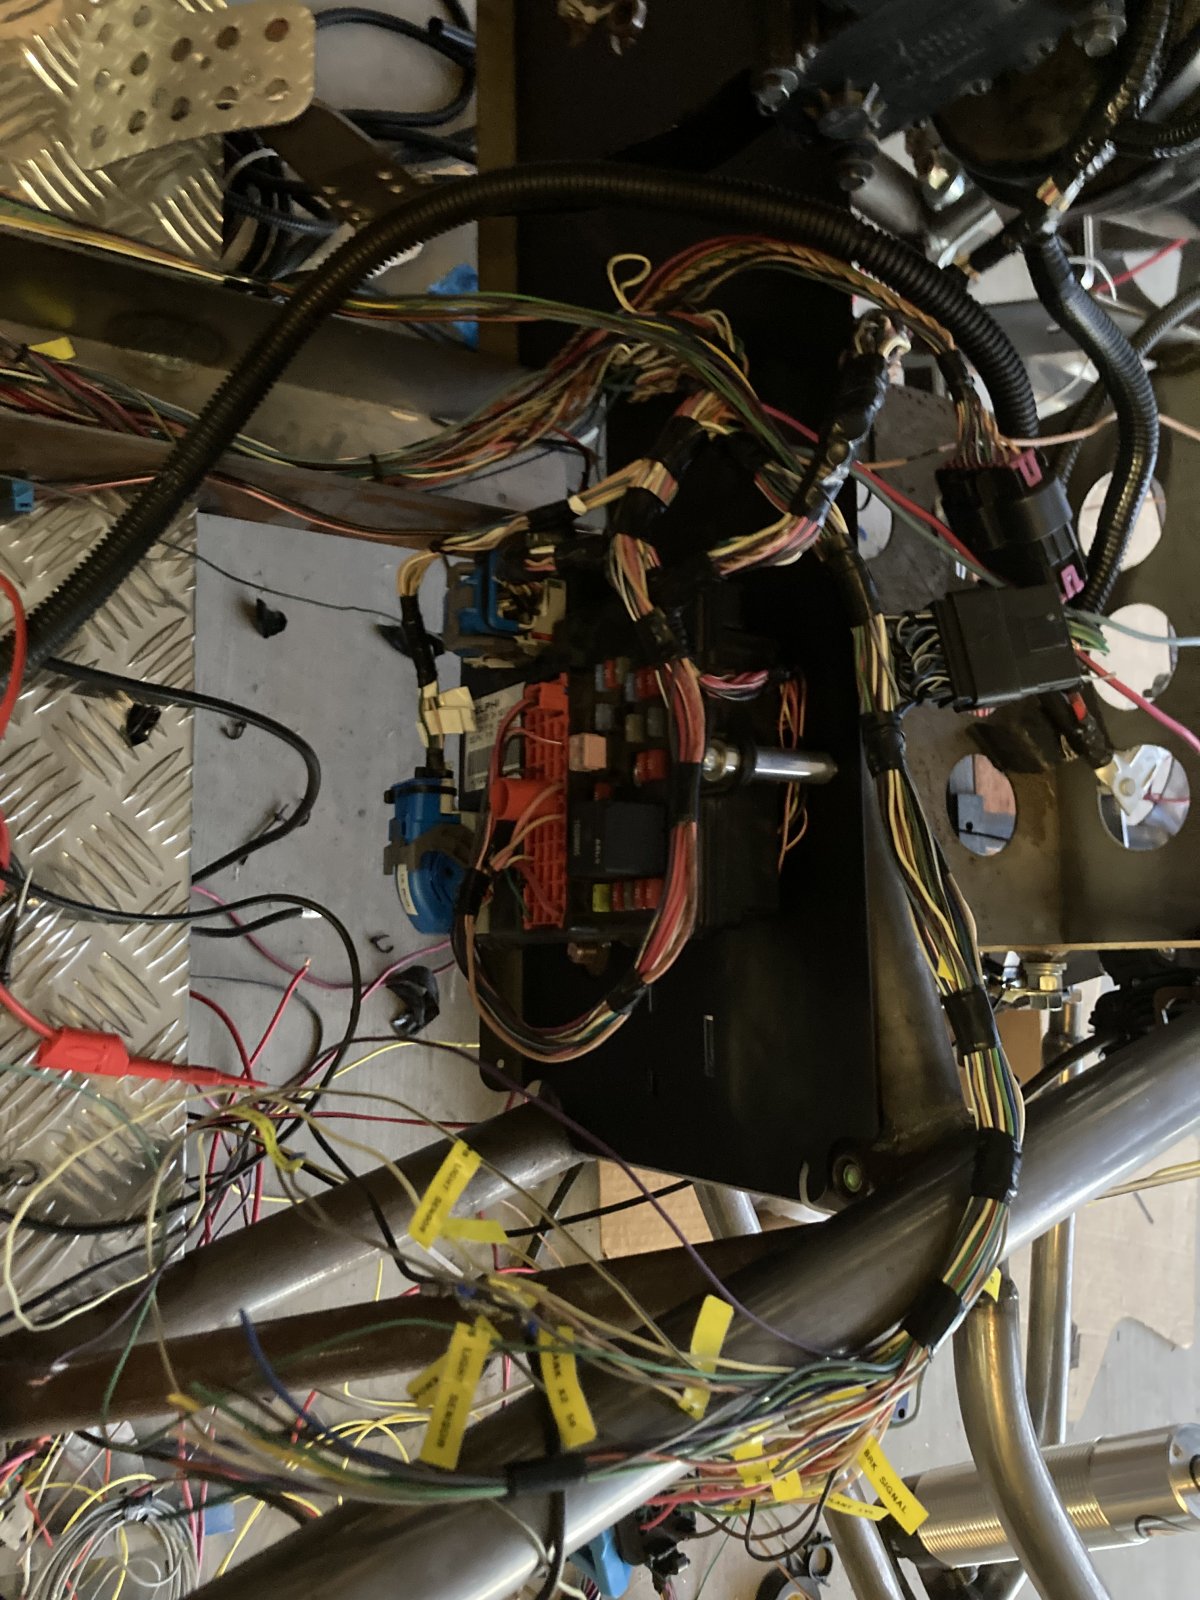
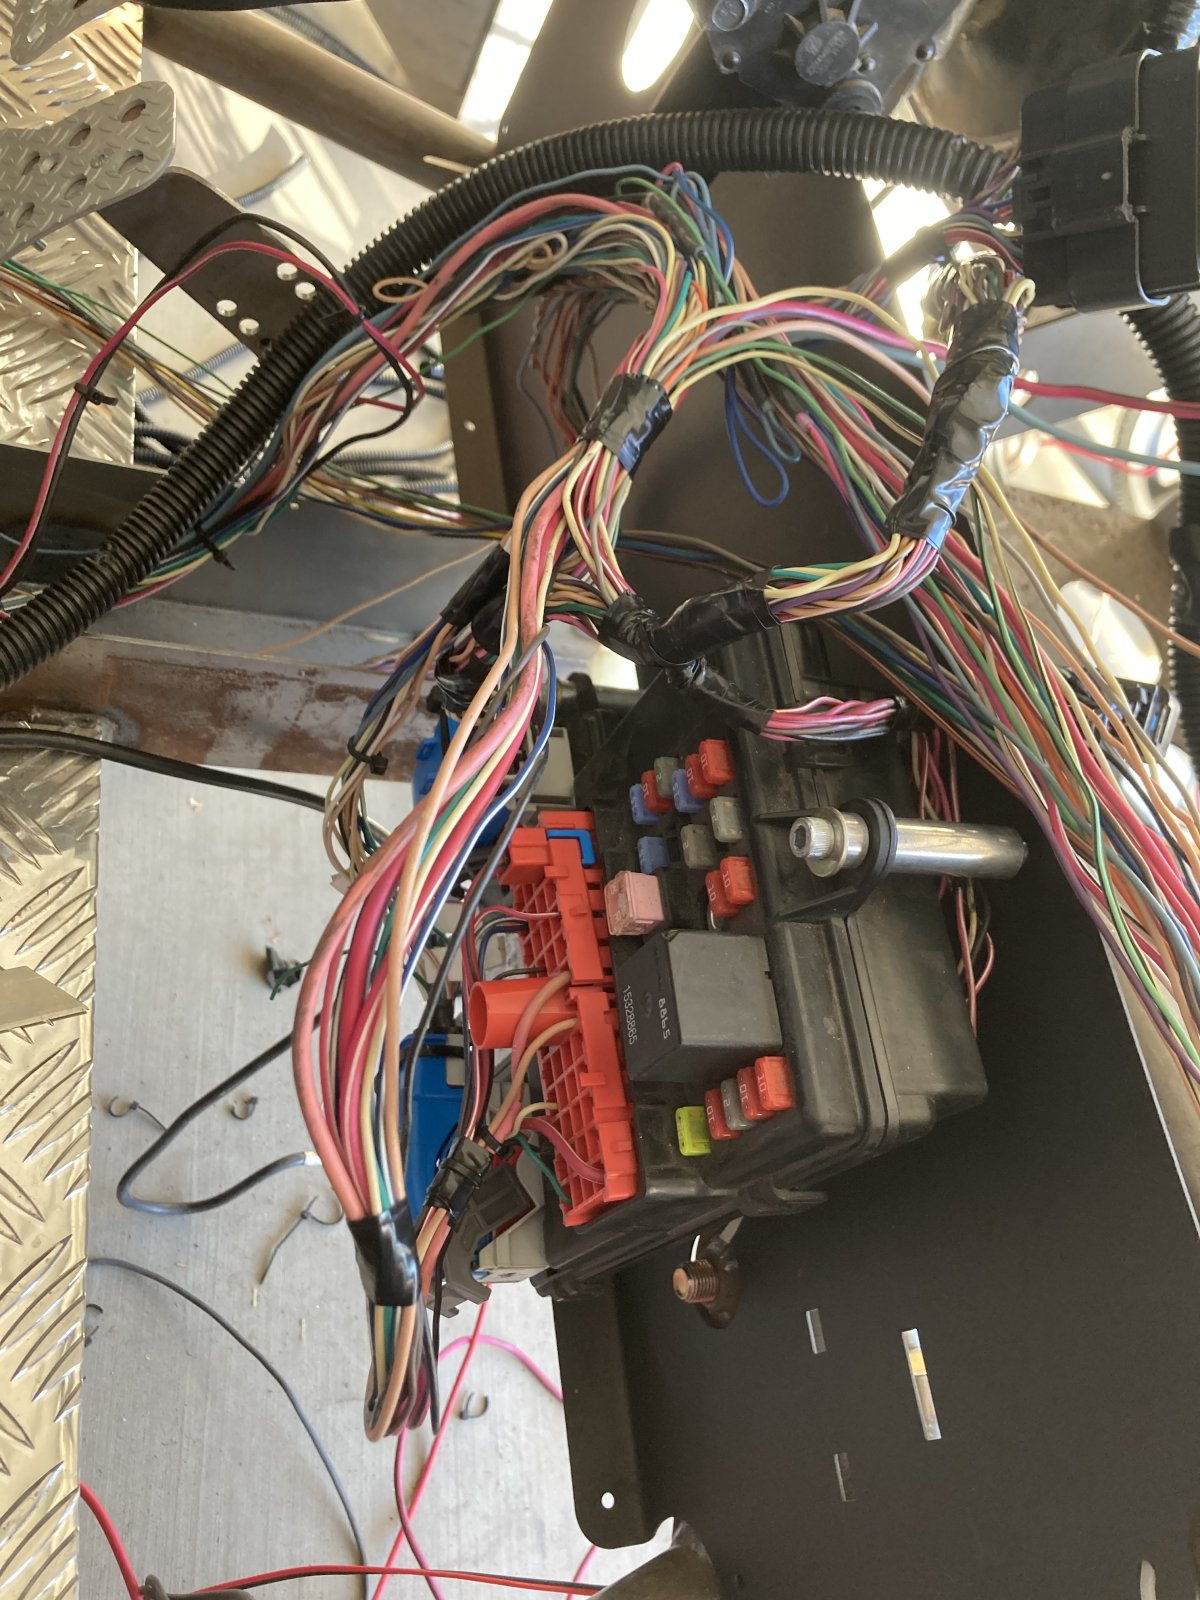
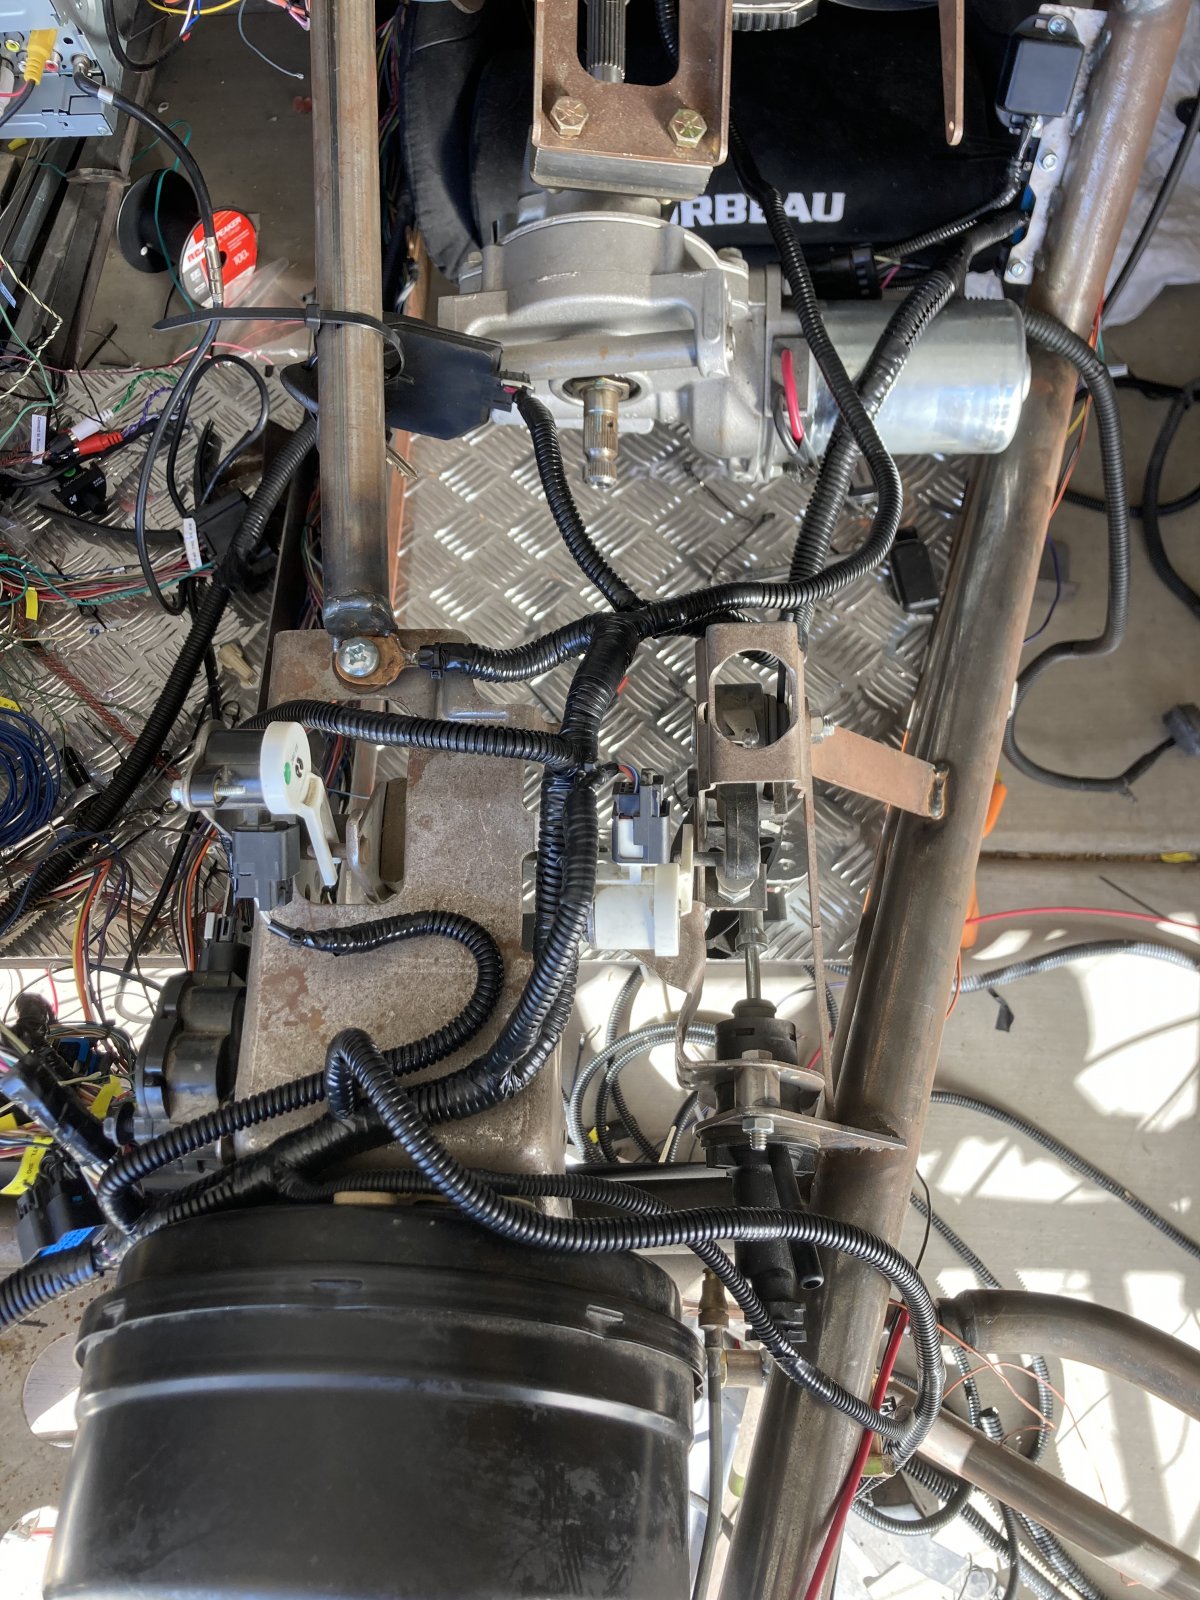
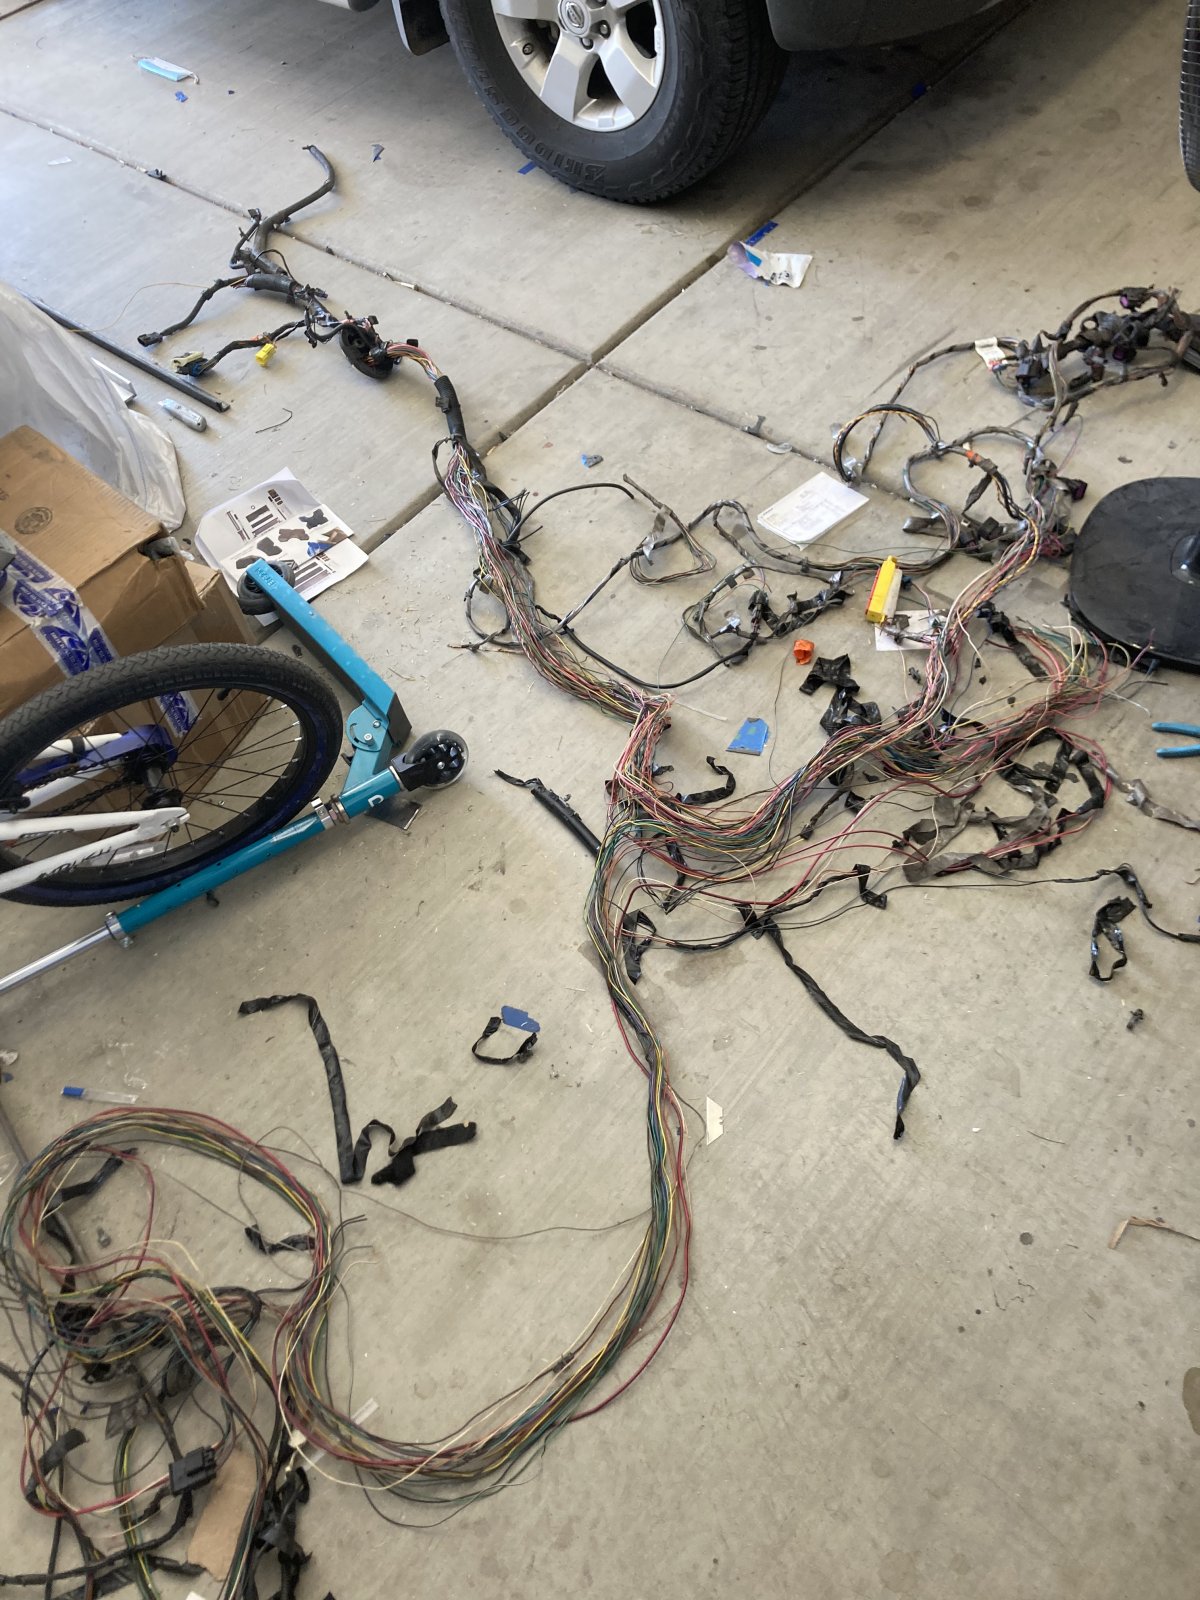
Got back on the build this last weekend. Re-attacked the wiring harness. Firewall fwd portion is wrapped and loomed. Now I’ve got 33 wires to attach to the dash from the body harness, and 7 spare wires that I added into the harness in case I need to add anything later.

I still need to wire in my fog lights and the fog light actuators and relays. I’ve also got 8 LED courtesy lights I still need to build a junction harness for and wire in.

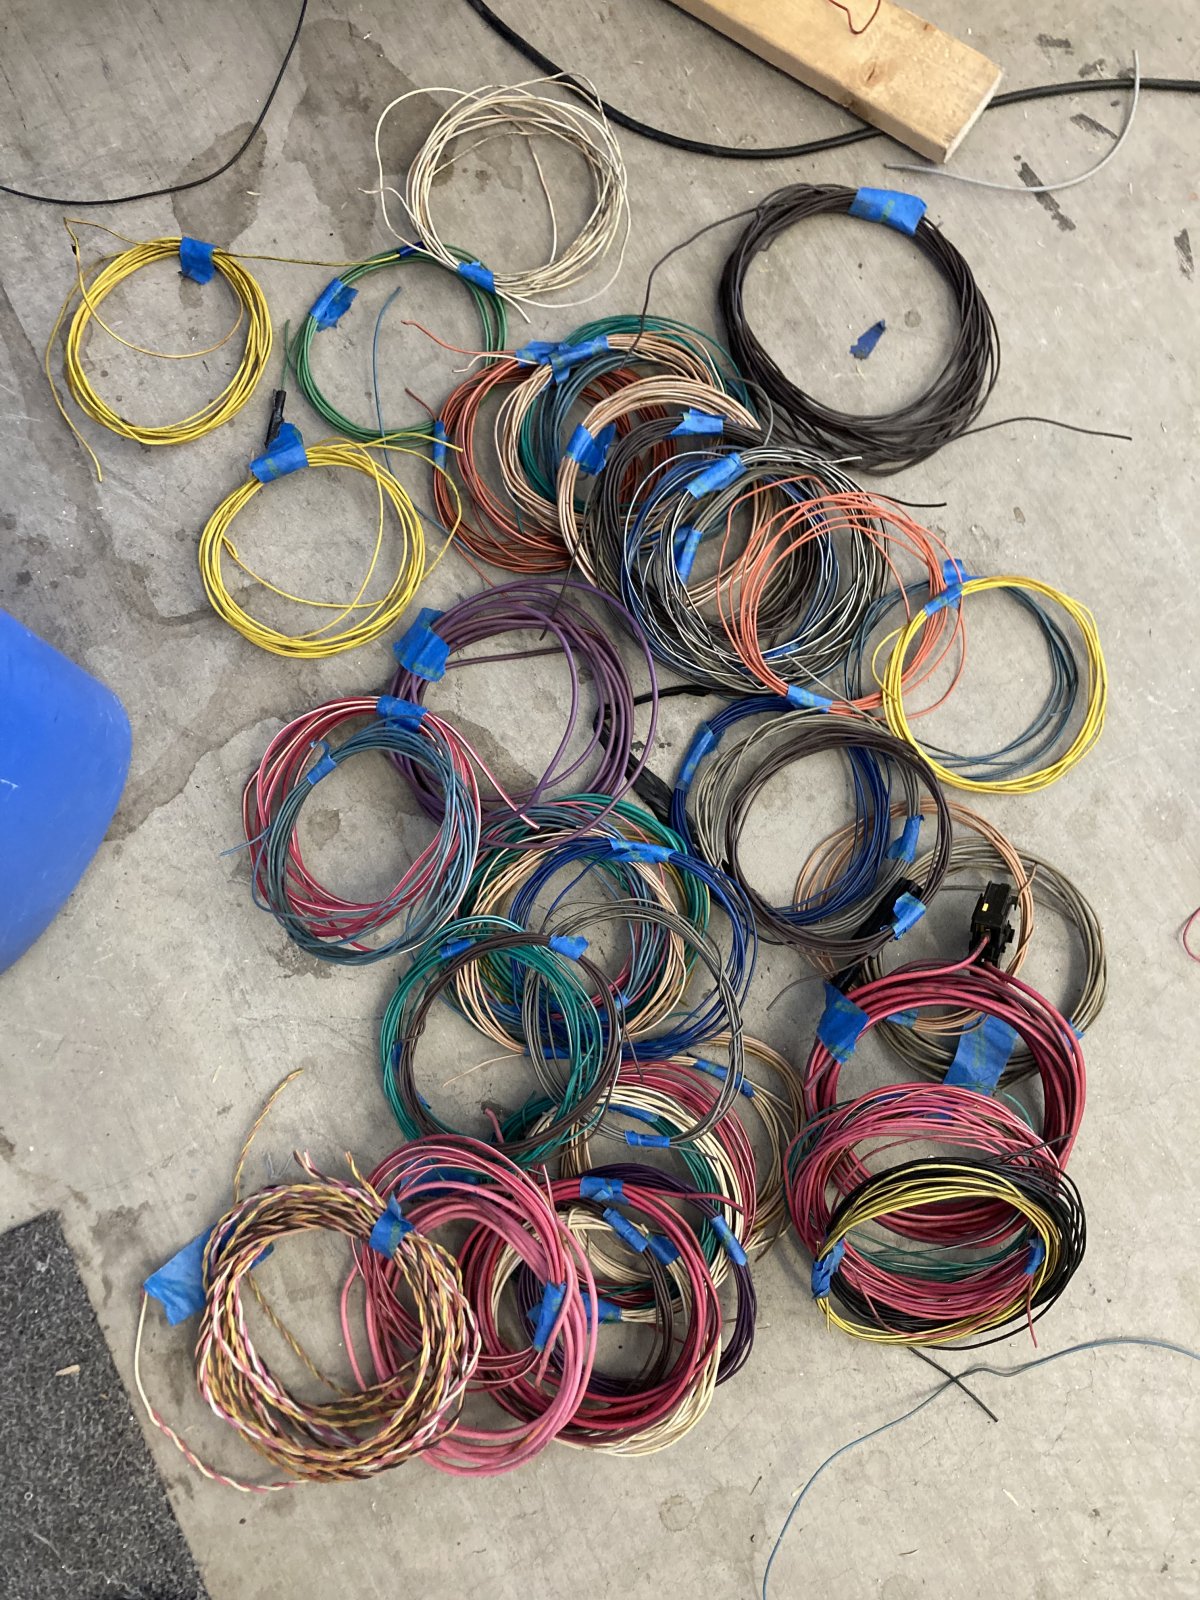
I had an extra Cobalt harness that I had pulled from a jy for around $5. I ran it across the garage floor, stripped the loom, and came out with around 300’ of nice quality wire. For the price of quality wire these days, the hour it took was worth it. I used some of it to add in spare wires for my existing harness.

Wiring the dash was super easy because I already had a plan. Kinda wishing I would have just designed my body harness from scratch to begin with as well. Its challenging and costly making harness run decisions on the fly.

99AAC568-BD34-43C6-9CFB-2A085D1280A9.jpeg
D32313D8-9940-4B7B-8FBA-26BA0DA88012.jpeg
E123C4D2-1D10-4A3F-838E-158250B64528.jpeg
0943EAC8-4A27-443F-8EB2-A4438129D62E.jpeg
7871B5BE-FE45-44CA-8833-8639CB98EE32.jpeg
8E85140B-D34F-4B15-BFFE-C30BB008C1B1.jpeg
 

Brian74

Goblin Guru
How far away are you on the front spoiler
Most of the mount design is done. I have a few concerns with the structural strength of the radiator mount providing proper support that I need to address. I’ve also been busy trying to get as far as I can on my Goblin before summer hits. I’ll be out of town all of March and most of April for work and I hope to get most of the CAD stuff finalized during that time.
 
Last edited:

Brian74

Goblin Guru
Harness is coming along. I scratch built a complete rear lighting harness today in GM style, and added in left & right side courtesy light connectors. I thought my tape job looked a little sloppy, but after looking at my brand new factory engine harness, I felt a little better.

The remaining harness design I utilized will make any future troubleshooting, removal or maintenance super easy. I still need the weather seals for my dash-main harness lever-lock connectors; which of course Mouser doesn’t have in stock.

Its not so much the bulk of the work as much as it is the stupid little details and the parts/time/labor that those little details require.

I also still need to CAD up more low-profile wire loom brackets to 3D print.

BEDB5B50-4D11-46C8-8844-13BAC4FD1C9C.jpeg
9C8CCA6C-90F8-46FC-B58A-C0E5EEC77973.jpeg
0BF805C3-08B6-4FBA-A657-64C0FE780CE2.jpeg
 

trophy1

Member
I guess my welding tank was empty. Swapped it out today to do my very last two welds, lol.

I designed some upper travel stops on the CAD, cut them out, and welded them in. Cleaned up the garage a bit, mocked up the rest of the front end, installed the fog lamp actuators and wired up all of the lighting.

For some reason, my front turn signal wires are not getting signal; will have to recheck the pins on the fuse block. Everything else works. Super happy with how the fog lamps turned out.

My next project will be getting the floorboards and center console properly mounted, and wrapping all of the wiring forward of the BCM,
as well as the dash harness I built.


View attachment 23061View attachment 23062View attachment 23063View attachment 23064View attachment 23065
Brian I would like to talk to you about some of your lighting. Any chance we can speak via phone?
 

Brian74

Goblin Guru
Any headway on the splitter?
I’ve been out of town for work training the last 5 weeks and will be back next week. I will start cutting up & fabricating a prototype when I get back in between finishing my wiring harness and some customer jobs. My structural concerns should be able to be remedied by a secondary support mount.
 

Brian74

Goblin Guru
Spent most the day working through the radiator bracket. I really wanted to make the front spoiler completely bolt on, but I feel its just not safely feasible with how the rad support was built. I spent some of the day on the CAD, drawing out gussets. I then printed the drawings to use as cut templates. I made gussets for the bottom and upper supports that will also serve as mounts for my aftermarket horns. I will weld everything up tomorrow.
1408A31C-0AE4-471A-9D0F-54A9BBAB6D1C.jpeg
4E97C26E-AEBF-4531-9E47-0644EF0E1C68.png
786E2FA3-DD93-4438-8ADF-82F699452CA9.jpeg
60F955CD-7DE3-484F-B437-543E434DE61A.jpeg
214CF5E1-62BE-41B7-9236-DB46F075D192.jpeg
E15B71D9-F0F2-43A6-A7EB-9B562466D6B7.jpeg
 

WarmPepsi

Active Member
Spent most the day working through the radiator bracket. I really wanted to make the front spoiler completely bolt on, but I feel its just not safely feasible with how the rad support was built.
How thick are the alum sheets for the floor boards? Tying another one of those up front would “help”, but obviously not fix the lack of structure. I plan to do that and also use either alum sheet or composite to make some better baffling in the hood area…. To keep the warm air out of the cabin, but also encourage the air to flow thru the radiator, rather than over the top.

Keep up the good work!
 

Brian74

Goblin Guru
How thick are the alum sheets for the floor boards? Tying another one of those up front would “help”, but obviously not fix the lack of structure. I plan to do that and also use either alum sheet or composite to make some better baffling in the hood area…. To keep the warm air out of the cabin, but also encourage the air to flow thru the radiator, rather than over the top.

Keep up the good work!
I will definitely be tabbing in a removable splitter from the rad extension to the beginning of the regular floorboard to maintain the lower airflow boundary layer. I haven’t got to designing that yet. So much time-consuming detail to do all of this stuff, lol.
 

Brian74

Goblin Guru
Just checking in… I would like to say that my build is coming along, but not so much recently.

I started a new job in management, so I find myself working 10 hour days lately. Combine that with my new midlife crisis health kick of running 2 miles a day, and M-F are pretty much a wash.

My LLC is starting to blow up. Both of the small businesses I have been tirelessly harassing for the past year have returned to me and now want me to design CAD prototypes and parts, so I’ve been quite busy with that. One of the companies builds $250k sandrails, and the other is a custom mountain bike manufacturer.

I did recently take most of my business income from last year and ordered a 22 IDEX 3D printer. With the massive explosion and demand for in-house prototyping, combined with new availability of polymer composites, I figure this will be a no-brainer investment. It should arrive in August.

9630E44D-F779-4F66-B94E-1A03FE101D0C.jpeg
 

Brian74

Goblin Guru
Its 110 out… Summer sucks here. Not a time to be in the garage… I’m around 4 years into my build; + learning welding, learning CAD, learning 3D printing, various manufacturing process, getting hired out of nowhere for design work, starting a business, learning business strategy; and now designing and prototyping stuff for two other amazing businesses as my customers.

Someday I’ll get back to my original Goblin build. Anymore I just see the “finished car” as a cool promotional item.

My build has definitely gone a different direction, lol.
 

Desert Sasqwatch

Goblin Guru
Brian, with the exception of surviving our summers here in the desert, sounds like a lot of positive things have occurred recently and over time within your life - always good to hear. As for your Goblin, great things take time and building yours is no exception. You've already engineered and incorporated many unique things and you are just getting started. If it takes another 4 years to complete that's your time and no one else's to spend. Work your Goblin at your pace and at some point it will get finished to enjoy during our 8 months of perfect weather - that is the reason we live out here! ;):cool:
 

Brian74

Goblin Guru
I picked up a CAD job designing some handlebars for a custom mountain bike company. I ran the requested dimension, added my own touches, then I refined the taper continuity tolerance to G2 continuity. For fun, I even played with a few 3D printer slicers to evaluate reproduction capabilities through the different stages based on contour quality; and I even printed a mockup.

Its uttely f— amazing what you can do on CAD these days. The machines aren’t that far behind.


06E310E1-6F4A-4B6B-96B9-900C1591BA5B.jpeg
ED0AD33B-6743-4F04-A981-455B634BC17C.jpeg
FD4C4F59-0D06-4144-B358-EC85869EE618.jpeg
 

Desert Sasqwatch

Goblin Guru
Installed my Powell Racing liquid/air seperator, got engine back together & new wiring harness installed, drained transmission, and installed new clutch.

View attachment 6925View attachment 6926View attachment 6927View attachment 6928View attachment 6929View attachment 6930View attachment 6931View attachment 6932View attachment 6933
Brian, sorry to bring up such an old post. Did you remove the intake manifold to install the plug in the PCV port for the Powell system? Did you have to do any drilling to tap the port for the plug? By chance any photos of this? Thanks!
 
Top