Andrew's Extended Track Goblin - 08 SS/TC
ATMironov
Well-Known Member
Good eye!Make sure you get the revised steering arms from DF. The newer ones have more cross section at the rearward thru bolt location.
View attachment 41090
I swapped the arms out yesterday.
ATMironov
Well-Known Member
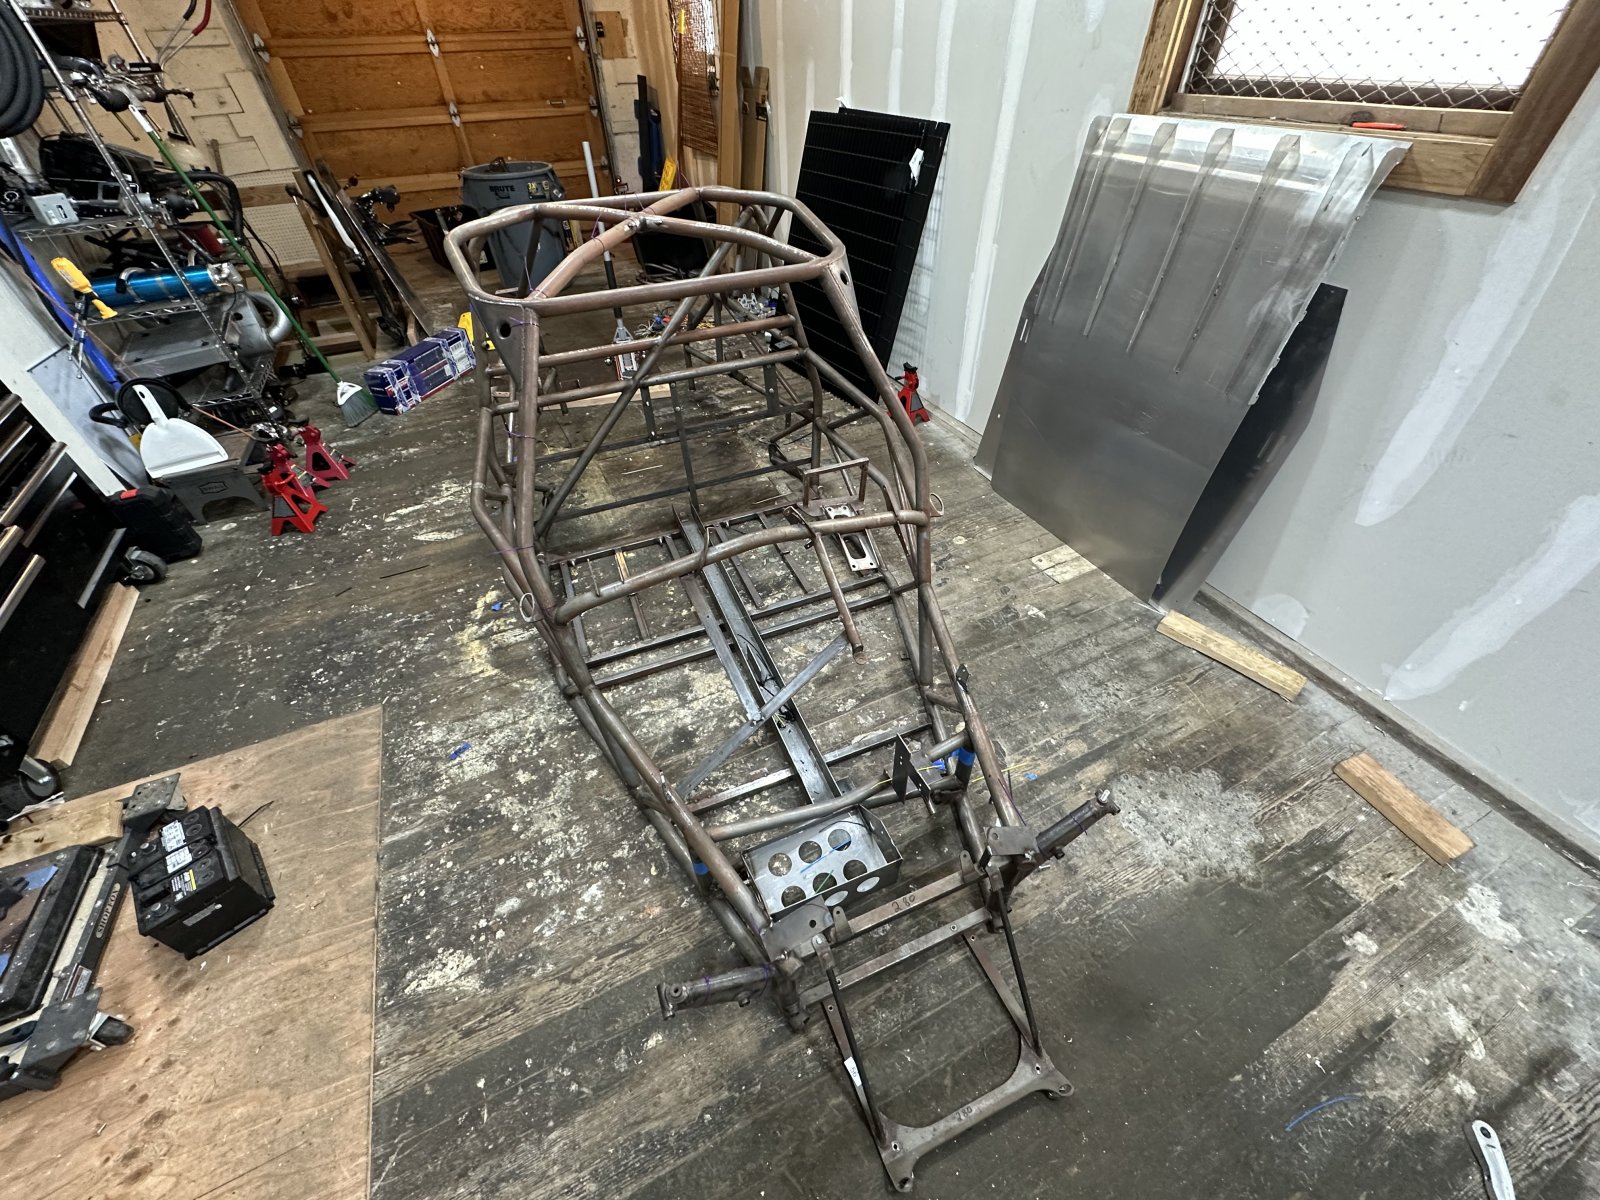
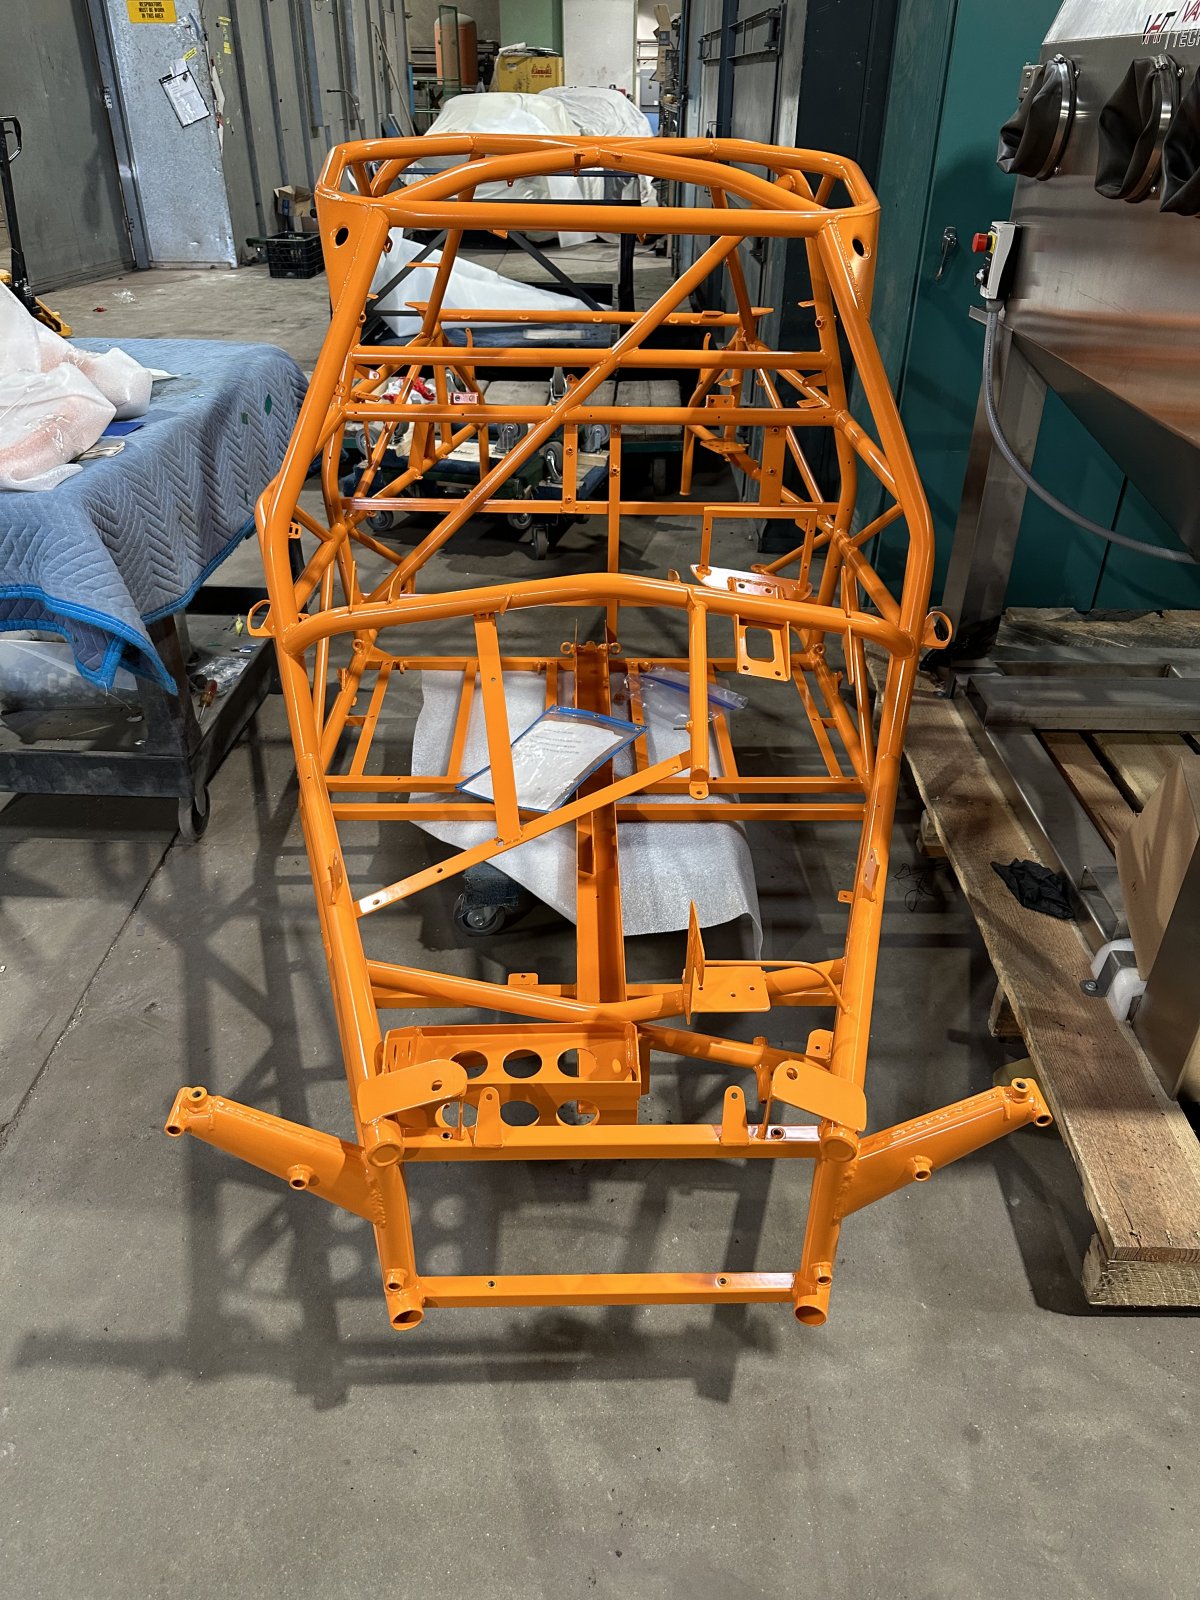
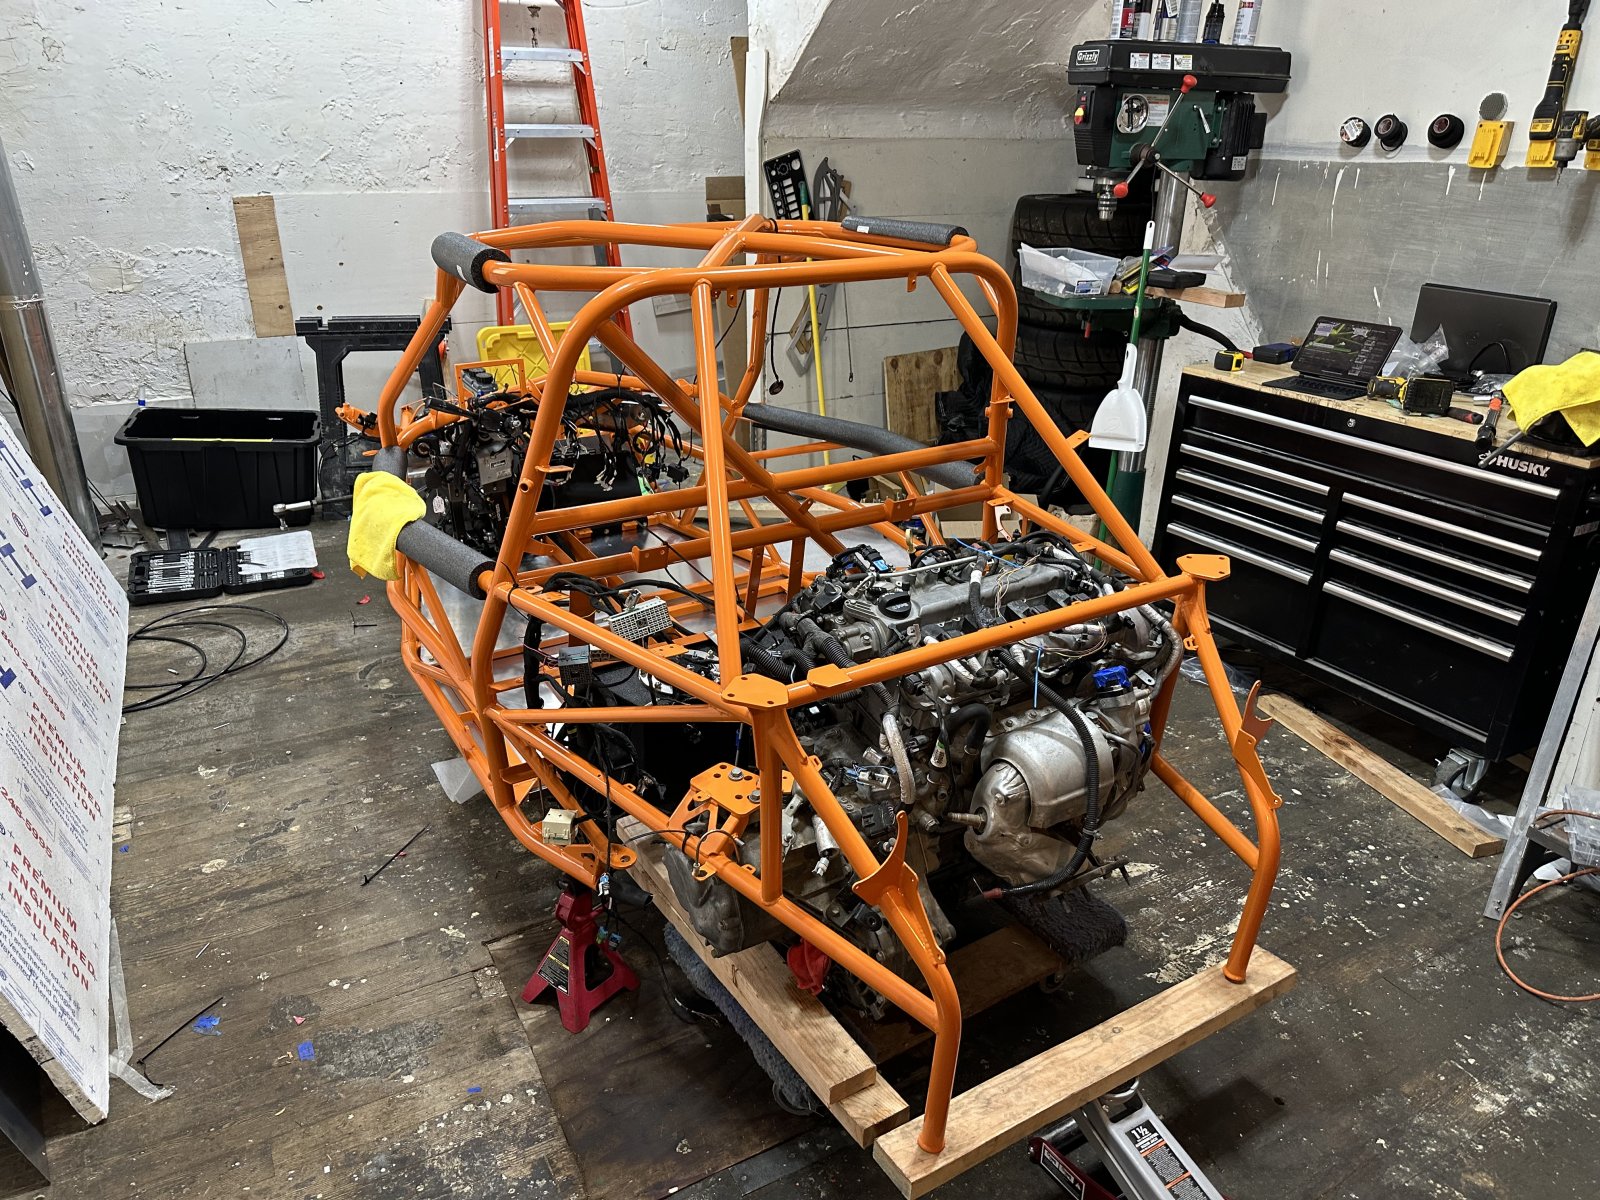
Disassembly is complete.
only took about 14hours. Do you think it will go back together that fast?
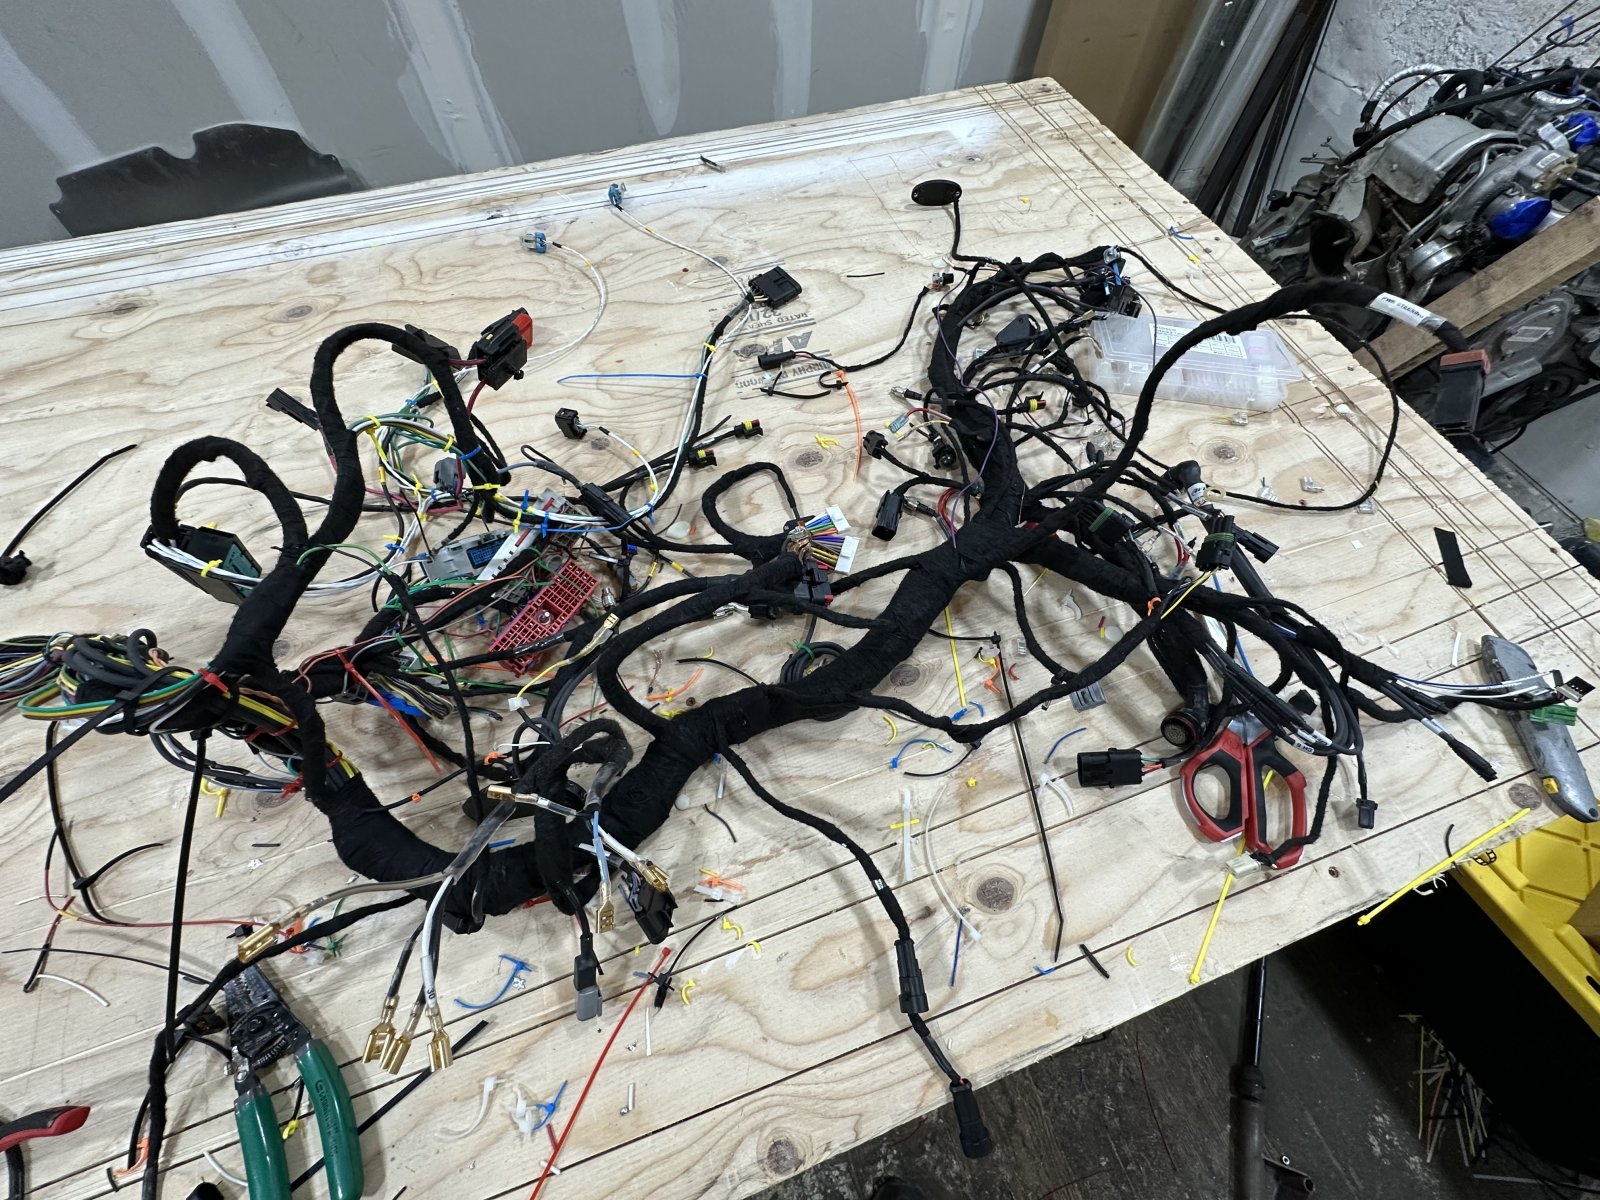
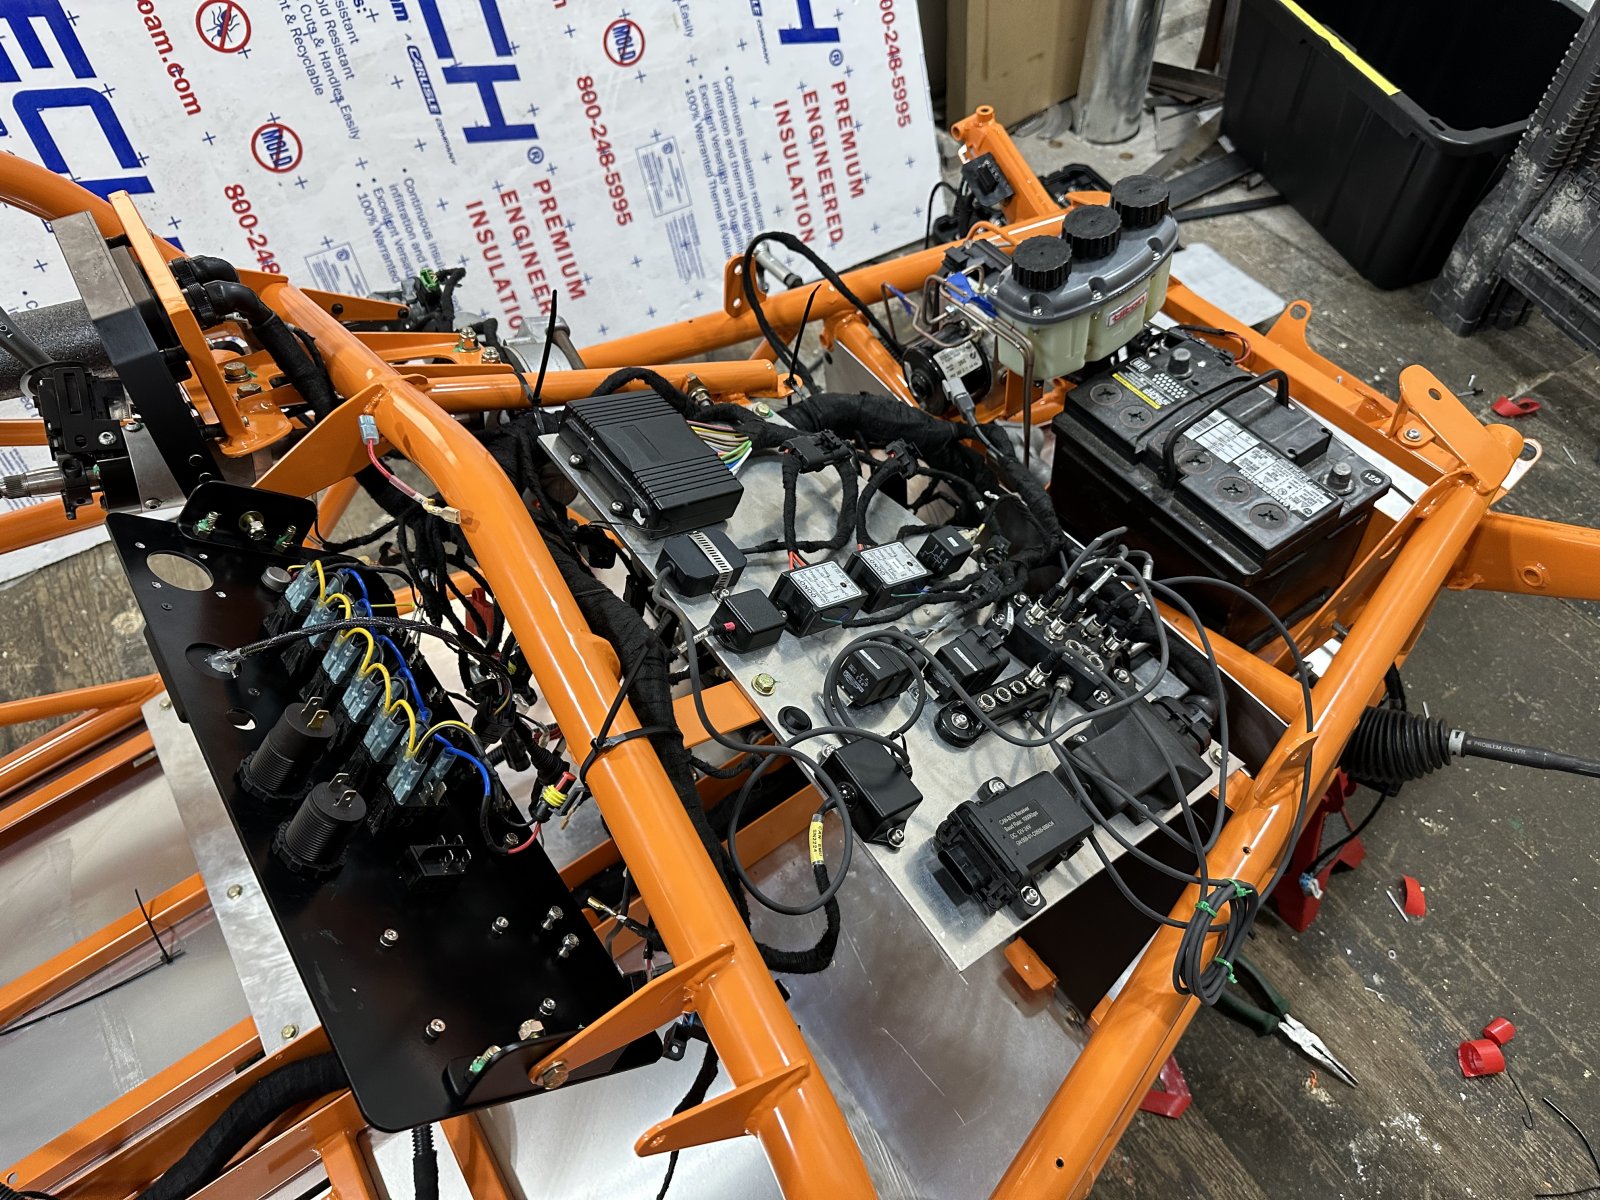
I ran into about 10 wires that were routed in such a way that they wouldn’t come out of the car, wouldn't allow for clean wrapping. So I cut them and will have to fix them on the bench.
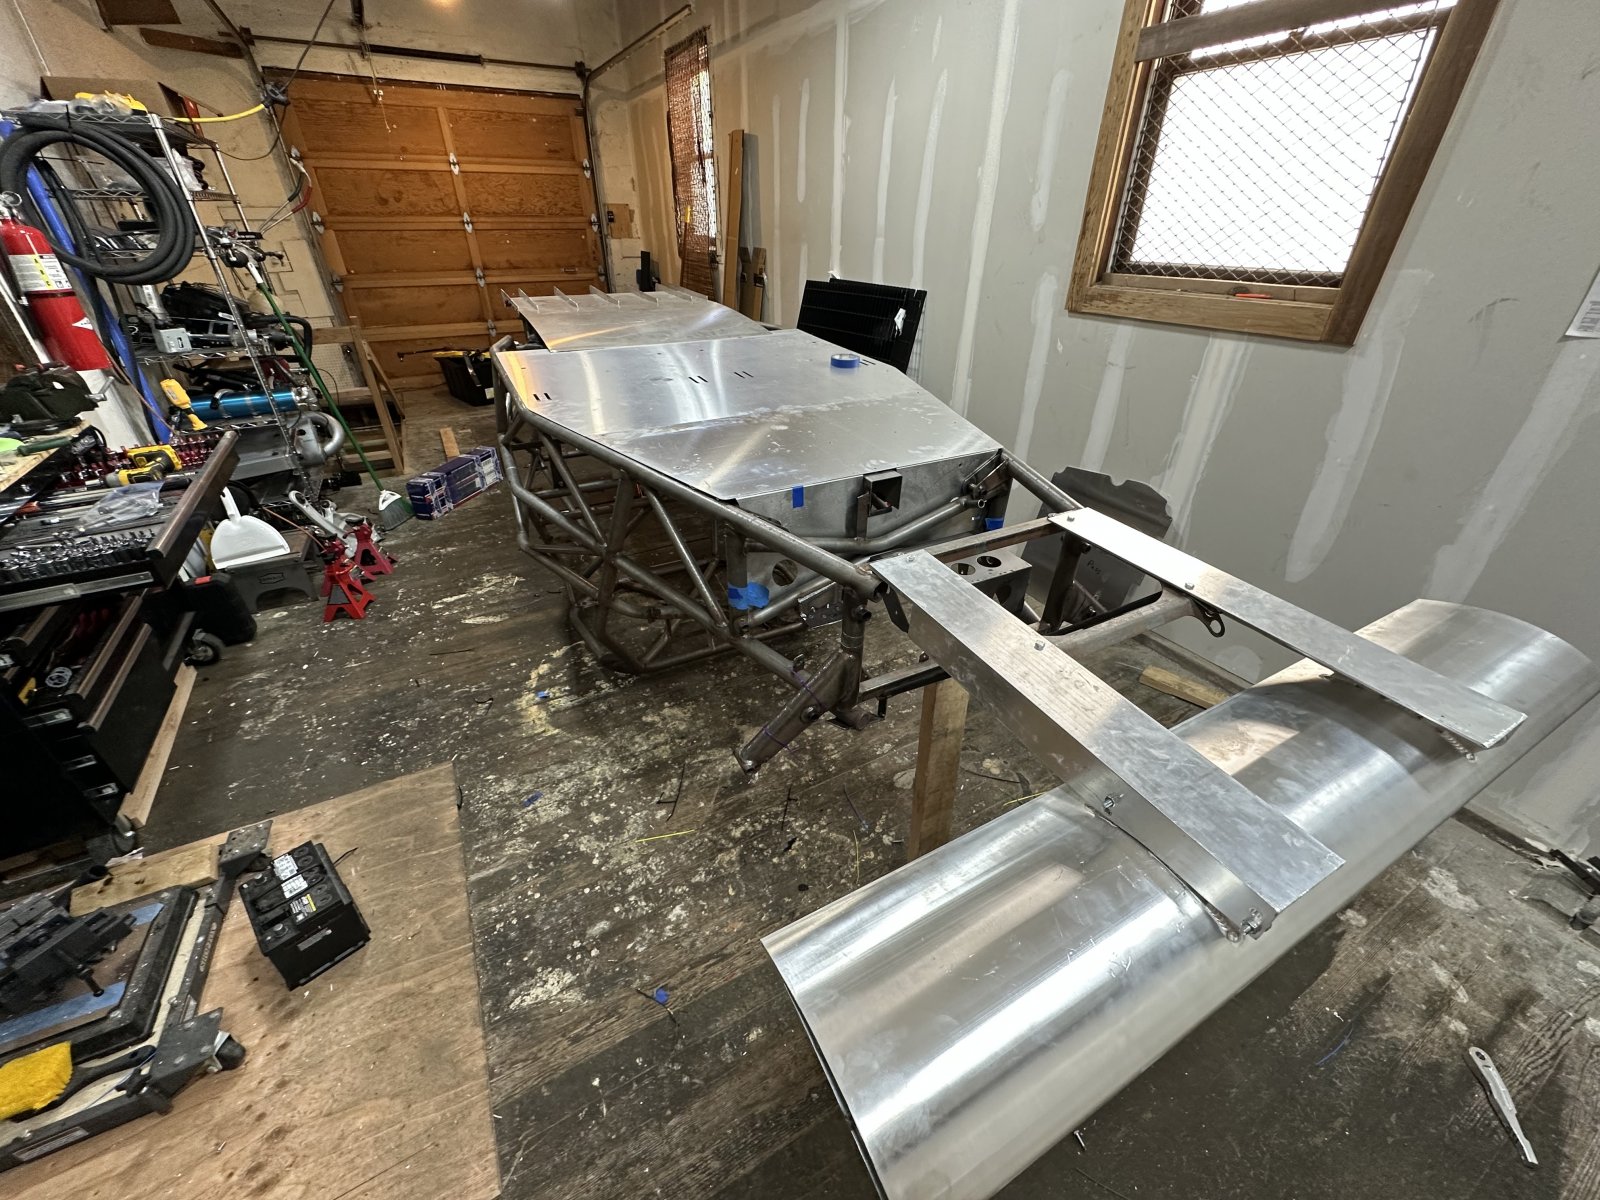
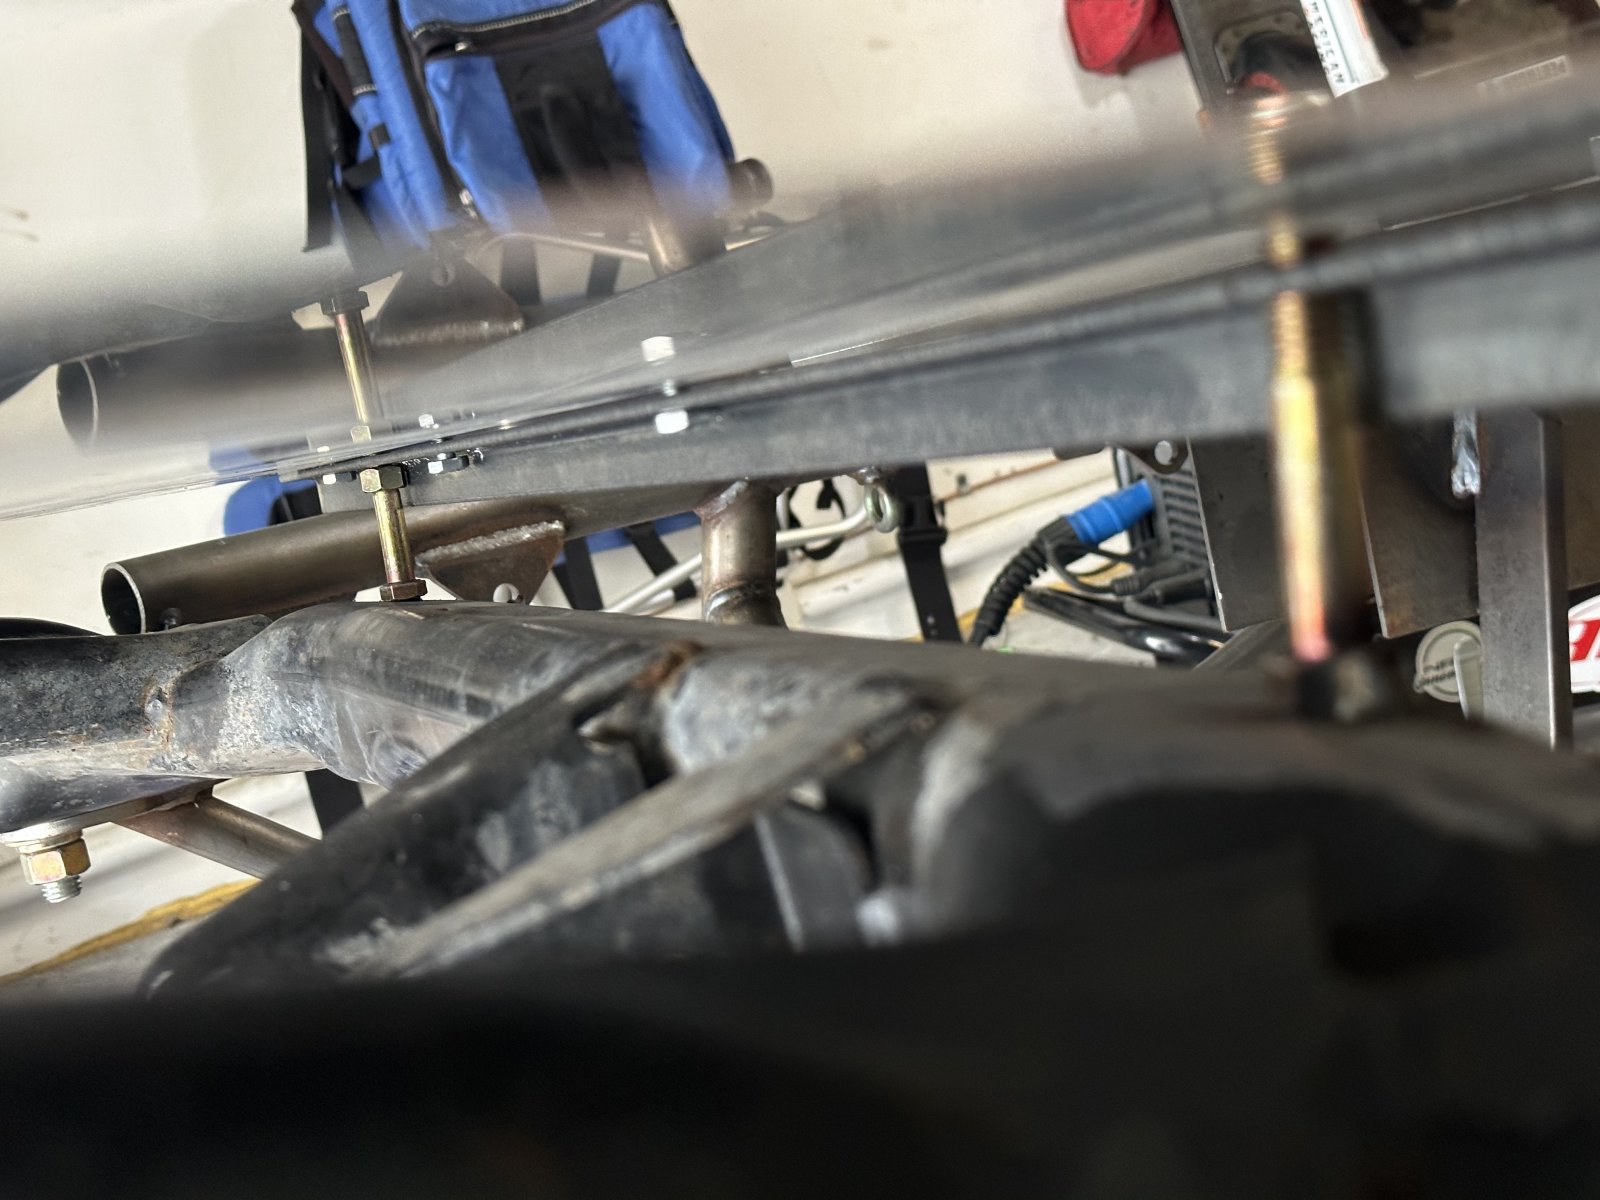
I flipped the frame upside down to figure out the diffuser and to get the rest of the flat bottom extended all the way out to the radiator.
ill hopefully be welding up all the miscellaneous pieces this weekend, and off to power coating next week.
my goal is to have the car ready for the weekend of 8/26
only took about 14hours. Do you think it will go back together that fast?
I ran into about 10 wires that were routed in such a way that they wouldn’t come out of the car, wouldn't allow for clean wrapping. So I cut them and will have to fix them on the bench.
I flipped the frame upside down to figure out the diffuser and to get the rest of the flat bottom extended all the way out to the radiator.
ill hopefully be welding up all the miscellaneous pieces this weekend, and off to power coating next week.
my goal is to have the car ready for the weekend of 8/26
ATMironov
Well-Known Member
I have to say, this build is really distracting me from work right now. .
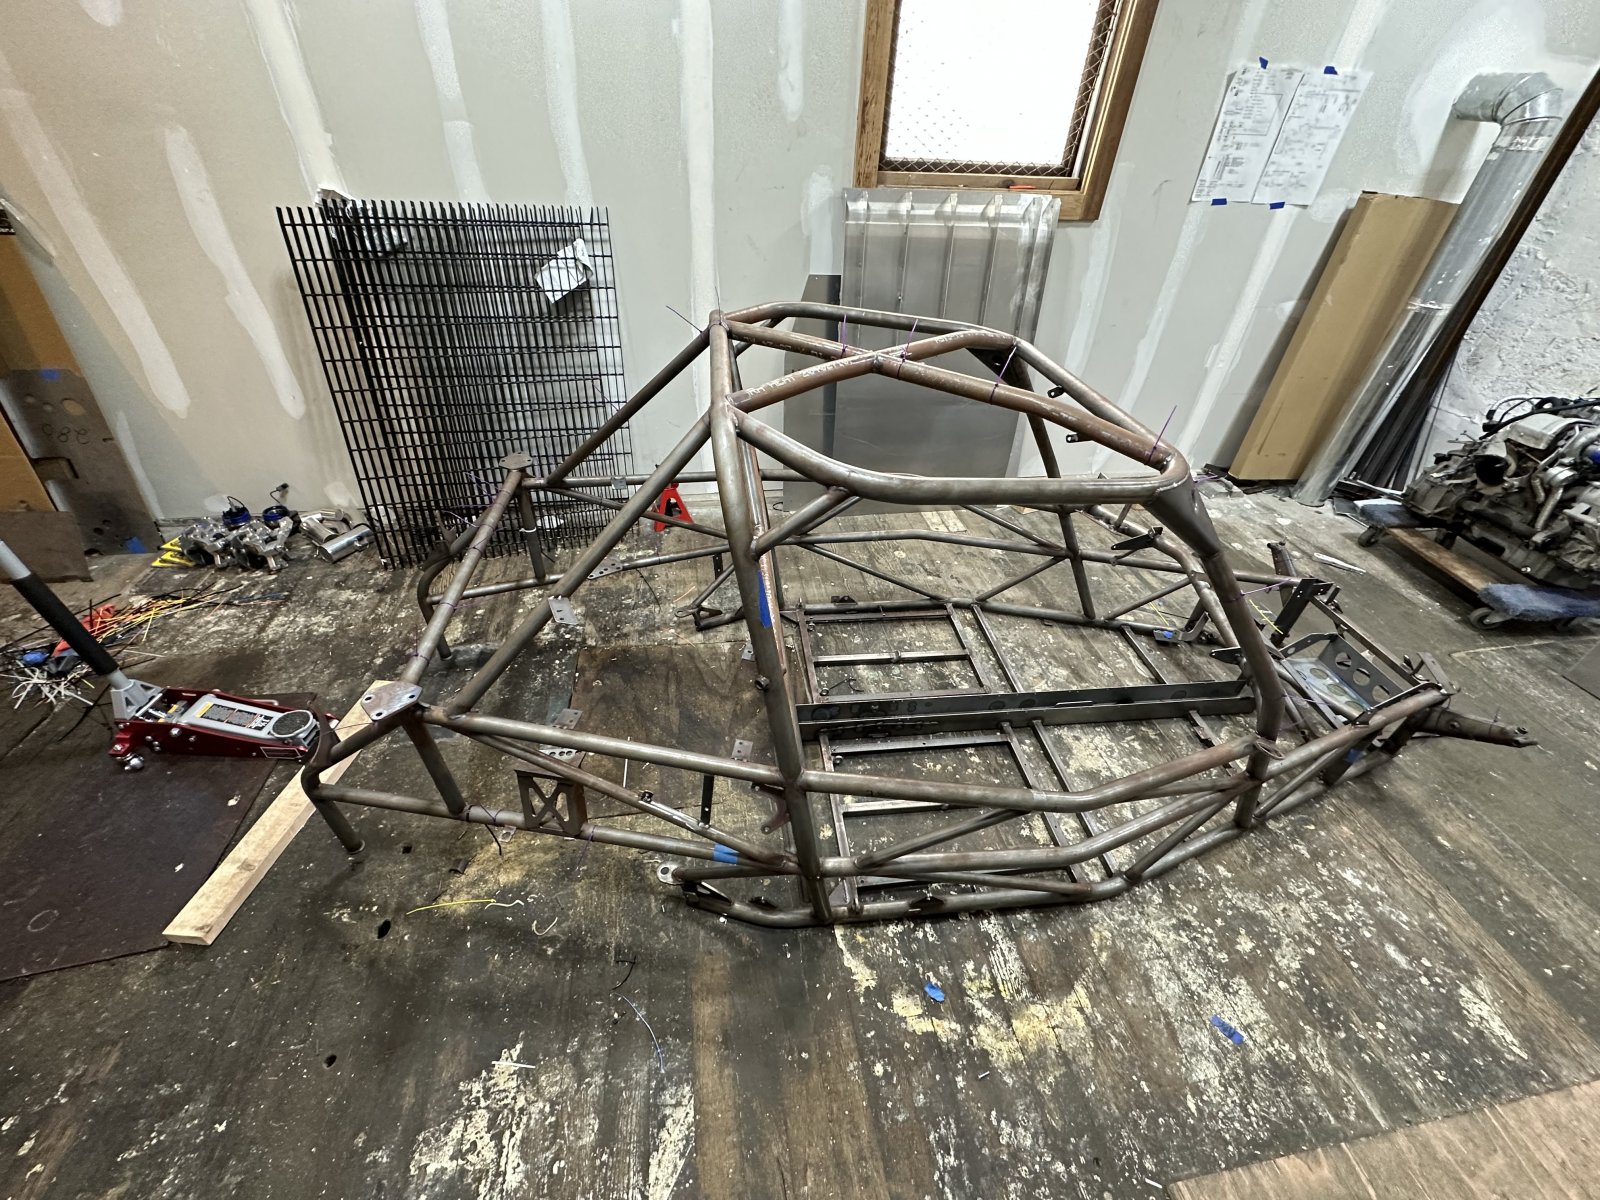
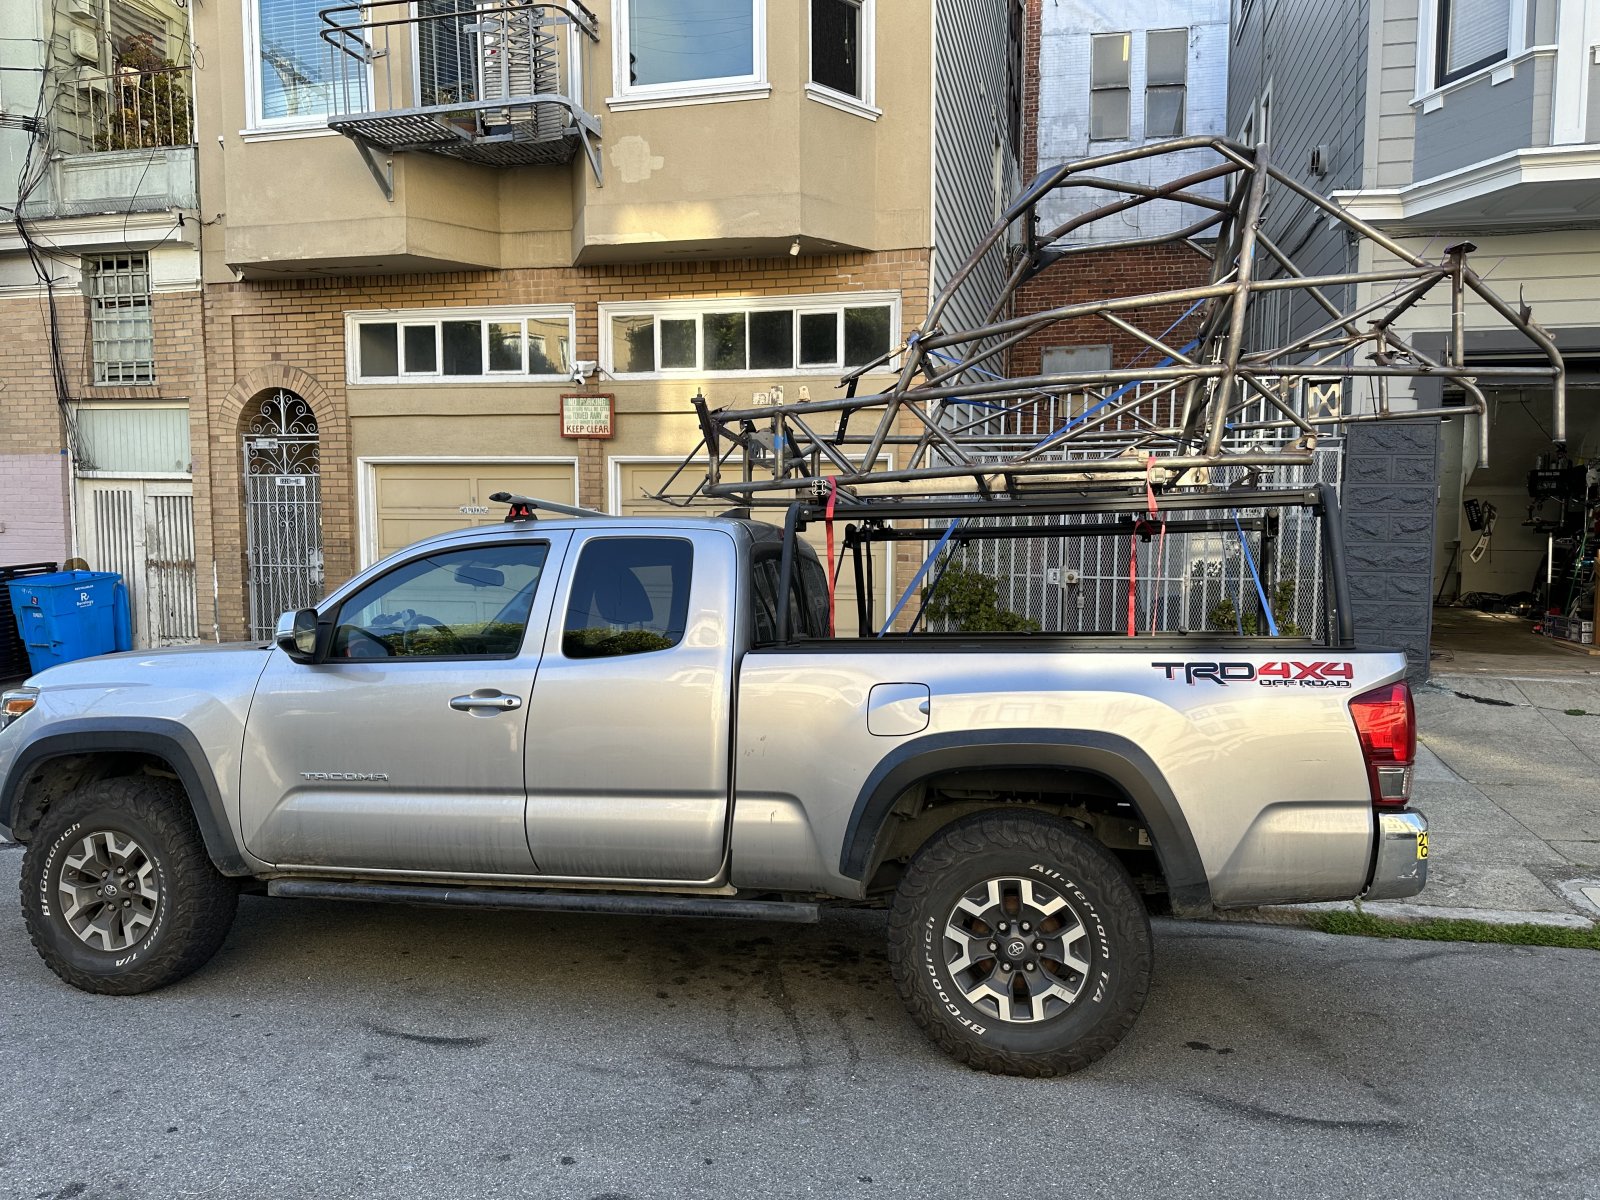
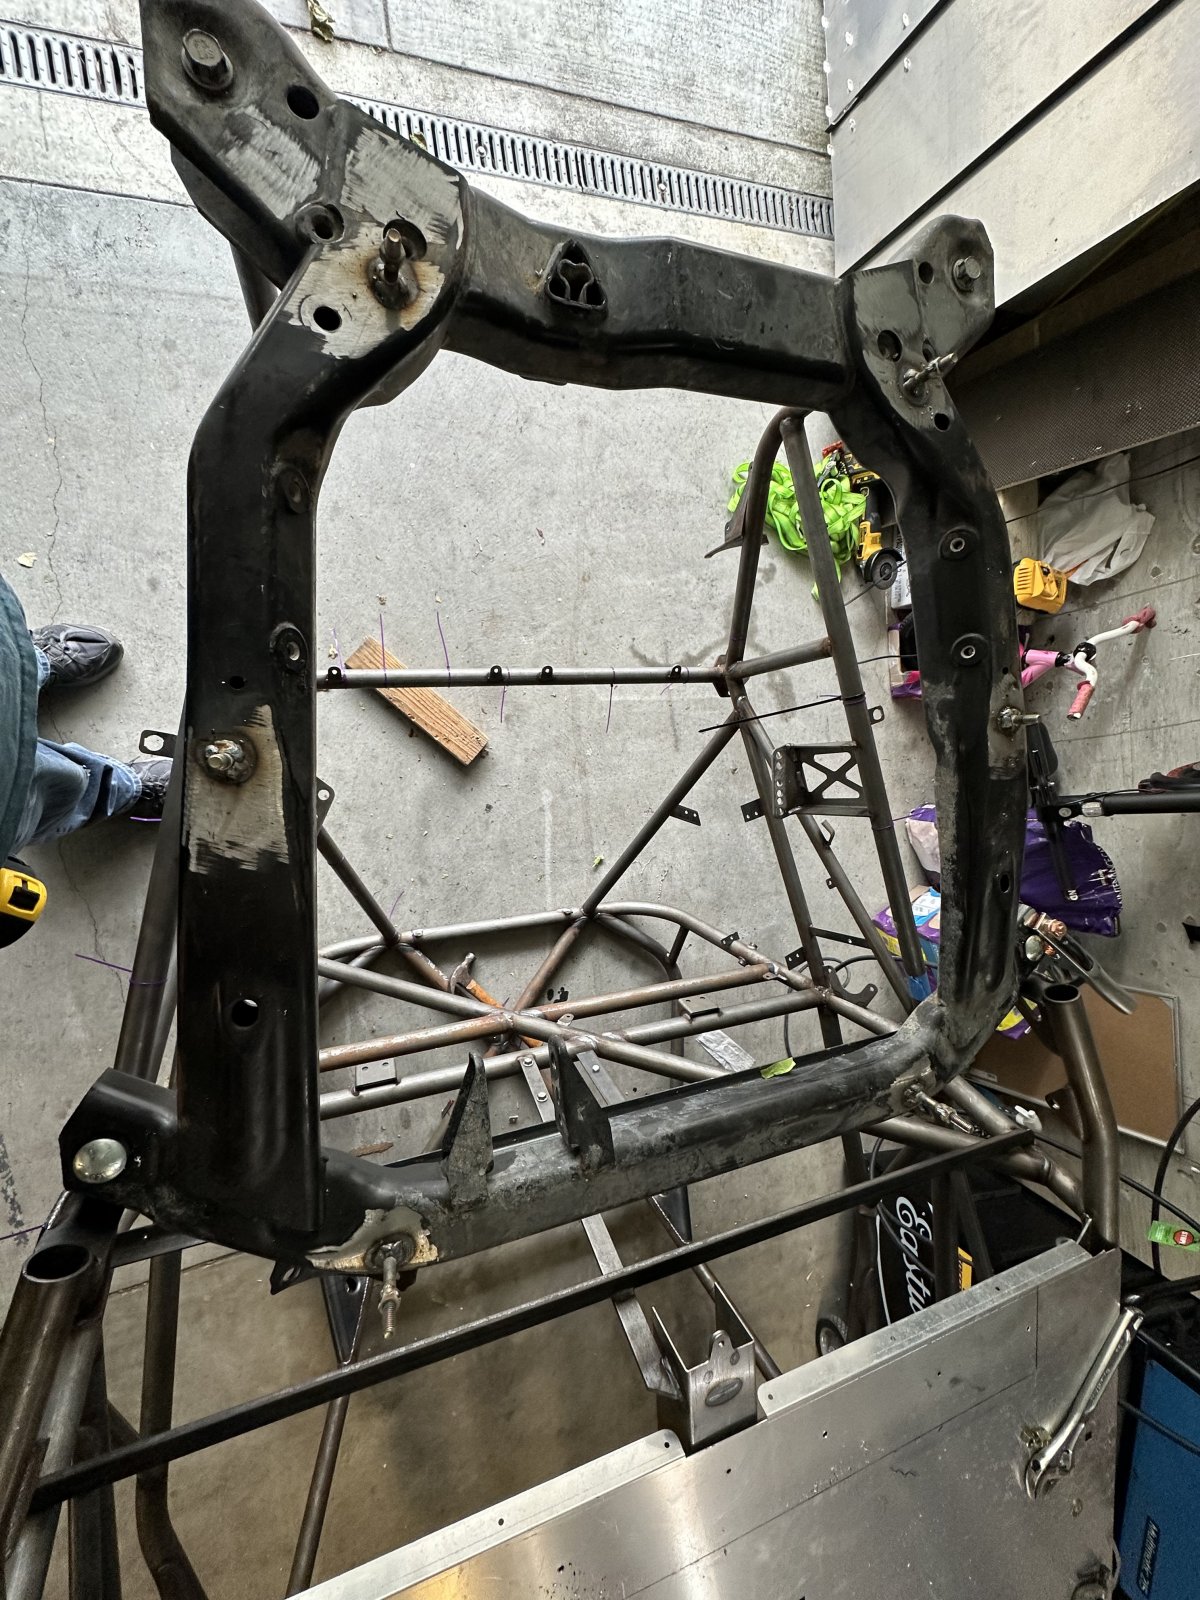
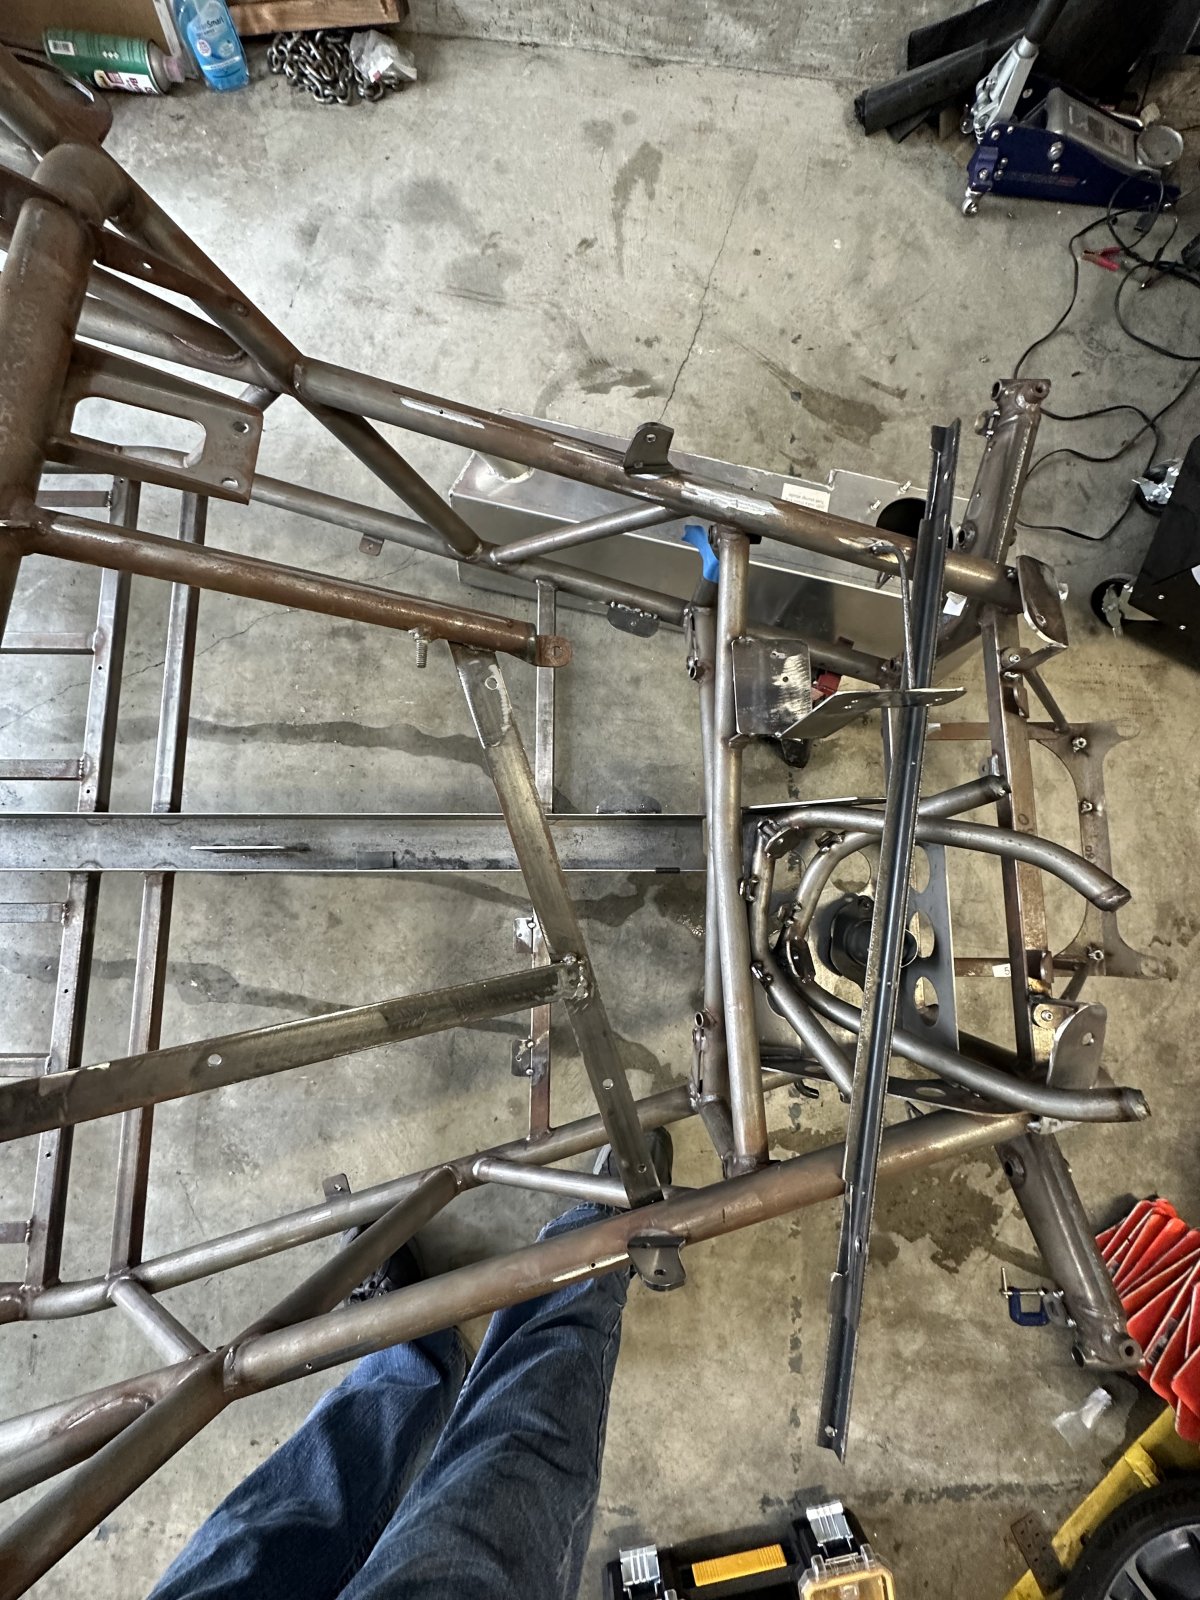
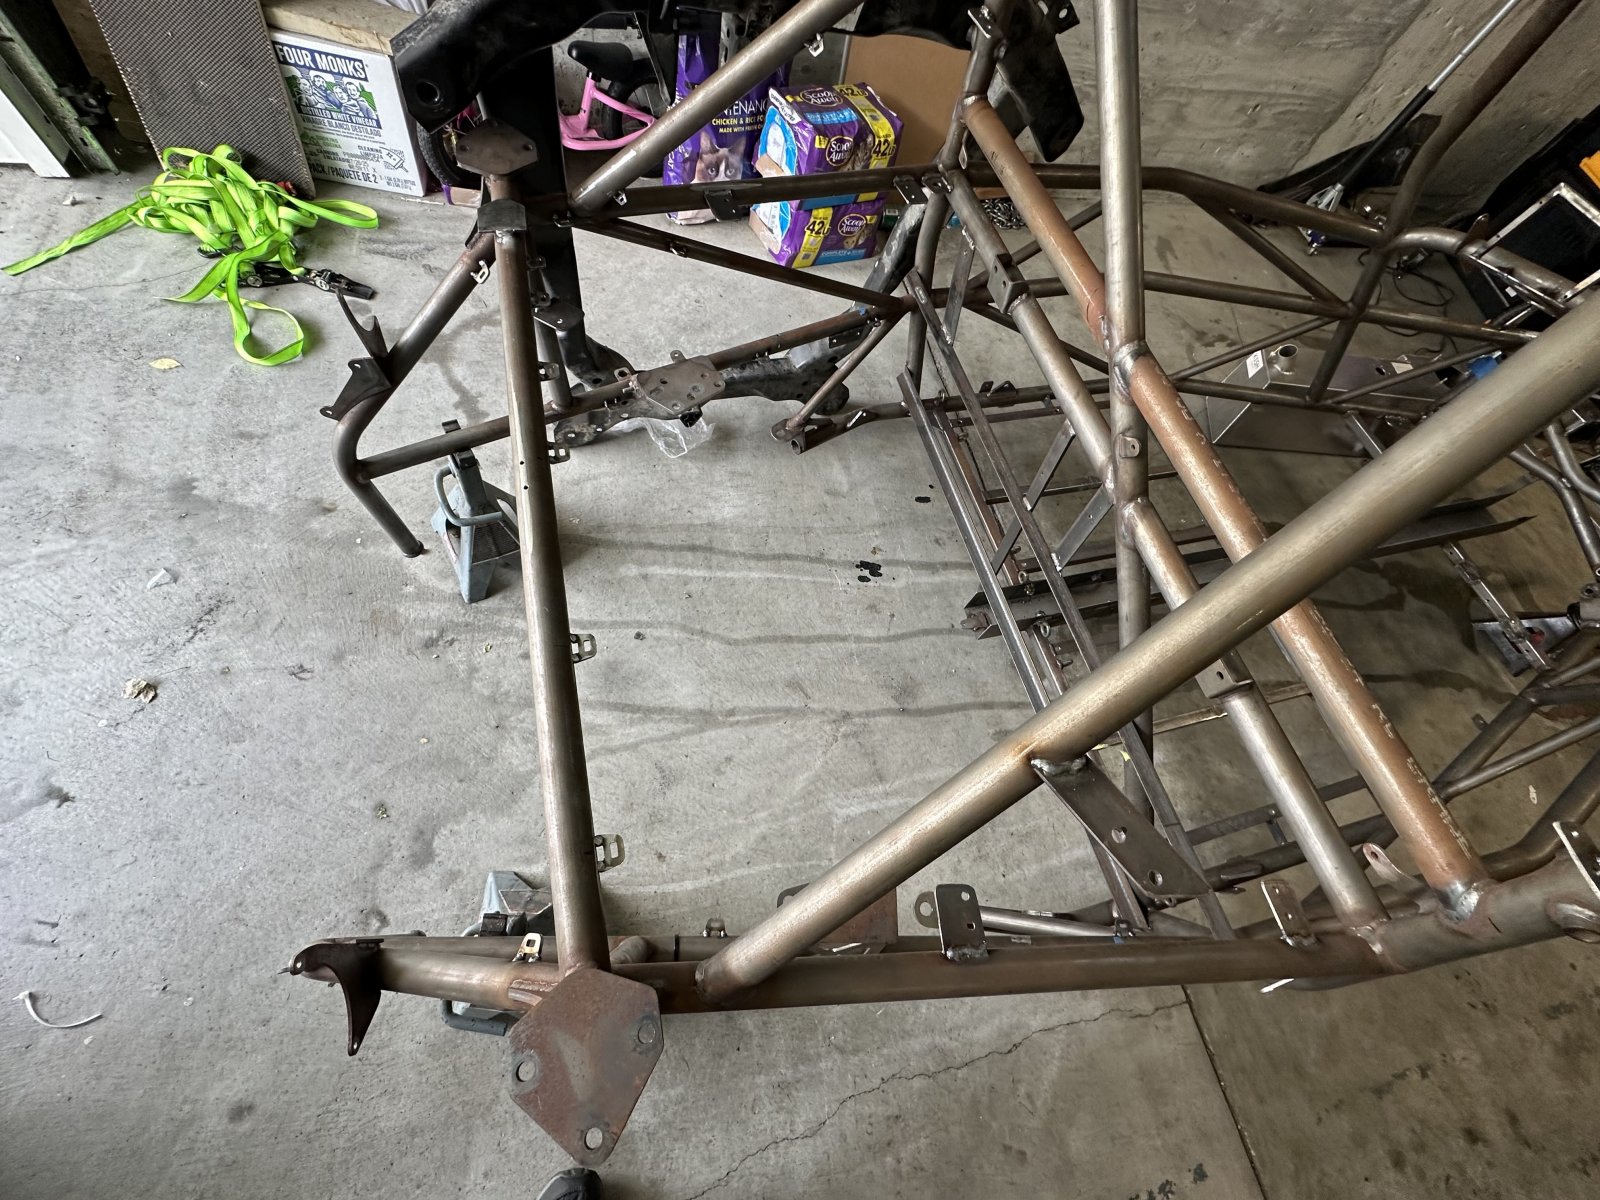
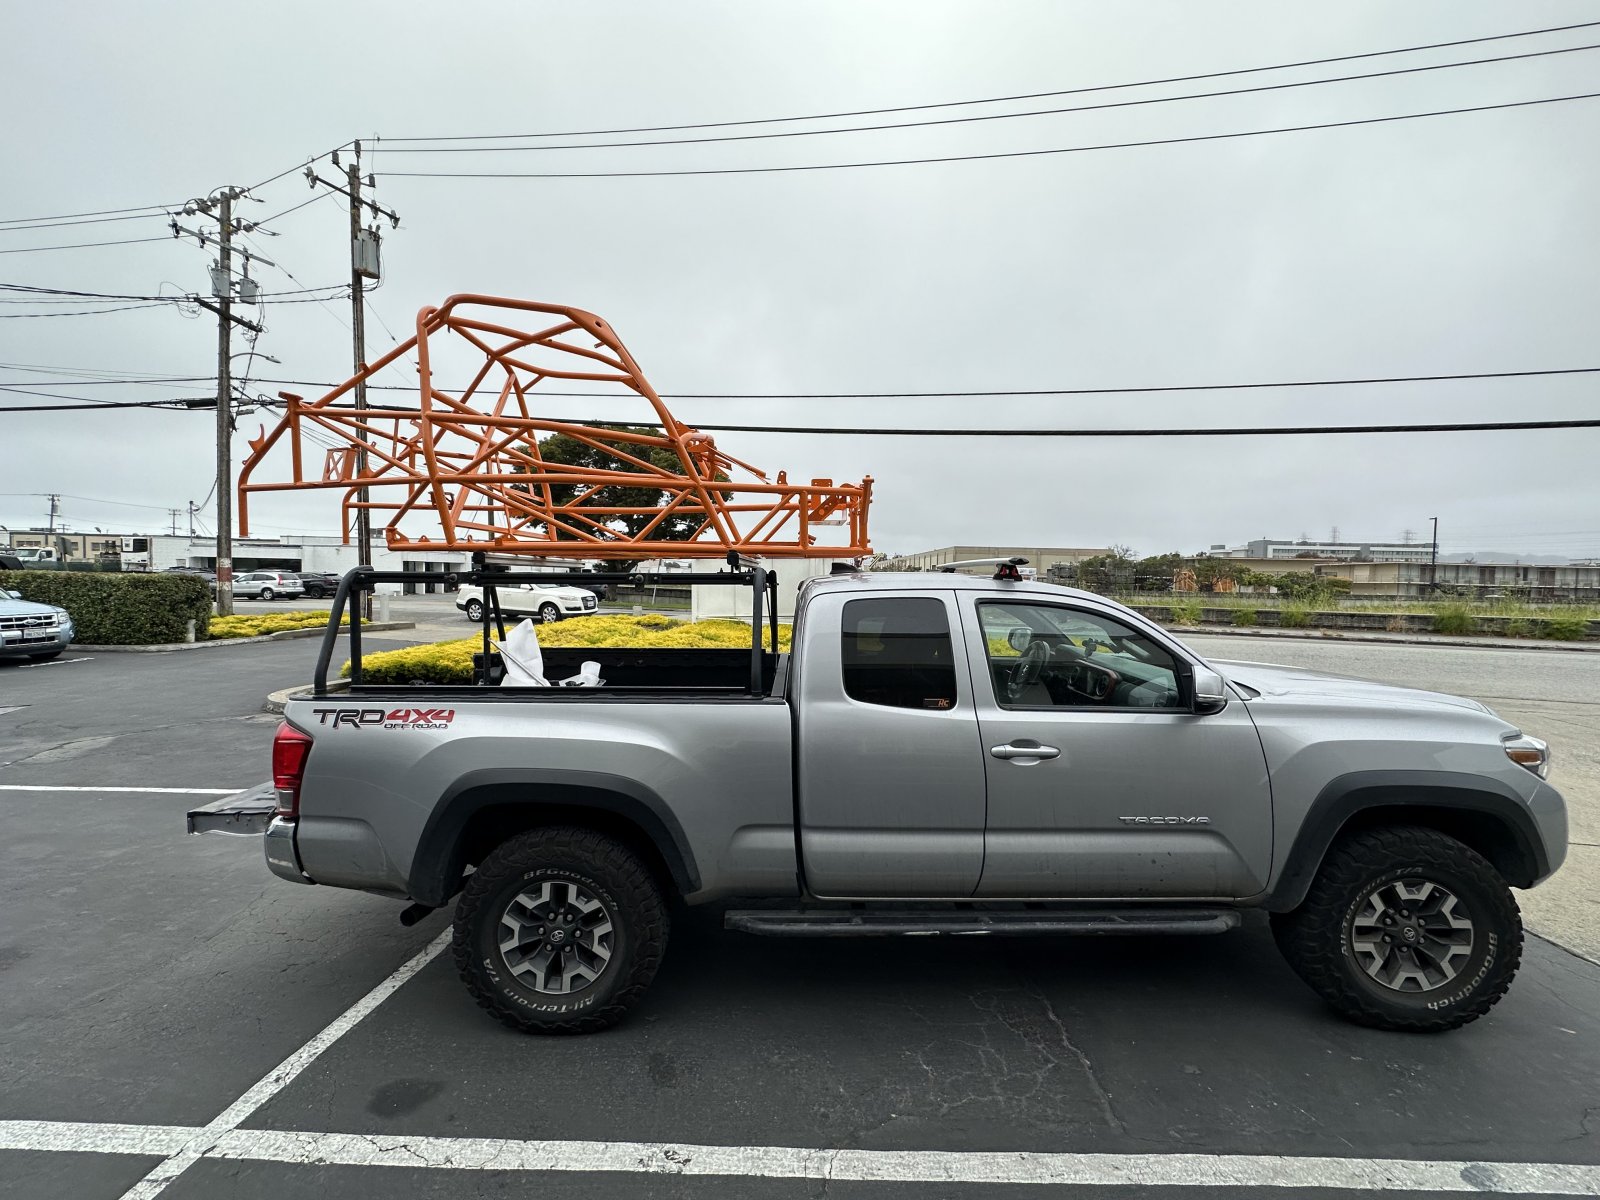
I moved the frame back to the garage that I can weld in. I need to finish welding all the tabs I have tacked on, as well as add all my zip tie tabs.
frame doesn’t fit between the racks, so it goes on top!
I have powder coating set for Monday, hopefully I can wrap up this weekend. Powder coater said he only needs a week, so I have a short period to Change the clutch and prep the motor.
I started wrapping the harness. I’m taking the time to extend some wires that took short cuts and wouldn’t wrap nicely. There are still some weird crossovers though.
And I finally got a call back from the CHP officer who will do the inspection on my car for registration. Super nice guy…. They can only schedule for the next month, so I’ll call him back in a couple weeks and set an appointment for August.
I’m debating internally how many hours it’s going to take me to assemble. I think it will go really fast.
. I moved the frame back to the garage that I can weld in. I need to finish welding all the tabs I have tacked on, as well as add all my zip tie tabs.
frame doesn’t fit between the racks, so it goes on top!
I have powder coating set for Monday, hopefully I can wrap up this weekend. Powder coater said he only needs a week, so I have a short period to Change the clutch and prep the motor.
I started wrapping the harness. I’m taking the time to extend some wires that took short cuts and wouldn’t wrap nicely. There are still some weird crossovers though.
And I finally got a call back from the CHP officer who will do the inspection on my car for registration. Super nice guy…. They can only schedule for the next month, so I’ll call him back in a couple weeks and set an appointment for August.
I’m debating internally how many hours it’s going to take me to assemble. I think it will go really fast.
Last edited:
ATMironov
Well-Known Member
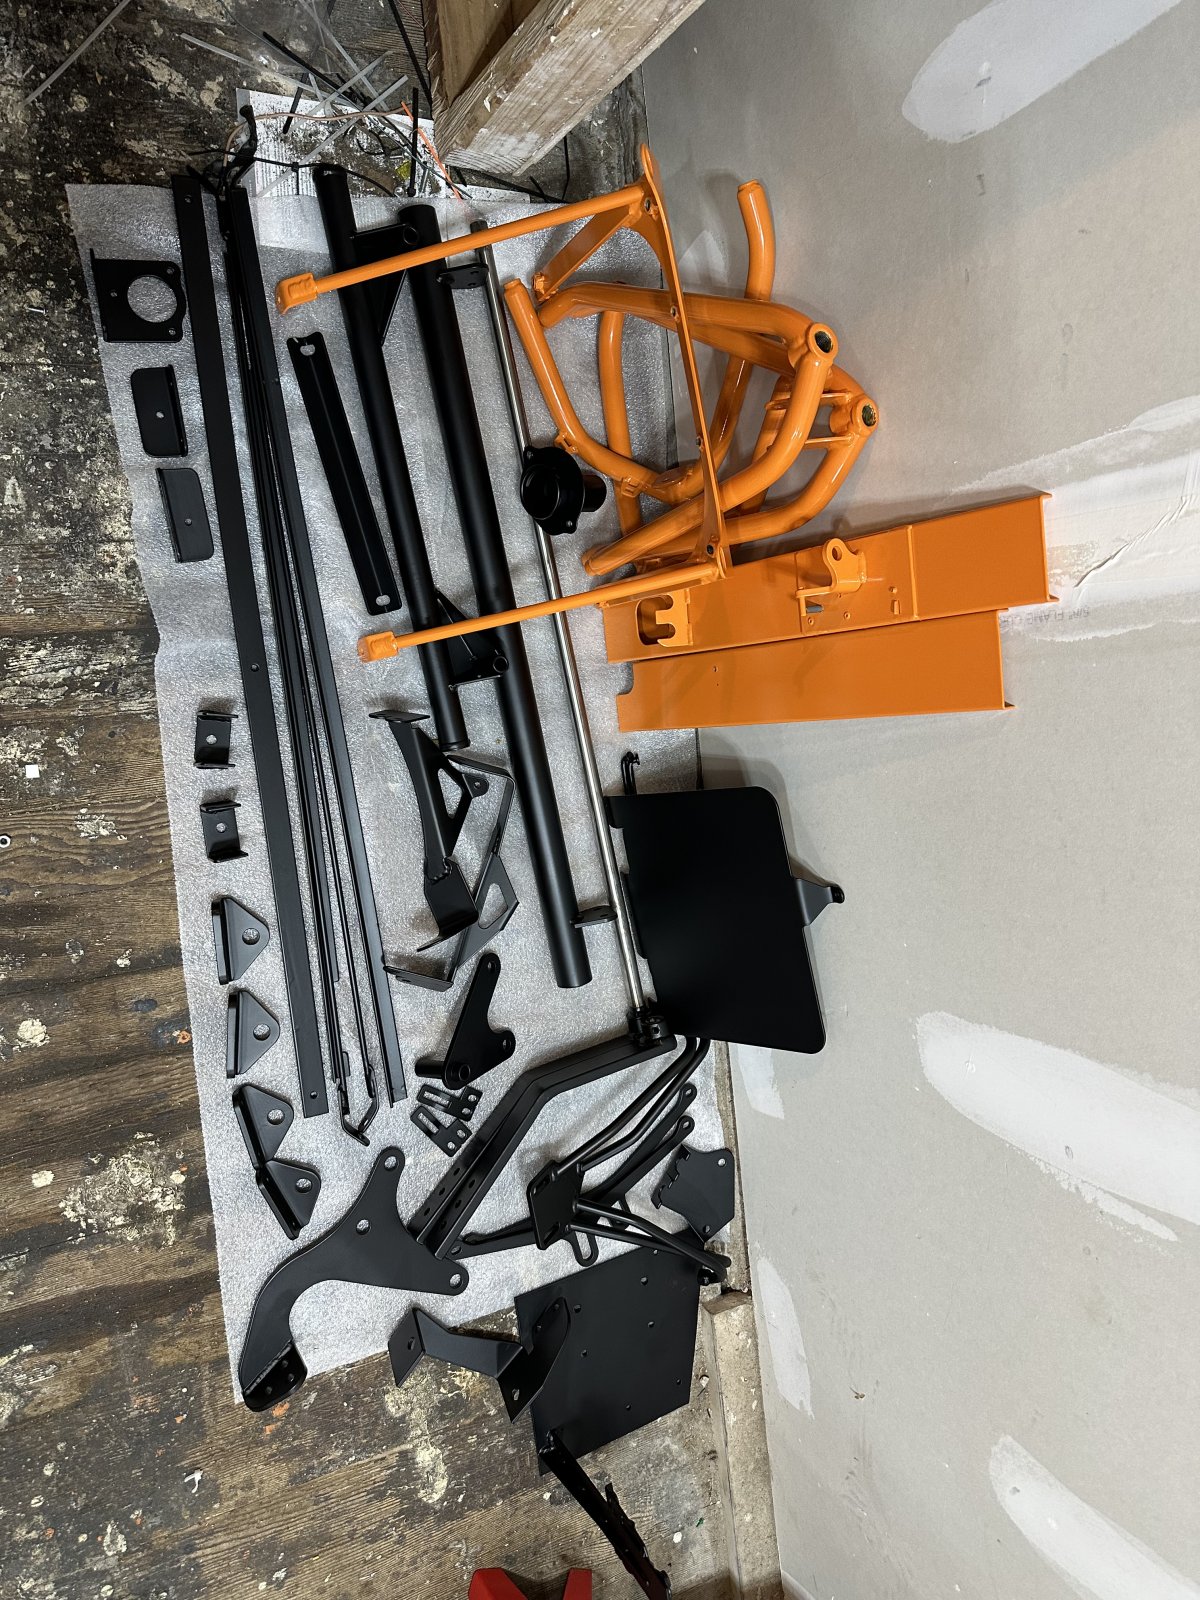
I spent the day making final preparations for powder coating which is scheduled for Monday.
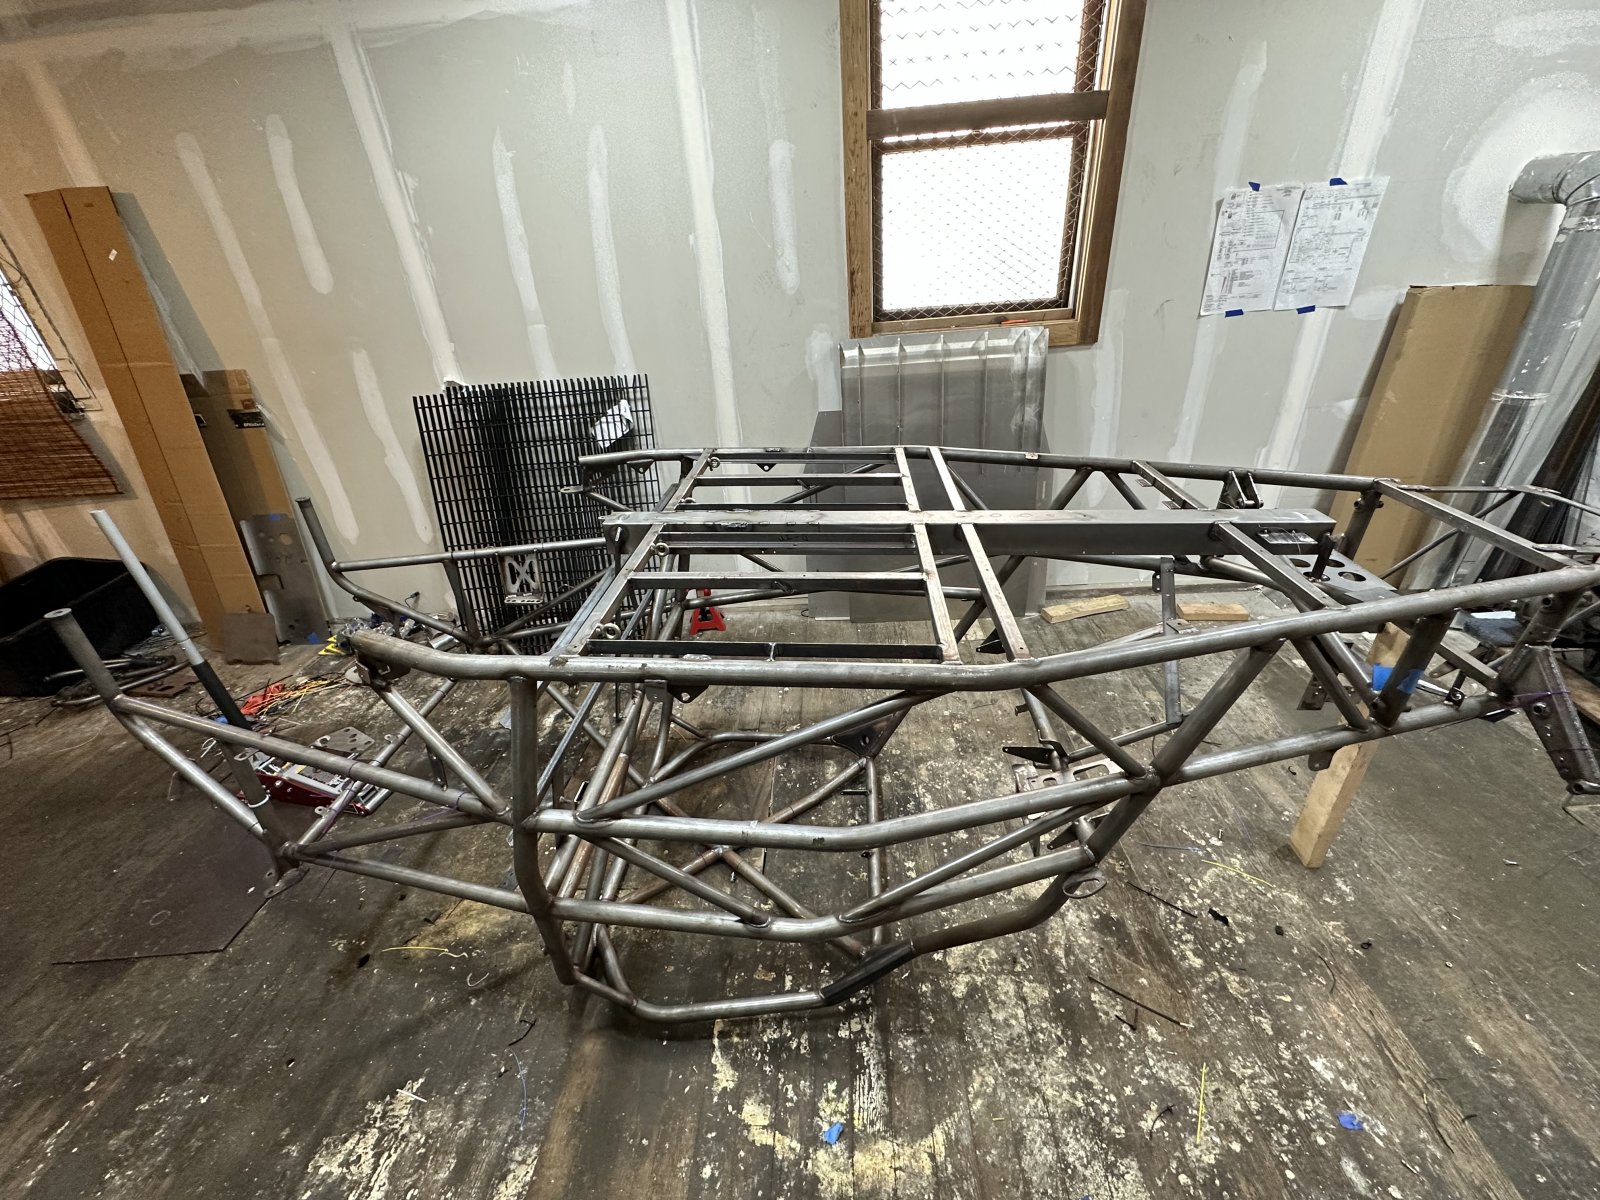
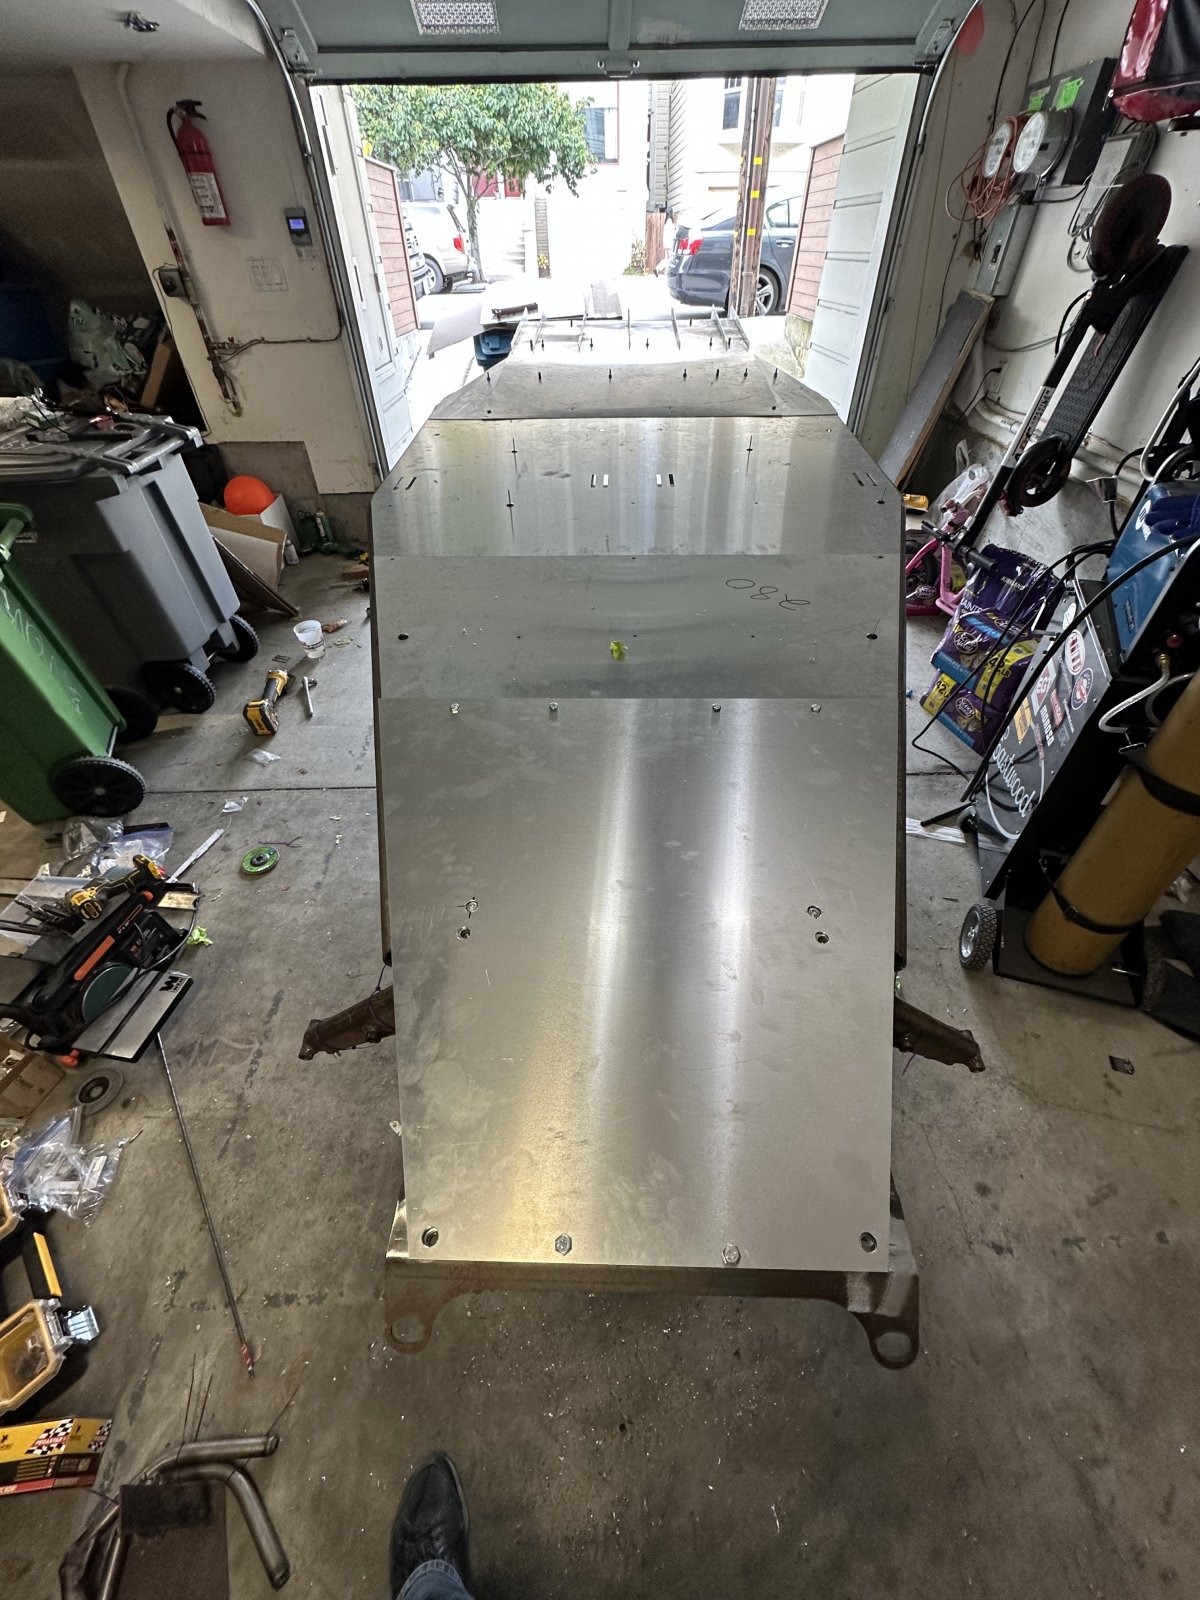
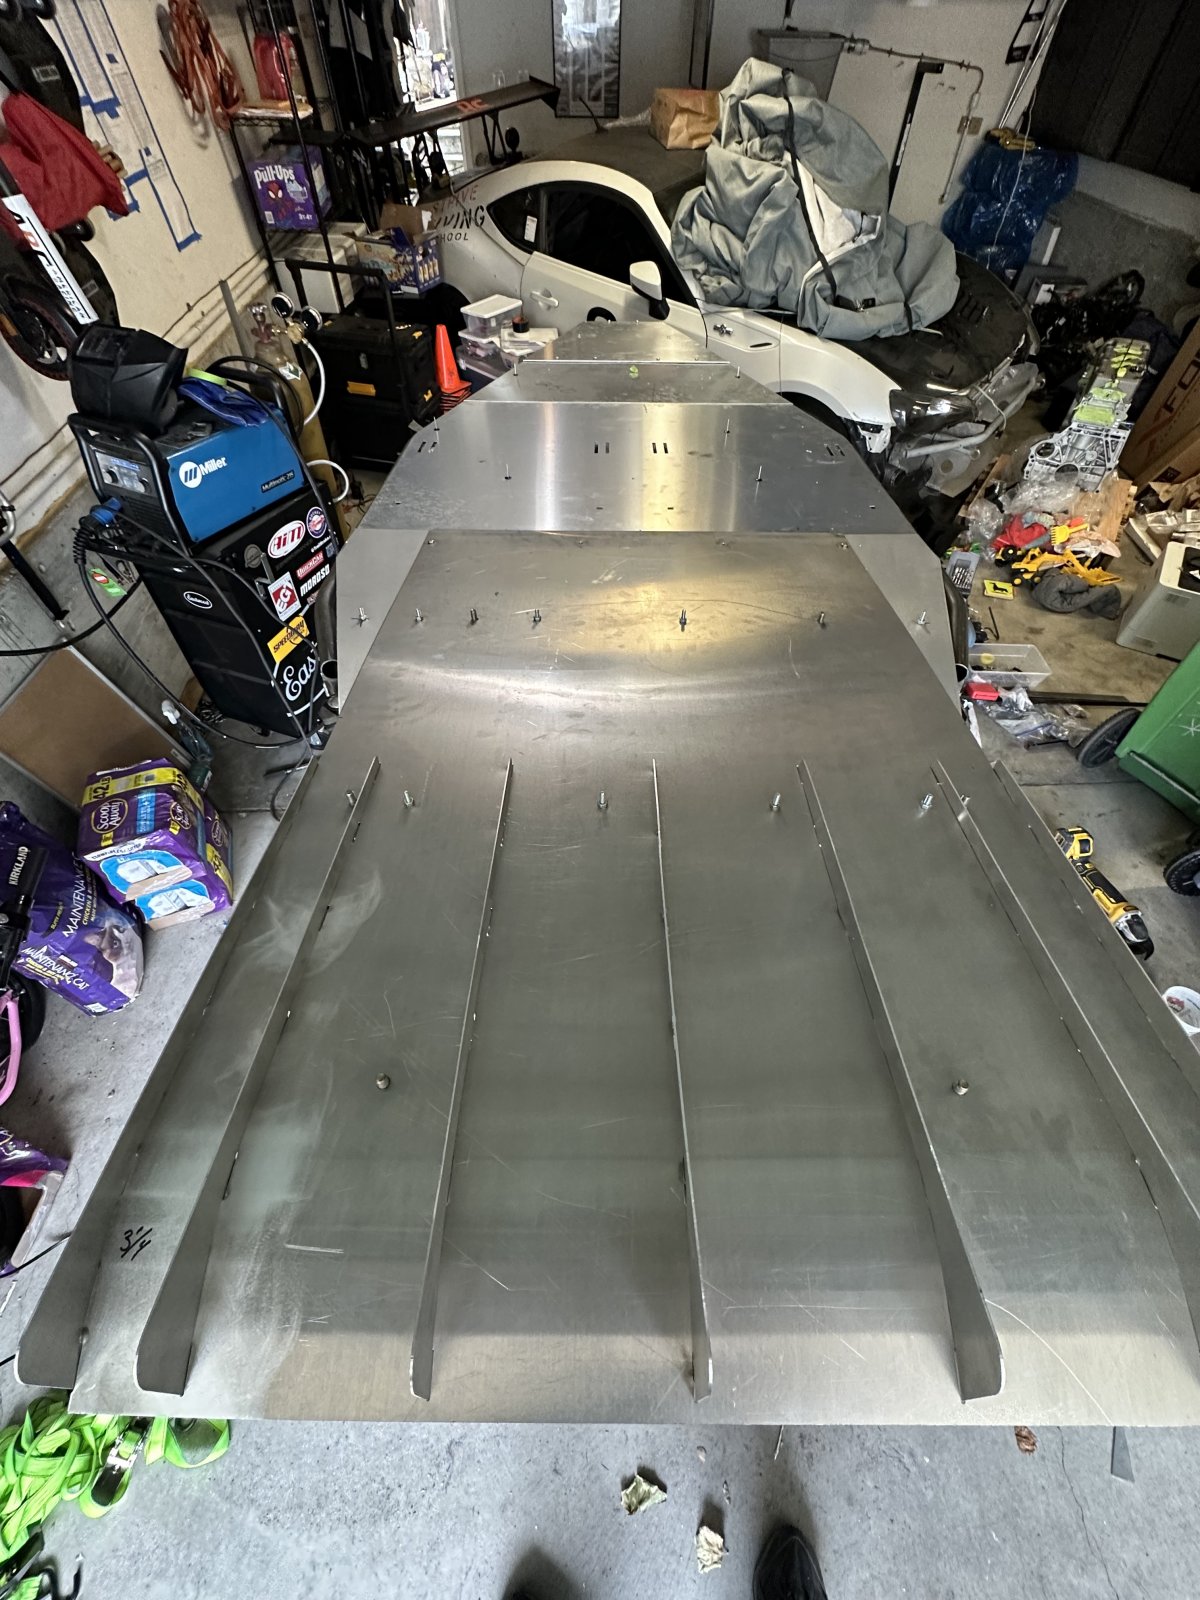
A big part of the day was completing the floor and diffuser.
I extended the floor forward to the end of the radiator mount. I’m not using the DF heat exchanger up front, so no need for it to be open.
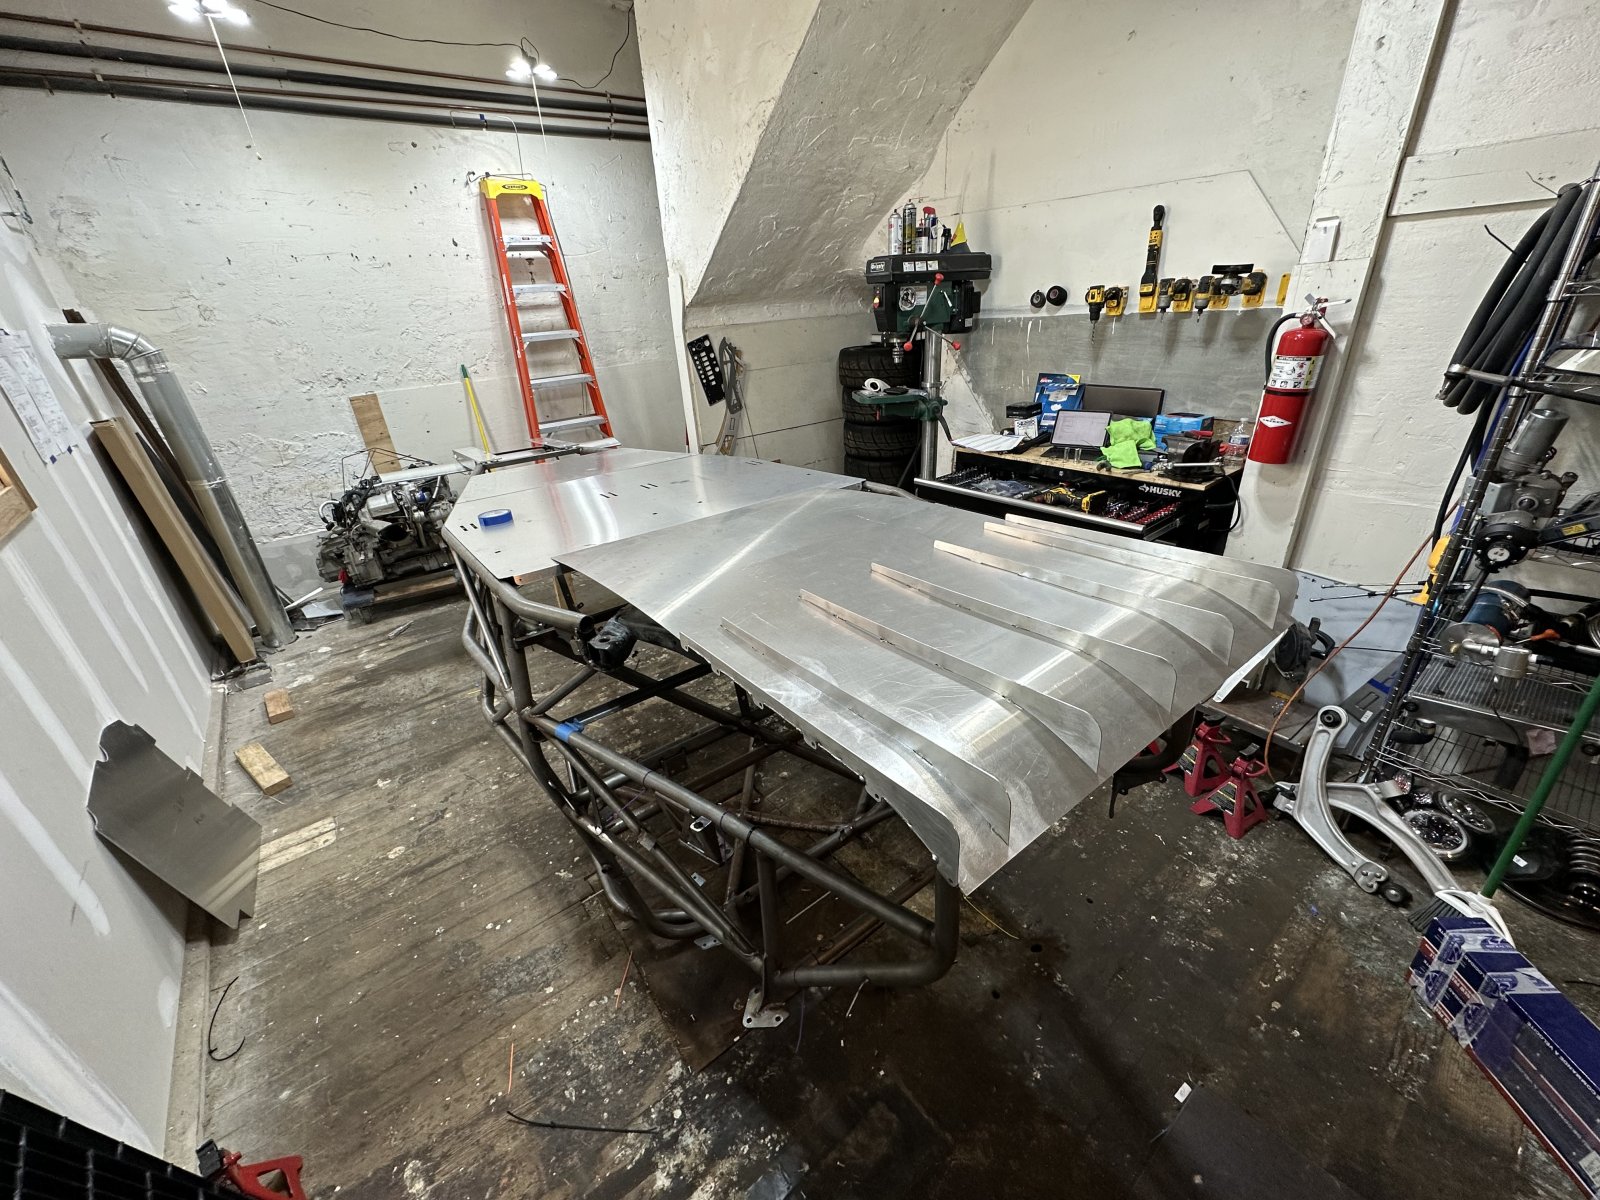
I installed the Nine Lives Racing diffuser, adding studs to the subframe for mounting and some winglets to complete the full coverage.
Took me a while to decide on how to mount the diffuser. I know it’s going to be on a off the car a lot, and it’s all going to be while I’m laying on the ground, so I figured studs would make installing it much easier compared to bolts.
The studs are pretty simple to install as you can just bolt them to the difissuer, then run them down till they touch the subframe and tac them at the correct angle.
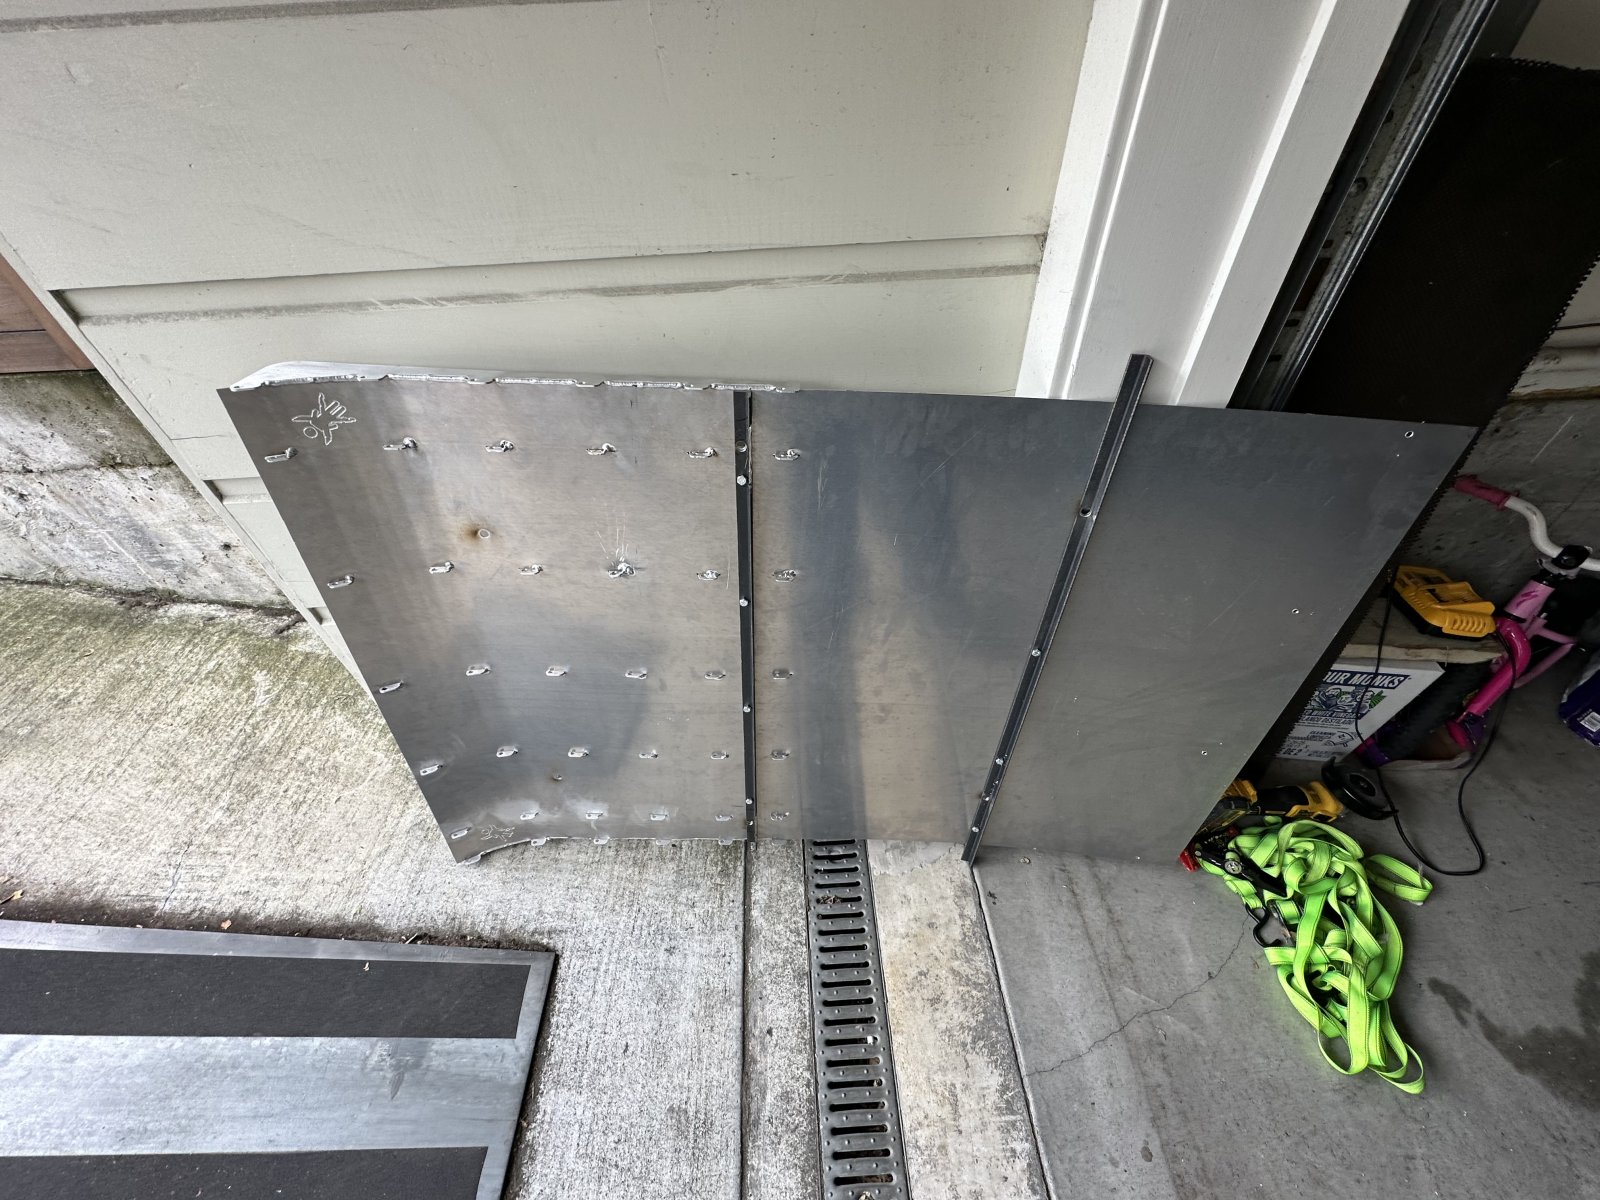
I kinda doubt it will do anything , but I extend the diffuser with some small extensions. I can’t weld aluminum so they will just be pop riveted to the diffuser.
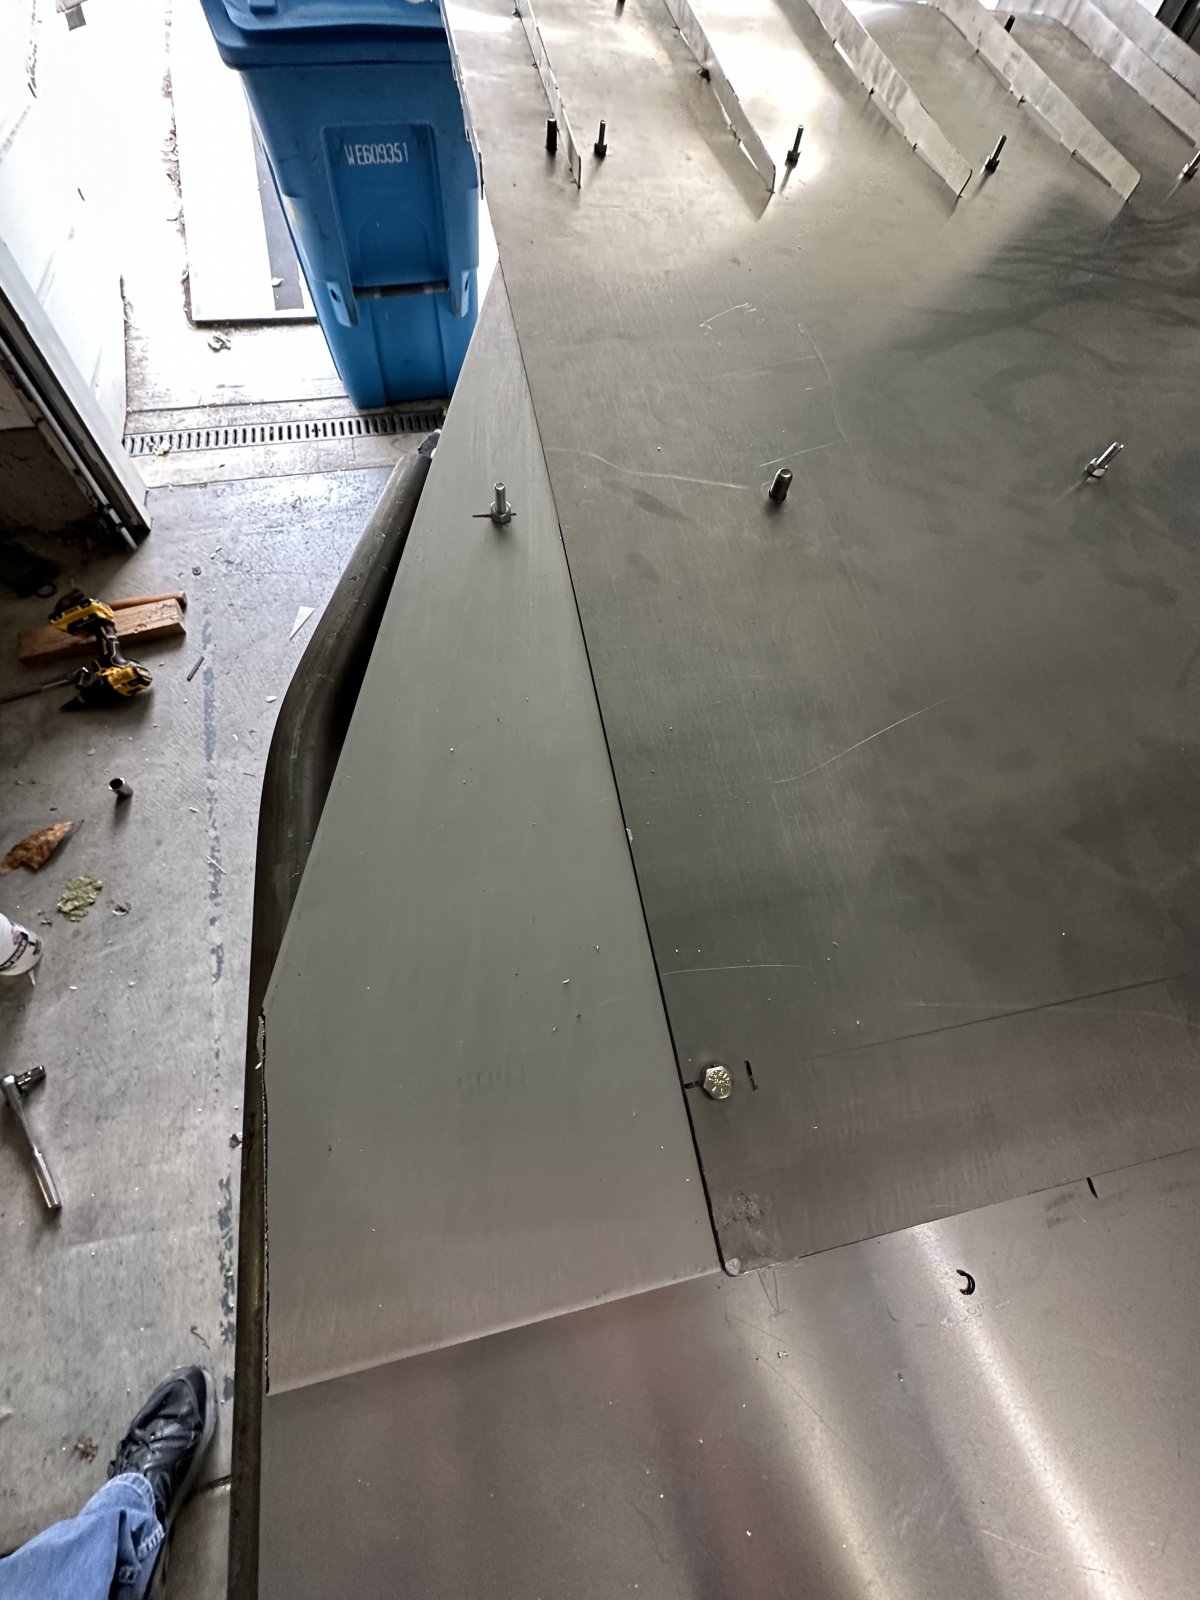
Other than that I spent a bunch of time finalizing miscellaneous brackets and welding zip tie tabs. Still have a few hours to wrap it all up tomorrow.
A big part of the day was completing the floor and diffuser.
I extended the floor forward to the end of the radiator mount. I’m not using the DF heat exchanger up front, so no need for it to be open.
I installed the Nine Lives Racing diffuser, adding studs to the subframe for mounting and some winglets to complete the full coverage.
Took me a while to decide on how to mount the diffuser. I know it’s going to be on a off the car a lot, and it’s all going to be while I’m laying on the ground, so I figured studs would make installing it much easier compared to bolts.
The studs are pretty simple to install as you can just bolt them to the difissuer, then run them down till they touch the subframe and tac them at the correct angle.
I kinda doubt it will do anything , but I extend the diffuser with some small extensions. I can’t weld aluminum so they will just be pop riveted to the diffuser.
Other than that I spent a bunch of time finalizing miscellaneous brackets and welding zip tie tabs. Still have a few hours to wrap it all up tomorrow.
OptimizePrime
Goblin Guru
@ATMironov You may be past this at this point but I took a look at the tune. @Gtstorey was on the money with the Power Enrichment, .83 is unnecessarily rich. You can bump that to .86 .87 or 12.7 afr with confidenceAttached is the tune. They also sent New Layout and Channels, but I can't upload them here.
All the internals on the motor are stock, I just have the 3 bar map sensors.
I did tell them and pay for the custom car tune.
I haven't sent it back to ZZP yet. Before I waste a bunch of their time, I want to make everything is correct on my end.
Sort of in the same vein, the MAF Correction base is adding or removing fuel in almost every cell across the Load / RPM. I'd set this table all to 1 and go and dial in these fuel trims and it'll impact virtually everything else you do. Ideally most of the cells will stay one with a few cells being modified ~ +-3%. Most of your fuel trim work will be in the MAF Calibration table, check out my Guide for more info.
Your torque to load upper limit is 305kpa (44.23psi - 14.7) = ~29.5psi and scaled pretty nicely however you're going to tax your wastegate and solenoid at the WG Duty Cycle levels he has set. Generally speaking you'd want to be around 85% as the upper limit and can scale your Torque to Load so the numbers match. Instead of 305kpa you'd have 359kpa (359kpa *.85=305kpa). It looks like he's targeting around 24-25psi and scaling up to maintain that same pressure. In the real world, you may notice boost creep, you may not - just something to keep in mind.
You can also be a lot more aggressive in your timing, injection angles but save that for later. Hope this helps!
Edit: Side note, I noticed in your Pressure to RPM factor table the upper limit is 2.9 or 28psi ( 14.7*2.9-14.7 ). I'm guessing he's using this to limit the boost creep / overboosting if there is any based on the other tables mentioned.
Last edited:
ATMironov
Well-Known Member
Thanks for the detailed analysis!@ATMironov You may be past this at this point but I took a look at the tune.
This tune is just the baseline from ZZP. When the car is running I will send them logs and they will send back revisions.
I really don’t know anything about tuning, so I’ll be sure to post what they send me.
ATMironov
Well-Known Member
Well it’s all set for powder coating tomorrow!
Fingers crossed I didn’t miss anything.
I started to work on replacing the clutch and flywheel.
The donor only had 4,000 miles on it, but I wanted a lighter flywheel, so I figure I would change the clutch at the same time.
existing clutch. No dust to speak of
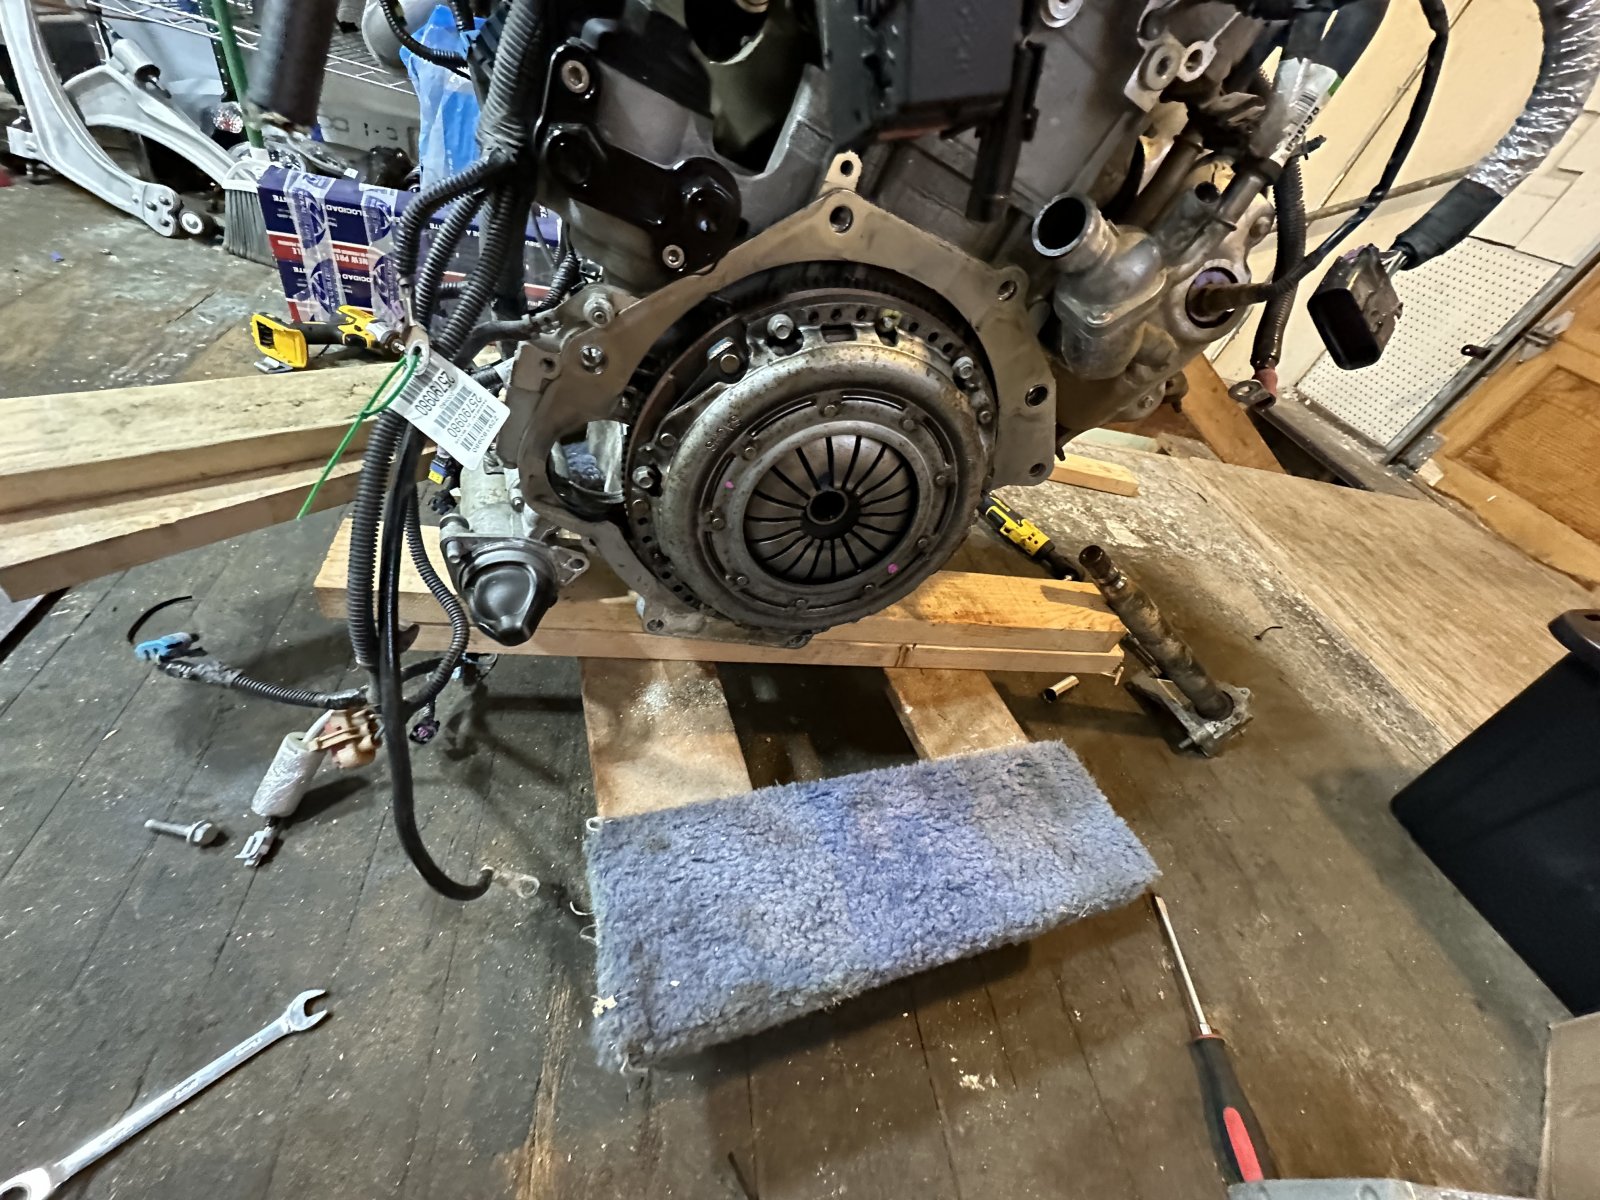
new flywheel
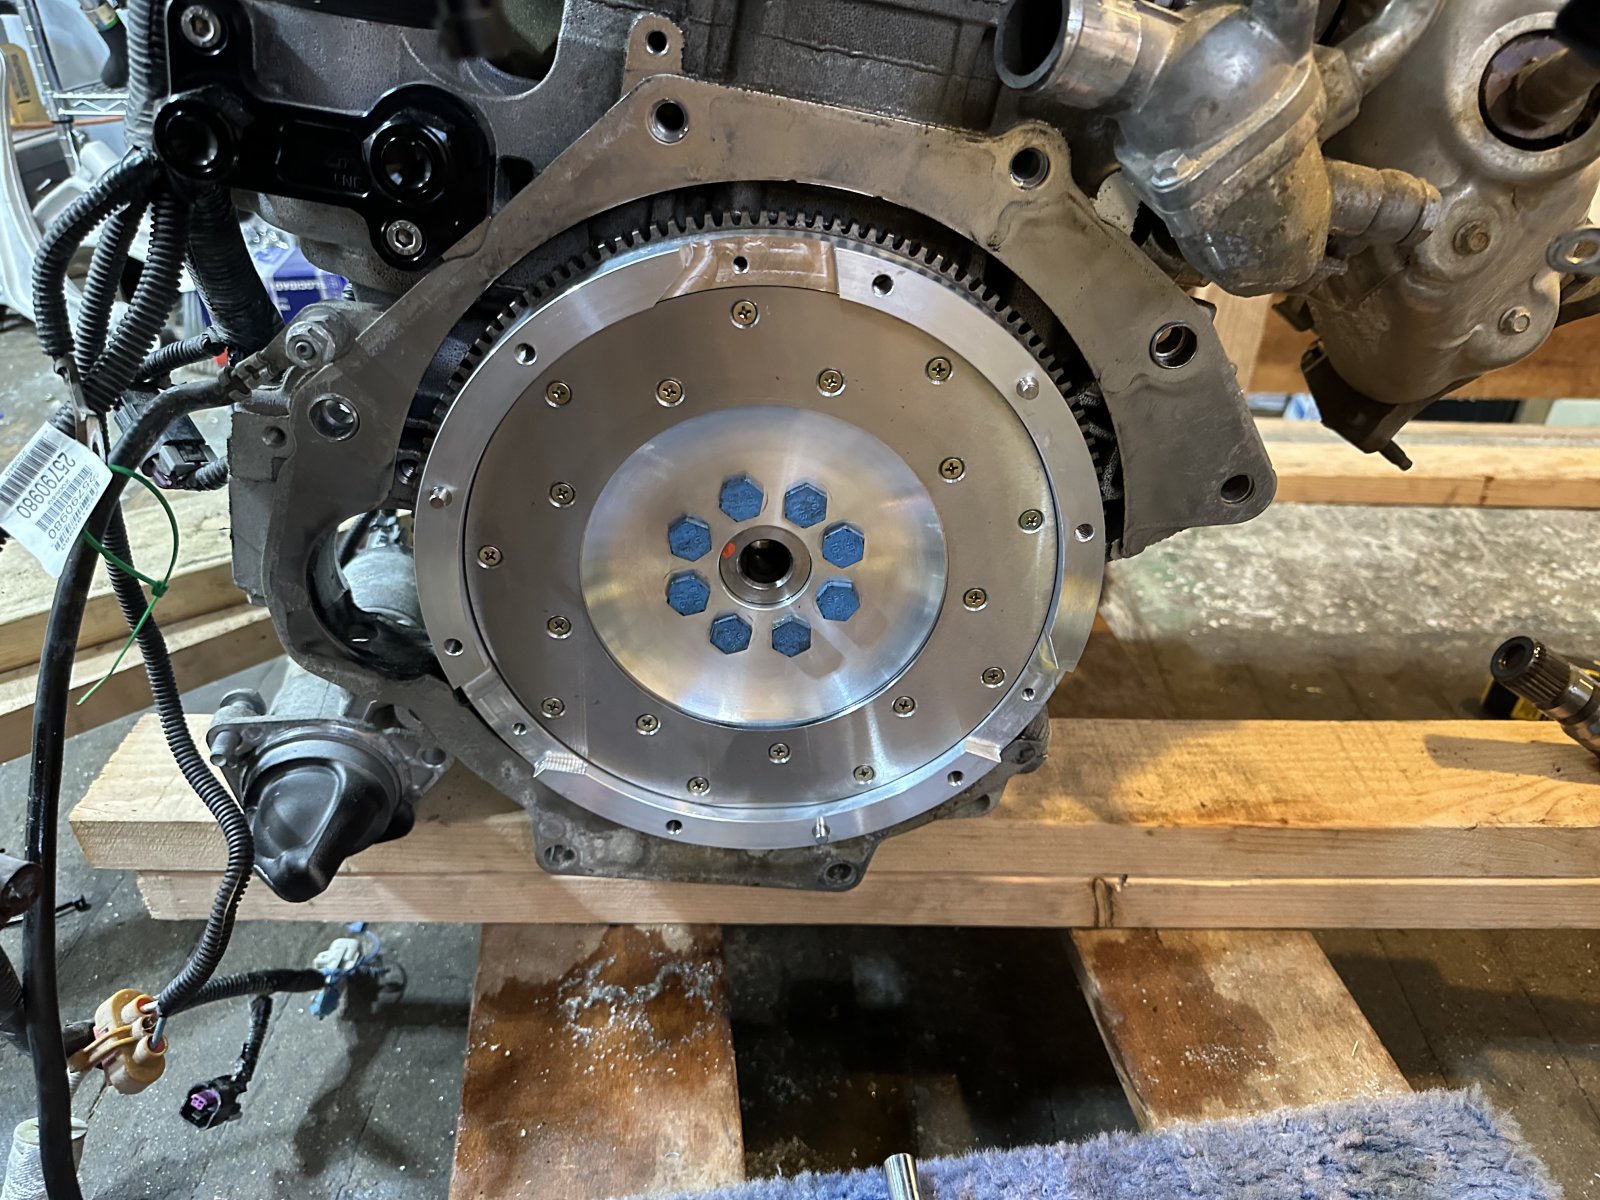
The alignment too doesn’t fit the crank. :-(. I’ll probably just wrap tape around it till it fits.
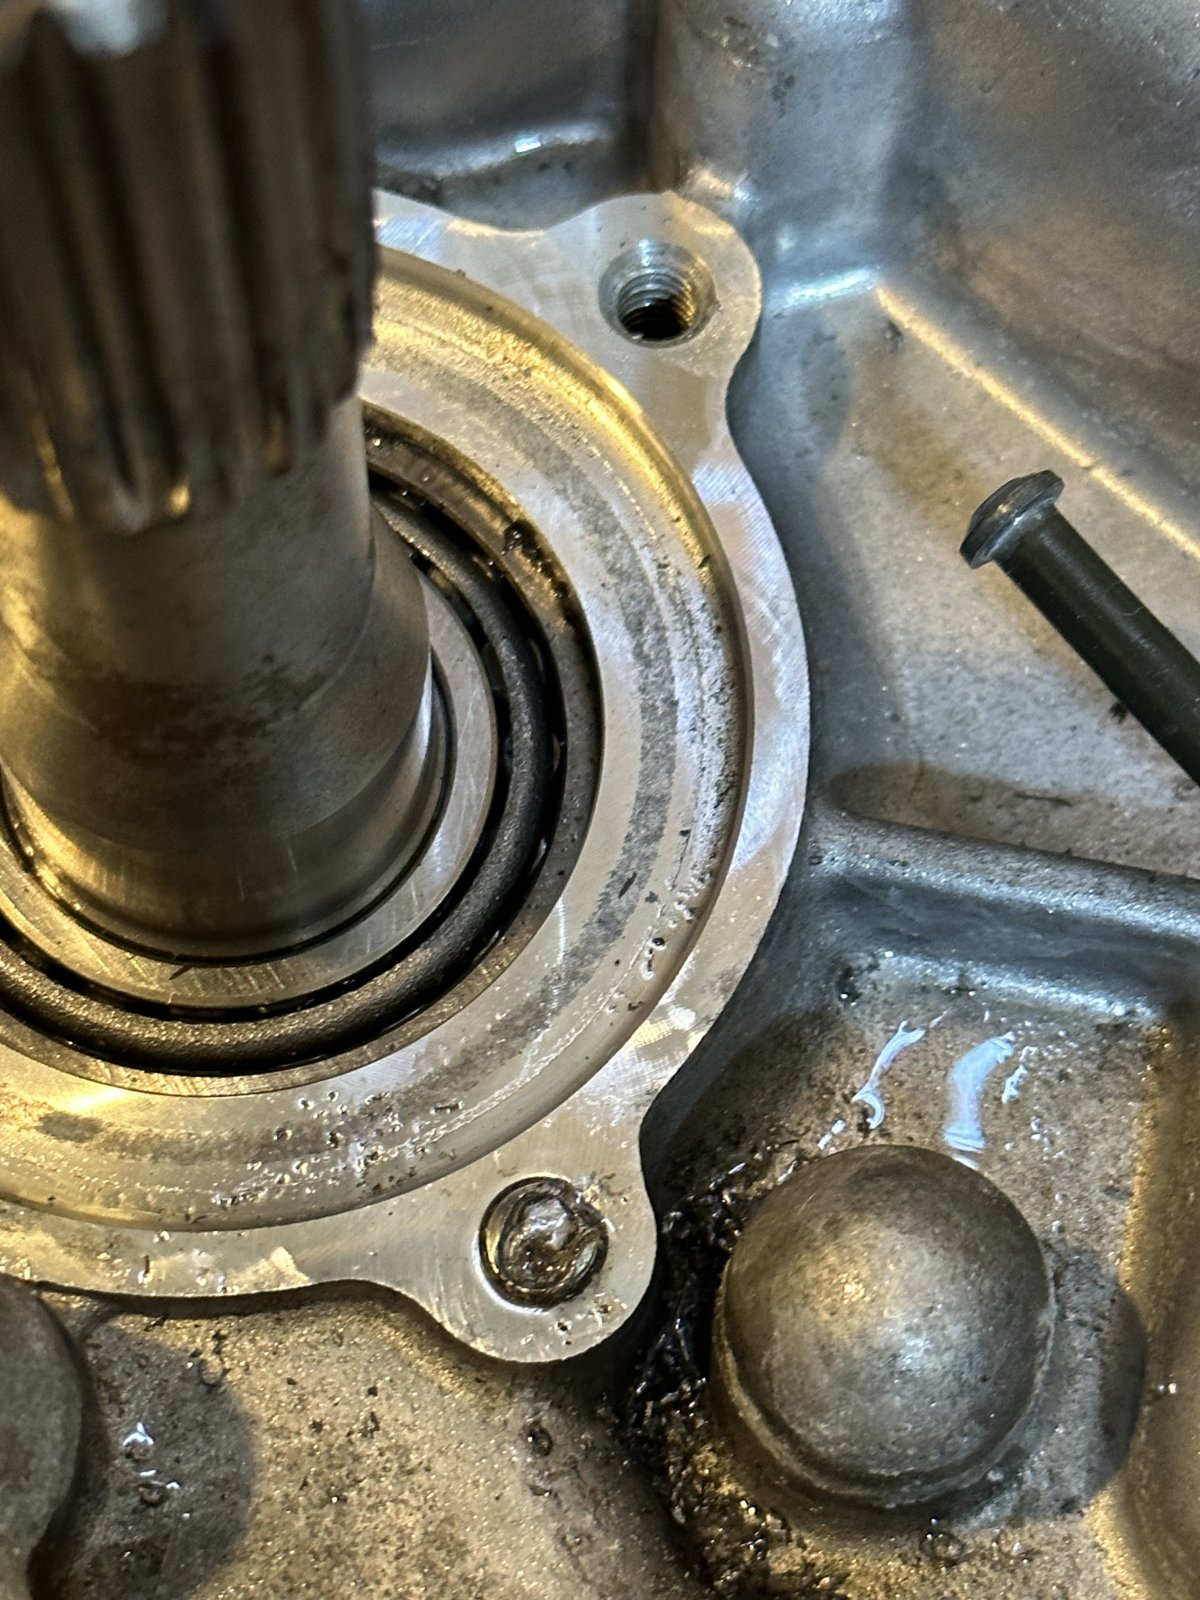
I went to change the throw out bearing and stripped the head of two of the T30 bolts. I started using extractors and both the heads came off the bolts allowing the bearing to come out.
i was able to spin one bolt out with vice grips, but ended up braking off an extractor in the 2nd bolt.
now I need to take the transmission to my other garage with the welder and try to weld on a nut to the broken bolt
I think this literally the last bolt I need to remove on this entire build, and it’s the only one I broke. :-(
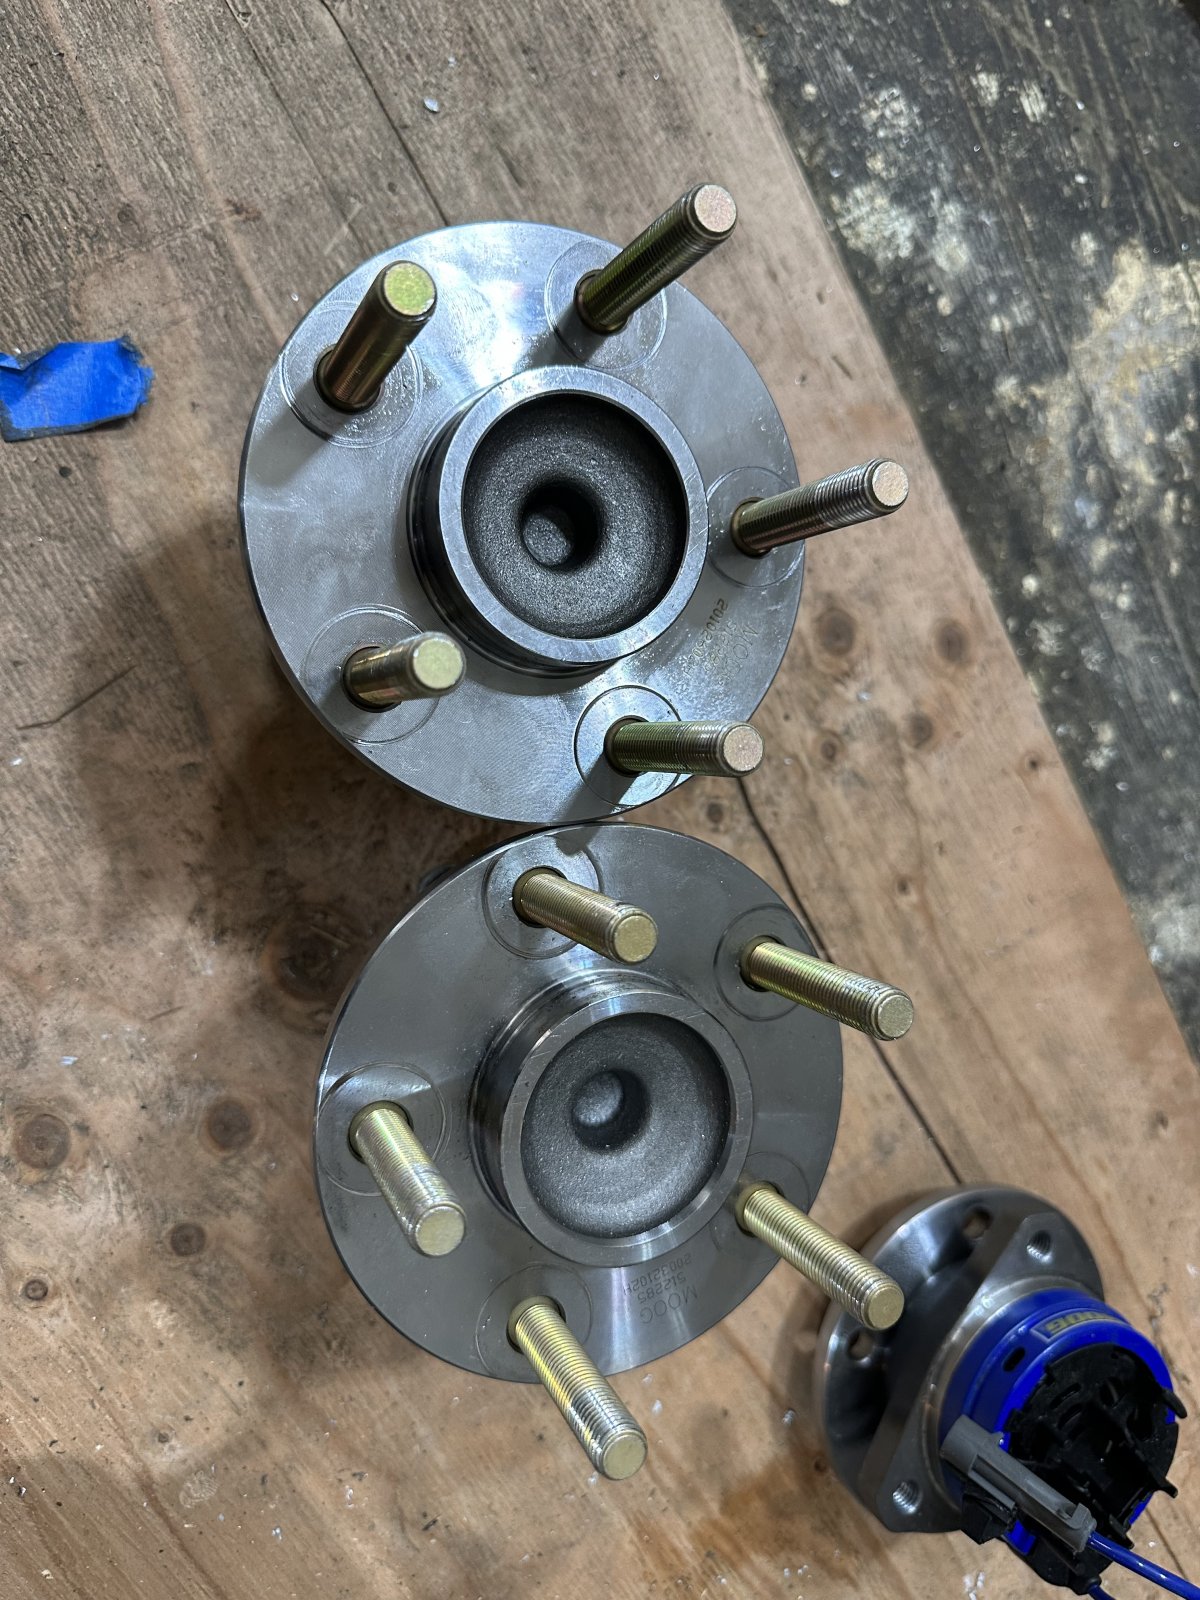
And finally I worked on the wheel studs.
I’m having a hell of a time getting the right sized studs. But the front work, I need to order a different set for the rear.
Fingers crossed I didn’t miss anything.
I started to work on replacing the clutch and flywheel.
The donor only had 4,000 miles on it, but I wanted a lighter flywheel, so I figure I would change the clutch at the same time.
existing clutch. No dust to speak of
new flywheel
The alignment too doesn’t fit the crank. :-(. I’ll probably just wrap tape around it till it fits.
I went to change the throw out bearing and stripped the head of two of the T30 bolts. I started using extractors and both the heads came off the bolts allowing the bearing to come out.
i was able to spin one bolt out with vice grips, but ended up braking off an extractor in the 2nd bolt.
now I need to take the transmission to my other garage with the welder and try to weld on a nut to the broken bolt
I think this literally the last bolt I need to remove on this entire build, and it’s the only one I broke. :-(
And finally I worked on the wheel studs.
I’m having a hell of a time getting the right sized studs. But the front work, I need to order a different set for the rear.
Last edited:
Desert Sasqwatch
Goblin Guru
Your missing speedholes in all that extra steel you welded in! LOL!
ATMironov
Well-Known Member
Frame has been dropped off at powder coating!

I also dropped off the fuel tank at a Line X shop for coating. It’s the best secondary protection I can think of since there is no bladder in the tank
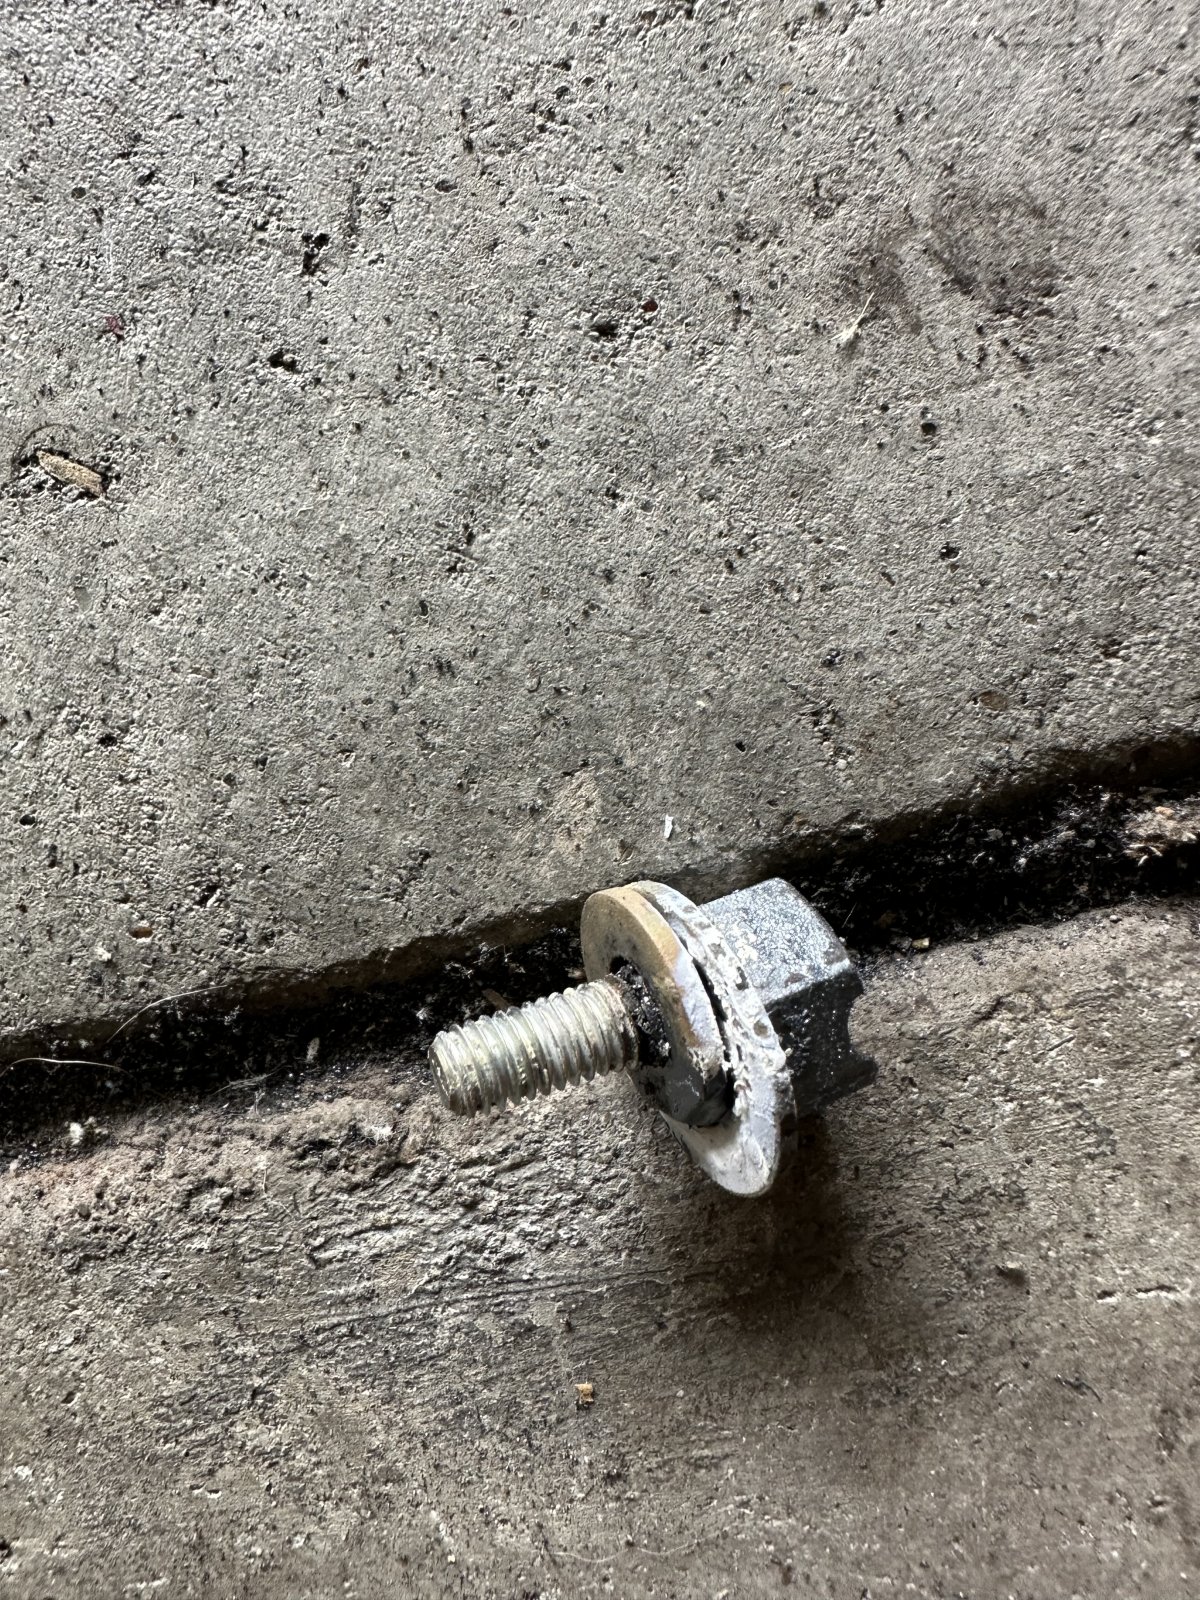
And finally I got the broken bolt out of the transmission by welding a nut onto it.
now I can put it back on the motor.
I also dropped off the fuel tank at a Line X shop for coating. It’s the best secondary protection I can think of since there is no bladder in the tank
And finally I got the broken bolt out of the transmission by welding a nut onto it.
now I can put it back on the motor.
Last edited:
Chris_WNC
Well-Known Member
I saw your posts on FB about that bolt. I never knew that "hack" for steel in aluminum. Freakin sweet! I've got a few snapped off screws in some Grand Wagoneer rims that I'm going to try it on.And finally I got the broken bolt out of the transmission by welding a nut onto it.
now I can put it back on the motor.
CHRIS
ATMironov
Well-Known Member
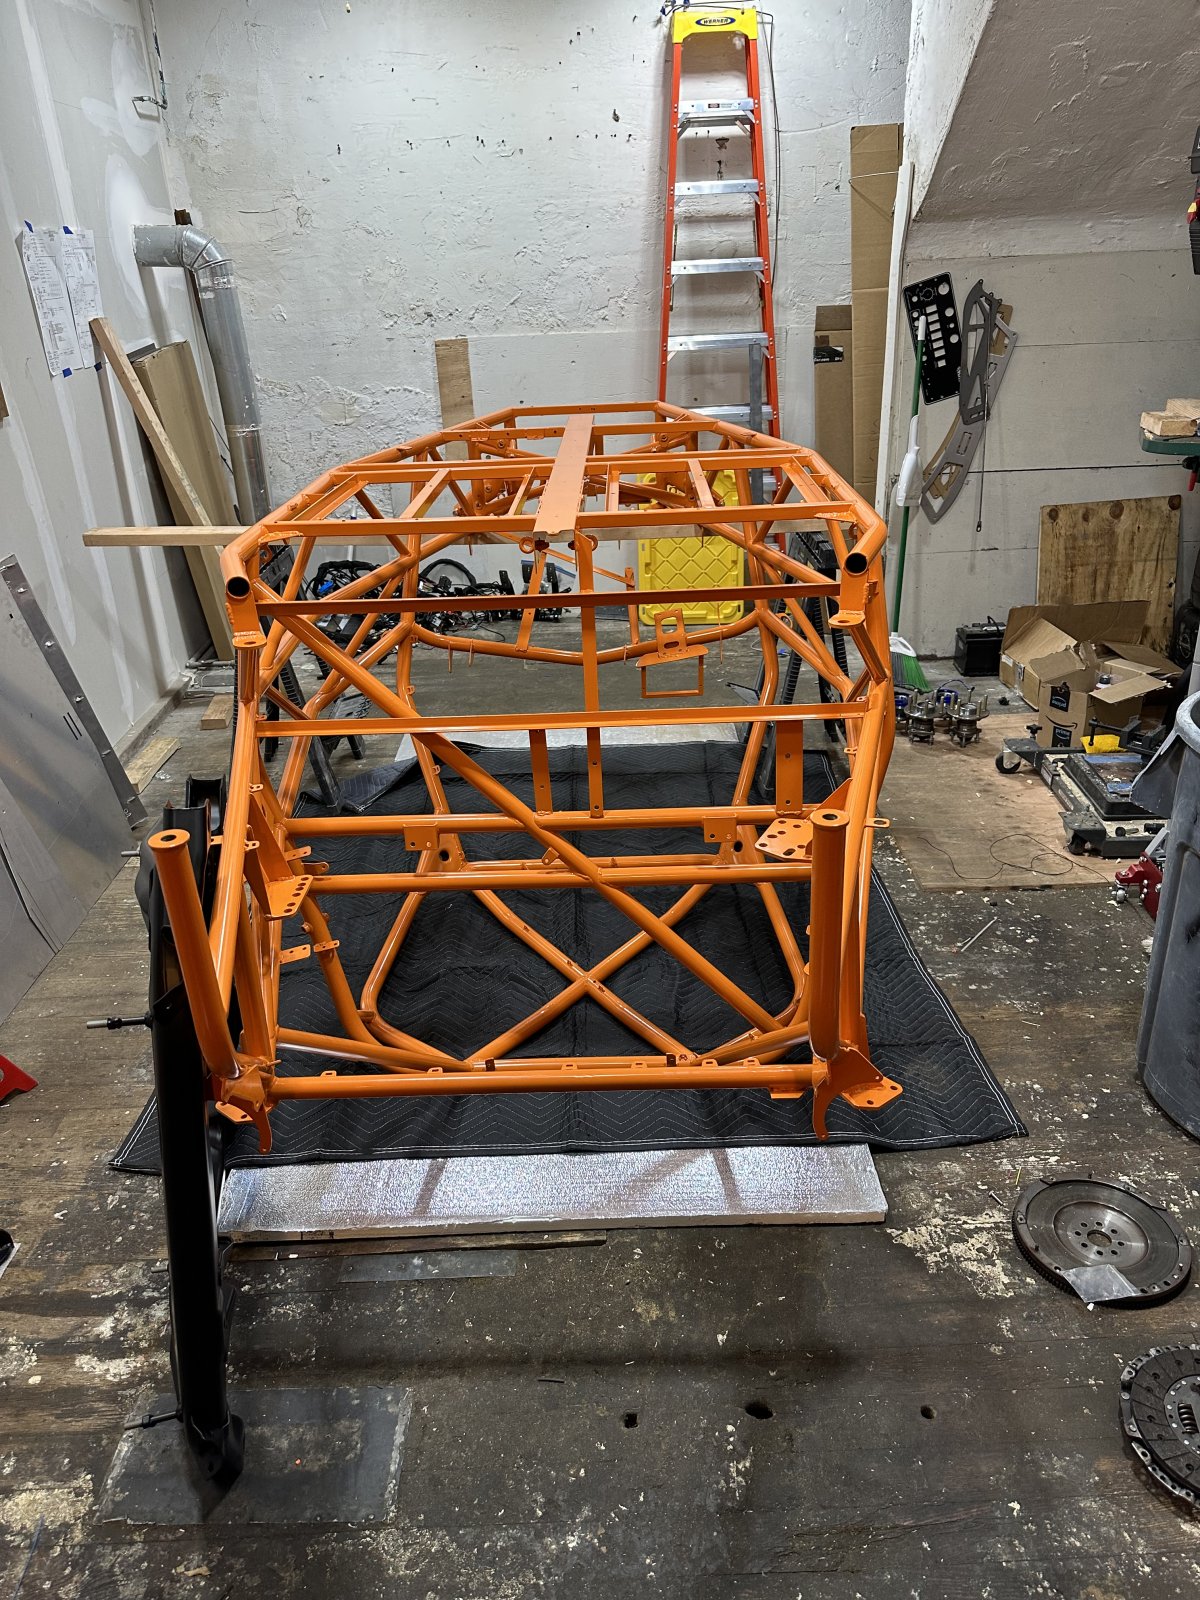
The frame is done and safely back in my garage. Everything’s looking really good.
I’ve got a nice four-day weekend, coming up, and no plans, so hopefully I’ll get a whole bunch of the car put back together.
I’m still waiting on the fuel tank, which should be ready on Friday and I’m waiting for flywheel bolts. Which I should hopefully have Thursday or Friday.
I’ve got a nice four-day weekend, coming up, and no plans, so hopefully I’ll get a whole bunch of the car put back together.
I’m still waiting on the fuel tank, which should be ready on Friday and I’m waiting for flywheel bolts. Which I should hopefully have Thursday or Friday.
Last edited:
ATMironov
Well-Known Member
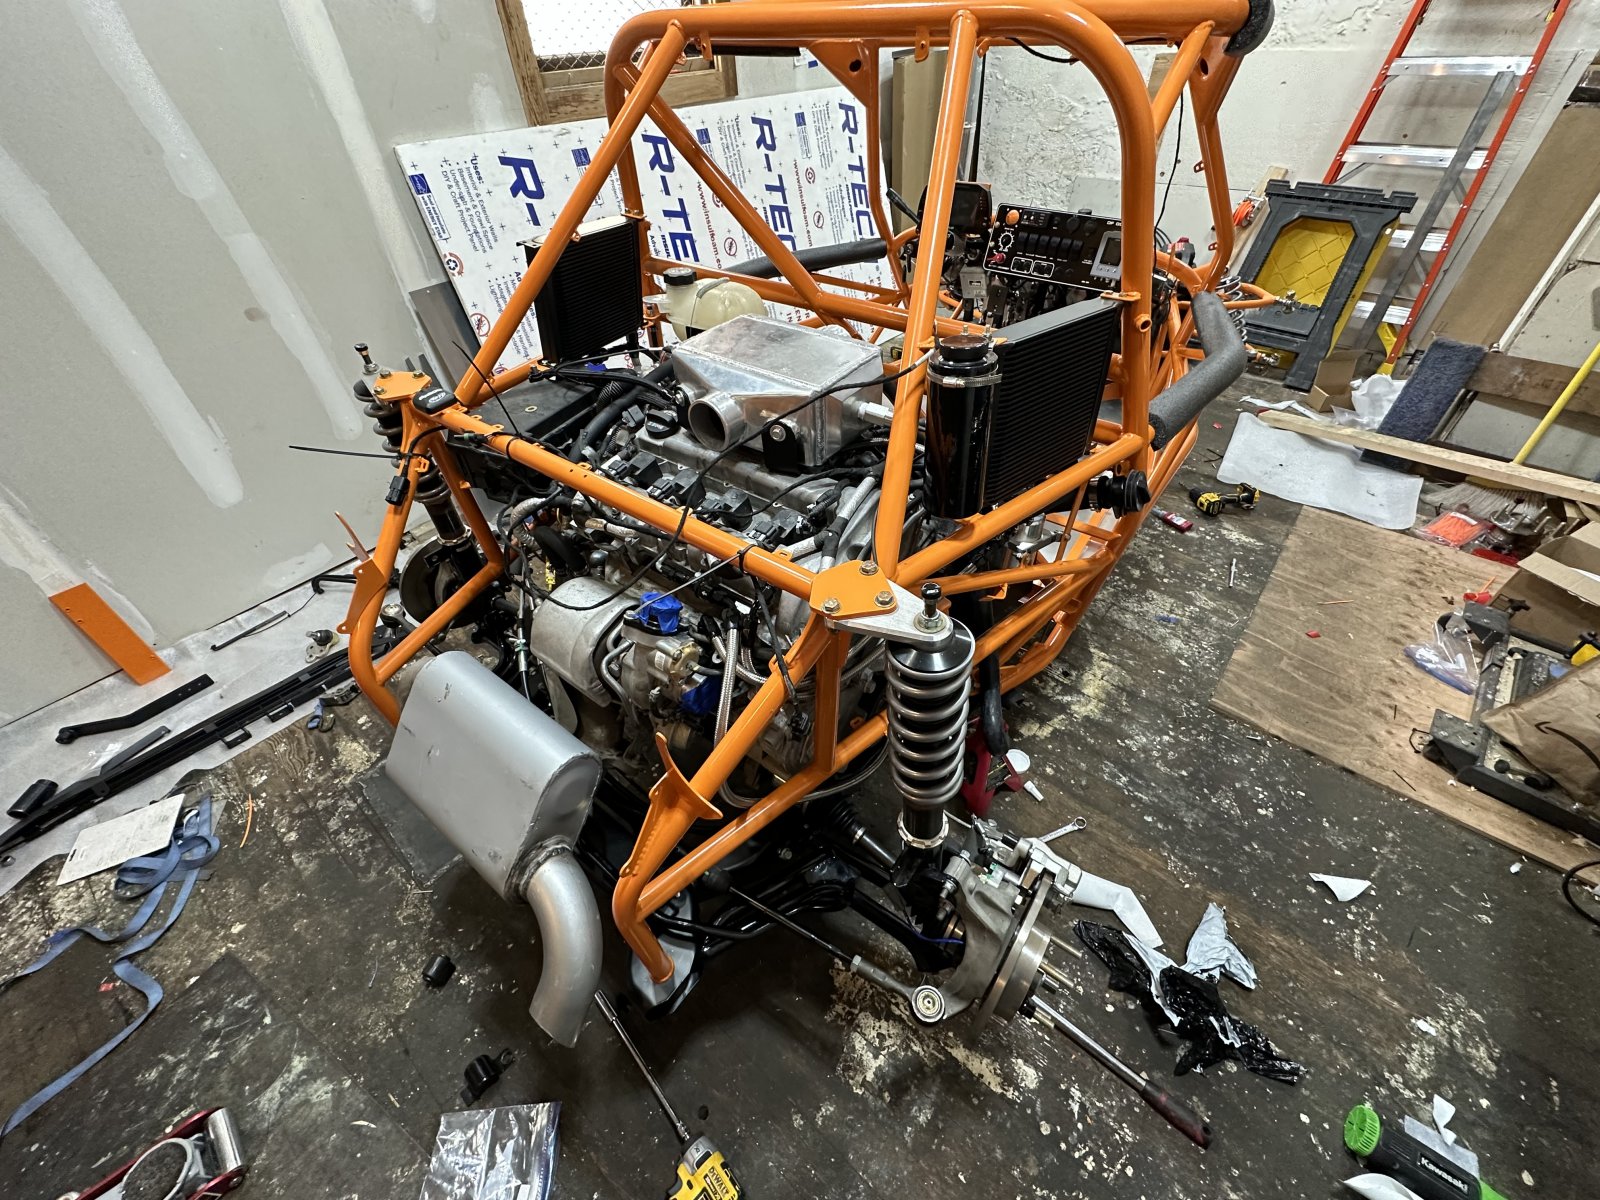
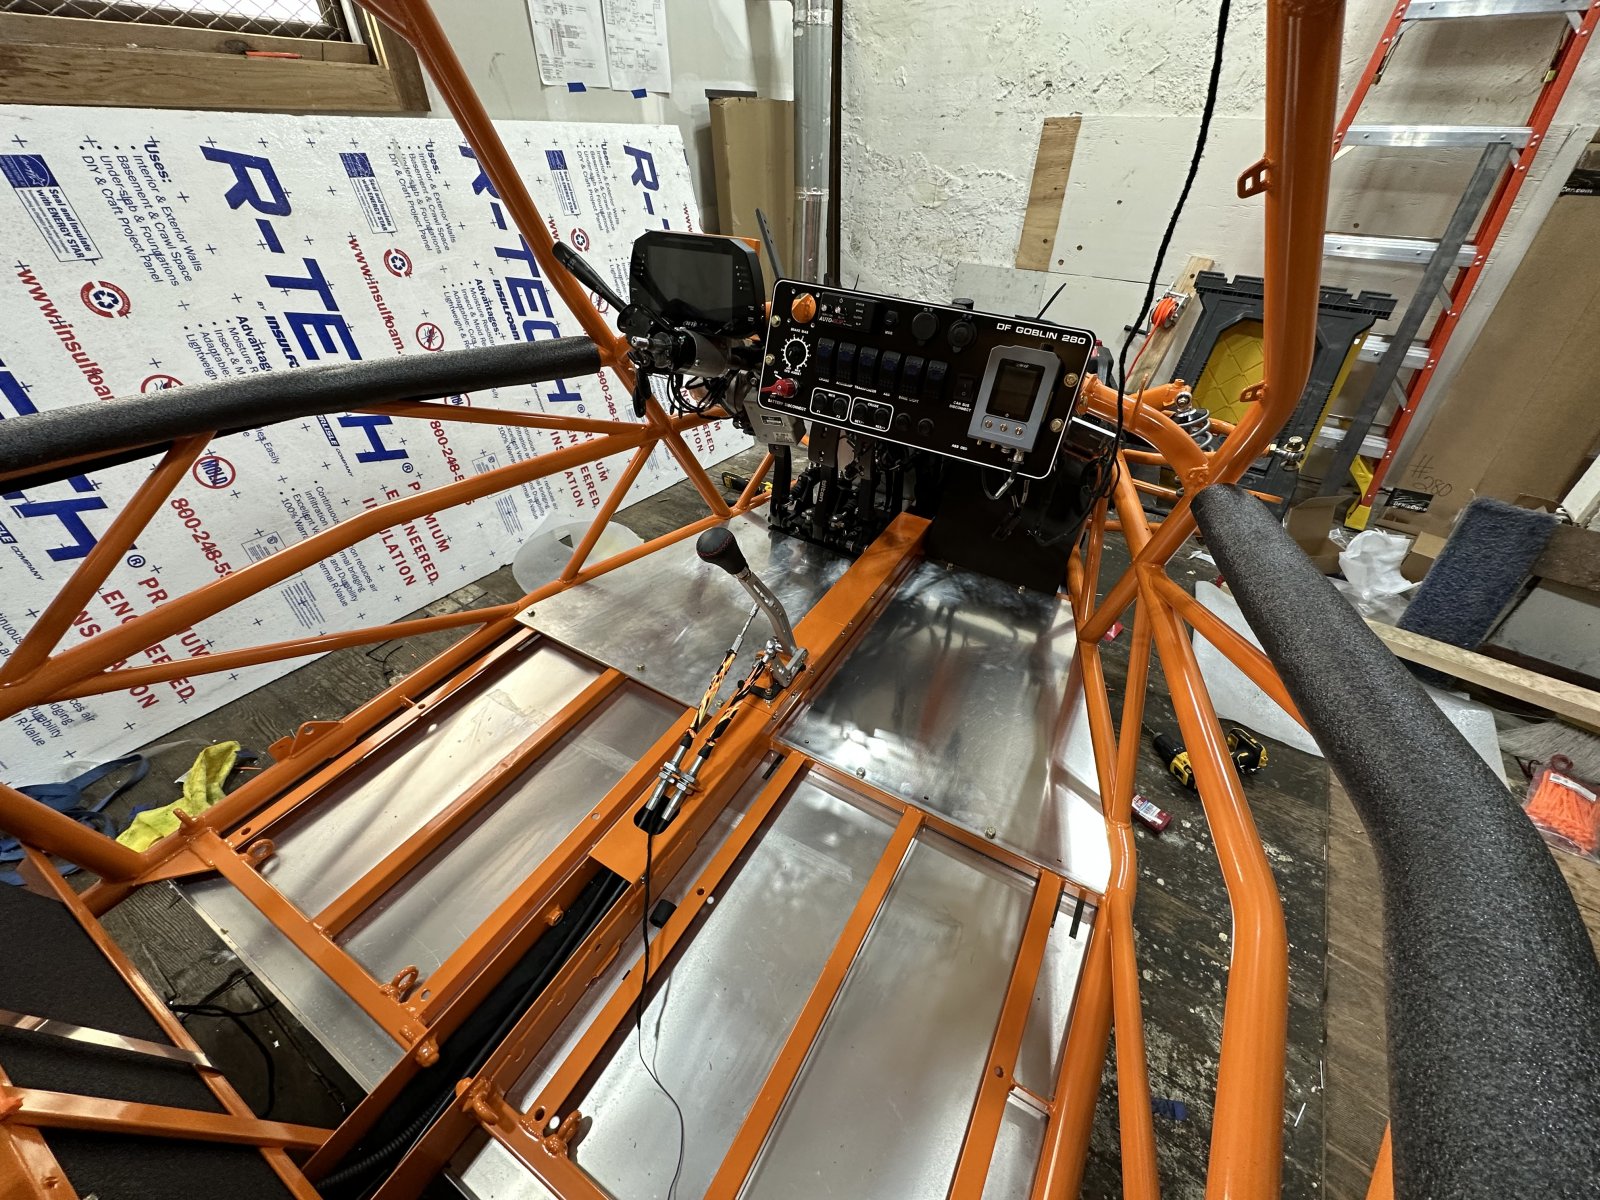
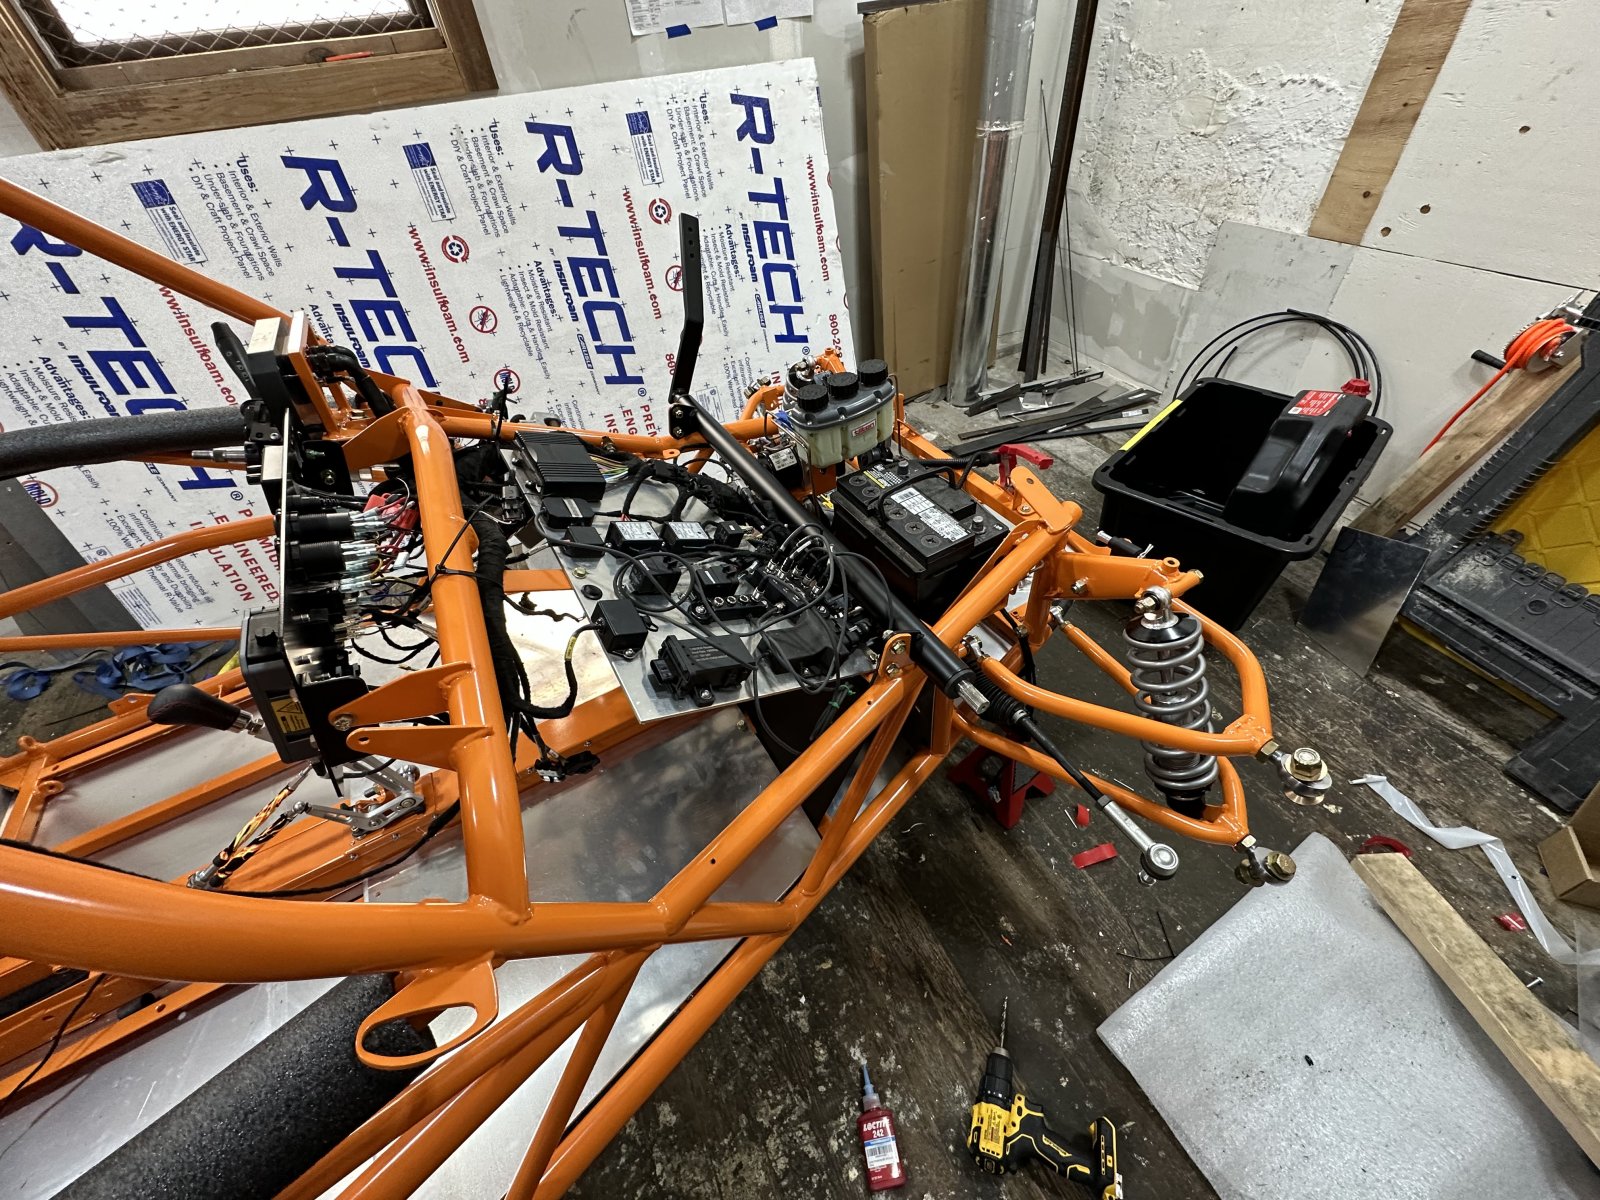
Day 1 of assembly and about 10 hours complete.
The following are installed, torqued and marked.
coolant hoses
Floor pans
ABS pump
Brake/clutch reservoir
Hard brake lines
Pedal assembly
Wiring harness and accessories
Ignition
Steering rack and EPS
Dash
Button Panel
New clutch and flywheel
Gas tank
Fuel pump
Fuel sender
back at it tomorrow
The following are installed, torqued and marked.
coolant hoses
Floor pans
ABS pump
Brake/clutch reservoir
Hard brake lines
Pedal assembly
Wiring harness and accessories
Ignition
Steering rack and EPS
Dash
Button Panel
New clutch and flywheel
Gas tank
Fuel pump
Fuel sender
back at it tomorrow
ATMironov
Well-Known Member
I got a few more hours into it.
Finished the rear suspension including the ZZP control arms
Front control arms are in, but waiting on my steering knuckles to wrap up the front suspension.
the list is pretty short now, but won’t have the rest of the parts till next week.


Finished the rear suspension including the ZZP control arms
Front control arms are in, but waiting on my steering knuckles to wrap up the front suspension.
the list is pretty short now, but won’t have the rest of the parts till next week.
ATMironov
Well-Known Member
Well ****.
I got the car together in about 40 hours, and it fired right today. I tightened up one loose oil cooler line and snugged down a fuel fitting and all seems to be great.
then I noticed a steady drip of oil coming out between the trans the motor. My only thought is the rear seal. Anyone have any other suggestions?

 youtube.com
I got the car together in about 40 hours, and it fired right today. I tightened up one loose oil cooler line and snugged down a fuel fitting and all seems to be great.
then I noticed a steady drip of oil coming out between the trans the motor. My only thought is the rear seal. Anyone have any other suggestions?
DF Goblin - LNF Rear main seal leaking
youtube.com
SmsDetroit
Goblin Guru
If it’s oil. Rear main seal. Did the seal seat property behind the throw out bearing. Could be trans fluid
ATMironov
Well-Known Member
I have a borescope coming.If it’s oil. Rear main seal. Did the seal seat property behind the throw out bearing. Could be trans fluid
if it’s the transmission, I should be able to see fluid though the inspection port, right?