CNCMan's City Ext 07 LS Manual

CncMan333

Active Member
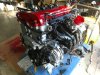
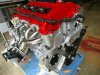
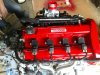
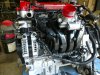
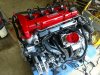
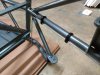
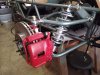
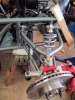
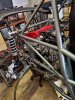
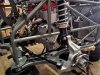
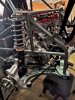
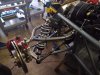
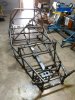
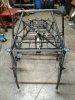
Tomorrow I will unpack all the boxes, but tonight I just peeped in them to see all the cool stuff! DF does a great job of packing it all and I can't wait to start putting it together! I can tell you one thing for sure, it is much nicer having this beautiful frame in the shop then that old Cobalt!
 

Attachments

CncMan333

Active Member
Wheels came in today - Drag DR-34 17x8 in back 16x7 in front. Planning on running 225/55r17 in back and 205/50r16 in front.
dr34l.jpg
 

CncMan333

Active Member
I wanted the engine to look special since it will be so visible in this car. I used a soda blaster to get the surface prepped after tons of degreasing and scrubbing. I used Painless brand powerbraid to recover the engine harness after moving the MAF and removing the air pump, air solenoid, and A/C connectors. The valve cover came off and was flat sanded smooth. I used engine paint (Cast Aluminium, Gloss black, and red). I have no doubt that there will be touch up to do after it gets in the car, but I like the look so far.
eng5l.jpg
eng1l.jpgeng2ail.jpgeng3il.jpgeng4.jpgeng6il.jpgeng7l.jpg
 

Adam

Administrator
Staff member
Planning on running 225/55r17 in back and 205/50r16 in front.
Your rear tire will be 26.8 inches tall which is quite a bit taller than we normally run. When we run 17s it is usually on an SS build and we choose 245/40-17 tires. They are 24.7 inches tall. The tallest tire we've run (besides on the all-terrain) was 26.1 inches a long time ago on P2. At 26.1 we had to use spacers to get the tire outside of the spring perch on the stock struts.

With your wheel choices and base model donor, here's what I would go for:
  • Front
    • 205/45-16 (23.2" tall)
    • or 205/50-16 if you want something a little taller (24.1" tall)
  • Rear
    • 235/40-17 (24.4" tall)
    • or 225/45-17 (25" tall)
I didn't extensively check the availability of these sizes but a quick search showed that there were at least a few options available on Tire Rack.
 

CncMan333

Active Member
I appreciate your input Adam. I changed my order to 225/45r17 in the rear and 205/45r16 in the front. I like look of the bigger tires although I think the performance might be better with smaller tires.
 

ctuinstra

Goblin Guru
I wanted the engine to look special since it will be so visible in this car. I used a soda blaster to get the surface prepped after tons of degreasing and scrubbing. I used Painless brand powerbraid to recover the engine harness after moving the MAF and removing the air pump, air solenoid, and A/C connectors. The valve cover came off and was flat sanded smooth. I used engine paint (Cast Aluminium, Gloss black, and red). I have no doubt that there will be touch up to do after it gets in the car, but I like the look so far.View attachment 4216
Beautiful engine! A lot of work there!
 

CncMan333

Active Member
Made some progress today. Welded in some extra cross members to align with the Sparco seat slider. I marked it out with the rear of the slider movement just about all the way back, then put in an extra set of holes 4 inches up from that so I had another option. I used 1 X 2 steel channel. Also welded flange nuts to the inside for easy mounting.
2018-07-03-17-21-46.jpg
2018-07-03-17-25-12.jpg
2018-07-03-17-24-58.jpg
 

CncMan333

Active Member
I printed a prototype body panel clamp today out of PETG. It is .125 thick around the bar and has a flat .062 from tangent to the outer diameter and a provision for a push type stainless theaded insert. It snaps around the bar very nicely although I will have to increase the ID after powder coat as it fits very well now on bare steel. Because the flat is tangent to the outside of the clamp it puts the edge of the alum panel below the center line of the bar that it is mounting to, so I am thinking once I am ready to try mounting the panels I will see if there is a plastic edging that I can use to fill the gap. That will make the panels more stable. I plan to upload the files for anything I print to thingieverse.
2018-07-04-10-33-32.jpg
2018-07-04-10-32-55.jpg
 

ctuinstra

Goblin Guru
I'm confused as to what body panel do you plan to clamp with this clamp? The side panels are typically pop riveted on and the front has mounting provisions already. Unless you are referring to the engine cover, which I do not have and have no experience with, but again I thought it had mounting tabs welded to the frame already.
 

CncMan333

Active Member
I am doing my own side panels. Rather than the ones in the kit which are just the bottom section, I am thinking I will come up higher and continuing back past where the gas tank fill is. But before I know how big to cut them I need to know how to mount them. I am curious about the hood mounting provisions. Does anyone have pictures of where the fiberglass hood mounts?
 

ctuinstra

Goblin Guru
I don't have pictures, but it's easy to see. The front mounts to the under the radiator using the twist-loc type of fastener and the top used simple bolts on the two large tabs on the dash crossbar.
 

Dre

Well-Known Member
They use quarter turn fasteners? That's dope. That's what i want for all my panels.
 

CncMan333

Active Member
Been a while since I sent an update to this page, but I am still here and still picking at it when there is time. The goal right now is to get it on wheels so it is more movable and the space can be freed up up some. The motor is bolted in but not connected. Things are coming together.
 

Attachments

Top