Joel's "new-to-me" standard track Goblin #007 - '10 SS/TC manual

Jm12

Active Member
The funny part to this story, was that everyone with a completed goblin knew this story before you started the journey. :D
We knew we were in for a ride, but I think we lacked the creative thinking to imagine just how bumpy that ride could get. In the scheme of things, the trip was *almost* perfect. Assuming the worst we come out with is a busted RPD screen, I'm calling the journey a success. Would I do it again? Hell. No. But I'm glad we did it.
 

Ross

Goblin Guru
I have soaked my Goblin a few time. Took 3 or 4 weeks to dry out the electronics. Maybe a fan would have sped up the dry time, but the instrument cluster, power steering and BCM didn't appreciate the water.
 

ATMironov

Well-Known Member
Man, that truck splash.... I can't stop laughing.
I'm glad you got it home. Thanks for sharing the journey!
 

Jm12

Active Member
Man, that truck splash.... I can't stop laughing.
I'm glad you got it home. Thanks for sharing the journey!
My buddy caught the first wave of water and my audible reaction. After that we watched it happen about 200 additional times. I still cannot believe it just started back up and continued to run while we drove it through yet another storm.

So good to be home. Today is the first time I've driven it since we finished the trip. It's such a pleasure to drive when I know I only have to go a few miles :)
 

Jareth

Goblin Guru
I'm sure that was an O'S##t moment when it sputtered and rolled to a stop?

Which begs the question? What sort of miles do Goblin's get to a tank ? Assuming your not putting your foot in it the whole time.

How many times would you guess you had to stop through out the trip for gas?
.
 

Jm12

Active Member
Still working that out without the cargo box, but with it on fuel efficiency was atrocious. Closer to 20mpg than 25. Even worse above 75, and we were doing 80+ when we ran out. We were practically watching the fuel gauge drop in real time and thought for sure it was an electrical problem. Needless to say we slowed down after that, although we still ran out once more and had to use the can. The shape of the Goblin's tank doesn't match the shape of the Cobalt's, so once it needle starts to drop, it drops precipitously, stalls, then drops fast again and then you're on the side of the road.
 

JBINTX

Goblin Guru
Like many other gas gauges in all different makes, the it is not linear. Most are actually skewed towards giving you a better reading towards empty. Some engineer somewhere at GM hopes it helps you avoid running out. Not sure if that works, though.

And our 9+ gallon tank (by volume) - maybe 8 or so useable gallons - only gives 180 miles range at 20 mpg. No a lot. :(

I have not looked at my mpg lately. The way I drive every time, I am probably getting 15 mpg. :)
Besides, stopping at the gas station is usually a fun event.
 

Jm12

Active Member
A 30 Minute event. o_O And that’s if you are rude and tell people you gotta go.
At one point on the trip home, we literally hid in a car wash bay and closed the door so we could plan our route around the storms in peace. Compared to this time last week I would say that there are about 500 additional people from Utah to Tennessee that now know what a DF Goblin is.
 

Jm12

Active Member
All the wishful thinking I could muster didn't magically change the code on my transmission plate to start with LSD once I cleaned it up. The more I read about the swap the more it looks like I will be dealing with the one I've got for a long, long time.

On to a slightly more straightforward installation- I've been working a few minutes each morning trying to get the solid shifter installed and adjusted so that fifth and reverse don't rip my shoulder out. I should have a fine selection of Chinese shifter knobs waiting for me to choose from this evening. I'll post some pics and thoughts once that's all wrapped up.
 

Attachments

Jm12

Active Member
Quick disclaimer: I see lots of build logs here with picture after picture of pristine Goblins. This will not be one of those build logs.

TLDR: I could use some suggestions at the end regarding the bushing retaining plate.


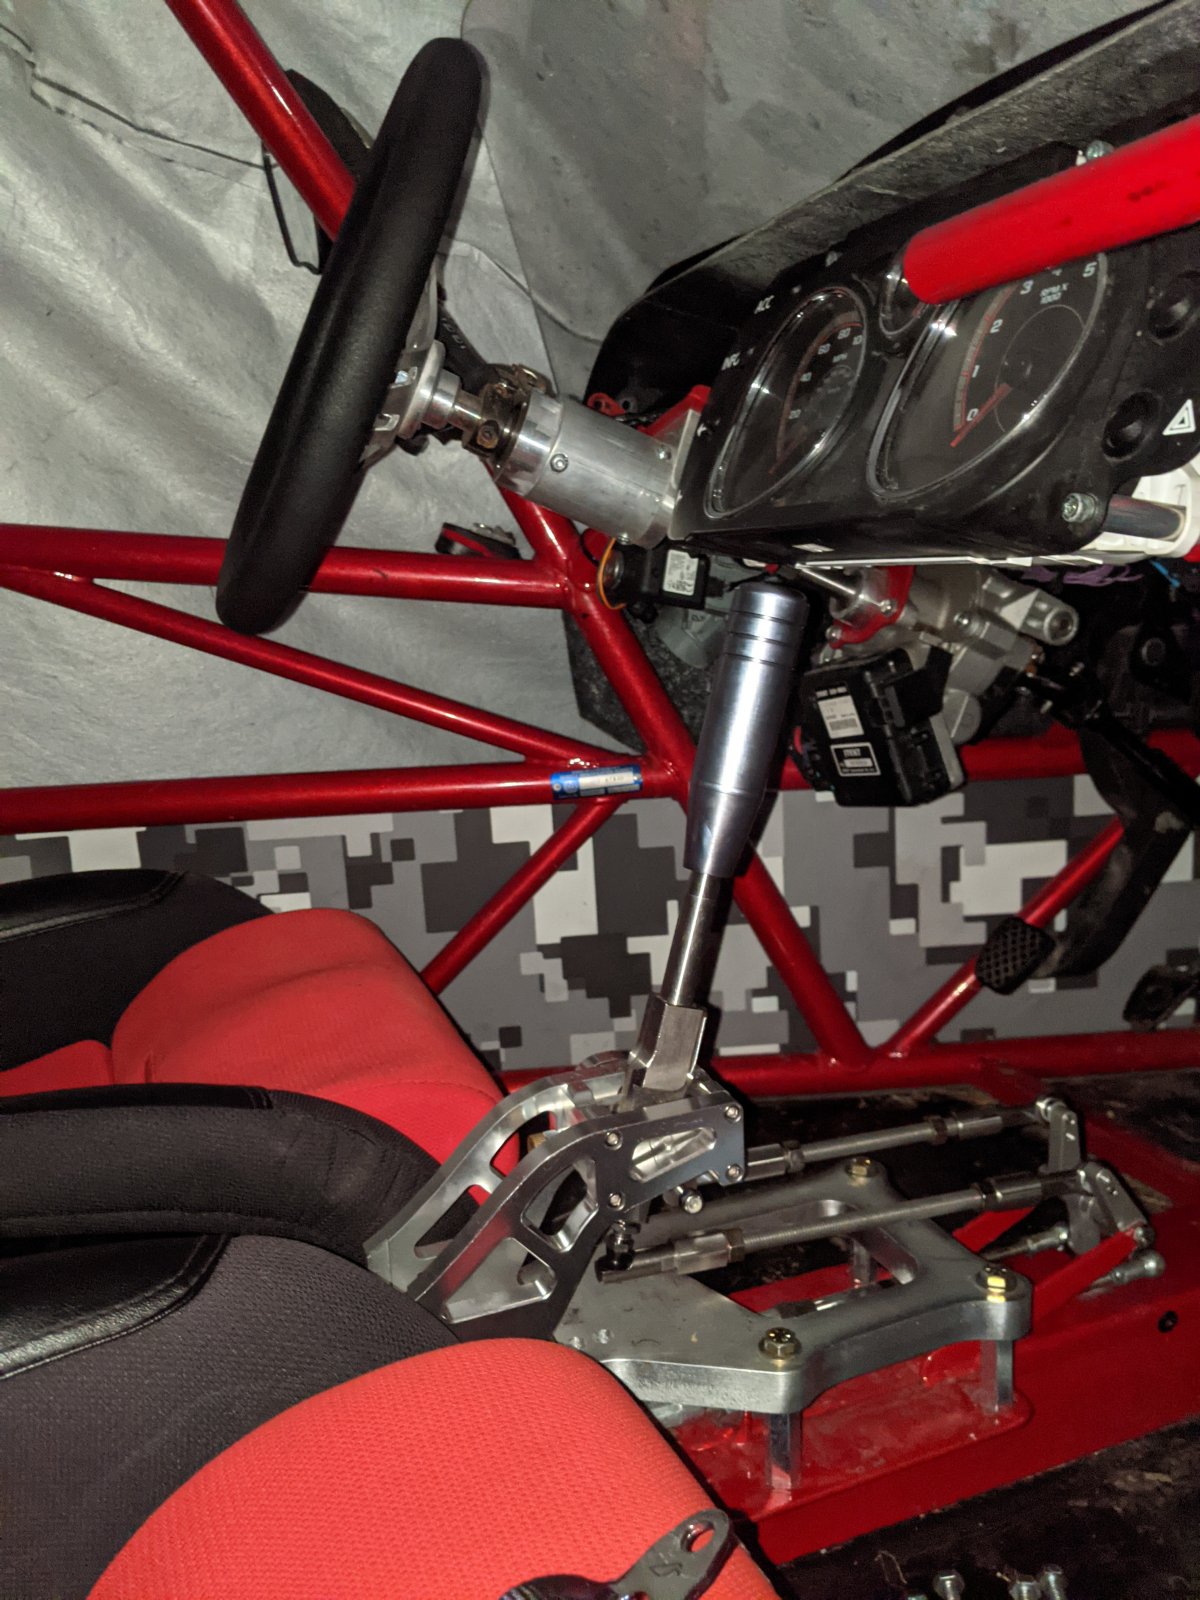
The shifter is mostly installed at this point. I knocked the razor's edges off of the base plate with a sanding block which was good enough for me.
PXL_20210808_154002439.jpg


Mounting the baseplate and shifter itself was trivial. Trying to get the rods and cables adjusted correctly has required a lot of trial and error. If there's a way to do it without removing one of the linkage rod ends everytime, I'm too dense to figure it out.

Forward/backward throw feels good and was easy to get right- really it could use an even shorter throw than what's afforded by backing the bolt at the bottom of the lever out as far as is reasonable and attaching the other end of the rod to the short hole of the bell crank, but it's good as is. The only problem is that even mounted to the rearmost mounting holes on the baseplate I can still bust my knuckles on the gauges on a forward throw with a 5" shift knob. I'm probably going to end up cutting about half an inch off of the lever to make room if I want to keep the long shift knob. I don't really want to cut the lever but it seems necessary. Pic below is the room that was provided after I destroyed one of the thread adapters trying to get the knob lower and it still wasn't quite enough.
PXL_20210811_043413570.jpg


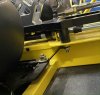
Left/right throw was a pain to work out. I started with the bell cranks straight up and down but found that I couldn't reach reverse at all, so I put the car in reverse and worked backwards from there which worked pretty well. I had to tighten the linkage arm down to make it as short as possible even with the shifter set back all the way on the mounting plate. Any farther forward and the threaded rod would have to be cut. I like the size of tighter pattern afforded by using the longer portion of the arm on the shifter and the shorter portion of the arm on the bell crank, but the amount of resistance makes this rather impractical so I'll likely swap one or both mounting points and deal with the additional left/right throw distance. As an aside, I've seen where folks have mounted up their left side linkage rods to the inside of the arm on the shifter which looks better and provides a more linear push/pull, but the rod end ends up interfering and binding with the shifter in that configuration.
PXL_20210810_130234418(1).jpg


It looks like I might be able to drop in a washer or two on the shift lever pivot to tighten things up so I'm probably going disassemble and give that a try.
PXL_20210810_130324400.jpg


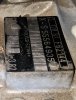
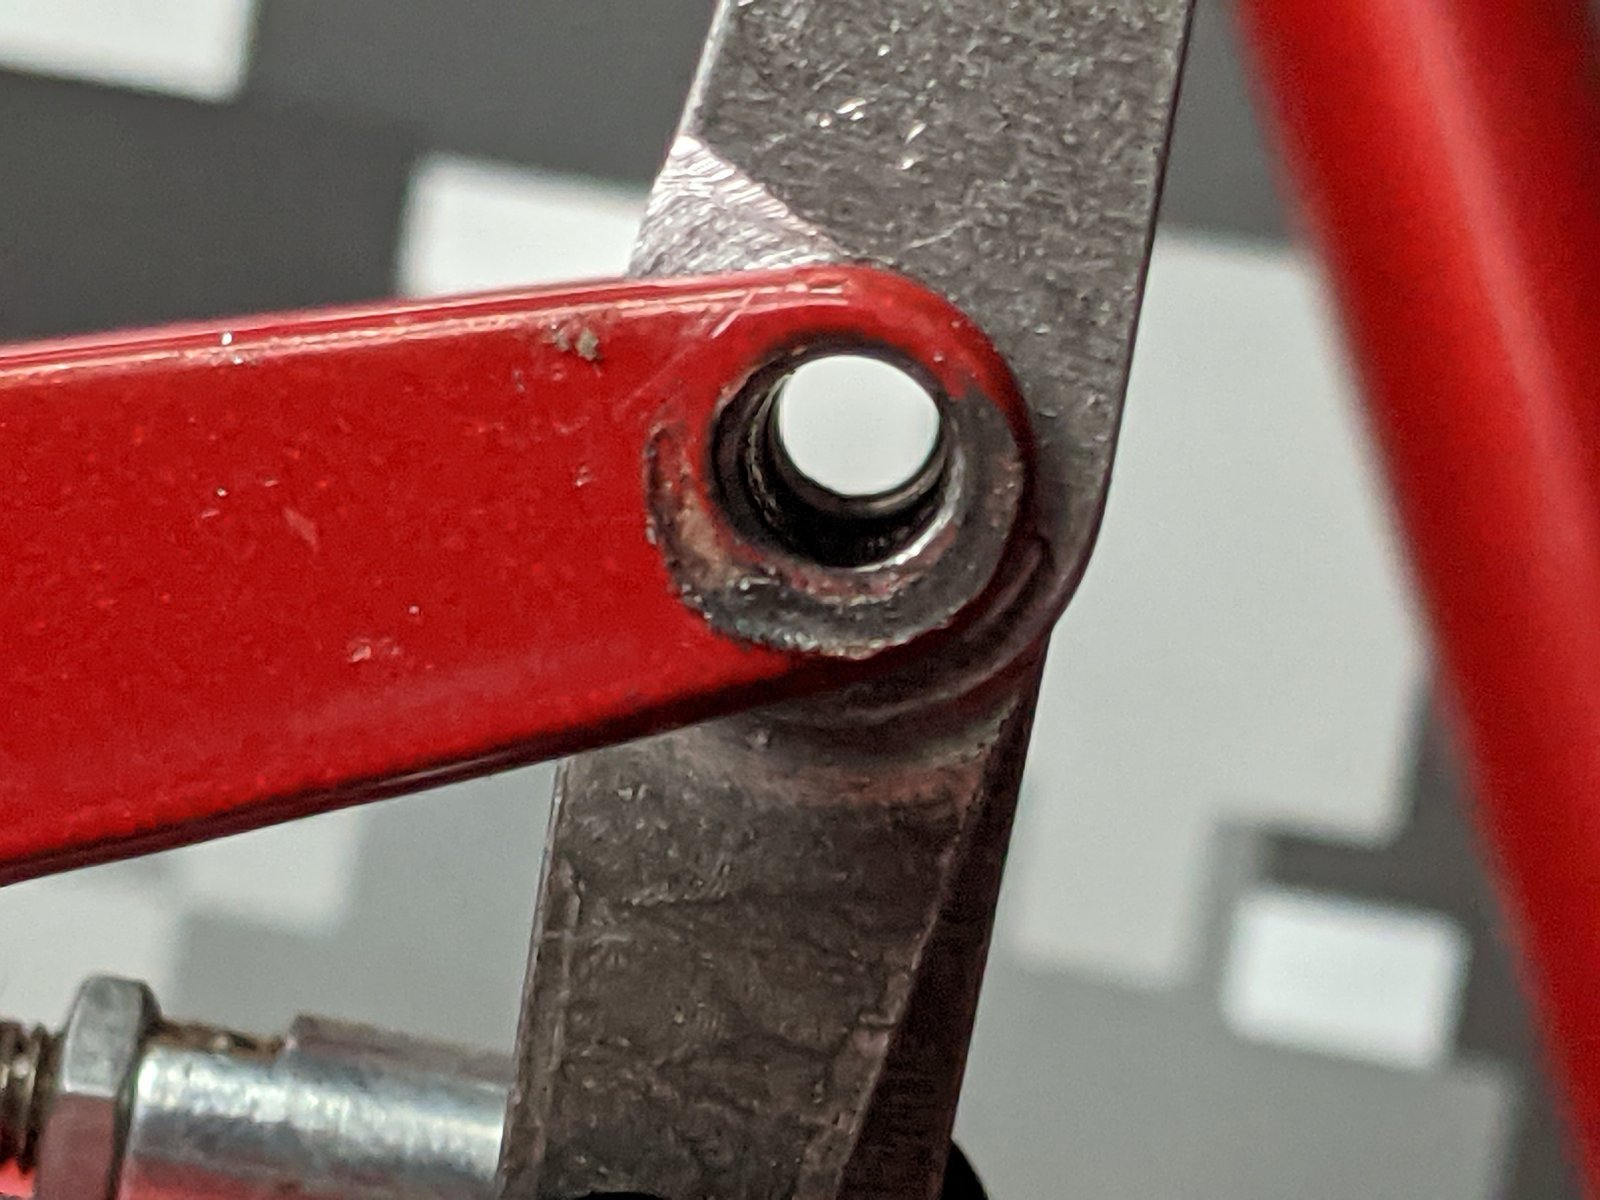
Something I ran into along the way that is a bit concerning- it appears that the threads for the pivot bolt for the reversers has wallowed out some of the metal causing some slop. There wasn't much metal here to begin with and there's less now. I don't know what to do to fix this other than weld in or bolt on more material in place. This area could have benefitted from additional material on all axes and/or enough room for some bushings or a sleeve for the bolt to run through.
PXL_20210810_130126675.jpg


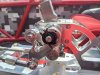
Finally, the biggest problem that I've run into- the retaining plate and hardware for the spherical bushing on the left hand side of the shifter didn't make its way into the box that I received. When and where it was lost is anyone's guess at this point. I've contacted SACTX and the original owner in hopes that I can find the original or a replacement, and I've got several bags and boxes of miscellaneous hardware that came with the car that I'm going to go through a 3rd time, but I'm kind of up a creek without it as the bushing pops out after a few shifts. I'm trying to figure out how to fashion a stopgap in the meantime. It's rough, but I'm thinking a couple of o-rings may be enough to keep things in place until I can find the proper part.
PXL_20210811_010257470.jpg
 

Jm12

Active Member
This is far from ideal, but it'll do until I have time to whittle down something more acceptable or the plate that's meant to go there magically shows up. It takes very little force to retain the bushing so if the o-ring is sufficiently elastic this should suffice for a long time.
 

Attachments

Jm12

Active Member
Drill a hole, add washer and cotter pin?

Also, if it’s not done already, add a “stiff leg” from the shifter to the frame. This firms up left to right excess movement and such.
Definitely needed. What did you start with the fab that? Just steel plate or something closer to the final product?
 

Rttoys

Goblin Guru
Yep. Used some flat plate I had laying around and eyeballed it. One cut, put it in a vice and make a few bends, then drill a couple of holes. I have been ghetto fab’n for years. Ain’t got no need for tape measures n all that fancy stuff. :D

seriously. Since I had a seat bolt right there, it wasn’t much to cut and bend a piece of plate for it. Check the thread for that shifter. A few other did a few other thing to get the same results. It really does stiffen it up a good bit.
 

Chris_WNC

Well-Known Member
I can laser cut that missing plate out of flat stock for you if you send me some dimensions. Hole spacing, hole size, outside perimeter shape. The drilled hole and cotter pin idea sounds like a solution as well.


CHRIS
 

Brett

Well-Known Member
I have a shifter still in the box so I pulled it out and grabbed some dimensions and a photo. I didn't pull out the hex screws since they are in there solid so no screw holes depicted. Let me know if you need any other dimensions. Sorry for the handdrawn CAD but quick and dirty wins.


25998


25999
 

Jm12

Active Member
You guys are awesome. SACTX pointed me towards the ebay seller so I've got a message out to them to see if they have replacement hardware. If that path doesn't work out I'll loop back around to you, Chris.
 
Top