Blue Man's City Goblin - 05 Base Donor
- Thread starter Blue Man
- Start date
Blue Man
Well-Known Member
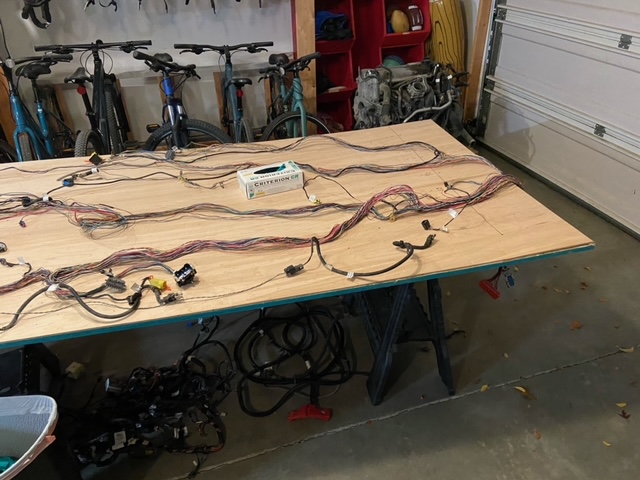
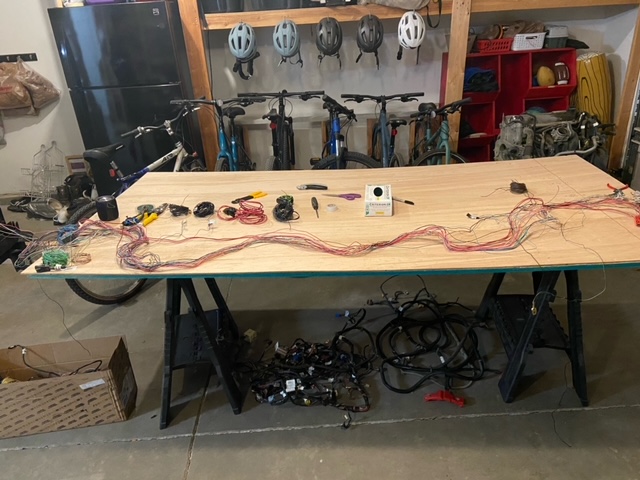
So I started on the wire harness this weekend. It all started out pretty well. Got the table built. Marked the locations. Cut off the harness attachments and stripped the casing and tape. Went through the first thinning video without much trouble.

Then hit the second video and ran into lots of trouble. The video does not address back doors. Think I figured that out easily enough. But then I I found that I had no reverse light plugs.
We labeled EVERYTHING we disconnected. EVERYTHING. Even some things that didn't need labeling, or got labeled twice because it connected again somewhere else. No reverse light plugs. When we pulled the car apart, the wiring for the rear lights was quite different than the video. We had to take off the rear bumper to get the right taillight connector. IIRC, it plugged into the left, then went along the back bumper and plugged into the right . . . something like that. Anyway, one side had two plugs. We did not know what the second plug was for, but I'm thinking that plug HAS to be the reverse lights, right? But it is one plug. This one:
It has the same plug attachment as the left and right rear taillights had. I don't know. Just a guess right now. Any suggestions? I've left this plug attached for now, as you can see.
Then there is this plug:
It is labeled "powertrain accessory plug" which I would have gotten from the donor dissembly videos. Early on it had me cut the braided wire, but then nothing else, or I missed it (definitely possible). The brake lights come back to this light, as do the running lights. It isn't attached to anything else though.
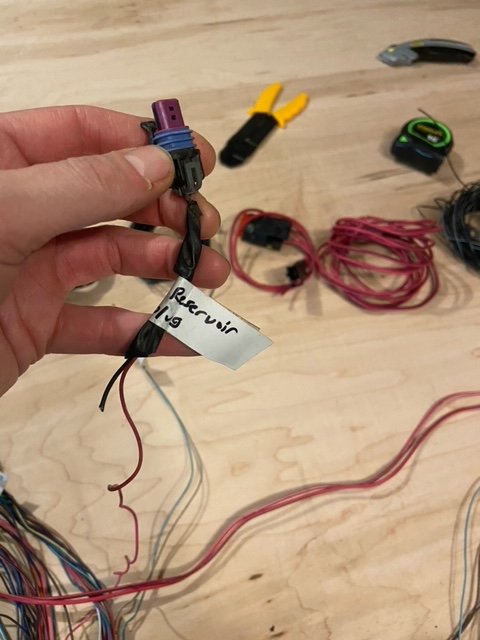
Then there is the "Brake reservoir plug". Not mentioned either. I cut the ground to be able to remove a whole ground bundle of wires, but I can put that back on easily enough. Just not mentioned. Any thoughts?
Lastly, I have an automatic and this plug was not mentioned, nor do I remember it being mentioned in any of the harness videos. Someone had said to watch the old videos to find out what to do with it, but I have gone through 30 minutes of old videos and not see this connector mentioned.
I imagine it stays intact and gets wrapped up, but where does it come out of the harness? Do I need to lengthen it to get to that point? I'll keep going through the old videos, but if someone knows, please tell me.
So this is where things sit now and I do not want to go on until I figure a couple of these things out.
Thanks for your help!
Then hit the second video and ran into lots of trouble. The video does not address back doors. Think I figured that out easily enough. But then I I found that I had no reverse light plugs.
We labeled EVERYTHING we disconnected. EVERYTHING. Even some things that didn't need labeling, or got labeled twice because it connected again somewhere else. No reverse light plugs. When we pulled the car apart, the wiring for the rear lights was quite different than the video. We had to take off the rear bumper to get the right taillight connector. IIRC, it plugged into the left, then went along the back bumper and plugged into the right . . . something like that. Anyway, one side had two plugs. We did not know what the second plug was for, but I'm thinking that plug HAS to be the reverse lights, right? But it is one plug. This one:
It has the same plug attachment as the left and right rear taillights had. I don't know. Just a guess right now. Any suggestions? I've left this plug attached for now, as you can see.
Then there is this plug:
It is labeled "powertrain accessory plug" which I would have gotten from the donor dissembly videos. Early on it had me cut the braided wire, but then nothing else, or I missed it (definitely possible). The brake lights come back to this light, as do the running lights. It isn't attached to anything else though.
Then there is the "Brake reservoir plug". Not mentioned either. I cut the ground to be able to remove a whole ground bundle of wires, but I can put that back on easily enough. Just not mentioned. Any thoughts?
Lastly, I have an automatic and this plug was not mentioned, nor do I remember it being mentioned in any of the harness videos. Someone had said to watch the old videos to find out what to do with it, but I have gone through 30 minutes of old videos and not see this connector mentioned.
I imagine it stays intact and gets wrapped up, but where does it come out of the harness? Do I need to lengthen it to get to that point? I'll keep going through the old videos, but if someone knows, please tell me.
So this is where things sit now and I do not want to go on until I figure a couple of these things out.
Thanks for your help!
Blue Man
Well-Known Member
Okay, so I should have watched the next video first. The reservoir plug gets cut off and added back later, so no biggie there. The other plug seems to go with the ECM taped up by the fuse box. No problem there.
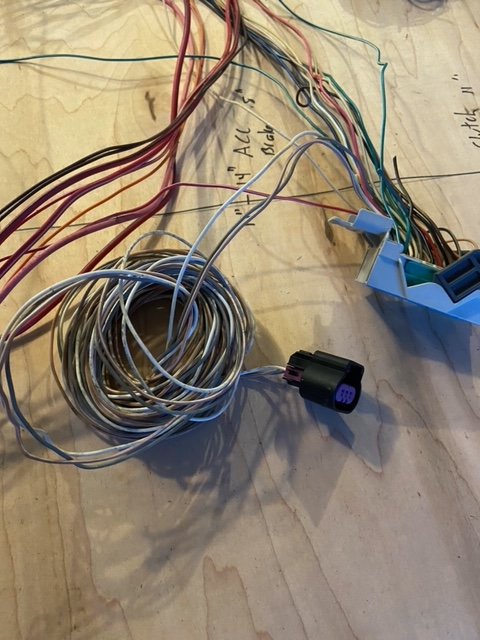
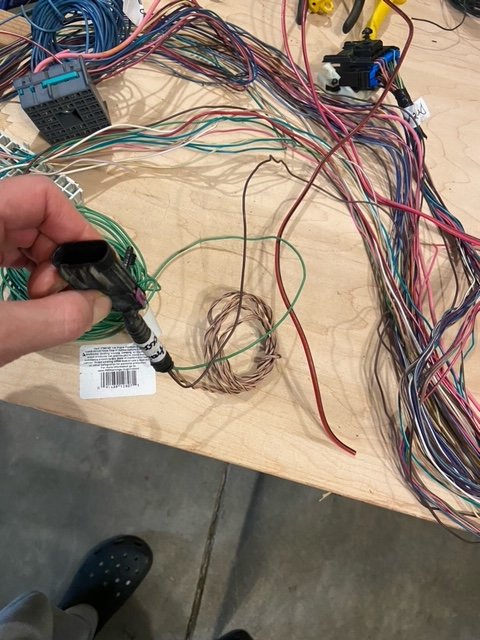
Still the issue with the reverse lights. I watched the old and new videos several times last night and again this morning. I had no reverse connections like the ones he showed. The only unaccounted for wire is that single purple one. I think I'm going to need a wiring diagram to sort that part out. If that is the reverse connector, then I should be good to move forward.
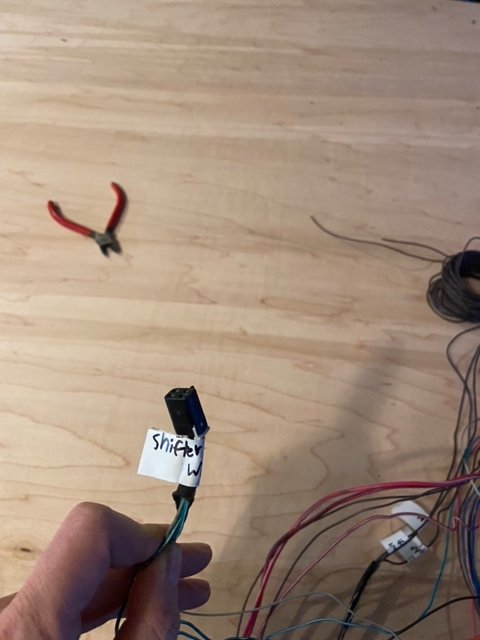
Oh, and the shifter connector of course. I pulled out the automatic stick assembly and plugged it in to be sure and yes, that is the shifter plug. I guess I will add some extra wire to it and leave it out of the main harness about halfway along, does that sound about right? Should give me some play to get to the right spot and I can coil and zip tie any extra.
All part of the fun, right?
Still the issue with the reverse lights. I watched the old and new videos several times last night and again this morning. I had no reverse connections like the ones he showed. The only unaccounted for wire is that single purple one. I think I'm going to need a wiring diagram to sort that part out. If that is the reverse connector, then I should be good to move forward.
Oh, and the shifter connector of course. I pulled out the automatic stick assembly and plugged it in to be sure and yes, that is the shifter plug. I guess I will add some extra wire to it and leave it out of the main harness about halfway along, does that sound about right? Should give me some play to get to the right spot and I can coil and zip tie any extra.
All part of the fun, right?
Ark :D
Goblin Guru
If I remember correctly, the reverse lights' wires are a dull light green color. They should be in the harness somewhere, even if the original connectors were no longer present on the harness. I would start by looking in that vicinity of the harness for dull light green wires, one on each side.
Joebob
Goblin Guru
Yes the shifter connector goes from the BCM down the tunnel and pops up to plug into the shifter at the bolted location. Somewhere in the old videos it is stated to extend the plug wires 20". You can leave loose the whole way or wrap it with the central tunnel and leave a 8-10" pigtail to plug into the shifter.Okay, so I should have watched the next video first. The reservoir plug gets cut off and added back later, so no biggie there. The other plug seems to go with the ECM taped up by the fuse box. No problem there.
Still the issue with the reverse lights. I watched the old and new videos several times last night and again this morning. I had no reverse connections like the ones he showed. The only unaccounted for wire is that single purple one. I think I'm going to need a wiring diagram to sort that part out. If that is the reverse connector, then I should be good to move forward.
Oh, and the shifter connector of course. I pulled out the automatic stick assembly and plugged it in to be sure and yes, that is the shifter plug. I guess I will add some extra wire to it and leave it out of the main harness about halfway along, does that sound about right? Should give me some play to get to the right spot and I can coil and zip tie any extra.
All part of the fun, right?
Joe
Blue Man
Well-Known Member
OK, turns out I was missing some of the old videos. I wish I had only watched the old videos and not the new ones as they take very different steps and I ended up caught between the two. Very confusing.
As a couple people have mentioned the old ones are much better if you have an automatic. I ended up having to reconnect a couple of wires that came out with a new video but that wasn’t such a big deal. Hopefully it will all come out in the end.
Between home and events at work, I have not been able to work on the car at all for the past six weeks. But getting back to it I have a problem with the fuel pump. I hope somebody can help me out.
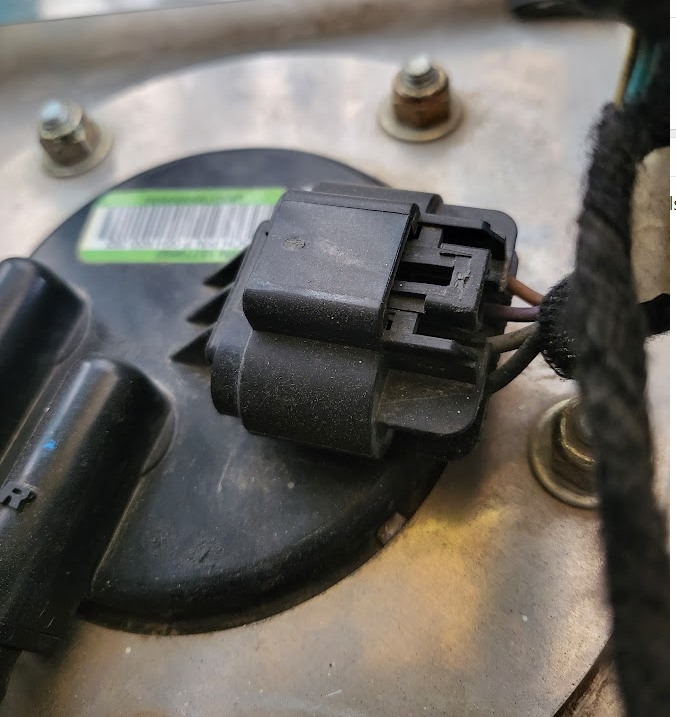
It wants me to Disconnect the plug from the fuel pump and wire it to the fuel pump wires. That would make sense except part of our fuel pump is plugged in and part of it appears to be directly wired. You can see in the pictures below. What do I do with this?
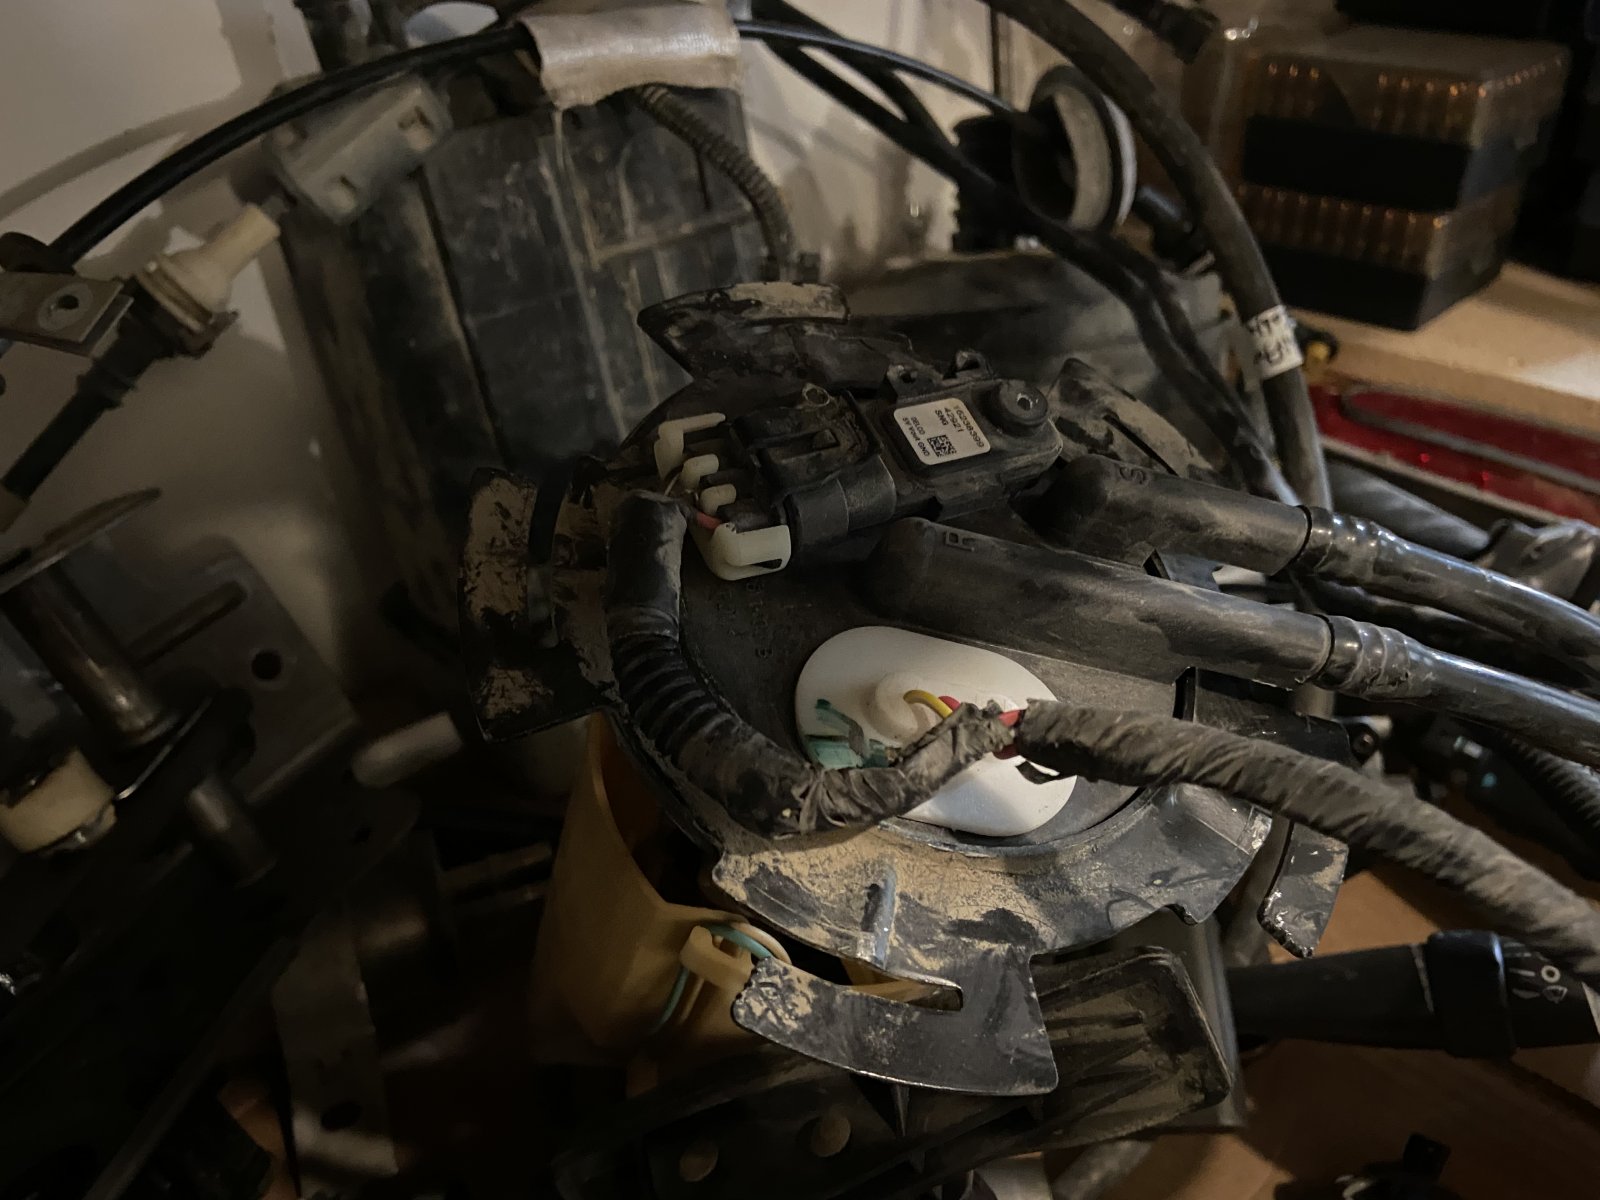
As you can see, the plugged in part and the wired in part run together to be common plug on the other end. I can cut that plug off and attach the fuel pump wires to the harness but how do I get the other wires attached and what do they belong to?
As a couple people have mentioned the old ones are much better if you have an automatic. I ended up having to reconnect a couple of wires that came out with a new video but that wasn’t such a big deal. Hopefully it will all come out in the end.
Between home and events at work, I have not been able to work on the car at all for the past six weeks. But getting back to it I have a problem with the fuel pump. I hope somebody can help me out.
It wants me to Disconnect the plug from the fuel pump and wire it to the fuel pump wires. That would make sense except part of our fuel pump is plugged in and part of it appears to be directly wired. You can see in the pictures below. What do I do with this?
As you can see, the plugged in part and the wired in part run together to be common plug on the other end. I can cut that plug off and attach the fuel pump wires to the harness but how do I get the other wires attached and what do they belong to?
Blue Man
Well-Known Member
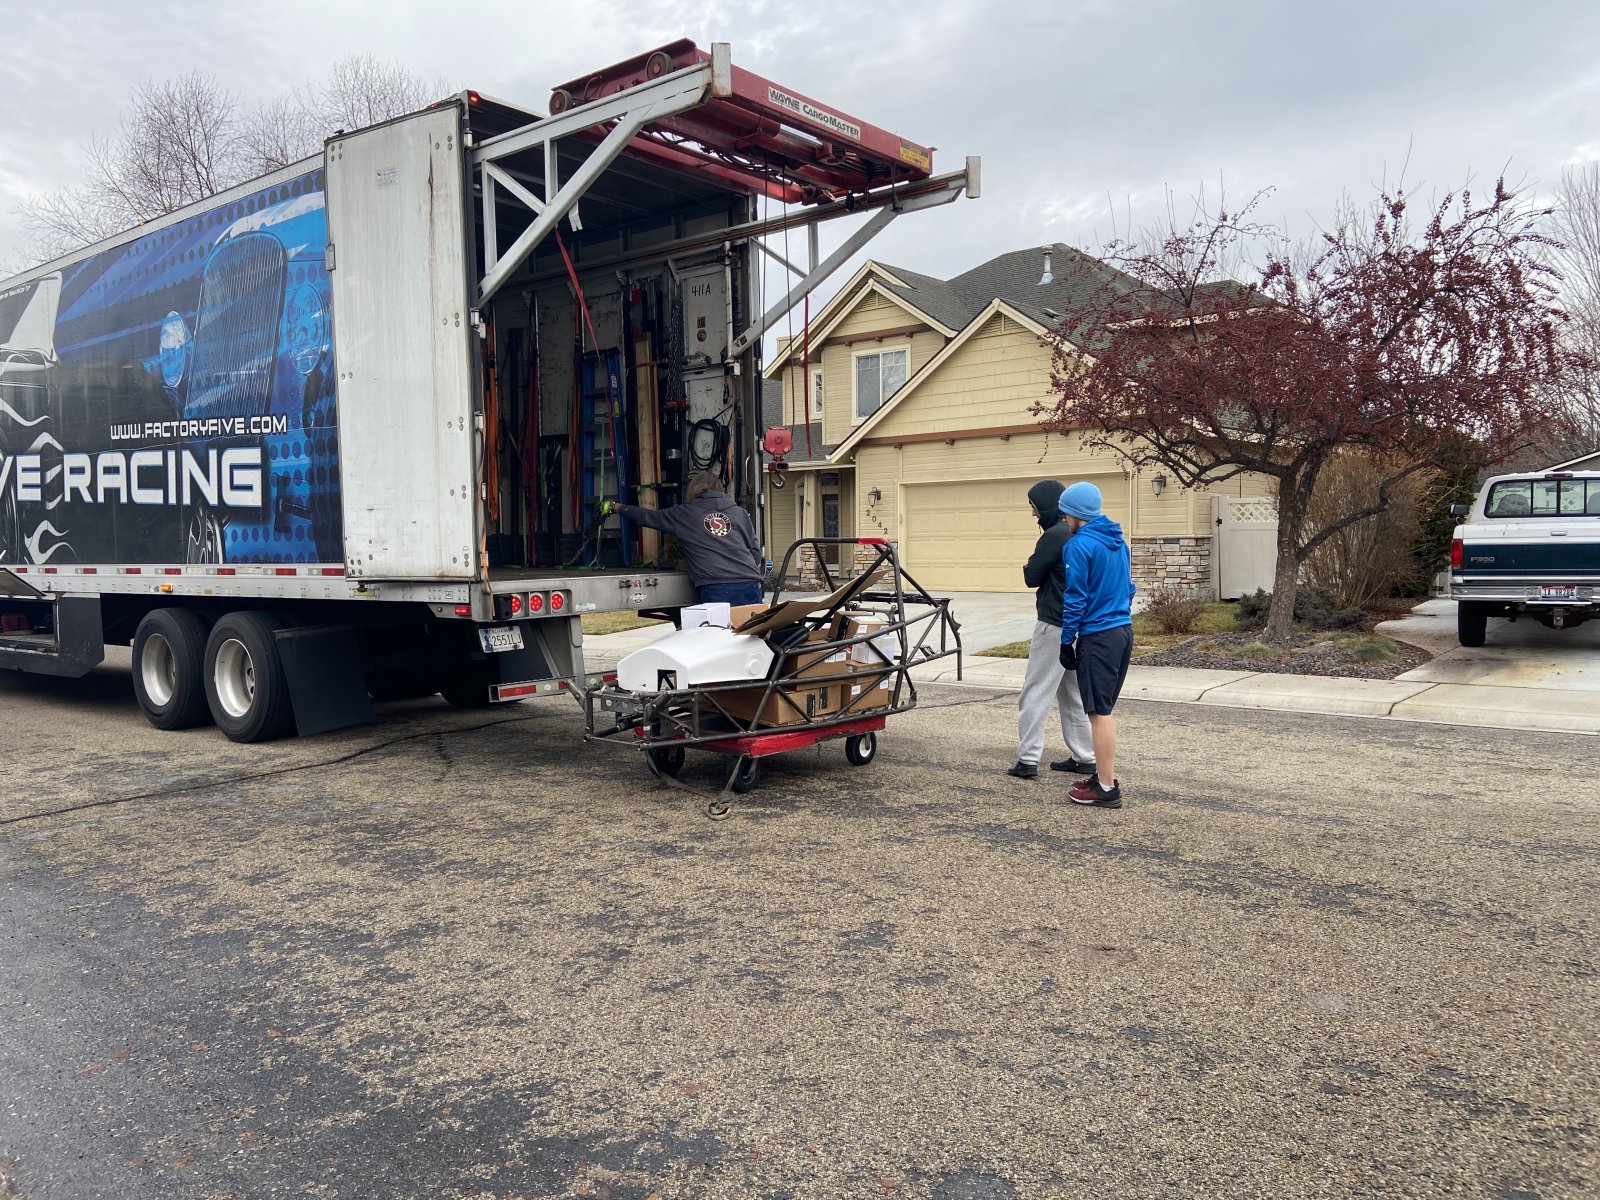
Also, the car arrived today! Build #451.
It’s kind of crazy after all this time to actually have the car here. It really illustrates how far behind we fell behind over the holiday season. We are nowhere near ready to start assembling.
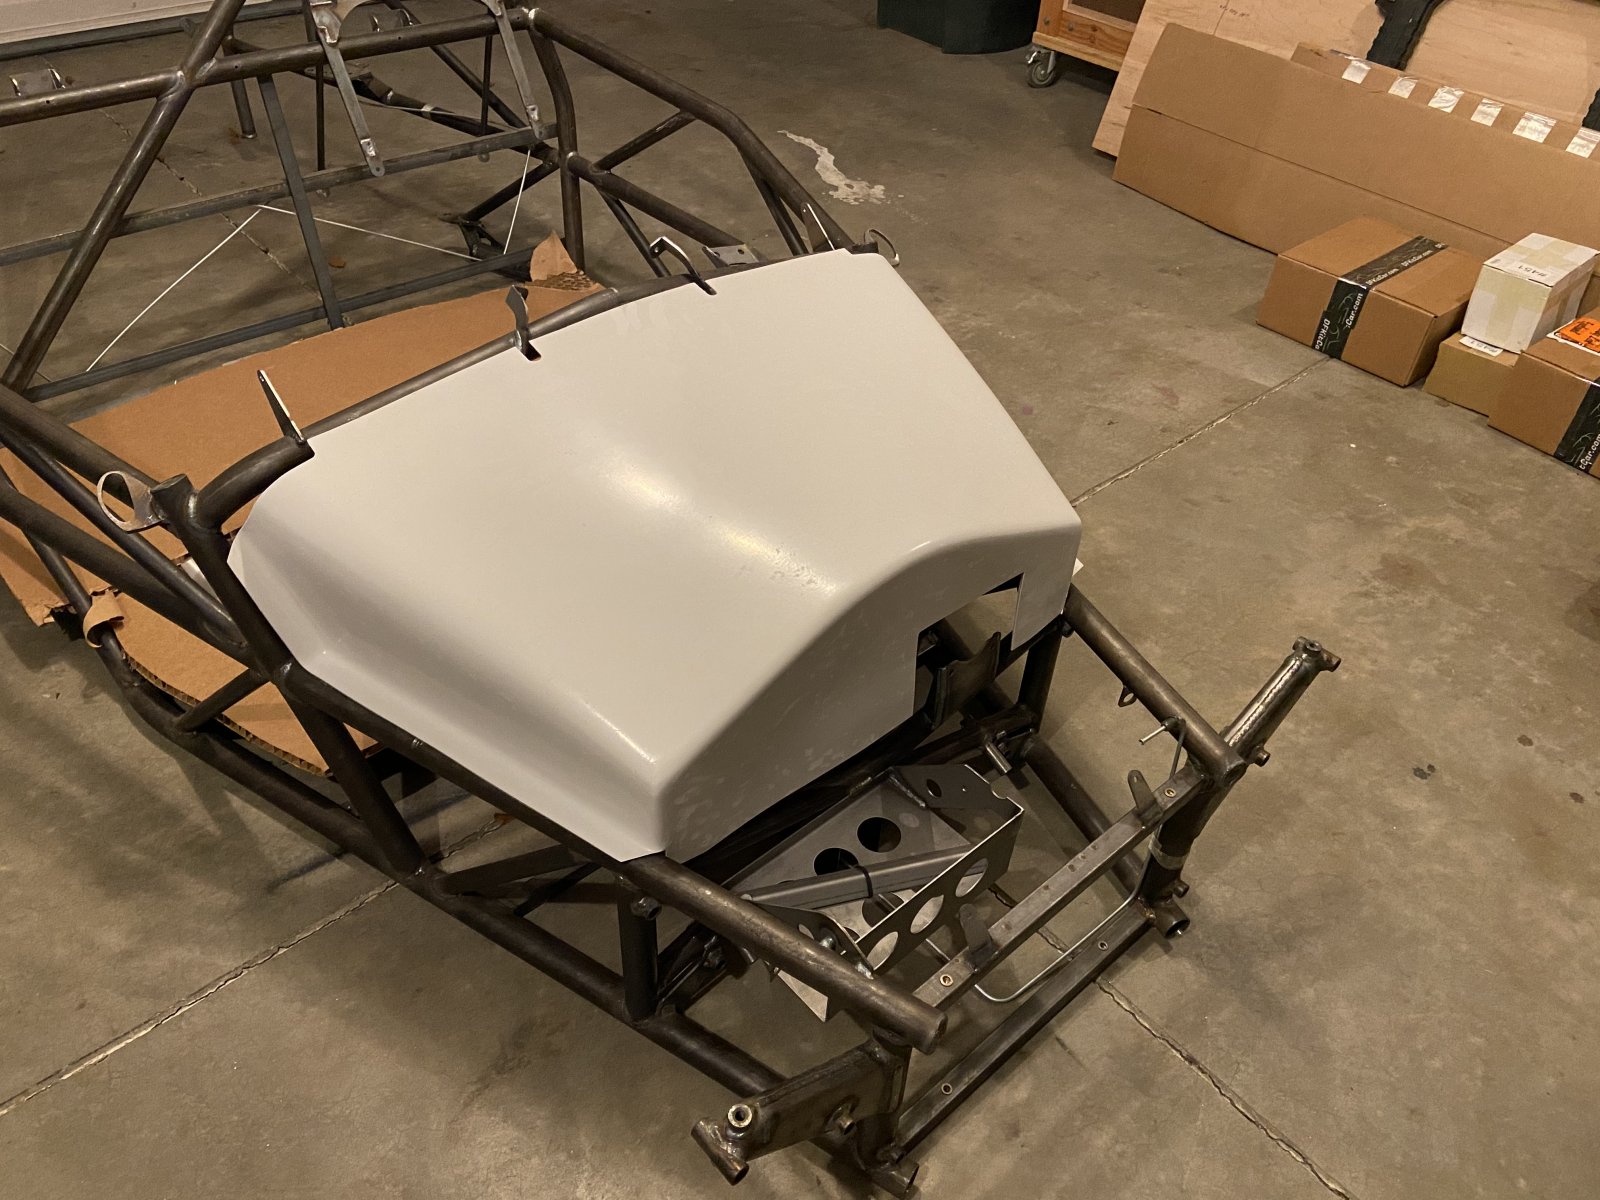
Also interesting they sent us a front cover that was mis-cut apparently.
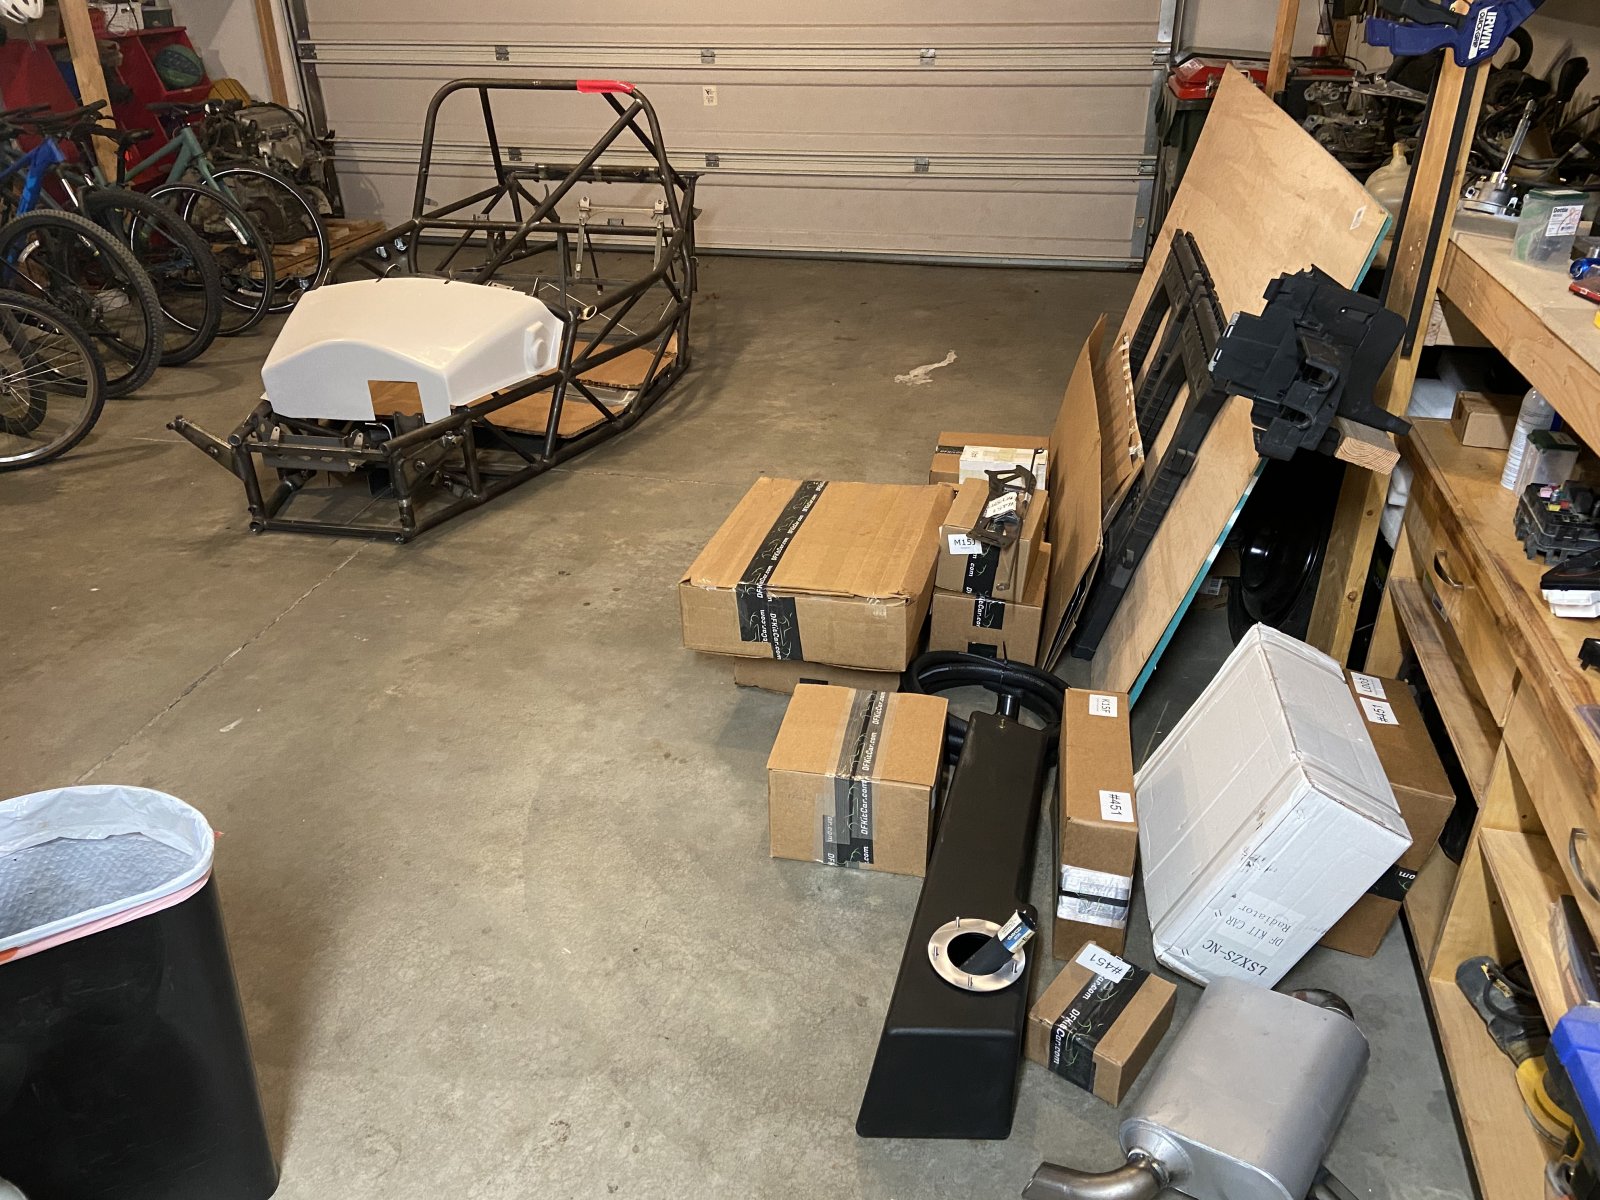
 They told Stewart transport that they would send us another cover. What should we do with the oops cover? You can see it in a picture below.
It’s kind of crazy after all this time to actually have the car here. It really illustrates how far behind we fell behind over the holiday season. We are nowhere near ready to start assembling.
Also interesting they sent us a front cover that was mis-cut apparently.
Desert Sasqwatch
Goblin Guru
Where are you located?
Edit: sorry didnot see your in Idaho.
Edit: sorry didnot see your in Idaho.
Desert Sasqwatch
Goblin Guru
Somebody up your way will probably want it. Too expensive to ship any distance.
Goblinfanclub1234
Well-Known Member
how was the footwell cover not cut correctly? is all hidden under the hood anyways.
Rttoys
Goblin Guru
This. It’ll save you headaches.My donor is an 05 as well. I ended up buying a new fuel pump for a newer model car and a connector pigtail. Then you can wire it in like the videos. Search the forum and you will find other posts related to this.
Ark :D
Goblin Guru
This. It looks perfect to me?how was the footwell cover not cut correctly? is all hidden under the hood anyways.
Sparvy
Active Member
I cut the whole top off of the footwell cover, added foam tape to the perimeter to seal it to the hood and sprayed it black. It seals from the radiator but also allows me to access the brake system, battery etc.Also, the car arrived today! Build #451.
It’s kind of crazy after all this time to actually have the car here. It really illustrates how far behind we fell behind over the holiday season. We are nowhere near ready to start assembling.
Also interesting they sent us a front cover that was mis-cut apparently. View attachment 37683View attachment 37684View attachment 37685They told Stewart transport that they would send us another cover. What should we do with the oops cover? You can see it in a picture below.
Blue Man
Well-Known Member
Where did you buy the new fuel pump and connector? Would you mind sharing? I want to make sure I get a working part. Thanks!My donor is an 05 as well. I ended up buying a new fuel pump for a newer model car and a connector pigtail. Then you can wire it in like the videos. Search the forum and you will find other posts related to this.
Ross
Goblin Guru
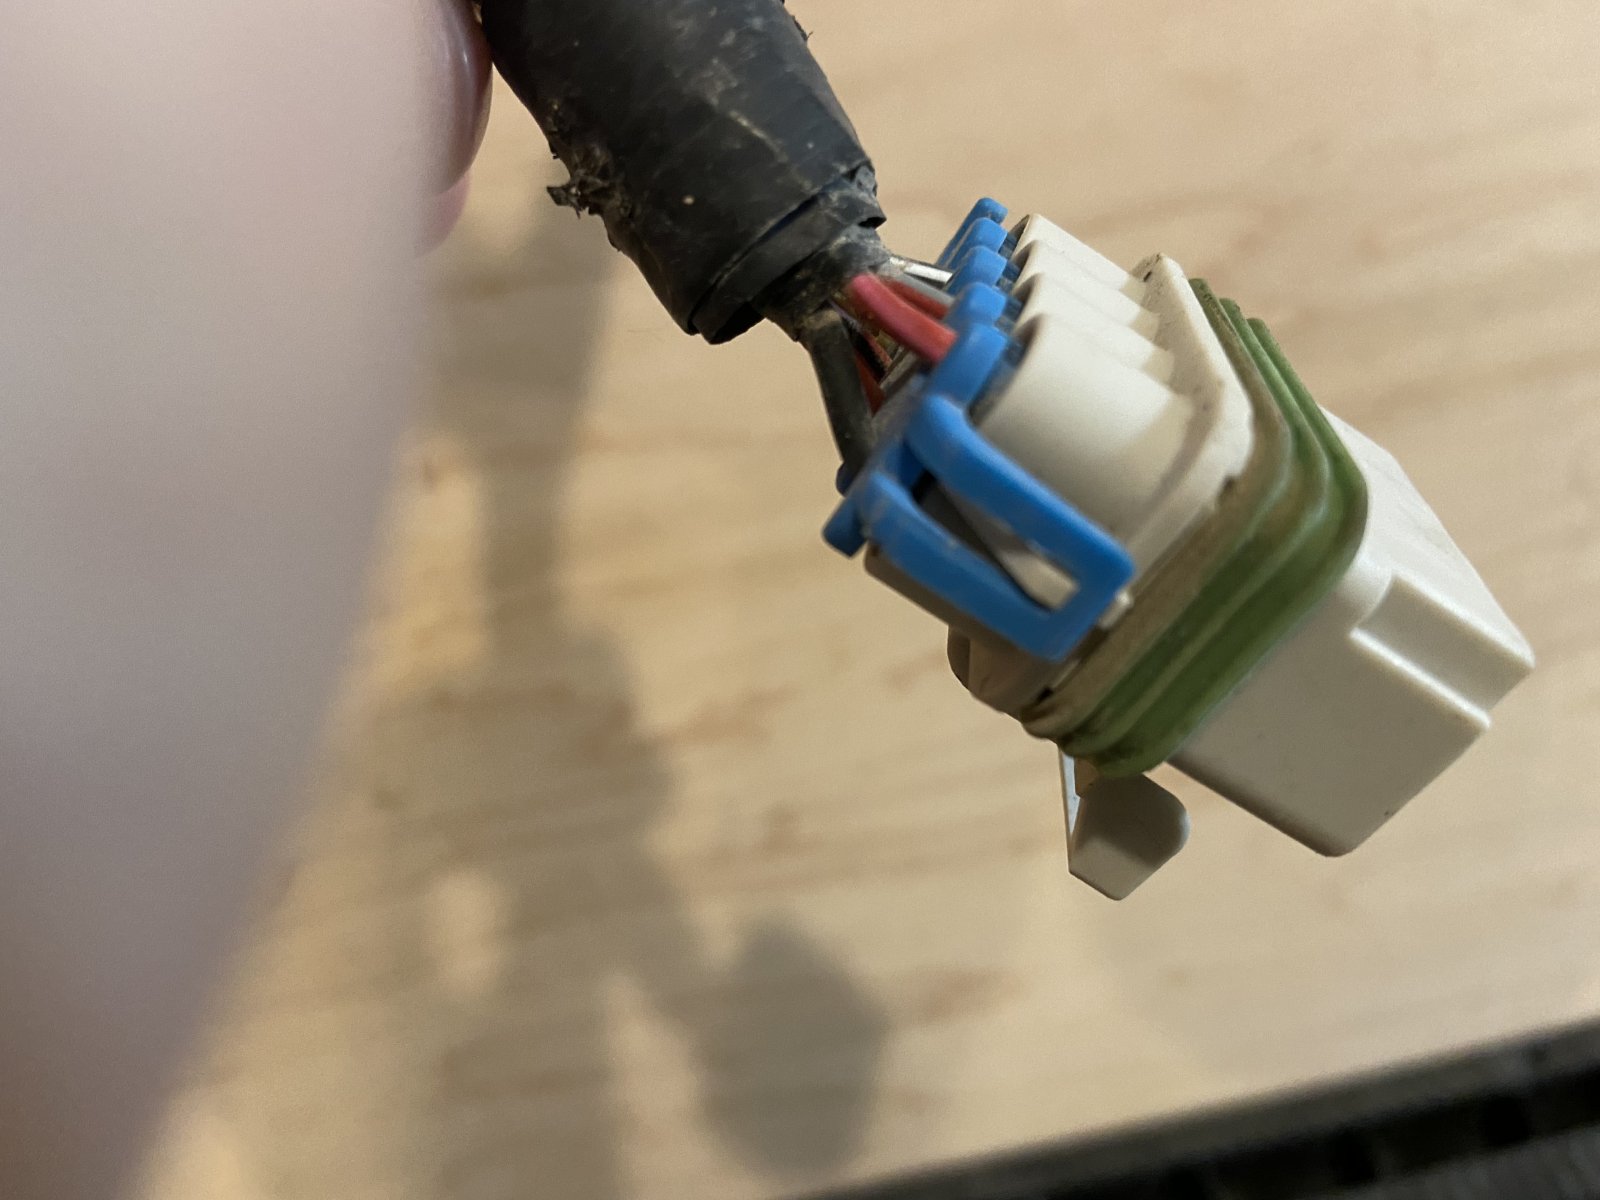
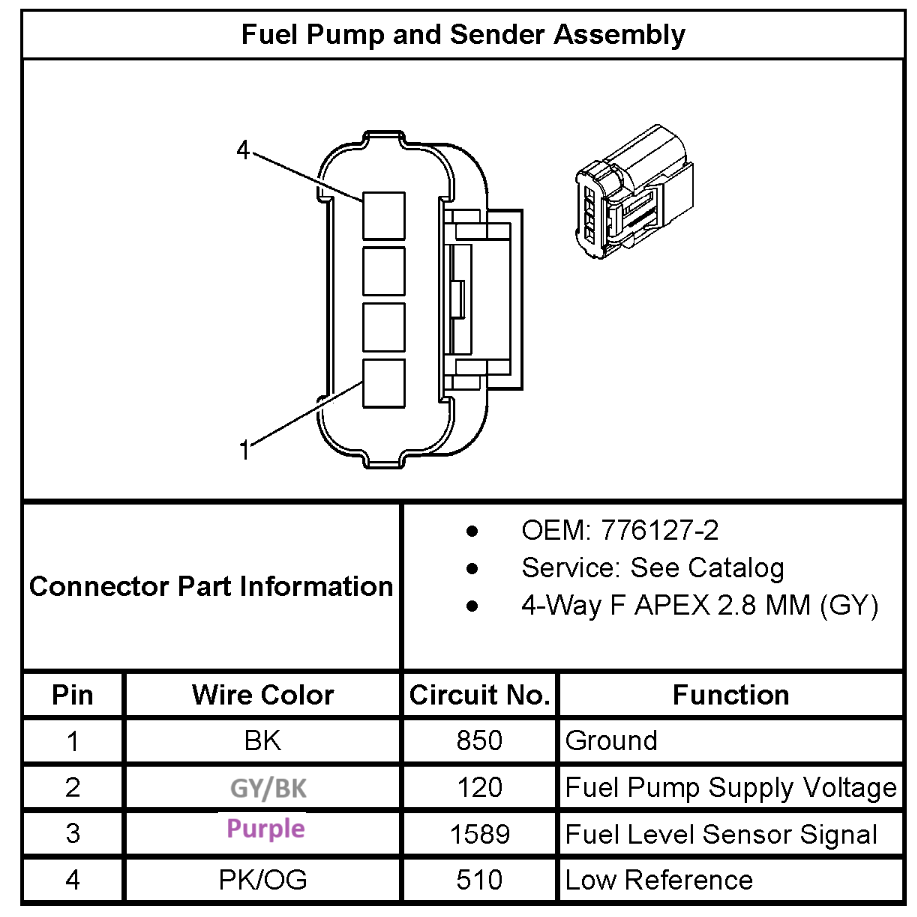
My 2006 fuel pump connector looks different than your 05.
ALLDATADIY says it is a 4-Way F APEX 2.8 MM (GY) which will be one of these connectors.
Not sure which donor you are planning on getting a fuel pump from, but this will help if you get one out of an 06 LSJ.
Here is the corrected AllData connector diagram:
ALLDATADIY says it is a 4-Way F APEX 2.8 MM (GY) which will be one of these connectors.
Not sure which donor you are planning on getting a fuel pump from, but this will help if you get one out of an 06 LSJ.
Here is the corrected AllData connector diagram:
Last edited: