Torchandregdoc
Goblin Guru
I'm struggling with a few of the decisions. For example.
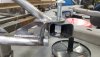
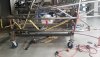
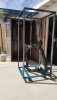
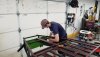
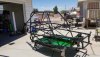
I want to put the transcooler here, but I'm not sure that will be its final spot. I want to do as much of the welding as possible now, before we coat, but know I may need to move it later to fit other things.
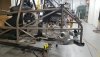
I want to put the transcooler here, but I'm not sure that will be its final spot. I want to do as much of the welding as possible now, before we coat, but know I may need to move it later to fit other things.