• We've upgraded and reskinned the forum. Notice something off? Email us at [email protected] and we'll fix it.

V1 ToothMagician's Full Cage Country Goblin #493 - '06 SS LSJ Turbo donor

Robinjo
Super helpful, thanks a ton! Definitely makes things feel more manageable


That would be awesome if you could send me that trans housing bolt. You don't happen to also have a valve cover bolt too huh? Lol. Message me, I'll send you some beer money for your troubles. Thanks ah.b.normal
Ah.b.Normal might be right on #2. I miss looked on my trans and got confused.
#3 might be the dowel guides location. That would explain why I don’t have one.
 
Rttoys
5. I’m not sure what you have going on with your IC hose routing, but here’s how it should be And core orientation.

F9C14343-2A45-475A-9926-DEF34382A786.png
D6AF5771-4088-40E4-AA2C-FF6193457AEB.png
680B018C-7DEF-466C-9D43-D4EDCF95AF68.png
 
Rttoys
6. That originally was a tube that goes back to the coolant reservoir. After the turbo conversion, I don’t know if that stays or goes.
608A1396-A822-41B2-8768-3965A072C910.jpeg
 
Robinjo
5. I’m not sure what you have going on with your IC hose routing, but here’s how it should be And core orientation.

There are a couple ways to plumb it. Mine has the HX pump outlet going to the HX.

Edit: It looks like this minus the secondary HX :
44211
 
Last edited:
Rttoys
There are a couple ways to plumb it. Mine has the HX pump outlet going to the HX.
I’m just not sure the purpose of the T I have circled. Looks like he’s doing pump to HE, then I assume HE to end plate input. That open T on the output side confuses me, unless it’s part of the turbo add on I’m not familiar with.
D12D6D22-EC12-4853-B112-0D908E8B1126.jpeg
 
Sluggonaut
I’m just not sure the purpose of the T I have circled. Looks like he’s doing pump to HE, then I assume HE to end plate input. That open T on the output side confuses me, unless it’s part of the turbo add on I’m not familiar with.

The T is for the Option B tank.
 
A
That would be awesome if you could send me that trans housing bolt. You don't happen to also have a valve cover bolt too huh? Lol. Message me, I'll send you some beer money for your troubles. Thanks ah.b.normal
[/QUOTE]
Check your messages, the envelope on the upper right, between your log in emblem and the bell.
 
ToothMagician
Hey all,
Took a break for Christmas, but I'm moving forward with the build. In this update, I've installed:

Radiator tubing
Floor pans and front bulk head
Steering rack
Clutch pedal with early model modifications
New clutch master cylinder and hard lines
Brake pedal
Brake booster with reservoir and hard lines - jam nuts are solid but have many threads still showing
Main wiring harness
Ignition with modifications
Collapsible steering column - This was seized and would not collapse. At first, I hammered it in with a rubber mallet, but it was still too long. So, I attached one side to a ratchet strap and the other to the engine hoist arm and slowly separated it. VERY DANGEROUS, DO NOT RECOMMEND. However, it did work and I cleaned the splines with a soft wire brush and soaked the inside with Krud Kutter - "the must for rust" (this stuff does some serious work with no elbow grease, seriously). Let it soak for a day or so, then cleaned the inside with the soft wire brush, repainted it, greased the splines again and rejoined the two pieces. Worked like a charm but ate up a lot of time.

I've ordered some wire looms and found some zip ties that color match the frame, so that'll be my next project. I was missing 2 - 5/8" coated clamps, so I have to attach one of the two clutch pedal switches still. Furthermore, I was wondering if I could mount this switch in a way that it moves the clutch pedal back about an inch and aligns it with the brake pedal? I plan on bringing the radiator and some other pieces to powder coat while I futz around with the wiring and install the gas tank

Other questions:

Where can I get new OEM-ish/style brake and clutch pedal pads, the ones that came on the car are worn through and all I can find are dangerous looking, 1999 Fast and Furious left-overs?

I'm looking for a way to remove grease from the crevices of the engine without damaging plastics or rubbers. I saw an older DF video where they discuss brushing on mineral spirits and then rinsing it. Has anyone tried this, or does anyone have any suggestions to remove stuck on grease, or detailing the engine a little?

Is there anything I should know about this part of the build, like helpful tips or tricks?
i.e. your collapsible steering column may not be collapsible because the grease has turned to glue.

Do the videos end after stage 1 because at that point the build becomes less mechanically technical and more about personalization?


VIDEO 18:
 
Ark :D
I just took my worn-through pedal pads off and replaced them with grip tape. That worked out great, and leaves more margin for error in moving my clumsy feet around the pedal area.
 
Ark :D
That would probably work out fine. I also put grip tape on the front side of my BCM kickplate, and it has stayed put and worked well since day 1.

Full disclosure though: I acquired a new floor pan from Adam recently and plan to replace the existing one with the new one, with no coating. Grip tape might be better, but all it took was a few drops of brake fluid early in to basically ruin the coat on my floor. I've been patching over it every year and it's not great, hence the decision to go uncoated this time. But, I have a really nice pair of custom-made coconut fiber floor mats that will hide the uncoated floor. As always, YMMV.
 
Chris_WNC
I used a larger roll of skateboard grip tape on my floor. Install was painless. Only downside that I can see is that it will stain if you get enough dirt in there. We have nasty red clay in my neck of the woods and it dirties up everything. A Goblin that lives on pavement or concrete wouldn't have that problem.
 
Robinjo
I used a larger roll of skateboard grip tape on my floor. Install was painless. Only downside that I can see is that it will stain if you get enough dirt in there. We have nasty red clay in my neck of the woods and it dirties up everything. A Goblin that lives on pavement or concrete wouldn't have that problem.

I put some old Paw Patrol playmat material that my kids weren't using in there as a floor mat. Since the material is printed foam, it cleans up a bit easier than the rough skateboard grip. Just something to consider since you may need to be cleaning yours from time to time. I wanted the carpet type play material, but this is what we had laying around.
 
Mahkoi
I'm looking for a way to remove grease from the crevices of the engine without damaging plastics or rubbers. I saw an older DF video where they discuss brushing on mineral spirits and then rinsing it. Has anyone tried this, or does anyone have any suggestions to remove stuck on grease, or detailing the engine a little?


VIDEO 18:

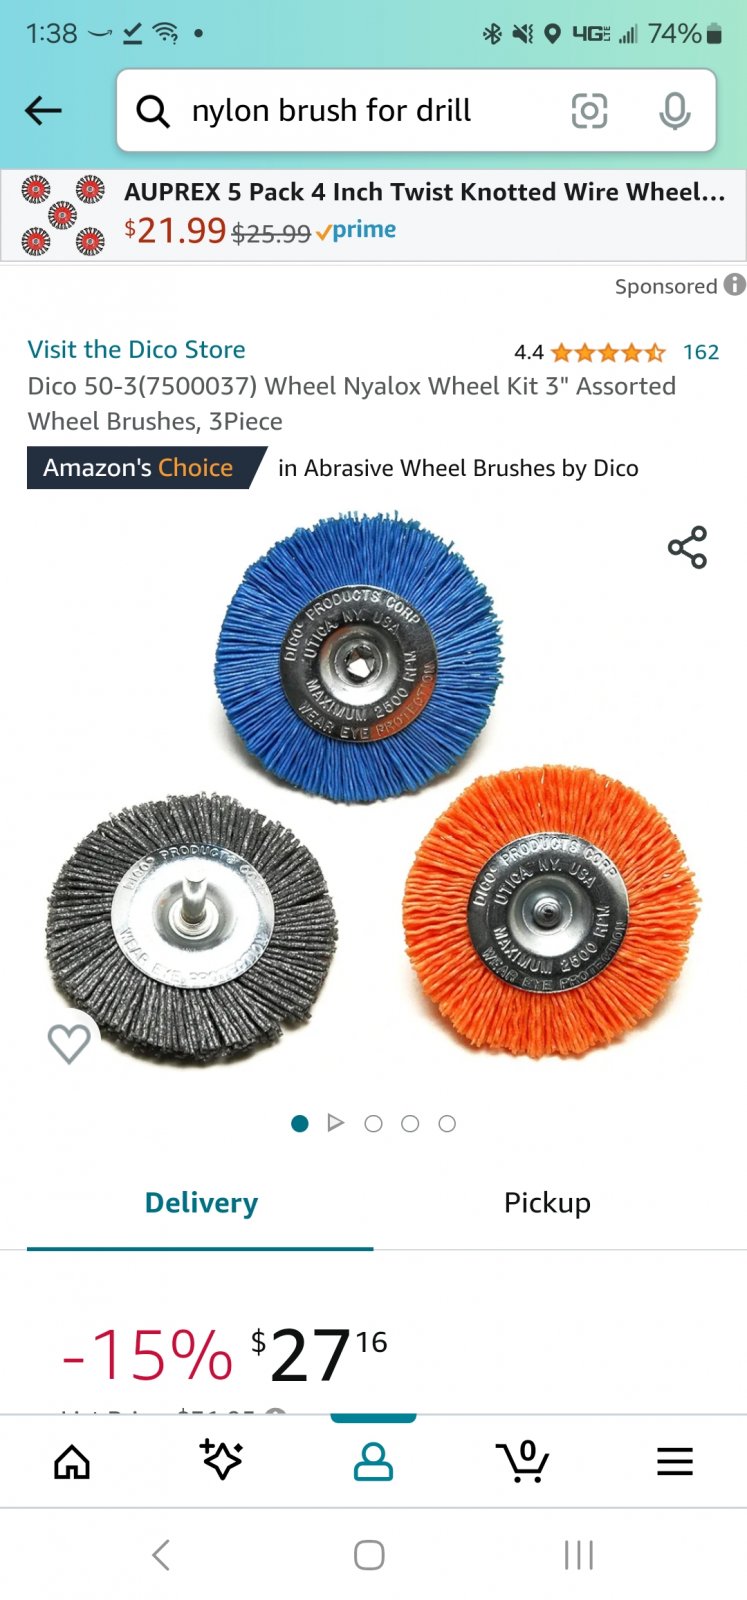
I used something like this on my drill when cleaning the engine. The thick bristled ones are pretty aggressive but the thin bristled one like the blue one help get the junk off. I'd spray it with degreaser, run the wheel on it, then spray it down again.

Screenshot_20240201_133804_Amazon Shopping.jpg
 
ToothMagician
Question... my donor brake reservoir plug recepticle is broken. I pushed out what was left.. Will this cause me problems if it's deleted?
 

Attachments

  • 20240202_231725.jpg
    20240202_231725.jpg
    133.7 KB · Views: 289
Back
Top