Andrew's Extended Track Goblin - 08 SS/TC
Desert Sasqwatch
Goblin Guru
Andrew, please don't try to use an incorrect bolt pattern hub. There is too much safety risk not having the hub studs centered in the holes in the wheels. 0.35mm (1/2 the difference in hub diameter) might not seem like much, but when the lug nuts are torqued to 80-90 ft.lbs. they will bend the studs inward and put radial stress on the studs. This is not good and under hard driving conditions may lead to snapping studs off.So onto the wheels, and specifically the bolt pattern.
I think I am most likely going to use Enkei RPF1 17x9s all around and will need 5x114.3 hubs.
At a little over 16lbs and a couple hundred dollars each, I don't think I can do much better.
As best as I can tell I have three options to got to 5x114.3
1. Drill the 5x110 hubs to 5x114.3
2. Use Adaptors
3. Change hubs to a 5x114.3 pattern
For #1, I don't like the idea of drilling the hubs partially because it makes me uncomfortable using drilled hubs in a track application, but mostly because bearings tend to be more of a consumable item when used heavily on the track. So I don't want to have to keep drilling out hubs when they need replacement.
#2. I could order some custom hub centric and wheel centric adaptors. I haven't made up my mind if this is ok or not. There are very opinionated people on both sides of this argument. I still can't decide if a 25mm adaptor would put any more stress on the bearings compared to a wheel with 25mm more of an offset. I don't think there are safety concerns with well made adaptors, just ware and tare and added rotational mass.
#3 would be ideal. It does not appear that that someone has found a prefect 5x114.3 hub for the LNF. The closest I've come across is an 04 Grand AM that has a 5x115 hub.
Searching through the forms it doesn't look like any Goblin owners have tried the Grand Am Hub.
Here are the spec of both the hubs.
Cobalt LNF Grand Am Spline Quantity 30 30 Bolt Circle Diameter 4.330" 4.530" Bolt Circle Diameter 110 mm 115 mm Flange Bolt Hole Quantity 3 3 Wheel Pilot Diameter 65 mm 70 mm Brake Pilot Diameter 65.4 mm 70.5 mm Wheel Stud Quantity 5 5 Hub Pilot Diameter 89.1 MM 91.4 MM Flange Shape Modified TRIANGULAR Anti-Lock Brake (ABS) Sensor Included Yes Yes Flange Offset 39 mm 36.9 mm Flange Diameter 137 MM 145 mm
The question also remains as to how well a 5x114.3 wheel will work on a 5x115 hub. Again, very opinionated people on both sides of the argument.
Are there any other reasonable ways to get a 5x114.3 bolt pattern?
View attachment 20202
Also noticed the Grand Am hub pilot diameter is 2.3mms wider, so it likely will not fit into the aluminum upright.
Ark :D
Goblin Guru
Well said/explained DS, as always.Andrew, please don't try to use an incorrect bolt pattern hub. There is too much safety risk not having the hub studs centered in the holes in the wheels. 0.35mm (1/2 the difference in hub diameter) might not seem like much, but when the lug nuts are torqued to 80-90 ft.lbs. they will bend the studs inward and put radial stress on the studs. This is not good and under hard driving conditions may lead to snapping studs off.
Also noticed the Grand Am hub pilot diameter is 2.3mms wider, so it likely will not fit into the aluminum upright.
Rauq
Goblin Guru
With Option #2, there's theoretically no different stress on the wheel bearing if you've got 25mm spacers, if the wheel has +25mm more offset than what was otherwise going to be run. It's just adding a bit of weight (1-1.5 lbs?) to each wheel.
Option #4 would be to get RPF1s drilled for the 5x110 bolt pattern. Obvious downsides there including cost, but then wheel bearings go back to being a standard off-the-shelf consumable.
Option #4 would be to get RPF1s drilled for the 5x110 bolt pattern. Obvious downsides there including cost, but then wheel bearings go back to being a standard off-the-shelf consumable.
ATMironov
Well-Known Member
Thanks for pointing out the Pilot Diameter, I wasn't thinking about that and am not willing to machine the DF parts.Andrew, please don't try to use an incorrect bolt pattern hub. There is too much safety risk not having the hub studs centered in the holes in the wheels. 0.35mm (1/2 the difference in hub diameter) might not seem like much, but when the lug nuts are torqued to 80-90 ft.lbs. they will bend the studs inward and put radial stress on the studs. This is not good and under hard driving conditions may lead to snapping studs off.
Also noticed the Grand Am hub pilot diameter is 2.3mms wider, so it likely will not fit into the aluminum upright.
As for the bending of the studs, playing Devil's Advocate, Wobble Lug Nuts allow for the seat of the lug to be offset from the center of the lug (most common use is 5x114.3 wheels on 5x112 hubs). It also seems like some manufactures use the same model rim and market it as both 5x115 and 5x114.3
Like I said there is every opinion out there from "I've been doing it all my life" to "You car will instantly blow up"
Although DS's input will weight heavier than most.
I like Rauq's idea of having the wheels custom drilled to 5x110. Not sure if its possible, but its worth looking into!
I couldn't agree more! Seems like the RPF1s are 5-6lbs lights than an equivalently sized (and priced) 5x110. So I should still be coming out ahead if I end up going this route.Seems sort of counter productive to run a heavy spacer just to run a light wheel.
And these conversation are 100% the reason I plan on discussing my planned modification well in advance of pulling the trigger.
Thanks everyone!
Last edited:
Rauq
Goblin Guru
I came super close to pulling the trigger on these:I like Rauq's idea of having the wheels custom drilled to 5x110. Not sure if its possible, but its worth looking into!
https://www.fm-wheels.com/enkei-rpf1/enkei-rpf1-silver-17x9-5x110-22
ATMironov
Well-Known Member
hahah! I just found that website as well.I came super close to pulling the trigger on these:
https://www.fm-wheels.com/enkei-rpf1/enkei-rpf1-silver-17x9-5x110-22
$35 add per wheel to re-drill to 5x110 beats the hell out of custom adaptors.
Thanks for posing it.
Last edited:
ATMironov
Well-Known Member
Onto the fuel system... This is a bit of a repeat of my original fueling questions.
At an absolute minimum I need to be able to run the car flat out for 40 minuets. In my current Supercharged VR6 that equates to around 7.5-8 gallons of fuel. I haven't really been able to find fuel consumption information for the Goblins, so I'm making the assumption it will be similar to my current car.
Searching the form, it looks like people start to have fuel supply issues below a 3/4 of a tank, so I need to make some modifications to the fuel system to ensure I don't run into issues.
The idea is to be able to consistently pick up as much fuel as possible even when in long turns on low fuel.
The two options I've been considering is either an external surge tank, or modifying the in-tank fuel pump set up. I did briefly consider custom baffles inside the fuel tank, but I don't think that's the best way to go about it.
I'm not in love with the surge tank idea. Its another canister to bolt in, a second noisy external fuel pump to be wired and plumbed in.
My current though is to replace the OEM intake fuel pump, housing, and level sender with an aftermarket system. This means the opening for the existing pump will not work. I emailed Adam to see what the possibility of getting the tank without the opening was and he said they get their tanks laser cut by a 3rd party, 50 at a time. So not to needlessly spend money I'll find some way to put a cover plate on the existing opening.
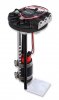
The two best options I have come up with for a replacement pump are the Phantom Apex 340 with the remote Siphon Pump or a generic Holley fuel pump connected to a Hydramat (or two)
The Phantom Apex is an in-tank Slosh control pump kit that consists of a bladder that is filled by both the return fuel line, and a remote pickup that can be placed anywhere in the tank.
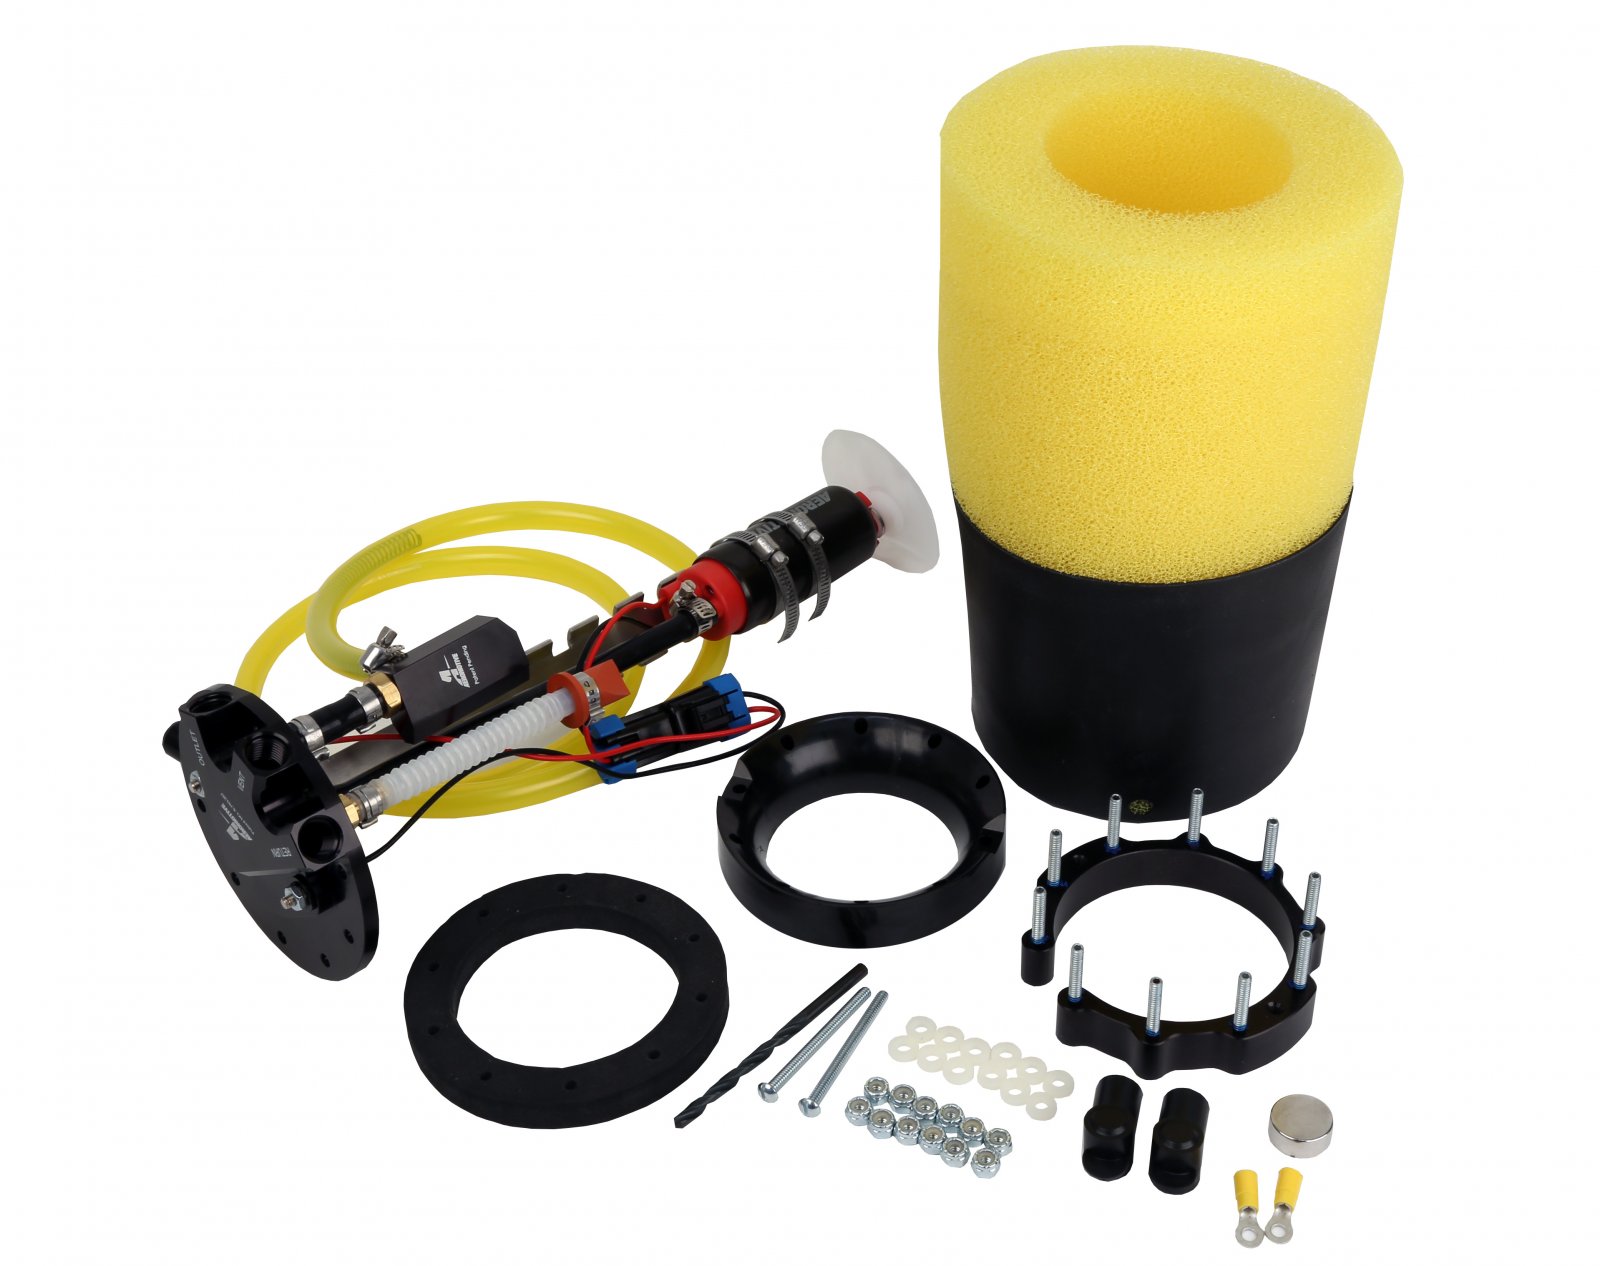
The Holley pump is just a generic in-tank pump (so I could really use anything), but it would connect to a Hydramat.
If you haven't see the Hydramat check this video out. Its a wicking fabric that will continue to pull fuel as long as any part of it is in contact.
The biggest problem is they don't offer a Hydramat that would fit goblin tank very well, so I would probably end up putt two 15x8 cross mats in.
Both systems are within $50 of each other and both will required a new fuel level sender.
I'm leaning towards the Hydramat set up as it will offer the most scavenging area.
At an absolute minimum I need to be able to run the car flat out for 40 minuets. In my current Supercharged VR6 that equates to around 7.5-8 gallons of fuel. I haven't really been able to find fuel consumption information for the Goblins, so I'm making the assumption it will be similar to my current car.
Searching the form, it looks like people start to have fuel supply issues below a 3/4 of a tank, so I need to make some modifications to the fuel system to ensure I don't run into issues.
The idea is to be able to consistently pick up as much fuel as possible even when in long turns on low fuel.
The two options I've been considering is either an external surge tank, or modifying the in-tank fuel pump set up. I did briefly consider custom baffles inside the fuel tank, but I don't think that's the best way to go about it.
I'm not in love with the surge tank idea. Its another canister to bolt in, a second noisy external fuel pump to be wired and plumbed in.
My current though is to replace the OEM intake fuel pump, housing, and level sender with an aftermarket system. This means the opening for the existing pump will not work. I emailed Adam to see what the possibility of getting the tank without the opening was and he said they get their tanks laser cut by a 3rd party, 50 at a time. So not to needlessly spend money I'll find some way to put a cover plate on the existing opening.
The two best options I have come up with for a replacement pump are the Phantom Apex 340 with the remote Siphon Pump or a generic Holley fuel pump connected to a Hydramat (or two)
The Phantom Apex is an in-tank Slosh control pump kit that consists of a bladder that is filled by both the return fuel line, and a remote pickup that can be placed anywhere in the tank.
The Holley pump is just a generic in-tank pump (so I could really use anything), but it would connect to a Hydramat.
If you haven't see the Hydramat check this video out. Its a wicking fabric that will continue to pull fuel as long as any part of it is in contact.
The biggest problem is they don't offer a Hydramat that would fit goblin tank very well, so I would probably end up putt two 15x8 cross mats in.
Both systems are within $50 of each other and both will required a new fuel level sender.
I'm leaning towards the Hydramat set up as it will offer the most scavenging area.
Ross
Goblin Guru
The snowmobiler and rock crawler guys have solved fuel pickup issues by using multiple of these $26 pickups.
They automatically close after they run out of fuel. If you put one on each side of the Goblin tank, long as one side of the tank has fuel in it, you are good. A lot cheaper than the $225 Holley Hydramat, but a bit more work to install.
They automatically close after they run out of fuel. If you put one on each side of the Goblin tank, long as one side of the tank has fuel in it, you are good. A lot cheaper than the $225 Holley Hydramat, but a bit more work to install.
I would pursue mounting an aftermarket pump with the Holley hydromat into the stock assembly first. If you look at the pictures of most of the aftermarket assemblies, they use hose clamps to fasten the pumps to the assembly anyway.
I think I have a spare fuel pump from my Camaro SS around and I think it might be the same size, and I'm sure there are aftermarket pumps that can be installed into that assembly.
Walbro 450 LPH Fuel Pump (overthetopperformance.com) shows it being "Flush mountable to existing hanger with installation kit 400-0085".
ATMironov
Well-Known Member
I do like the idea of using the OEM housing, but the housing is designed to sit on the bottom of the tank, and there would not be room to install fittings from the pump to the Hydramat.I would pursue mounting an aftermarket pump with the Holley hydromat into the stock assembly first. If you look at the pictures of most of the aftermarket assemblies, they use hose clamps to fasten the pumps to the assembly anyway.
I think I have a spare fuel pump from my Camaro SS around and I think it might be the same size, and I'm sure there are aftermarket pumps that can be installed into that assembly.
Walbro 450 LPH Fuel Pump (overthetopperformance.com) shows it being "Flush mountable to existing hanger with installation kit 400-0085".
I'll giving the housing a look and see if there is any possibility of modifying it.
ATMironov
Well-Known Member
I haven't seen these before.The snowmobiler and rock crawler guys have solved fuel pickup issues by using multiple of these $26 pickups.
They automatically close after they run out of fuel. If you put one on each side of the Goblin tank, long as one side of the tank has fuel in it, you are good. A lot cheaper than the $225 Holley Hydramat, but a bit more work to install.
Thanks!
In my mind you would cut away most/all of the bucket and hang a new pump off the the stock hat.I do like the idea of using the OEM housing, but the housing is designed to sit on the bottom of the tank, and there would not be room to install fittings from the pump to the Hydramat.
I'll giving the housing a look and see if there is any possibility of modifying it.
ATMironov
Well-Known Member
I get where your going now.In my mind you would cut away most/all of the bucket and hang a new pump off the the stock hat.
Seems like that might be a pretty good solution. I'll take a look at the housing and see what I can come up with.
Thanks!
ATMironov
Well-Known Member
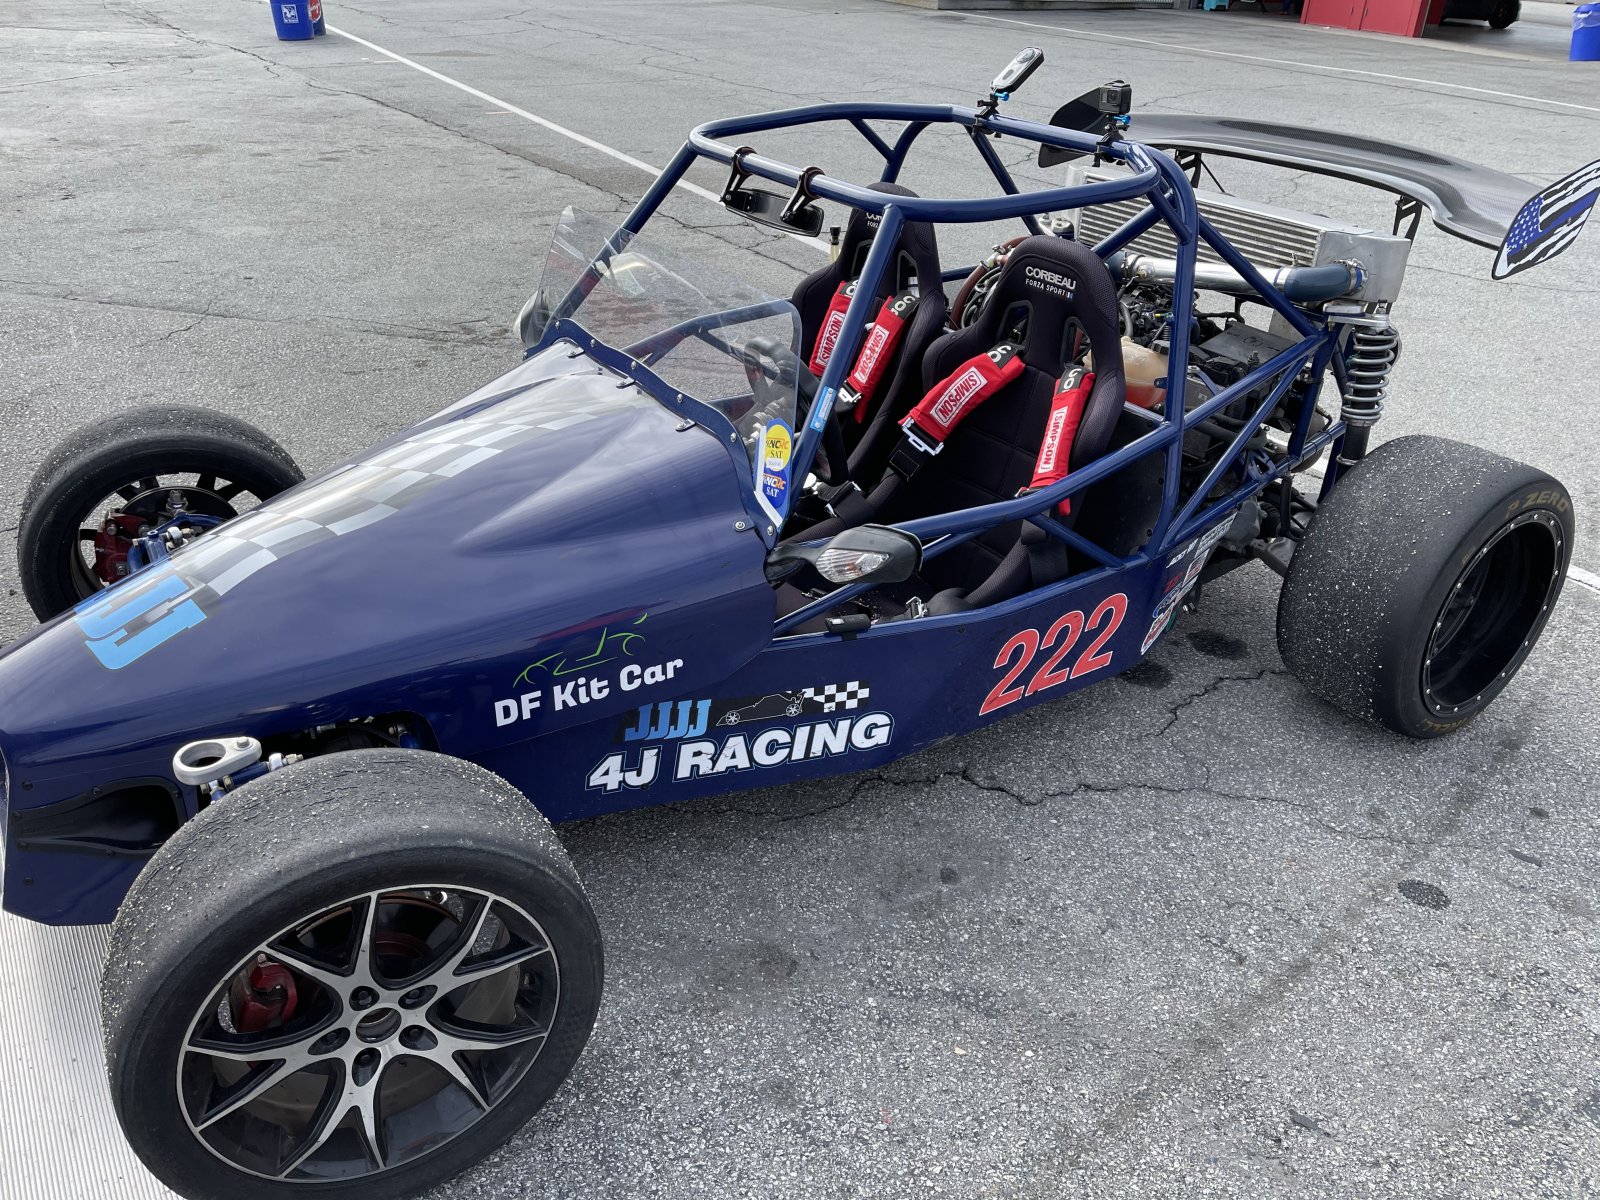
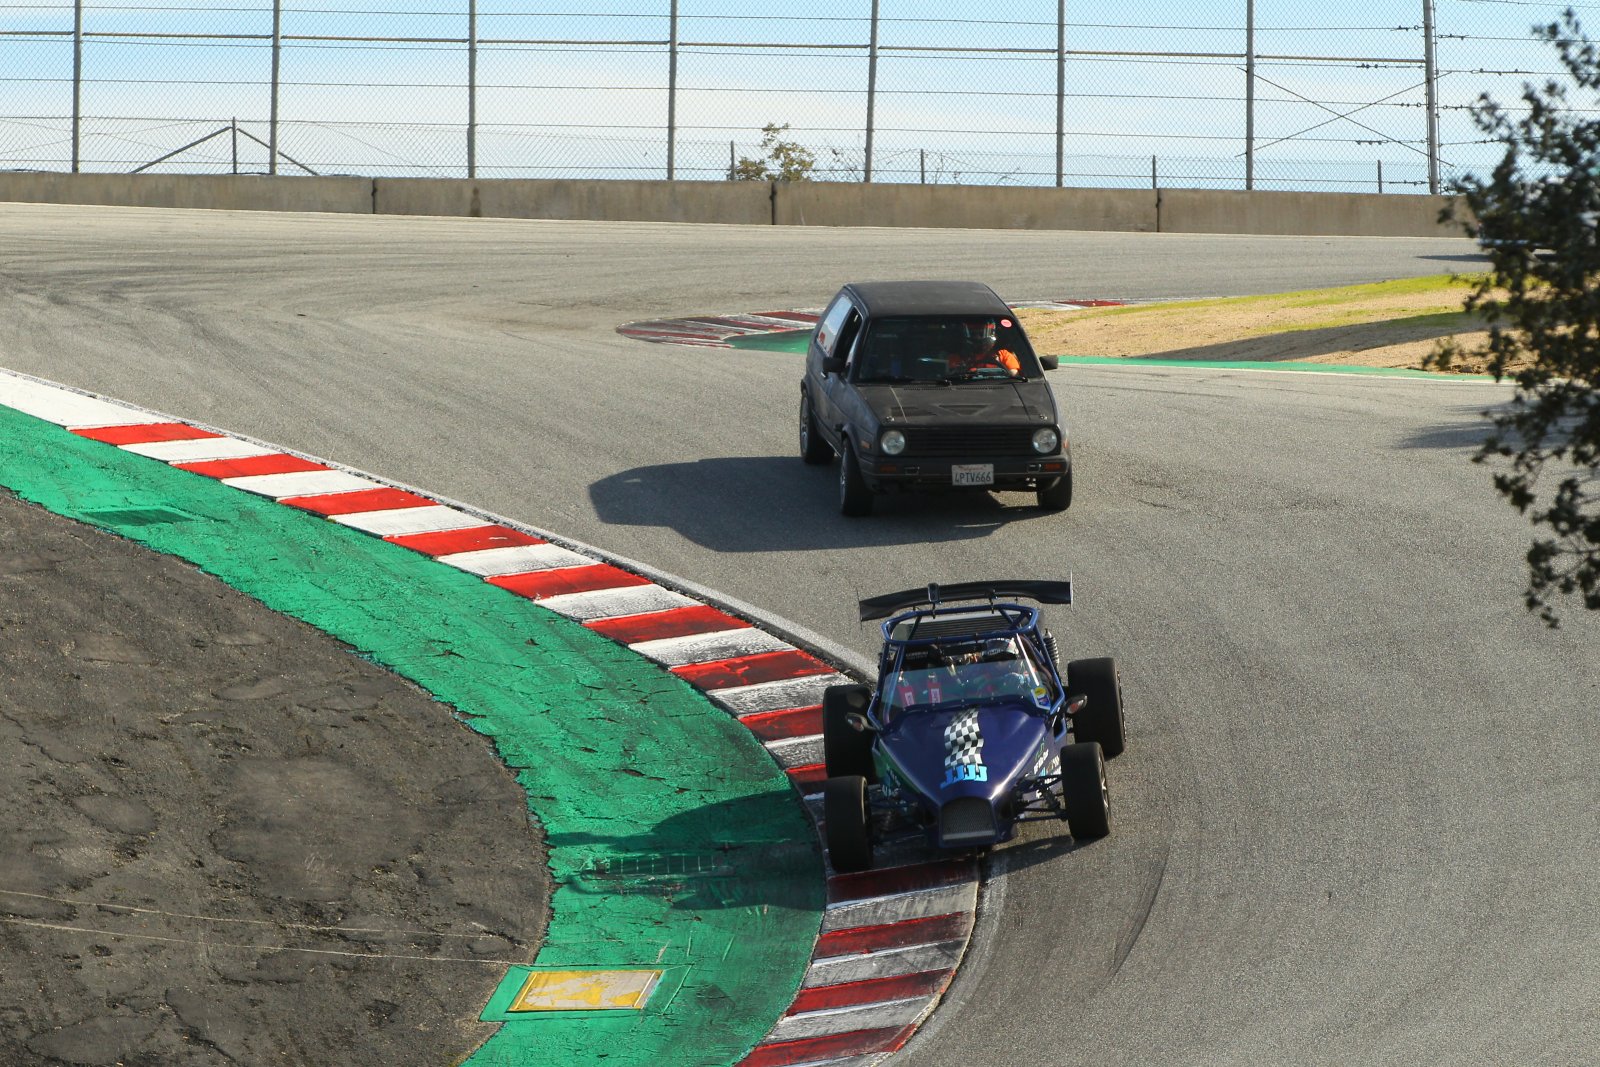
I had a really fun weekend at Laguna Seca.
Jim and Jeff Loesche came out to my event and brought their Turbo Goblin.
I spent a bunch of time talking with them and checking out their build.
Too bad Lagna Seca is not allowing passengers right now so I couldn't get a ride, but I followed Jeff around the track for a few laps.
Here is a video of a couple of laps. I'm in the pesky Black VW.
I really can't wait to get working on mine!
ATMironov
Well-Known Member
Well my VW is officially gone and now I have all the room I need for the build.
I really didn't think I would be able to sell it as its an acquired taste for a track car.
Happy to see it went to another track junkie who will be coming to lots of my events, so at least it will still be around.
I'm also really happy I drove it a couple of weekends ago for the last time.
I really didn't think I would be able to sell it as its an acquired taste for a track car.
Happy to see it went to another track junkie who will be coming to lots of my events, so at least it will still be around.
I'm also really happy I drove it a couple of weekends ago for the last time.
ATMironov
Well-Known Member
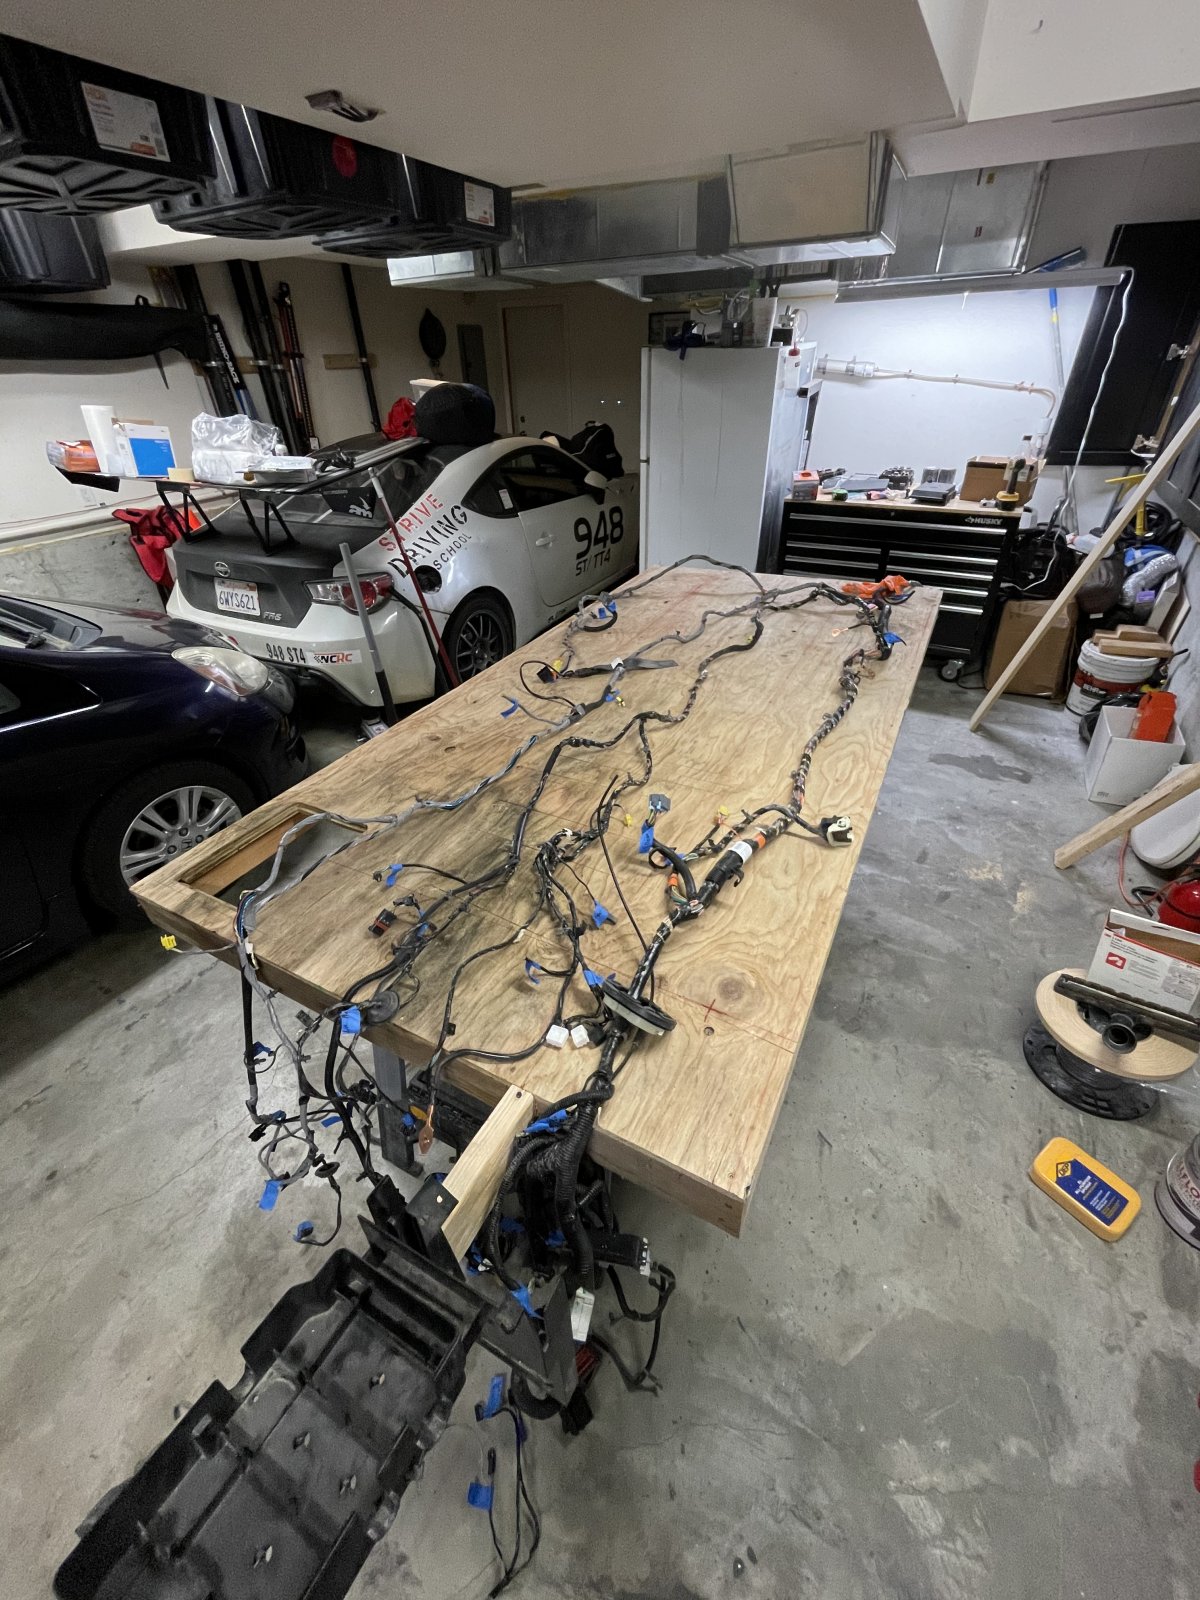
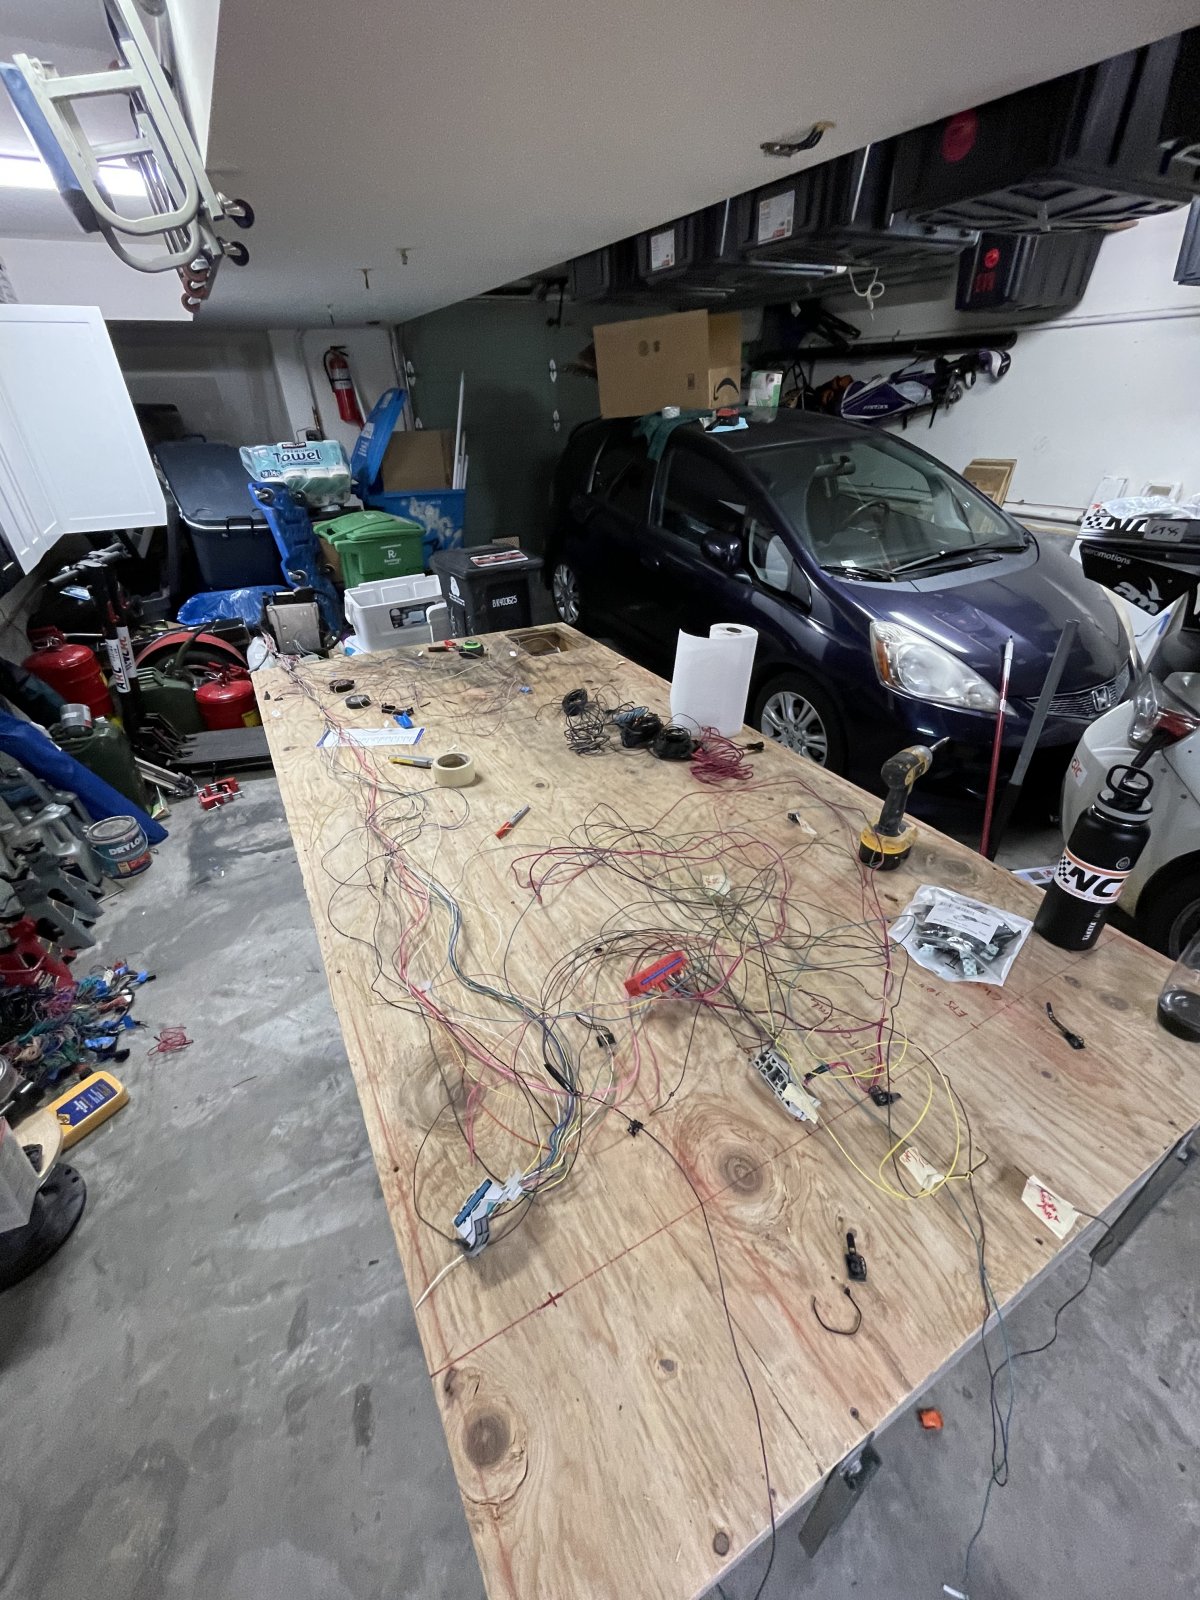
I put in a solid 8 hours today on the wiring.
got through the 4th video. No surprises. Everything seems to be as it should")
At the end of the 4th video Lonny says the loose small pink wire is for the coolant level, but the earlier videos says it’s for the Heat exchanger Pump.
coolant level sensor has a green wire on it.
can anyone confirm that the small pink wire to be extended is for the HX Pump?
got through the 4th video. No surprises. Everything seems to be as it should
At the end of the 4th video Lonny says the loose small pink wire is for the coolant level, but the earlier videos says it’s for the Heat exchanger Pump.
coolant level sensor has a green wire on it.
can anyone confirm that the small pink wire to be extended is for the HX Pump?