

-
We've upgraded and reskinned the forum. Notice something off? Email us at [email protected] and we'll fix it.
You are using an out of date browser. It may not display this or other websites correctly.
You should upgrade or use an alternative browser.
You should upgrade or use an alternative browser.
V1 MisterDave's - Ext. city Goblin - 09 SS/TC donor

JeffsGoblin
Goblin Guru

- JeffsGoblin Goblin Guru
This is what they had in mind for the clutch reservoir line:

 dfkitcar.com
Take your current hose off the master cylinder and cut it in half and use the nylon line to patch them together.
I bought a couple of feet of this 5/16" ID... instead. It is a little pricing: https://www.ebay.com/itm/REMOTE-BRAKE-FLUID-RESERVOIR-HOSE-5-16-ID-Sold-by-the-Foot-see-description/332975349019?ssPageName=STRK:MEBIDX:IT&_trksid=p2057872.m2749.l2649
Jason in Texas - ext. track - 09 SS/TC
Brake fluid doesn't sweat out of the fuel line? No, it's been about a year and half and looks and feels like the day I installed it.
Take your current hose off the master cylinder and cut it in half and use the nylon line to patch them together.
I bought a couple of feet of this 5/16" ID... instead. It is a little pricing: https://www.ebay.com/itm/REMOTE-BRAKE-FLUID-RESERVOIR-HOSE-5-16-ID-Sold-by-the-Foot-see-description/332975349019?ssPageName=STRK:MEBIDX:IT&_trksid=p2057872.m2749.l2649
WYGoblin
Well-Known Member

- WYGoblin Well-Known Member
That is similar to what I did. Ordered the brake hose so I didn't have any splices in it. Figured it would be less chances for leaks.This is what they had in mind for the clutch reservoir line:
Jason in Texas - ext. track - 09 SS/TC
Brake fluid doesn't sweat out of the fuel line? No, it's been about a year and half and looks and feels like the day I installed it.
Take your current hose off the master cylinder and cut it in half and use the nylon line to patch them together.
I bought a couple of feet of this 5/16" ID... instead. It is a little pricing: https://www.ebay.com/itm/REMOTE-BRAKE-FLUID-RESERVOIR-HOSE-5-16-ID-Sold-by-the-Foot-see-description/332975349019?ssPageName=STRK:MEBIDX:IT&_trksid=p2057872.m2749.l2649

JBINTX
Goblin Guru

MisterDave
Well-Known Member

- MisterDave Well-Known Member
Making progress. Feels good to get the sub frame on. I ordered some hose for the clutch to reservoir line. Just thinking I’d prefer it to be one solid line. Here are some progress pics. Be sure to let me know if you notice anything wrong. I thank you all for your input. I don’t think I would be able to do this without the help of this forum. Thank you
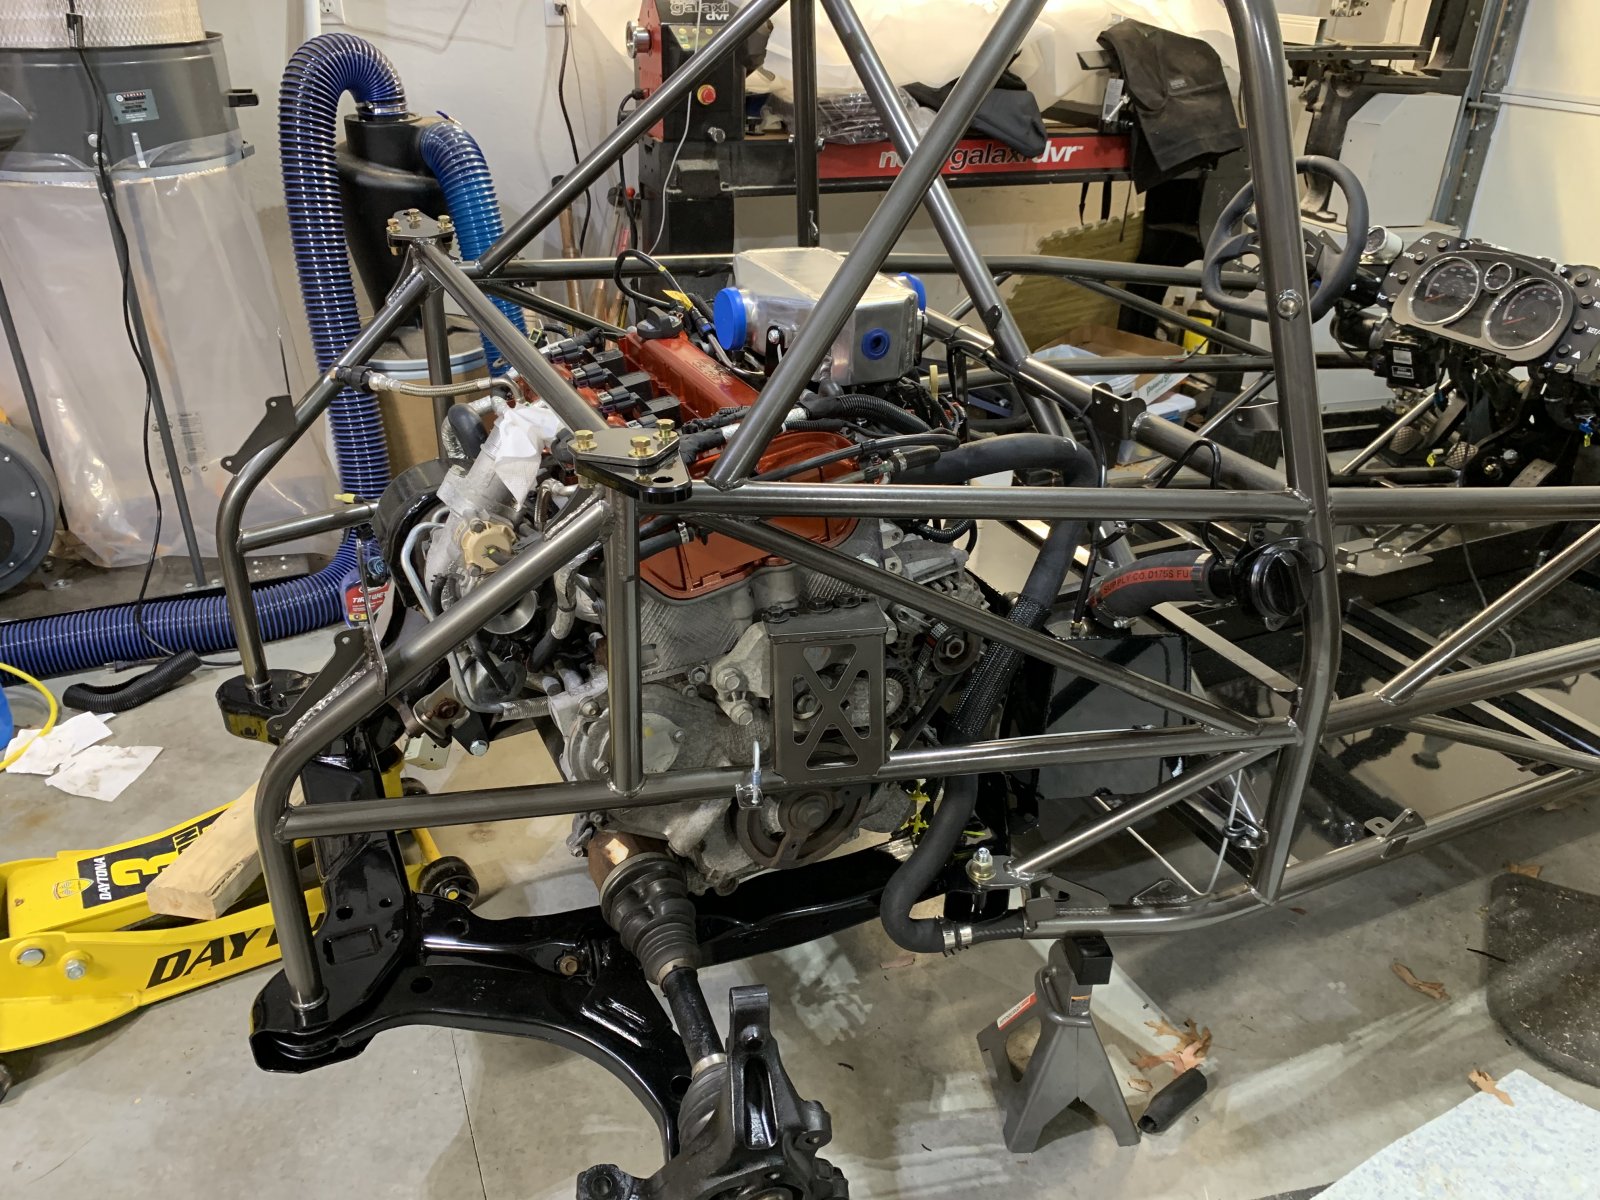
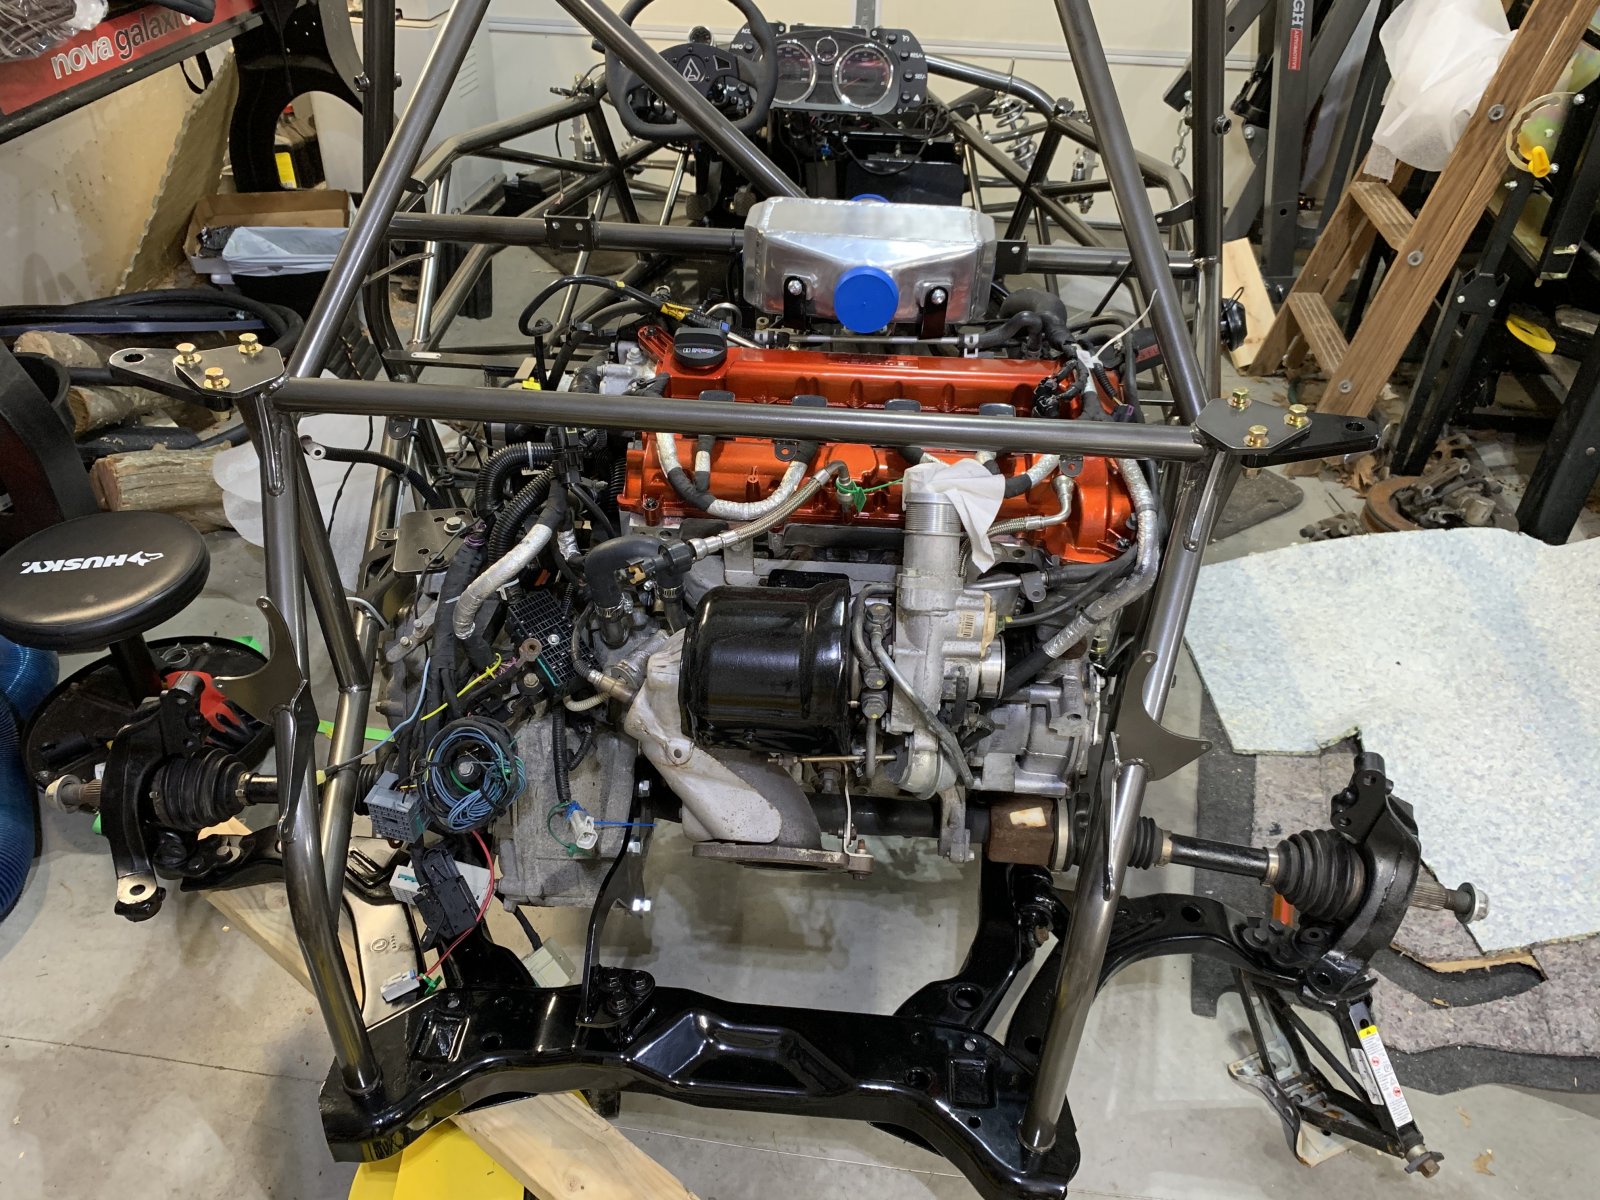
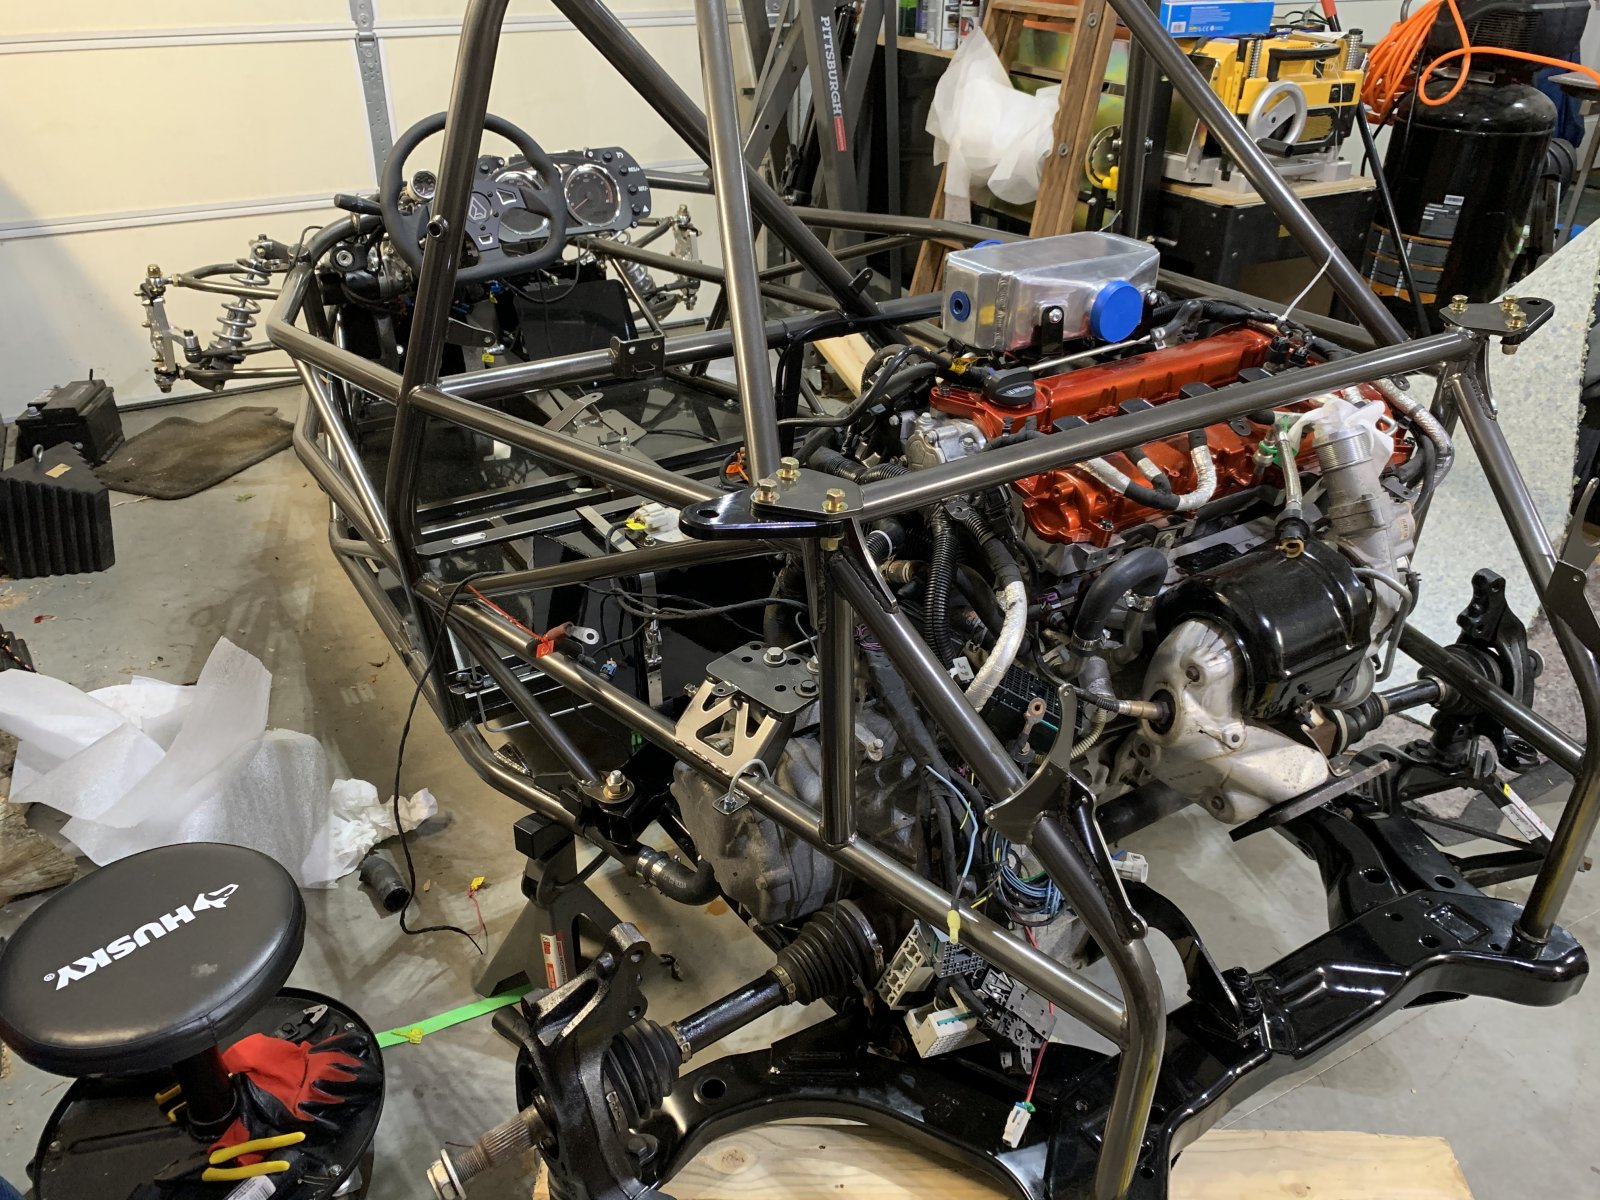
MisterDave
Well-Known Member
- MisterDave Well-Known Member
This is the blue wire that connects to the radiator fan wire right?
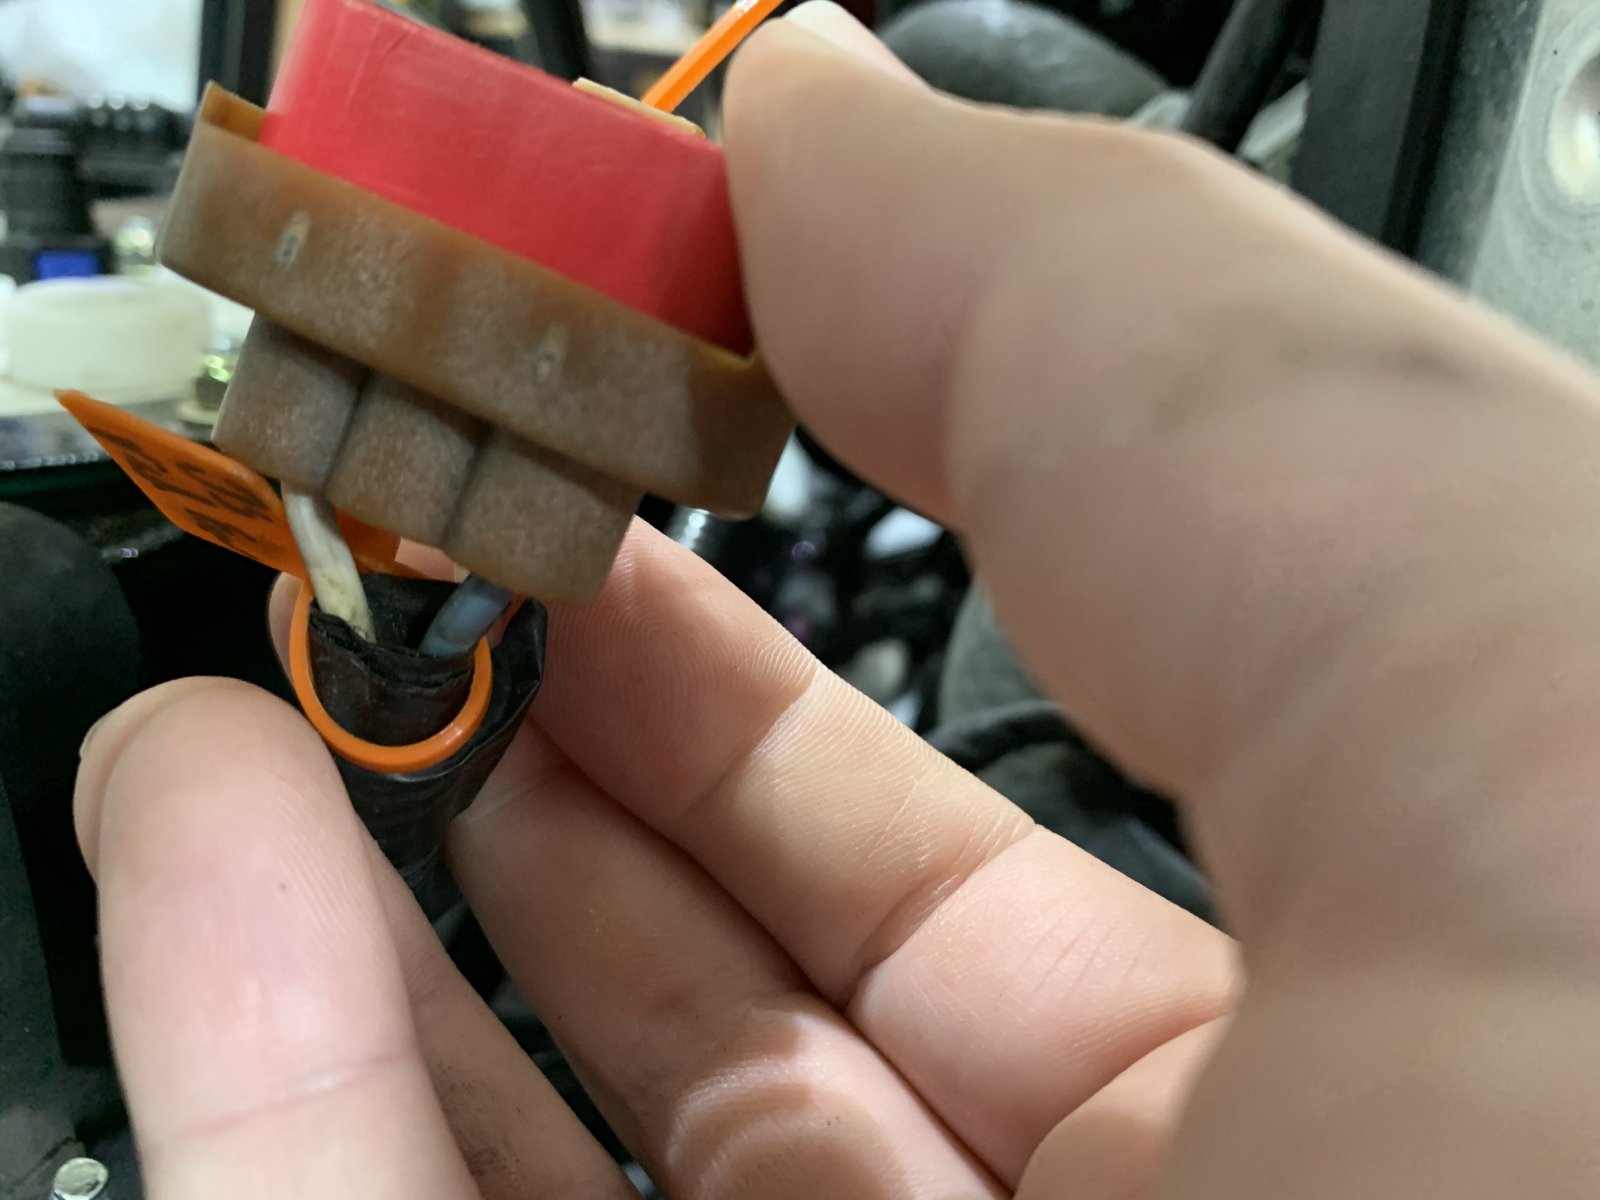
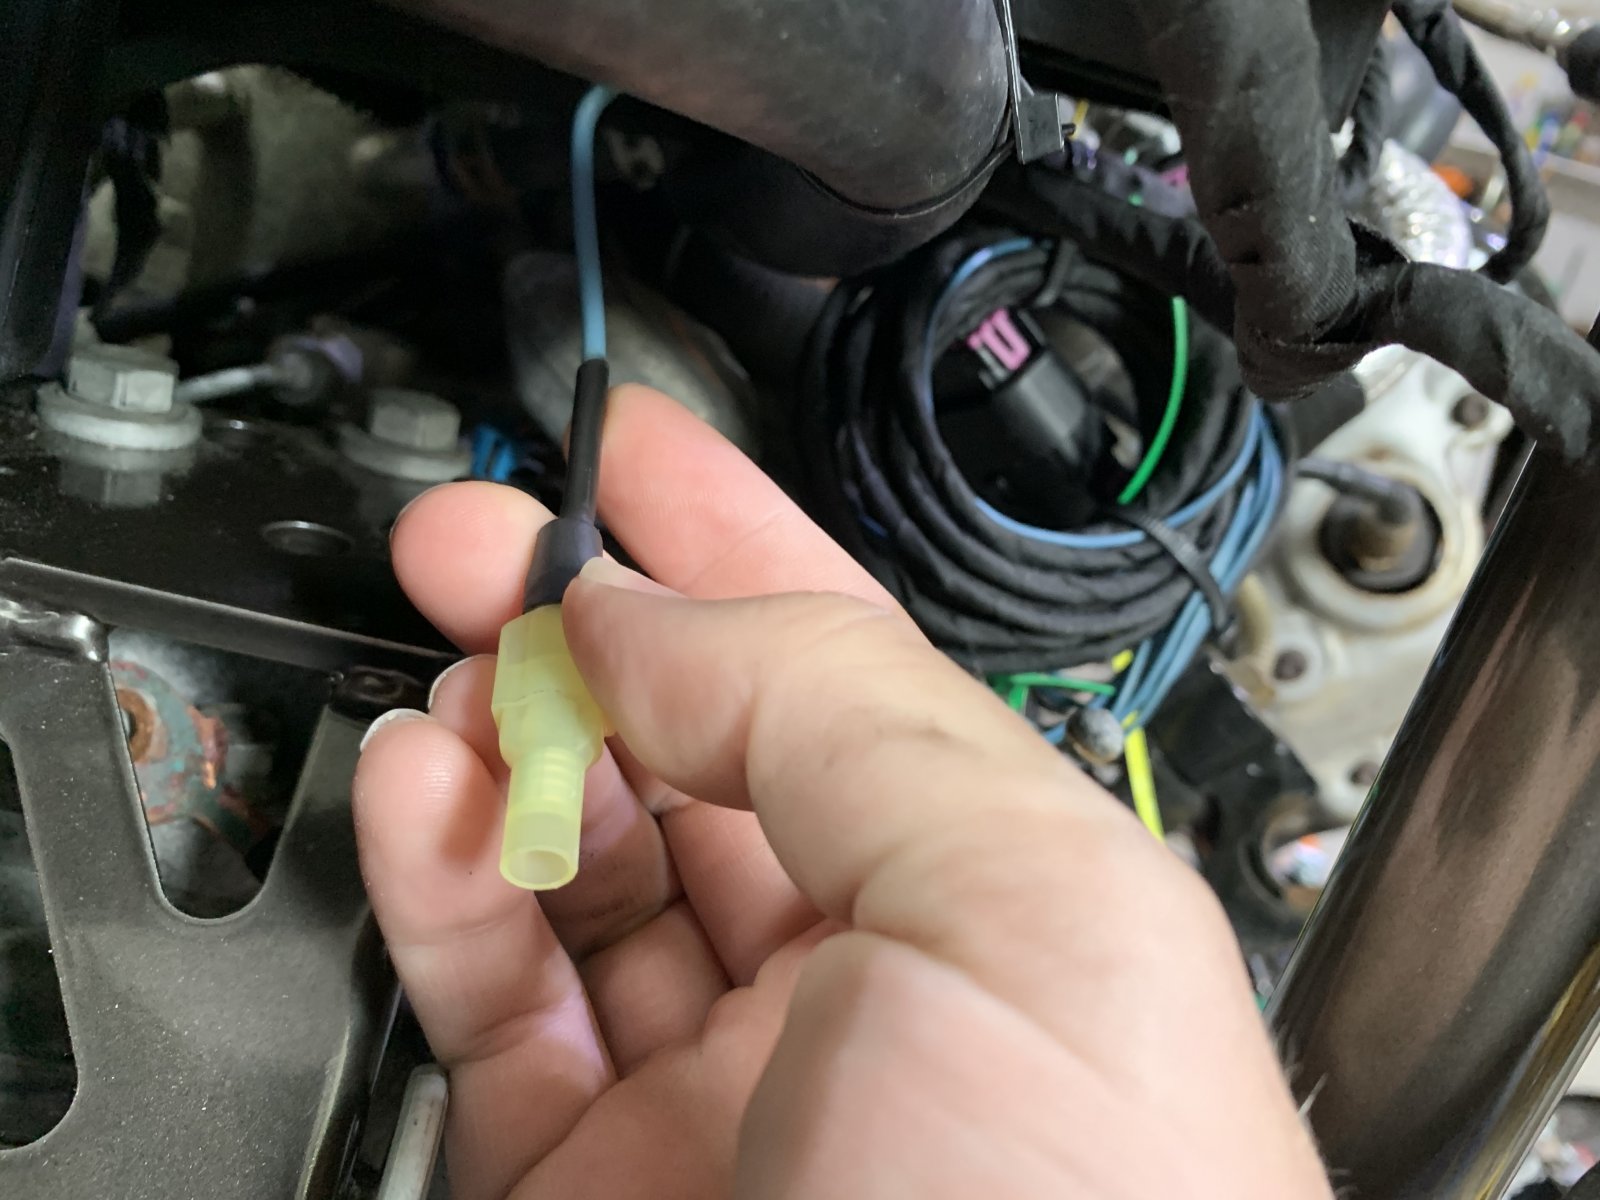
Assuming I have the right plug. Couldn’t I cut the blue wire at the original plug and use that to connect to the blue wire coming from the new fan?
Is the white just a ground? Do I need to do anything with the white?
Assuming I have the right plug. Couldn’t I cut the blue wire at the original plug and use that to connect to the blue wire coming from the new fan?
Is the white just a ground? Do I need to do anything with the white?

Murcielago311
Well-Known Member

- Murcielago311 Well-Known Member
You can connect from where the original plug was or trace it up the engine harness farther and connect the new wire closer to where it comes out of the fuse box. That's what I did since the new light blue wire going to the new fan was already up by the fuse box.
The blue is the only wire you need from the two cobalt fans connectors, since the new fan should already be grounded up front.
The blue is the only wire you need from the two cobalt fans connectors, since the new fan should already be grounded up front.


MisterDave
Well-Known Member
- MisterDave Well-Known Member
Thanks for the help, I did cut that blue wire from the plug and connected it to my fan wire. The white wire I just capped off with some heat shrink.
This morning I tried to mount my inter-cooler water pump. I got the mount plate(diamond shaped) bolted on to the oil pan. Now the next session of Dave's dumb questions.... There are two screws that go into that plate to mount the water pump clamp. These screws are 3/4" long. With the plate being 1/4 thick and clamp mount is only about 0.1" that 3/4" screw seems too long. Am I missing something? the screws bottom out and hit the oil pan.
This morning I tried to mount my inter-cooler water pump. I got the mount plate(diamond shaped) bolted on to the oil pan. Now the next session of Dave's dumb questions.... There are two screws that go into that plate to mount the water pump clamp. These screws are 3/4" long. With the plate being 1/4 thick and clamp mount is only about 0.1" that 3/4" screw seems too long. Am I missing something? the screws bottom out and hit the oil pan.
JBINTX
Goblin Guru

- JBINTX Goblin Guru
yep on the screws. I used shorter ones.Thanks for the help, I did cut that blue wire from the plug and connected it to my fan wire. The white wire I just capped off with some heat shrink.
This morning I tried to mount my inter-cooler water pump. I got the mount plate(diamond shaped) bolted on to the oil pan. Now the next session of Dave's dumb questions.... There are two screws that go into that plate to mount the water pump clamp. These screws are 3/4" long. With the plate being 1/4 thick and clamp mount is only about 0.1" that 3/4" screw seems too long. Am I missing something? the screws bottom out and hit the oil pan.
MisterDave
Well-Known Member
- MisterDave Well-Known Member
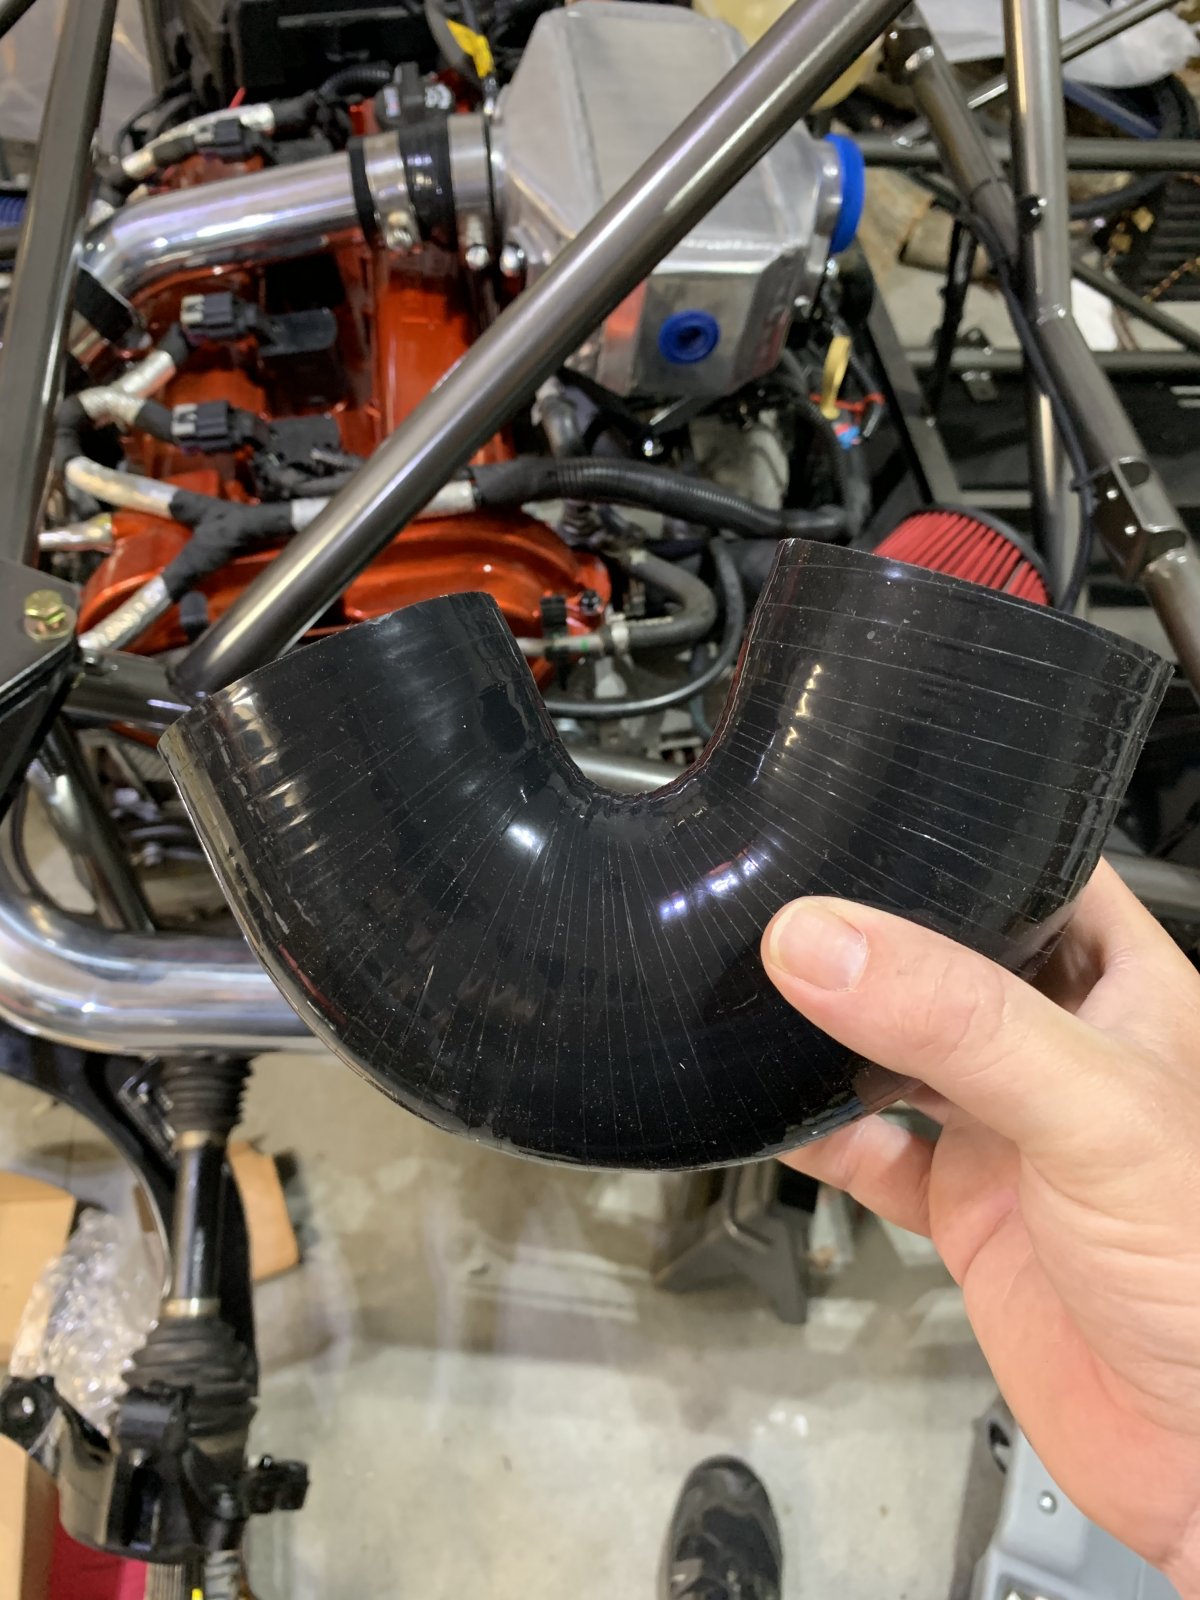
Anyone have any tips or tricks for cutting this elbow to complete the turbo plumbing? I haven’t cut into it yet because it feels too much like I’m just guessing.

Torchandregdoc
Goblin Guru

- Torchandregdoc Goblin Guru
I'm running an HHR, so mine is a bit different, but thats all I did, guess. I just cut off about half inch and kept shortening untill it looked close.
JBINTX
Goblin Guru
- JBINTX Goblin Guru
Jason in Texas - ext. track - 09 SS/TC
This is the hose we supply for the heat exchanger, it gets cut in half.
Not sure anyone can give you an exact dimension. Best to trim and fit it. I did that about three times until I had it fitting well.
Last edited:

Desert Sasqwatch
Bigfoot Goblin

- Desert Sasqwatch Bigfoot Goblin
Measure eight times, cut once! 
MisterDave
Well-Known Member
- MisterDave Well-Known Member
I ended up cutting just about an inch off one side of that elbow and everything seemed to work out....
If everything works out as planned for today.... I might attempt my first start!!!
Let me know if there is any advice on things to check before the first key turn.
If everything works out as planned for today.... I might attempt my first start!!!
Let me know if there is any advice on things to check before the first key turn.

Ark :D
Goblin Guru

- Ark :D Goblin Guru
Like JB said, I don't think anyone's going to be able to give you exact numbers. I know I cut at least an inch off the tight elbow that goes under the intake manifold, and I cut off at least 2 inches off the thinner tube that goes from the turbo to the intercooler.
What did you do with the coated clamp that's part of bag L23D, "Intake hardware for TC"? I don't see anywhere it can fit my build .... just curious.
What did you do with the coated clamp that's part of bag L23D, "Intake hardware for TC"? I don't see anywhere it can fit my build .... just curious.
MisterDave
Well-Known Member
- MisterDave Well-Known Member
I was actually hoping your build log might provide an answer for that coated clamp. I was waiting to see if you had any replys to that one. Mine is still in it's bag.Like JB said, I don't think anyone's going to be able to give you exact numbers. I know I cut at least an inch off the tight elbow that goes under the intake manifold, and I cut off at least 2 inches off the thinner tube that goes from the turbo to the intercooler.
What did you do with the coated clamp that's part of bag L23D, "Intake hardware for TC"? I don't see anywhere it can fit my build .... just curious.


Ark :D
Goblin Guru
- Ark :D Goblin Guru
Silly me, looking for a bolt hole that matches when the **** clamp CAME WITH a bolt and a nylok nut. DERP!
Interesting on the intake tube. I followed the images in Adam's helpful pics album for mine, and don't I recall reading somewhere that the further the MAF sensor is from the actual intake/air filter, the better?
Interesting on the intake tube. I followed the images in Adam's helpful pics album for mine, and don't I recall reading somewhere that the further the MAF sensor is from the actual intake/air filter, the better?
Similar threads

- Replies
- 13
- Views
- 367


- Replies
- 168
- Views
- 19K