Kingchuck's (and friends) Street Goblin #435 - 06 LT Manual (Aftermarket Supercharger)
- Thread starter KingChuck24
- Start date
Robinjo
Goblin Guru
Go ahead and run your heat exchanger coolant lines. I wish I had before everything else as space gets tight.Yesterday did not go all that smoothly, I was trying to install the steering rack but it seemed that the holes for the bolts were welded improperly and there was not enough space to get it in. I ended up having to mallet the bolts in with quite a big of force which seemed to work. Here is the thread detailing that: https://dfkitcar.com/forum/index.php?threads/kit-welded-incorrectly.3927/
I was able to install the pedal box easily and now it is onto trimming the clutch pedal and I think I will trim the starter at the same time just to tackle that as well.
I just got word that there are still two donor harnesses in front of mine which is really unfortunate because I was told that Lonny can do one per week and that puts us at October 18th if it was completed immediately which Lonny has not been doing one per week because there were 4 in front of mine about a month ago.
This leads me to the question of exactly how far I can go without the wiring harness. I have seen that a bunch of people have put the engine in, could I do the suspension and other things like that. Just don't want to sit on the goblin for a couple weeks to wait for the harness.
KingChuck24
Well-Known Member
I know this might be a difficult question to answer but is there anything specifically I should refrain from putting on?You could probably put the harness in last if you have to, just more work as you work around previously installed components. And you won't be able to do some of the start/run testing you might would do as you go through the build.
k.rollin
Goblin Guru
Provided you don't rivet on the tunnel cap, it's not even that much of a hassle to run the harness after assembly. A few screws and bolts here and there and the interior of the Goblin is stripped. I installed my harness without any sort of wrap to make troubleshooting any electrical issues easier several years ago, and was able to install split loom over all the wires this year without removing the harness from the car. You should be fine to proceed.The tunnel cover, seats and firewall(s) are the only thing I can think of that would be a pain with running the harness later. Everything else is pretty easy to get to.
KingChuck24
Well-Known Member
Sounds good, I guess we will try to finish up the front end of stage 1 this weekend!Provided you don't rivet on the tunnel cap, it's not even that much of a hassle to run the harness after assembly. A few screws and bolts here and there and the interior of the Goblin is stripped. I installed my harness without any sort of wrap to make troubleshooting any electrical issues easier several years ago, and was able to install split loom over all the wires this year without removing the harness from the car. You should be fine to proceed.
escapepilot
Goblin Guru
It is much easier to install the heat exchanger before installing the radiator or wiring harness. That isn't in the videos.
Goblinfanclub1234
Well-Known Member
might need to drill the powder coat out of a bunch of holes...
Desert Sasqwatch
Goblin Guru
And possibly tap out the threads of holes that got powder coated - that can take a while.might need to drill the powder coat out of a bunch of holes...

KingChuck24
Well-Known Member
Is there a good kit to get for tapping. I just don't know what any of the sizes are for tapping out the holes.And possibly tap out the threads of holes that got powder coated - that can take a while.
Desert Sasqwatch
Goblin Guru
A good combination set of SAE and metric sizes up to 1/2 inch and 12mm would cover most any situation on a Goblin build. These can purchased from Amazon, Harbor Freight, or any of the big box stores that carry tools.
If you plan ahead and tape off or coat the inside threads with grease or silicon will help keep the threads cleaner during powder coating or painting.
If you plan ahead and tape off or coat the inside threads with grease or silicon will help keep the threads cleaner during powder coating or painting.
KingChuck24
Well-Known Member
Haha, planning ahead we did not. Just ran into the first thread we are going to need to tap.A good combination set of SAE and metric sizes up to 1/2 inch and 12mm would cover most any situation on a Goblin build. These can purchased from Amazon, Harbor Freight, or any of the big box stores that carry tools.
If you plan ahead and tape off or coat the inside threads with grease or silicon will help keep the threads cleaner during powder coating or painting.
KingChuck24
Well-Known Member
9/27/2022
Day 3
Hours Worked: 4
Total Hours: 11
Today we got a lot done, we had four of us all doing different things so a lot was put into the actual frame.
Clutch pedal installed. Brake booster installed. Lines ran into brake booster. Removed brake reservoir.
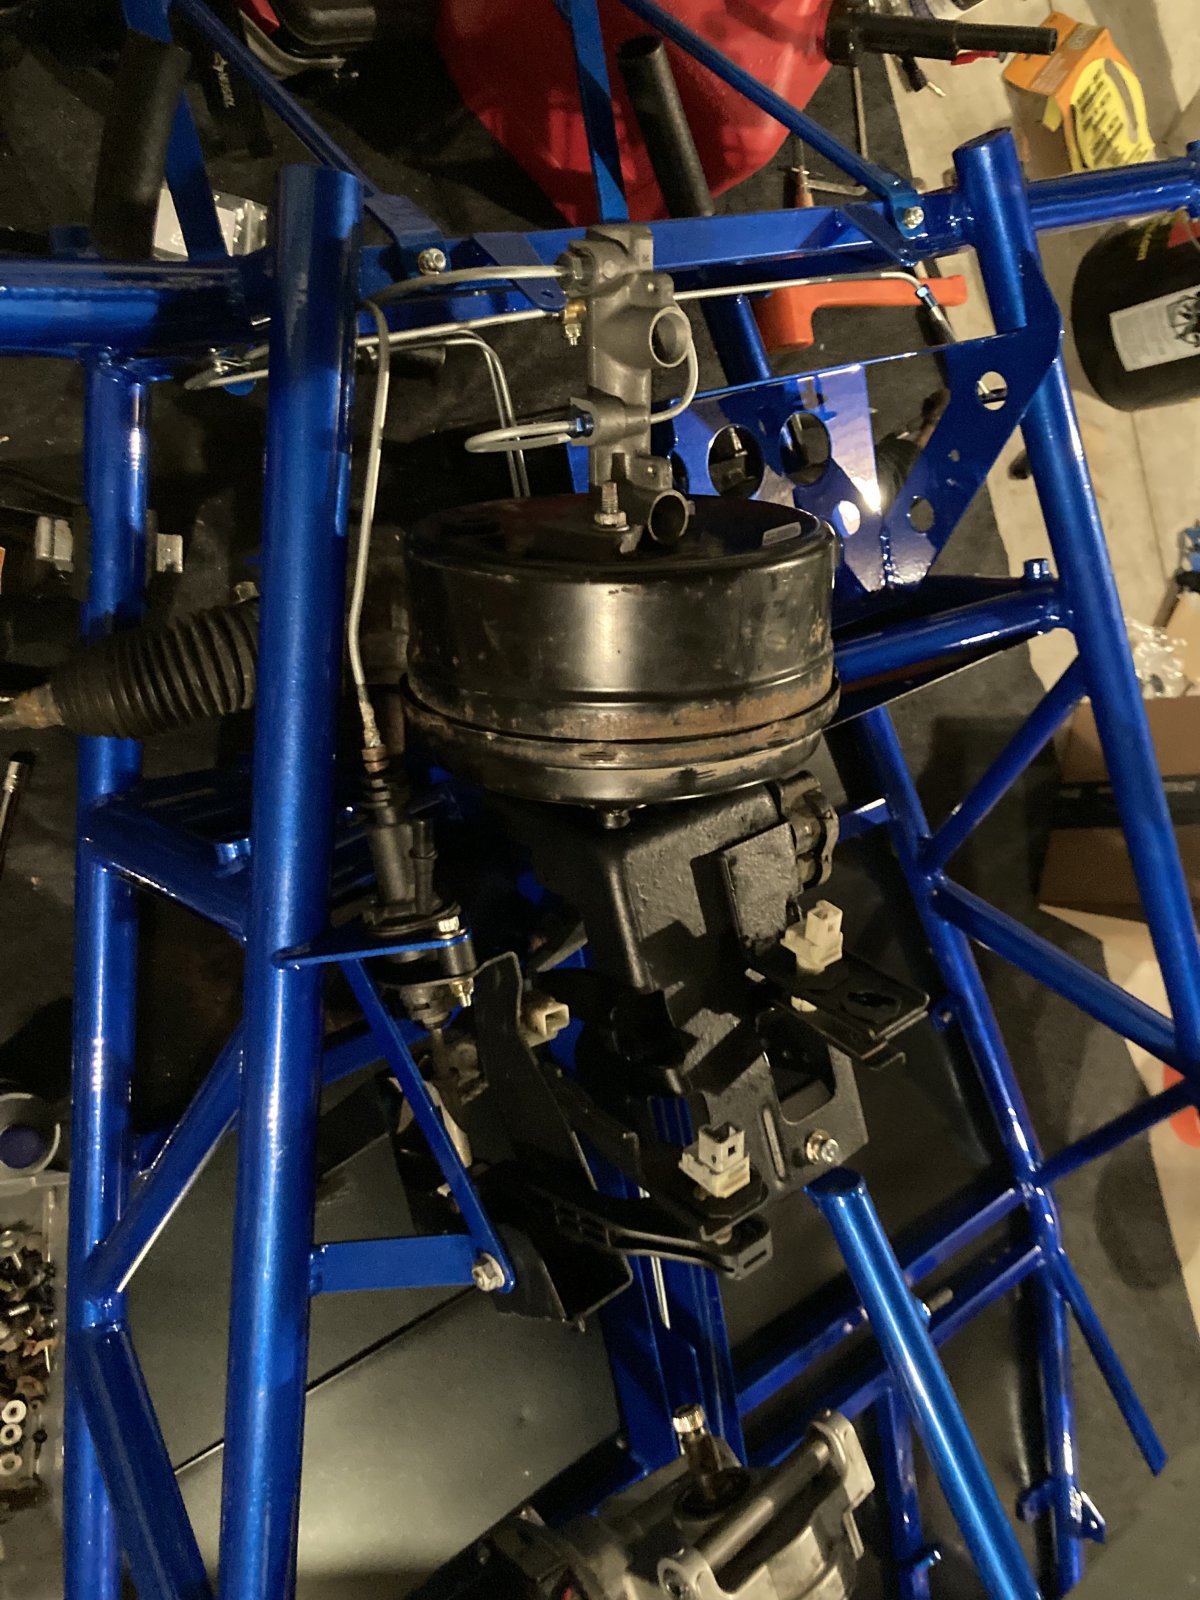
I am missing the clip that attaches the brake pedal to the arm of the brake booster, anyone know where to find that?
Got the clutch master cylinder installed:

I seem to be missing the clip that attaches the clutch master cylinder line to the clutch master cylinder. Anyone know where to get one?
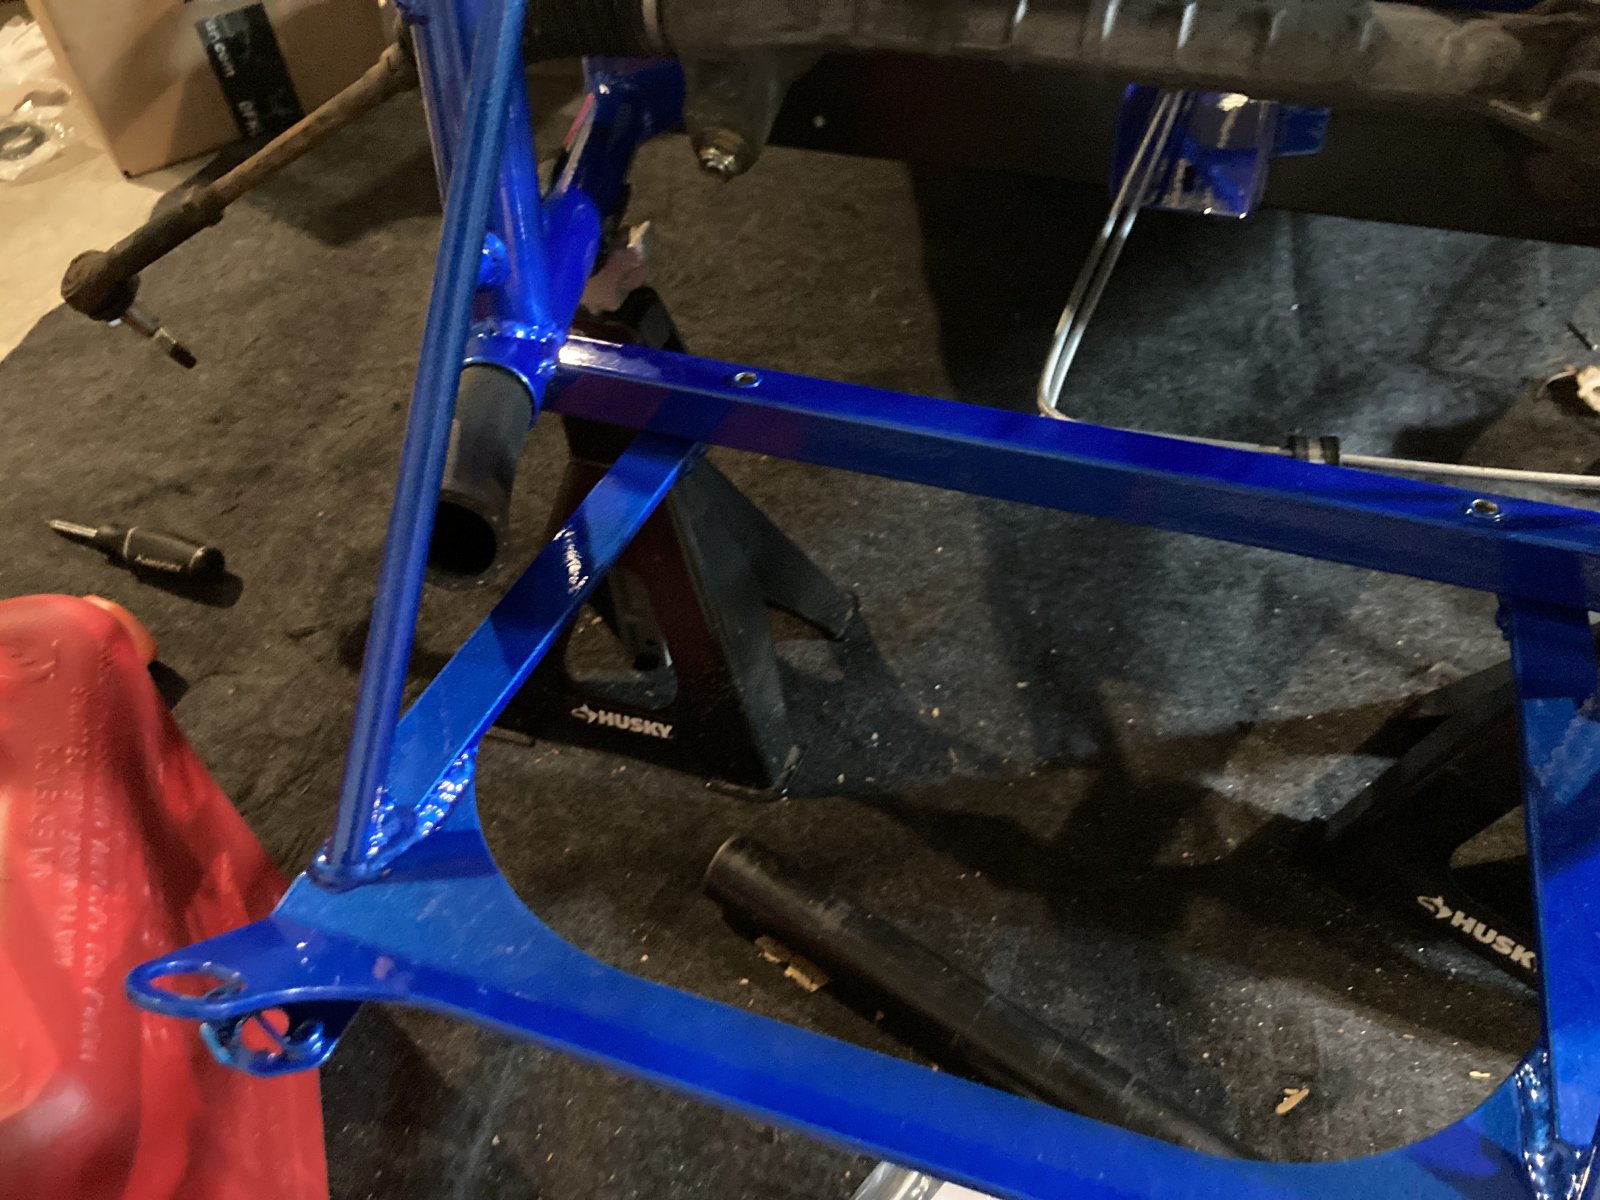
Test fitted the radiator mount and figured out that the bottom holes got powder coated so those will need to be tapped:
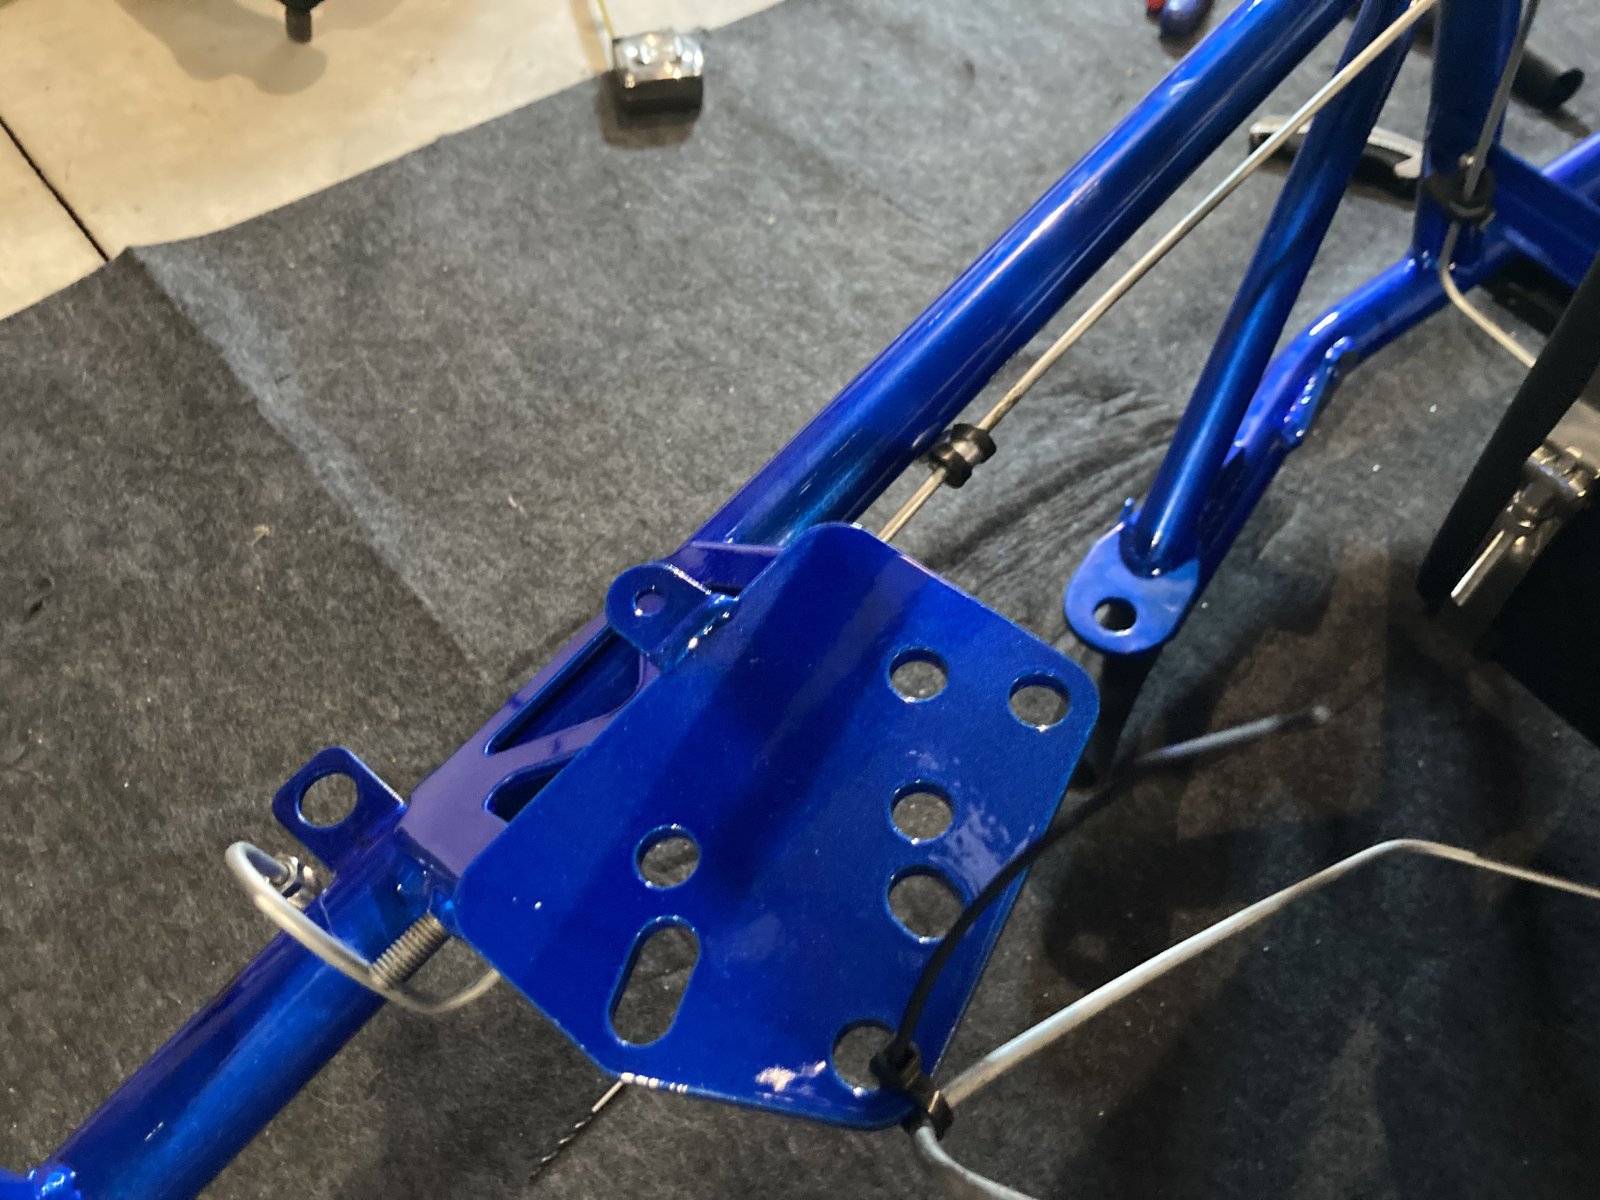
Secured the brake lines to the frame:
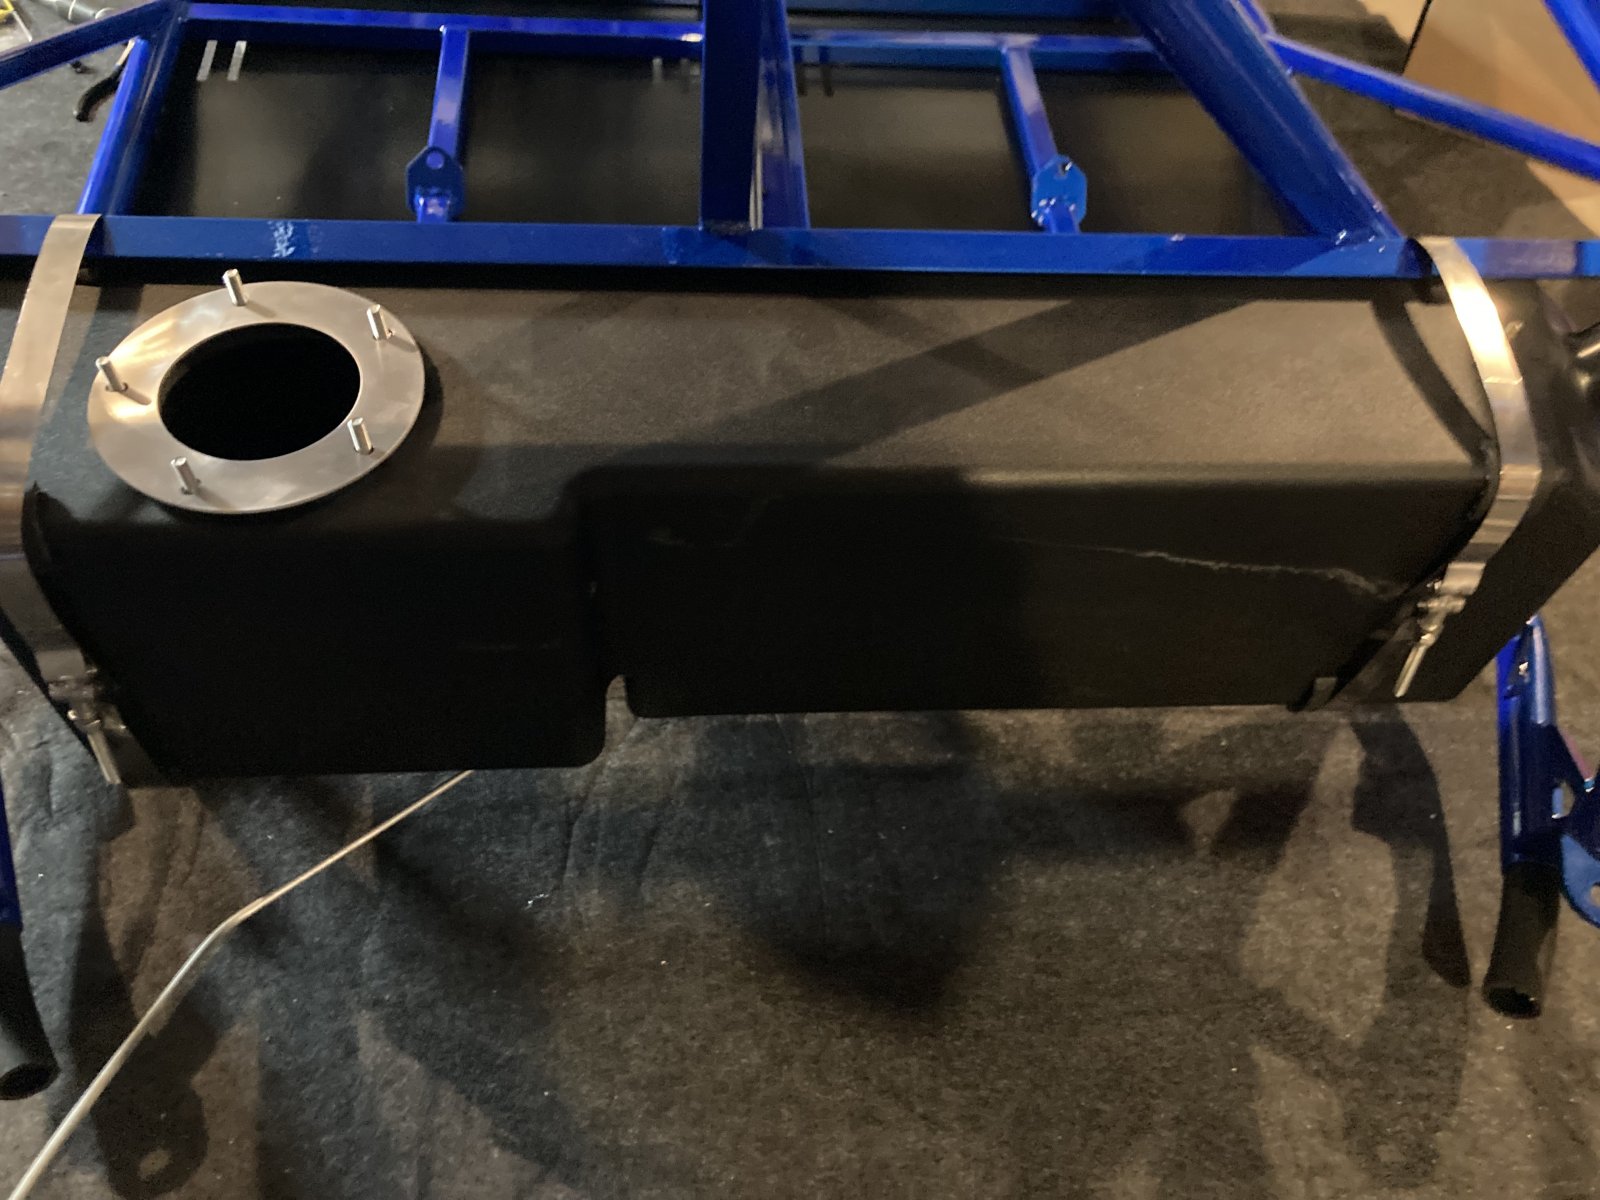
Got the fuel tank installed:
We also got the shifter mechanism completely installed onto the tunnel cap which took two of us an hour but we got that knocked out which is good!
Current Issues:
Clamp things for both the Clutch line and the brake pedal.
Questions:
Should I put in the heat exchanger before putting in the radiator?
Is there a detailed guide for putting the heat exchanger in?
What should be our next steps after stage 1 is complete. We are nearing the end of the videos and I have found a list from another user, r3drckt:
Heat Exchanger
Shifter
Master Cylinder
Steering Column (steering rack as well if not done already)
Steering Wheel
Front upper and lower control arms
Front Coilovers
Front uprights
Front brakes
Front braided brake hoses
Rear toe link rack
Rear brakes
Rear braided brake hoses
Intercooler assembly (pumps, piping, mounts, A2W intercooler, etc.)
Intake assembly (MAP and MAF tubes, Turbo t-bolt clamps, intake couplers, filter, etc.)
Anything to look out for or helpful tips before diving into any of these things?
Day 3
Hours Worked: 4
Total Hours: 11
Today we got a lot done, we had four of us all doing different things so a lot was put into the actual frame.
Clutch pedal installed. Brake booster installed. Lines ran into brake booster. Removed brake reservoir.
I am missing the clip that attaches the brake pedal to the arm of the brake booster, anyone know where to find that?
Got the clutch master cylinder installed:
I seem to be missing the clip that attaches the clutch master cylinder line to the clutch master cylinder. Anyone know where to get one?
Test fitted the radiator mount and figured out that the bottom holes got powder coated so those will need to be tapped:
Secured the brake lines to the frame:
Got the fuel tank installed:
We also got the shifter mechanism completely installed onto the tunnel cap which took two of us an hour but we got that knocked out which is good!
Current Issues:
Clamp things for both the Clutch line and the brake pedal.
Questions:
Should I put in the heat exchanger before putting in the radiator?
Is there a detailed guide for putting the heat exchanger in?
What should be our next steps after stage 1 is complete. We are nearing the end of the videos and I have found a list from another user, r3drckt:
Heat Exchanger
Shifter
Master Cylinder
Steering Column (steering rack as well if not done already)
Steering Wheel
Front upper and lower control arms
Front Coilovers
Front uprights
Front brakes
Front braided brake hoses
Rear toe link rack
Rear brakes
Rear braided brake hoses
Intercooler assembly (pumps, piping, mounts, A2W intercooler, etc.)
Intake assembly (MAP and MAF tubes, Turbo t-bolt clamps, intake couplers, filter, etc.)
Anything to look out for or helpful tips before diving into any of these things?
k.rollin
Goblin Guru
7/16-20 > Welded Seatbelt NutsI have a list of taps I bought to clean threads of my chassis and suspension after powder coat laying around somewhere for forum reference. I'll find it and post up after I get home from work.
3/8-16 > Headlight Bungs
3/4-16 > Front Outboard Control Arms
1/2-20 > Front Inboard Control Arms
10-24 > I don't remember why
M14x2.0 > Rear LCA/Subframe to Chassis M10×1.5 > Subframe (Horizontal LCA mount)
Robinjo
Goblin Guru
I think ZZP sells the little clips. I may have had 1 extra (somewhere) but ZZP will get them to you faster.

 zzperformance.com
When you put the clips back in, remember that this is the orientation. The male end will not go into the female port with the clip wrong. I spent hours and many attempts trying to get the clutch to go in, 2 minutes with it in the right orientation.

 dfkitcar.com
F35 Clutch Clip
This is a replacement "Hydraulic Clutch Clip" line that goes from the "Master Cylinder Line" to the "Clutch Pipe" for the F35 transmissions out of the Cobalt, Ion, and HHR.
When you put the clips back in, remember that this is the orientation. The male end will not go into the female port with the clip wrong. I spent hours and many attempts trying to get the clutch to go in, 2 minutes with it in the right orientation.
A Little Adult Supervision Requested
Greetings all, Trying to button up the suspension, brakes and clutch and bleed the lines before moving on. Ran into a snag trying to clip in the clutch line into one of Lonny's new F35 transmissions. Do any of the Gurus out there recognize if the clips below are the correct versions (one is...
Last edited:
escapepilot
Goblin Guru
Heat exchanger before radiator - much easier. There is so little room to get to the hose clamps if you wait till everything else is installed (personal experience).
Check other build threads for tips or pics, but I recommend:
1. mount plastic elbows to heat exchanger (with teflon paste or 5-6 wraps of teflon tape) then mount heat exchanger.
2. install rubber hoses onto pex (front and back if possible) - pay attention to location of hose clamp parts and what they could rub against.
3. install rubber hoses w/ pex lines onto heat exchanger.
4. once engine and subframe installed, connect to heat exchanger lines.
If I were starting over, I would love to add a block in the front and rear of the tunnel to separate the heat exchanger lines, harness, brake and clutch lines - to keep everything from potentially rubbing too much and to seal the tunnel from heat from the radiator.
KingChuck24
Well-Known Member
So today we went to pick up the other powder coated things like brake calipers and adjustment perches. We came in and saw they were a much darker blue, these were parts were actually the illusion blue. Instead the other, large and very reputable, company who powder coated the frame coated it illusion blue-berg which I never even knew existed. So if you like the look of my frame, powder coat it that color instead. Just wasted a lot of money to powder coat the wrong color .
.