r3drckt - extended track - 06 SS/SC G85

r3drckt

Goblin Guru
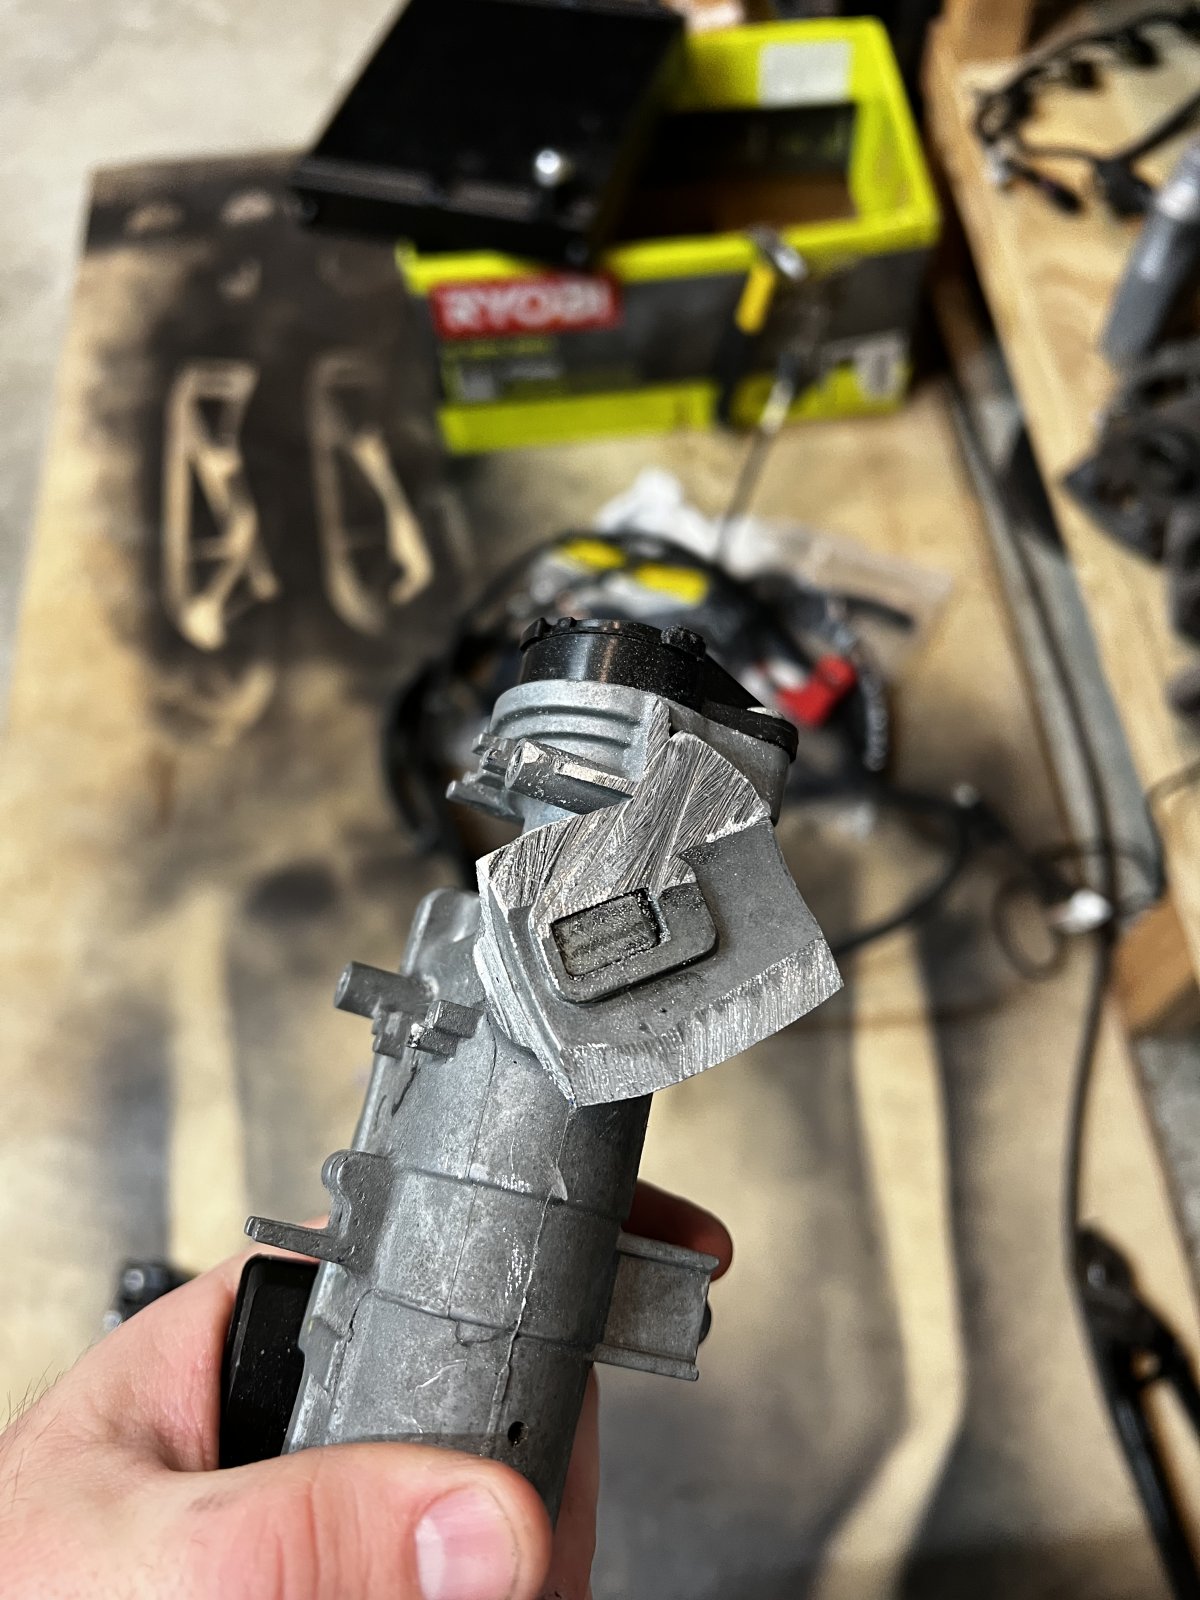
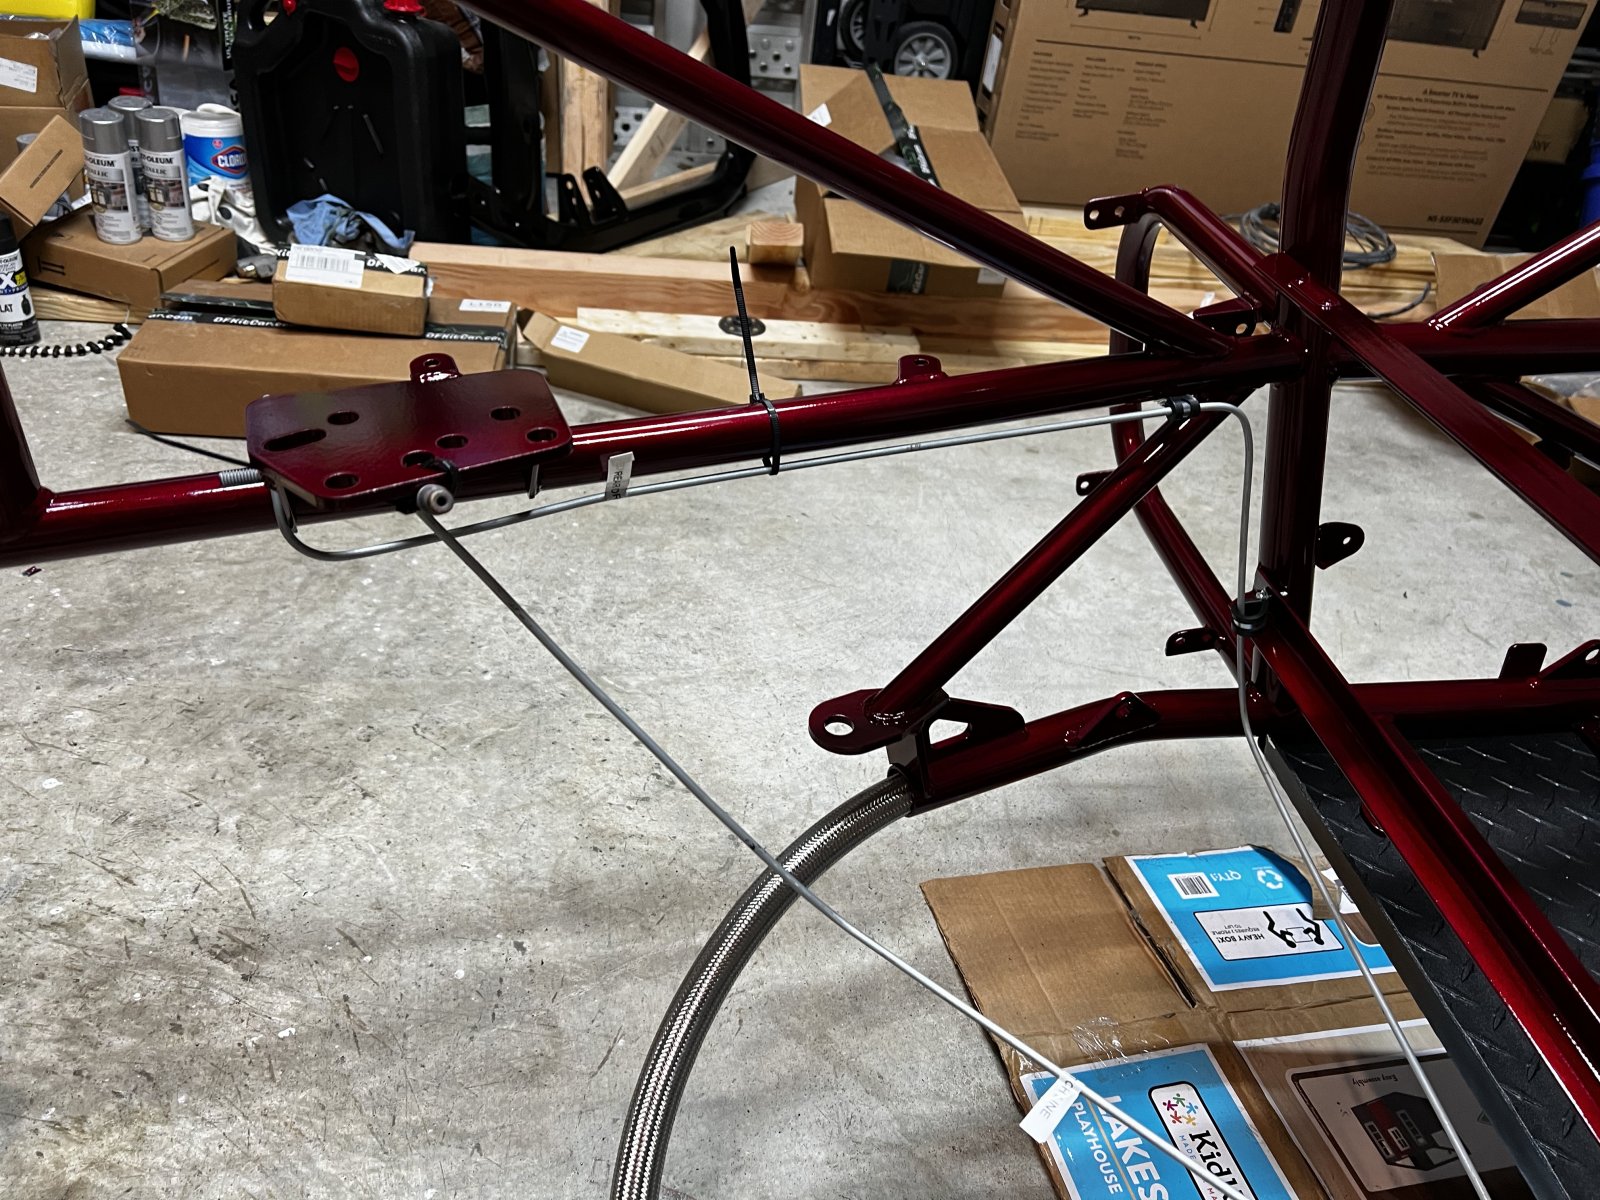
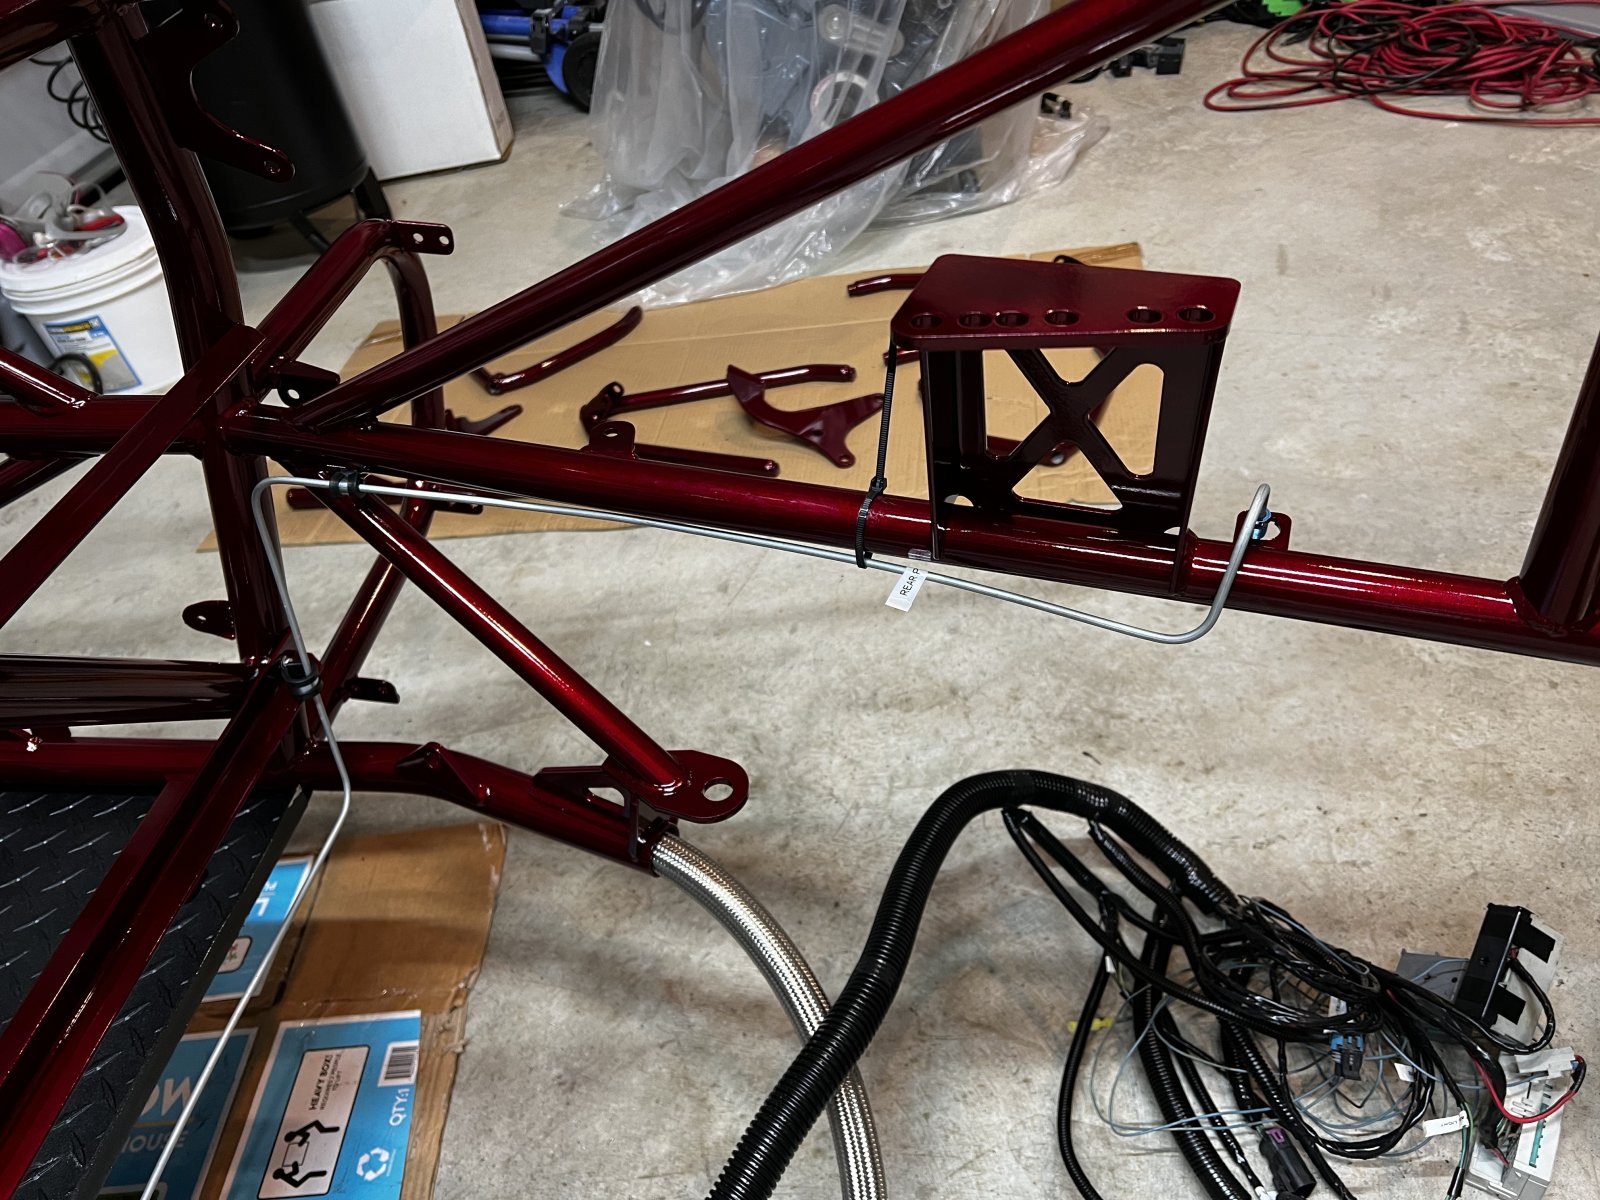
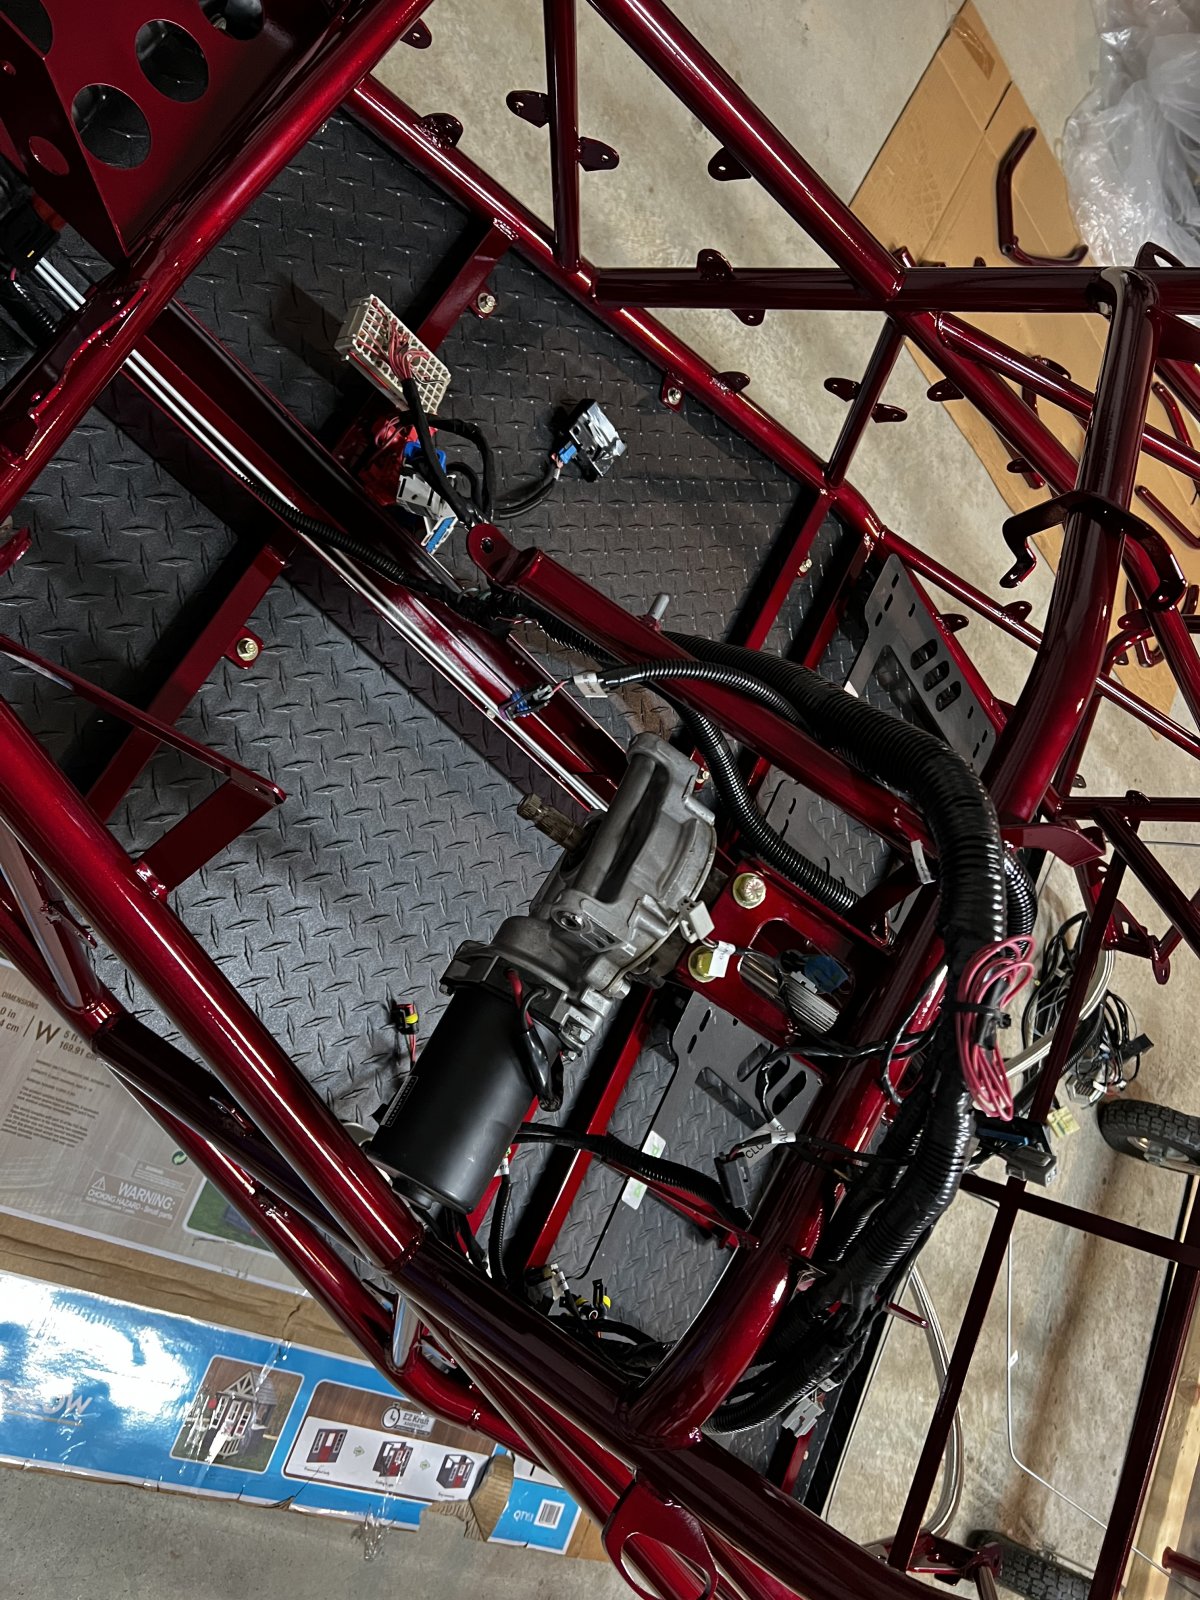
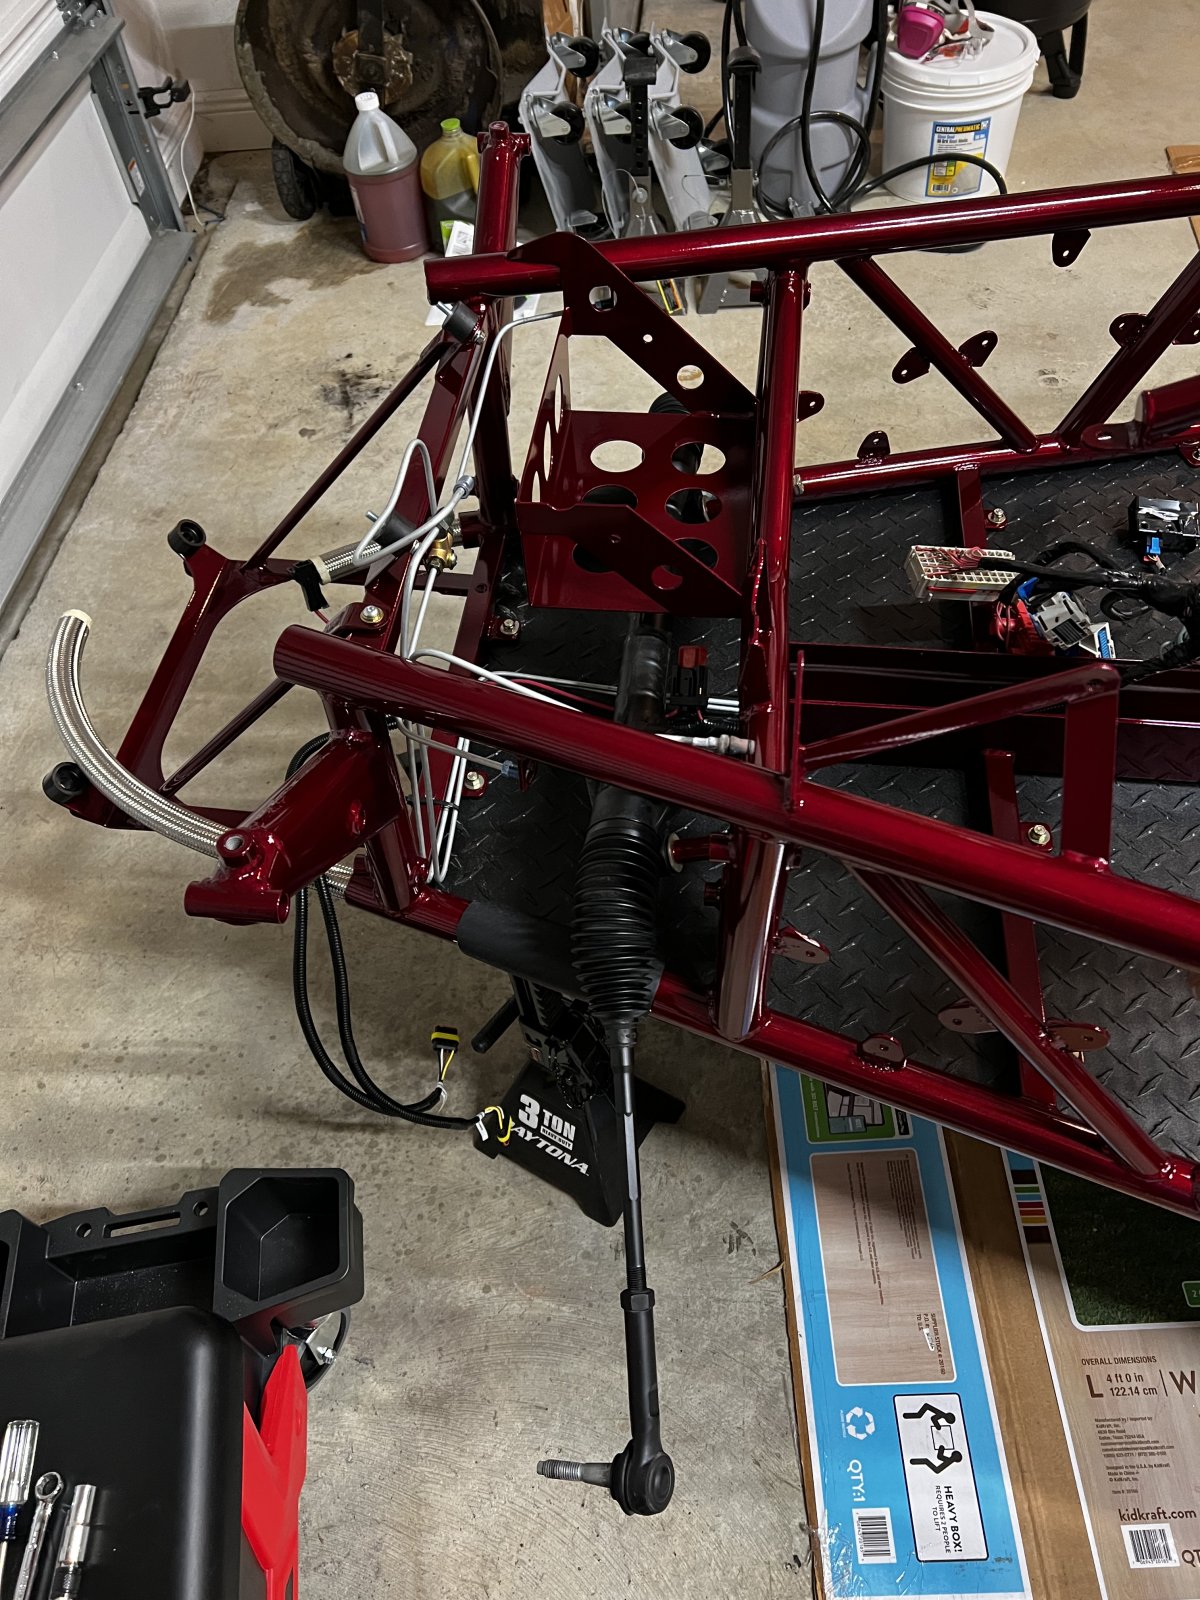
Got the steering rack installed, EPS unit installed, brake and clutch lines installed, laid out the harness in the chassis and lastly cut the ignition switch down. Kick plate, front bulkhead and some other small pieces are hanging up to dry from paint. Need to dig out the steering column pieces to paint still.
C888BC8C-73FA-4FDB-B0D5-283B3CAE8CAB.jpeg
B55703FD-9739-4606-B1C7-08F81AE1EB84.jpeg
AD0CDE57-B853-41A6-A62A-2716F250E246.jpeg
FB49D2DD-4839-4185-A7F3-6EC902C315D3.jpeg
52B3B21E-741D-45E4-93ED-EBF273E182DB.jpeg
FAC49BB1-A65A-4930-BBEF-58A35FA8472F.jpeg


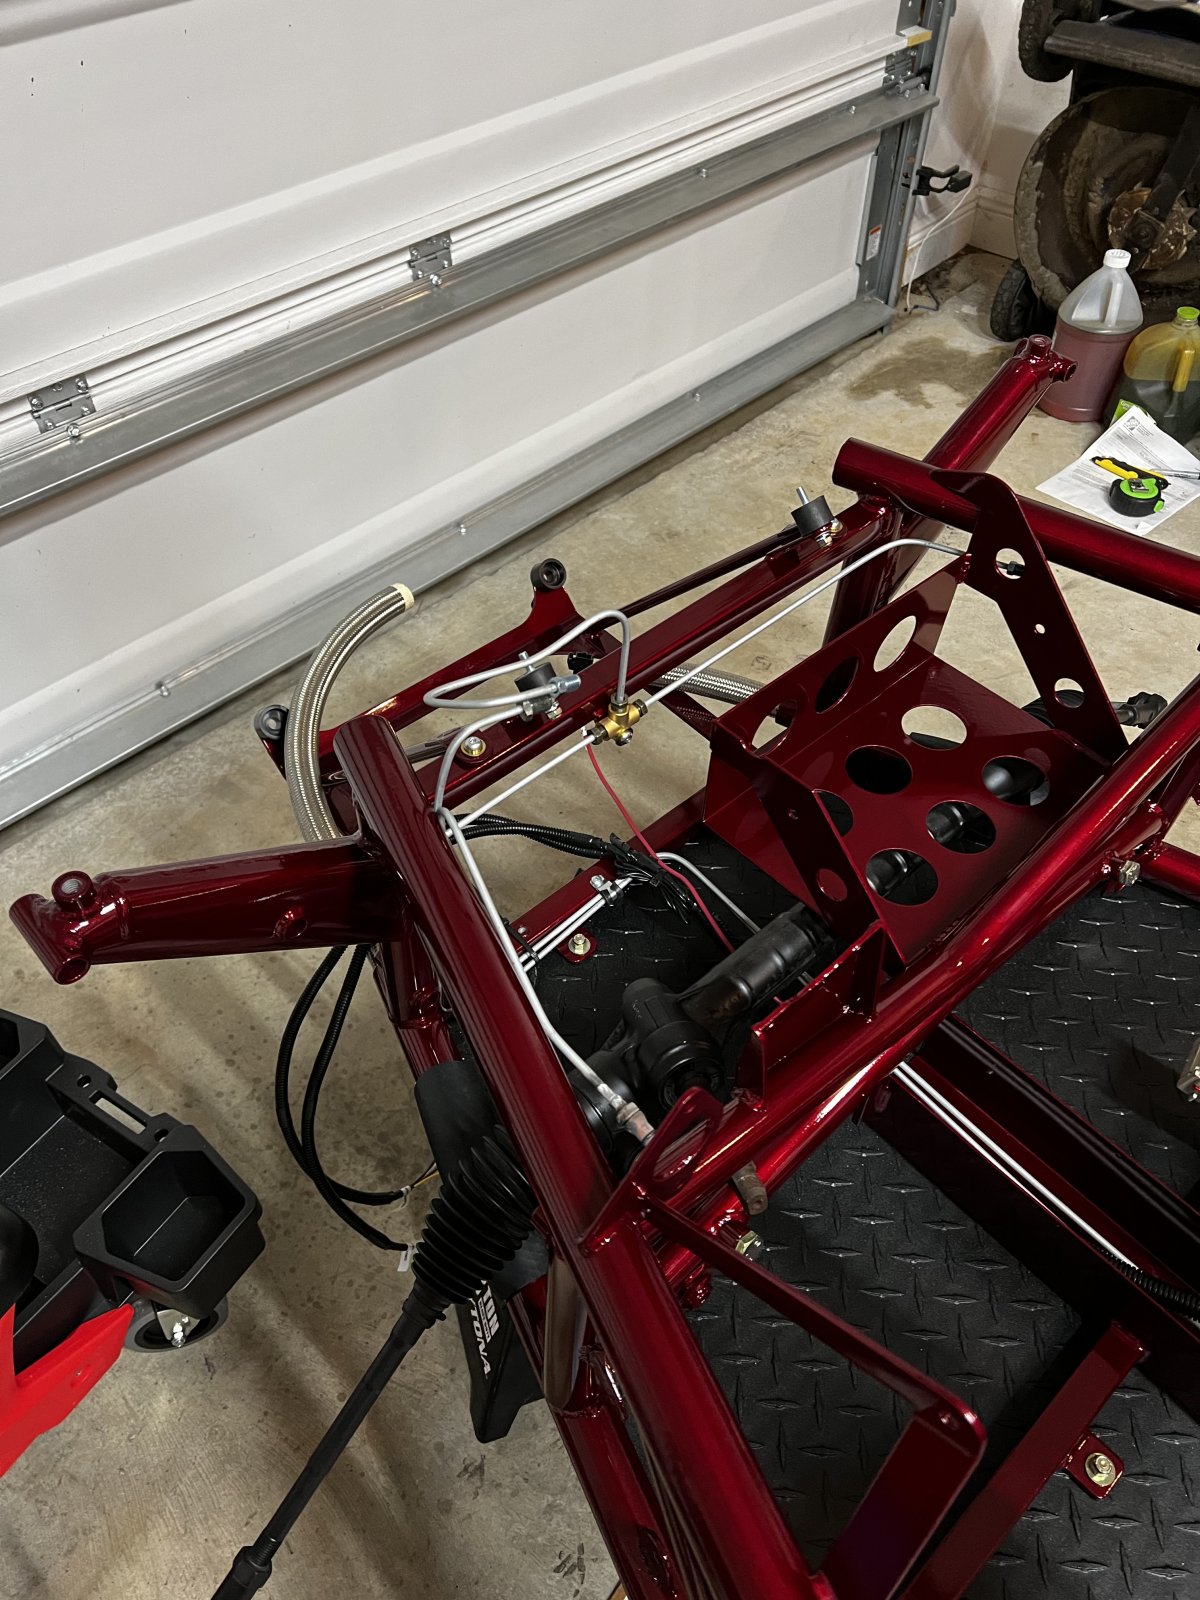
Didn’t get the pedal box installed like I wanted due to the bulkhead needing to be painted. Was gonna wrap it, but figured since it was permanent that I’d paint it. So that will all be done tomorrow evening now.

List to do tomorrow (today?):
-install front bulkhead
-install steering shaft
-install pedal assembly
-install front radiator and hoses
-install manual brake setup (including proportioning valve)
 

Sluggonaut

Goblin Guru
I wish I put something between the bulkhead and the frame. I used the window weld like in the videos and of course the bulkhead flexing and hitting the frame is the only potential source of noise. I'll probably put something in there at some point, but it would have been easier to install tape or something during install.
 

r3drckt

Goblin Guru
I wish I put something between the bulkhead and the frame. I used the window weld like in the videos and of course the bulkhead flexing and hitting the frame is the only potential source of noise. I'll probably put something in there at some point, but it would have been easier to install tape or something during install.
Thanks for mentioning this! I noticed the video only used the sealant on the edge posts and not the cross bars. I didn’t want to do a permanent install of the bulkhead so I got rope caulk and was going to use that instead. Thought about getting a roll of small weatherstripping as well but thought that might be too thick
 

r3drckt

Goblin Guru
You just HAD to say it :eek: I did do a test of everything after my harness rework. Video is somewhere here I believe.

Dash came on, showed 0 miles thanks to Odo-Pro. Headlights worked. All turn signals worked. Brake lights worked. Dash panel buttons all worked including the horn. Gas pedal fluttered the throttle body. OBD reader was able to pull codes. HPT was able to pull the tune file. Fuel pump primed when key switched to on. Engine kicked violently as I blimped the starter (engine was hanging from the hoist at the time). Everything APPEARED to be working. That's why I went ahead and did my engine rebuild. If I have any issues, I'd assume it'll be with that. Thankfully, I was very meticulous about labeling the connectors so I shouldn't mix up any of them (I'm looking at you injector/coil pack connectors!)

I'm hopeful that it will get assembled by Monday evening. Already told the wife I need to spend the entire weekend knocking things out on this and she's supportive and offered to help assemble and keep my daughter busy. Only worry I have is leaky brake lines. Thought about using thread sealant on the connections but I didn't.
 

Ark :D

Goblin Guru
You got this! It sounds like you're good to go. Fingers crossed for you.

No sealant on the brake lines. I forget where I read it on here, but I'm pretty sure it was Lonny that said that.
 

Rauq

Goblin Guru
No sealant on the pressure lines, but loctite or another brake fluid friendly thread sealant on the fittings of the lines between the reservoir and the clutch and brake masters.
 

Gtstorey

Goblin Guru
I had to tighten most of the compression fittings much more than I have ever had to before, some to the point of almost rounding off the nut. Finally got all of them to stop leaking, but I was starting to think I was going to have to buy a brake flare tool and have to remake some of the ends.
 

k.rollin

Goblin Guru
I had to tighten most of the compression fittings much more than I have ever had to before, some to the point of almost rounding off the nut. Finally got all of them to stop leaking, but I was starting to think I was going to have to buy a brake flare tool and have to remake some of the ends.
Rather than doing that, I mated the seating surfaces together by repeated tightening and loosening cycles. I don't know if it was necessary for my pressurized lines (I did it preemptively prior to filling the system), but it sure was for the bleeder valves on the front calipers lol
 

Gtstorey

Goblin Guru
I could see it working more for the bleeder valves since the sealing surface is rotating against the other face and "wearing" in. Probably not as useful for the compression fittings but might help and won't hurt. I think I probably backed off a few of mine and retightened while I was messing with it but I didn't do it multiple times.
 

Rauq

Goblin Guru
Rather than doing that, I mated the seating surfaces together by repeated tightening and loosening cycles. I don't know if it was necessary for my pressurized lines (I did it preemptively prior to filling the system), but it sure was for the bleeder valves on the front calipers lol
This is actually a part of mating flared hydraulic seats for the first time, and in my experience should automatically be considered part of the process. Count on tightening and loosening and tightening the fittings a few times before you even fill the system. In the rear this is obviously easier to do before the powertrain's in place. I've had a few times where each successive tightening gets another 1/8th turn of travel before the flares finally and completely seat.

This is actually also mentioned in the original assembly videos:
 
Last edited:

Gtstorey

Goblin Guru
Now that I think about it, all of my experience with flare has been with used stuff, never messed with new flared fittings. New stuff has always been thread or banjo.
 

Dale E

Well-Known Member
@Gtstorey, I put a drop on the first thread and where it traveled from there I don't know. This was on my Stalker V6 which is 16 years old now. I used this about 4 years ago. It doesn't leak and I'm good with that.

Dale
 

r3drckt

Goblin Guru
Little more progress made.
-bulkhead in
-pedal box in
-clutch pedal in and modified
-steering shaft in
-gauge cluster in
-front grounds connected
-radiator prepped for install (trying to get the AN fitting on the SS lines is proving to be difficult)
-front control arms and uprights loosely in place
-headlights in
-BCM in
-kick plate in
C247FC4C-8E1D-4F17-BDFA-64F62209051B.jpeg
05EE714E-62D2-4889-A932-5044FB45C167.jpeg
4FB2B795-466B-4F76-A336-79B93F8B9BD6.jpeg
F961EBFF-4B1D-45CC-8B60-5E6AC3DA48F6.jpeg
7AA30BBE-ABF2-4819-A1A1-EE570DCB024A.jpeg
8989EDD1-ED2D-49DD-9E65-4B752D778BAE.jpeg
D0403E42-824C-41D9-834A-D3A05C055216.jpeg
3565521A-EAAC-4EC5-99EE-B58DCF6E982F.jpeg
653A24D2-15DD-4212-8395-D056A69CA073.jpeg
E7A6D931-1729-41A1-8B3A-1D374AF9AD05.jpeg
9DF496A2-9721-4C18-A6FC-655A87061420.jpeg
A1ABDC12-A11A-409E-8BA3-B1A4DD7EEB3A.jpeg
F7CDC6B6-5308-4F3E-A2F8-B0AC92A3D262.jpeg

I used the stage 2 picture archives to assemble the control arms and uprights since the video has been removed (wish it was up until the new one was up). I believe I assembled everything correctly, but would love confirmation from everyone if possible. All heims are all the way in until I tackle the alignment since it doesn’t matter too much ATM. Inner heims only have a washer on the bolt head side, not on the nut side (based on pictures). Outer heims have washers on top and bottom with small end facing the heims.

Things to do next:
-finish the dash assembly with button panel, boost gauge mount, steering column, and quick disconnect
-torque everything down on the front suspension
-assemble and install the QA1 suspension up front
-install the radiator
-install the manual master cylinder and proportioning valve
-install the tunnel cap and shifter assembly
-install the gas tank
-install the firewall
-install the seats
-install the harnesses
-install the engine
-install the heat exchangers
-plumb the heat exchangers
-install the subframe
-install the rear suspension
-put some God Dang shoes on this car and get it running!!!!!
 

Ark :D

Goblin Guru
I love that frame color, it's beautiful! However, I'm still glad I went with a more basic color (dark gray metallic) because I'm finding I have a thirst for changing the color of the body, etc.

Do you know what color you're going with, for the body panels?
 

r3drckt

Goblin Guru
I love that frame color, it's beautiful! However, I'm still glad I went with a more basic color (dark gray metallic) because I'm finding I have a thirst for changing the color of the body, etc.

Do you know what color you're going with, for the body panels?
I was gonna do a carbon fiber wrap on the panels for now. My wheels are bronze and I think making the panels match would be to much
 
Top